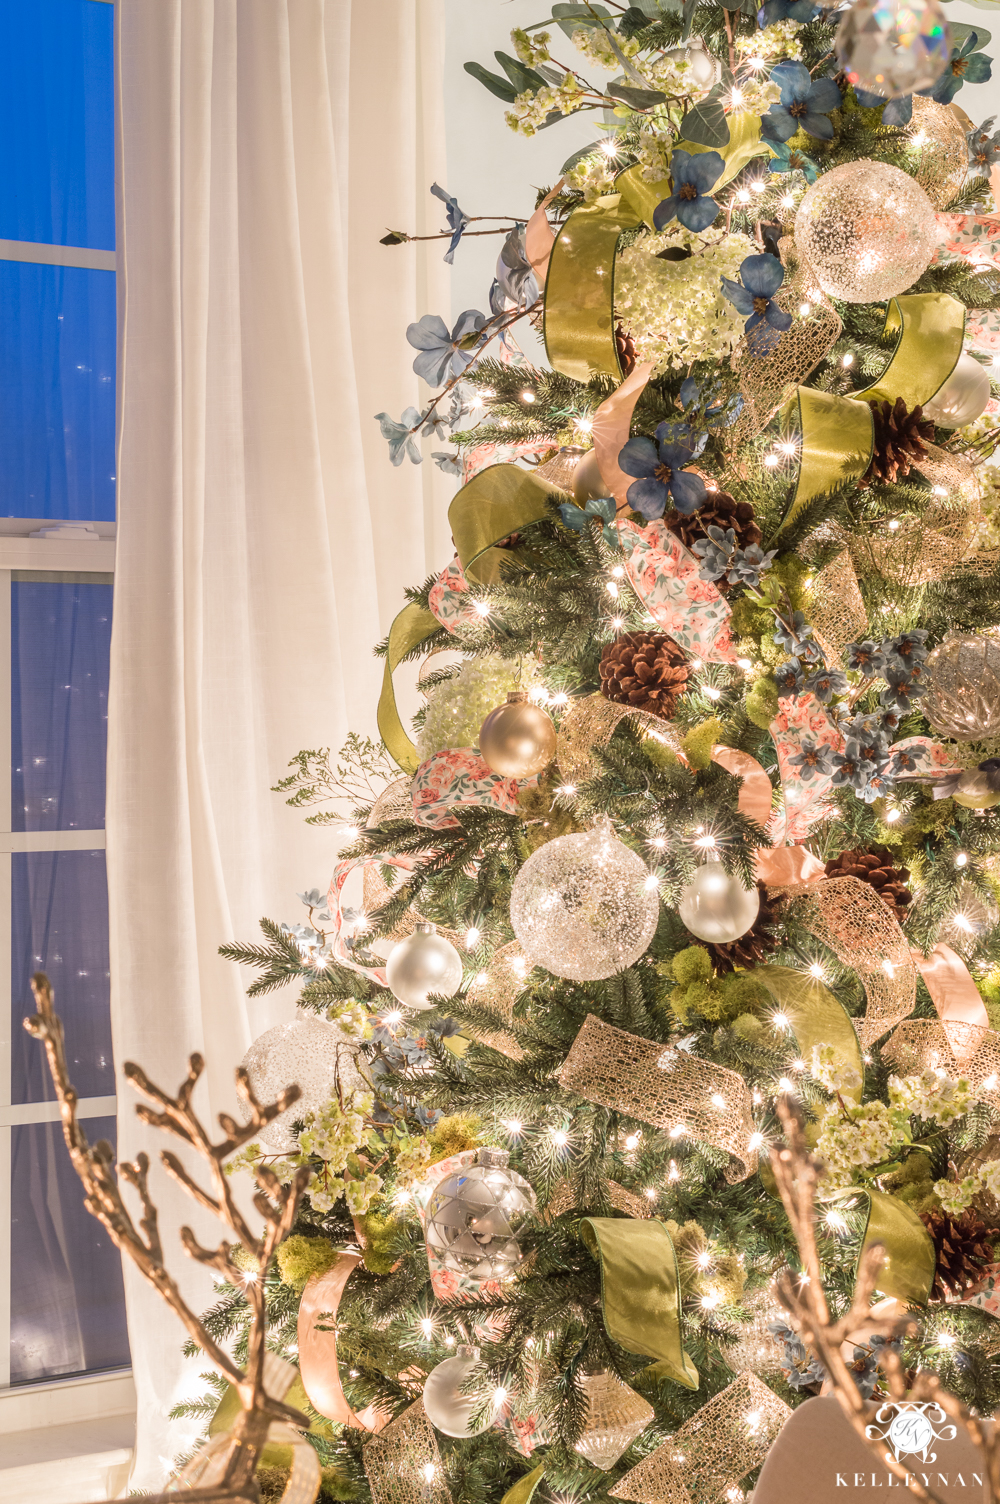
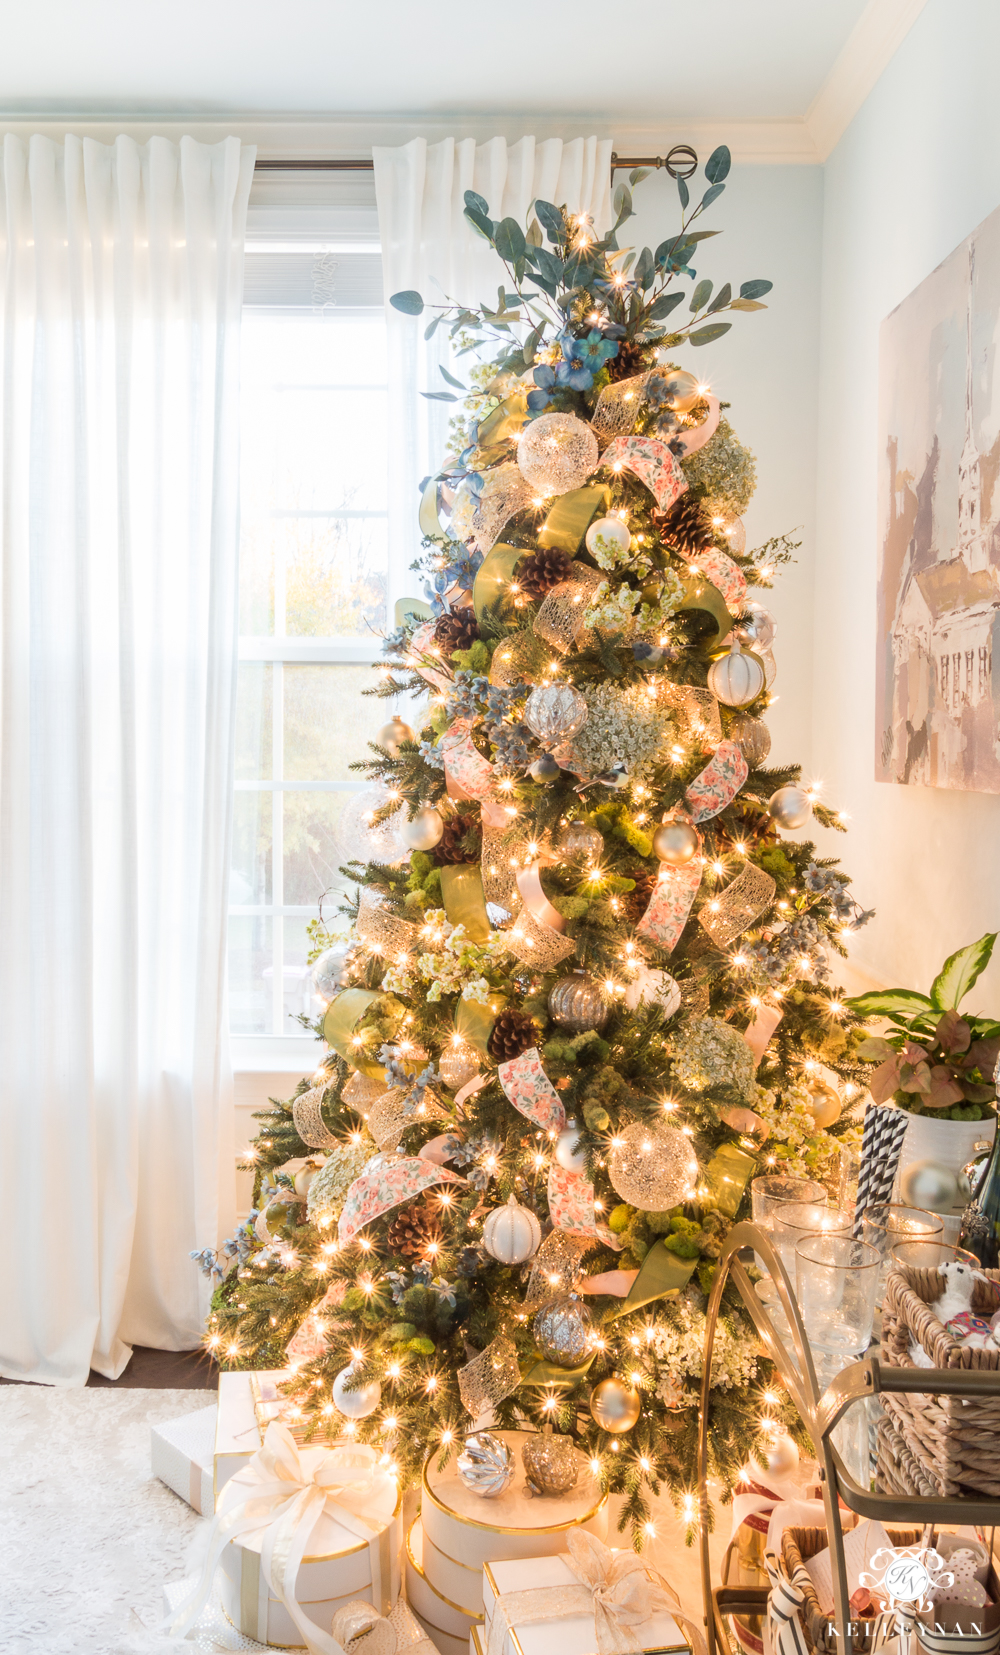
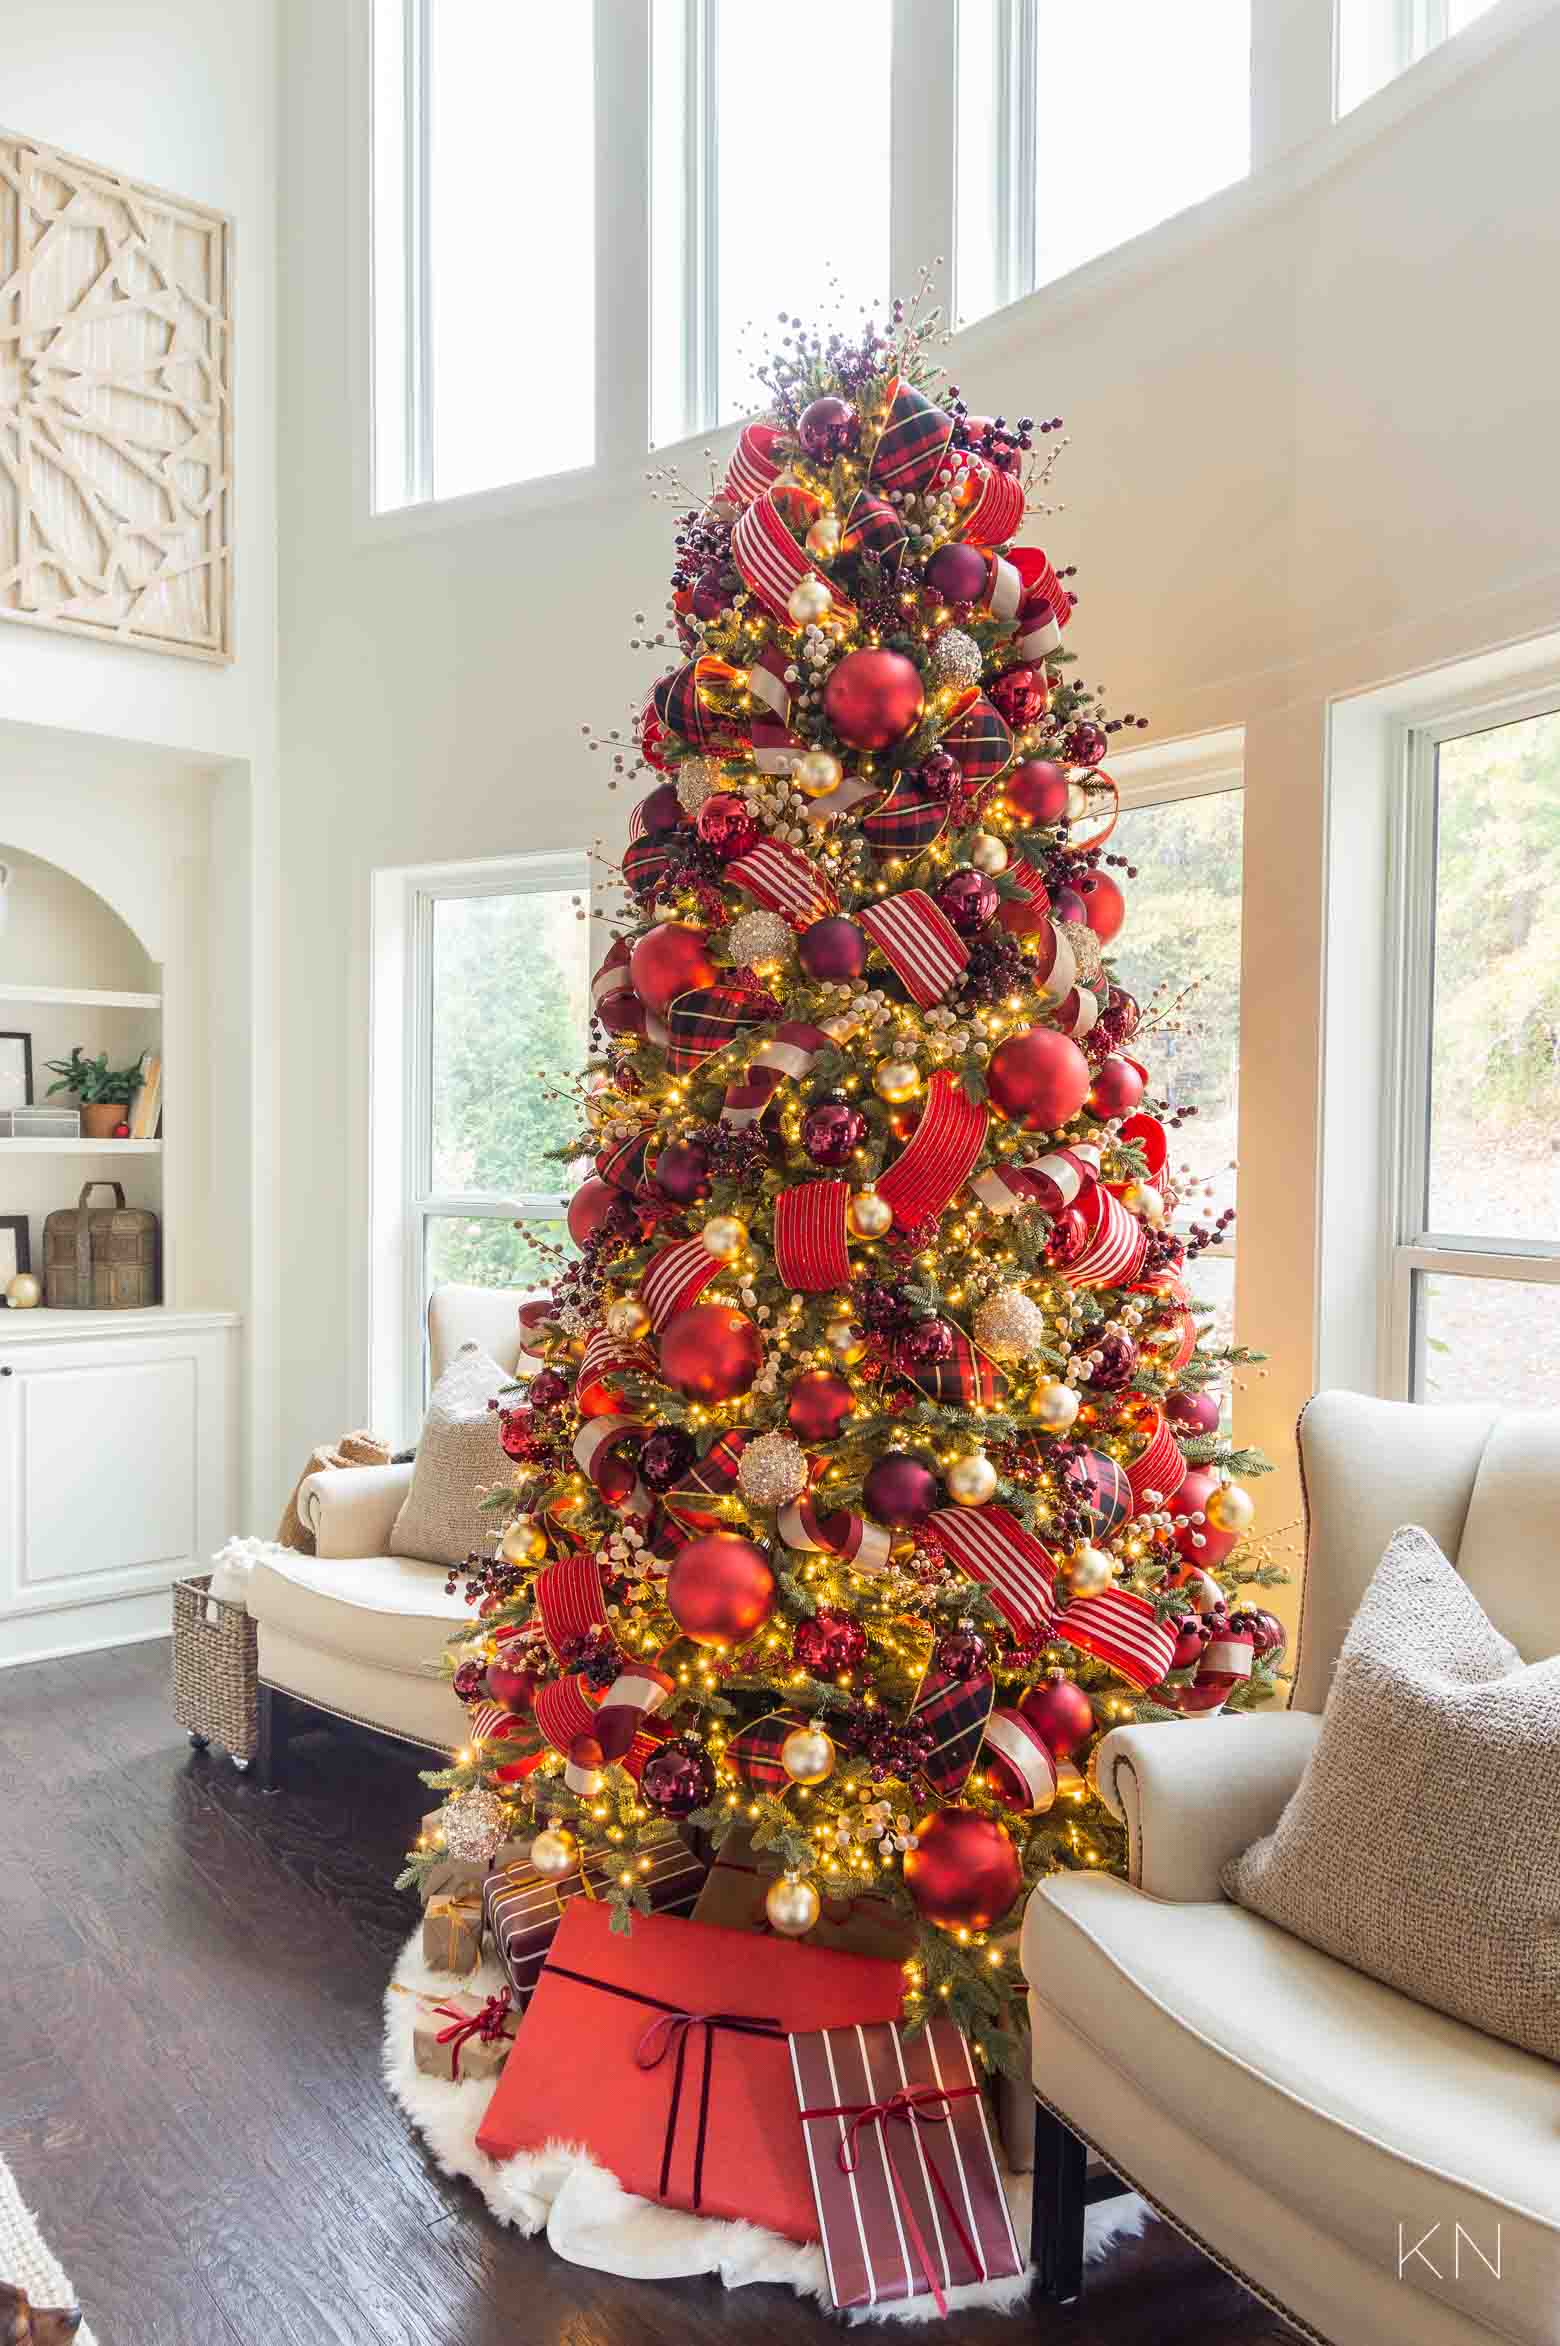
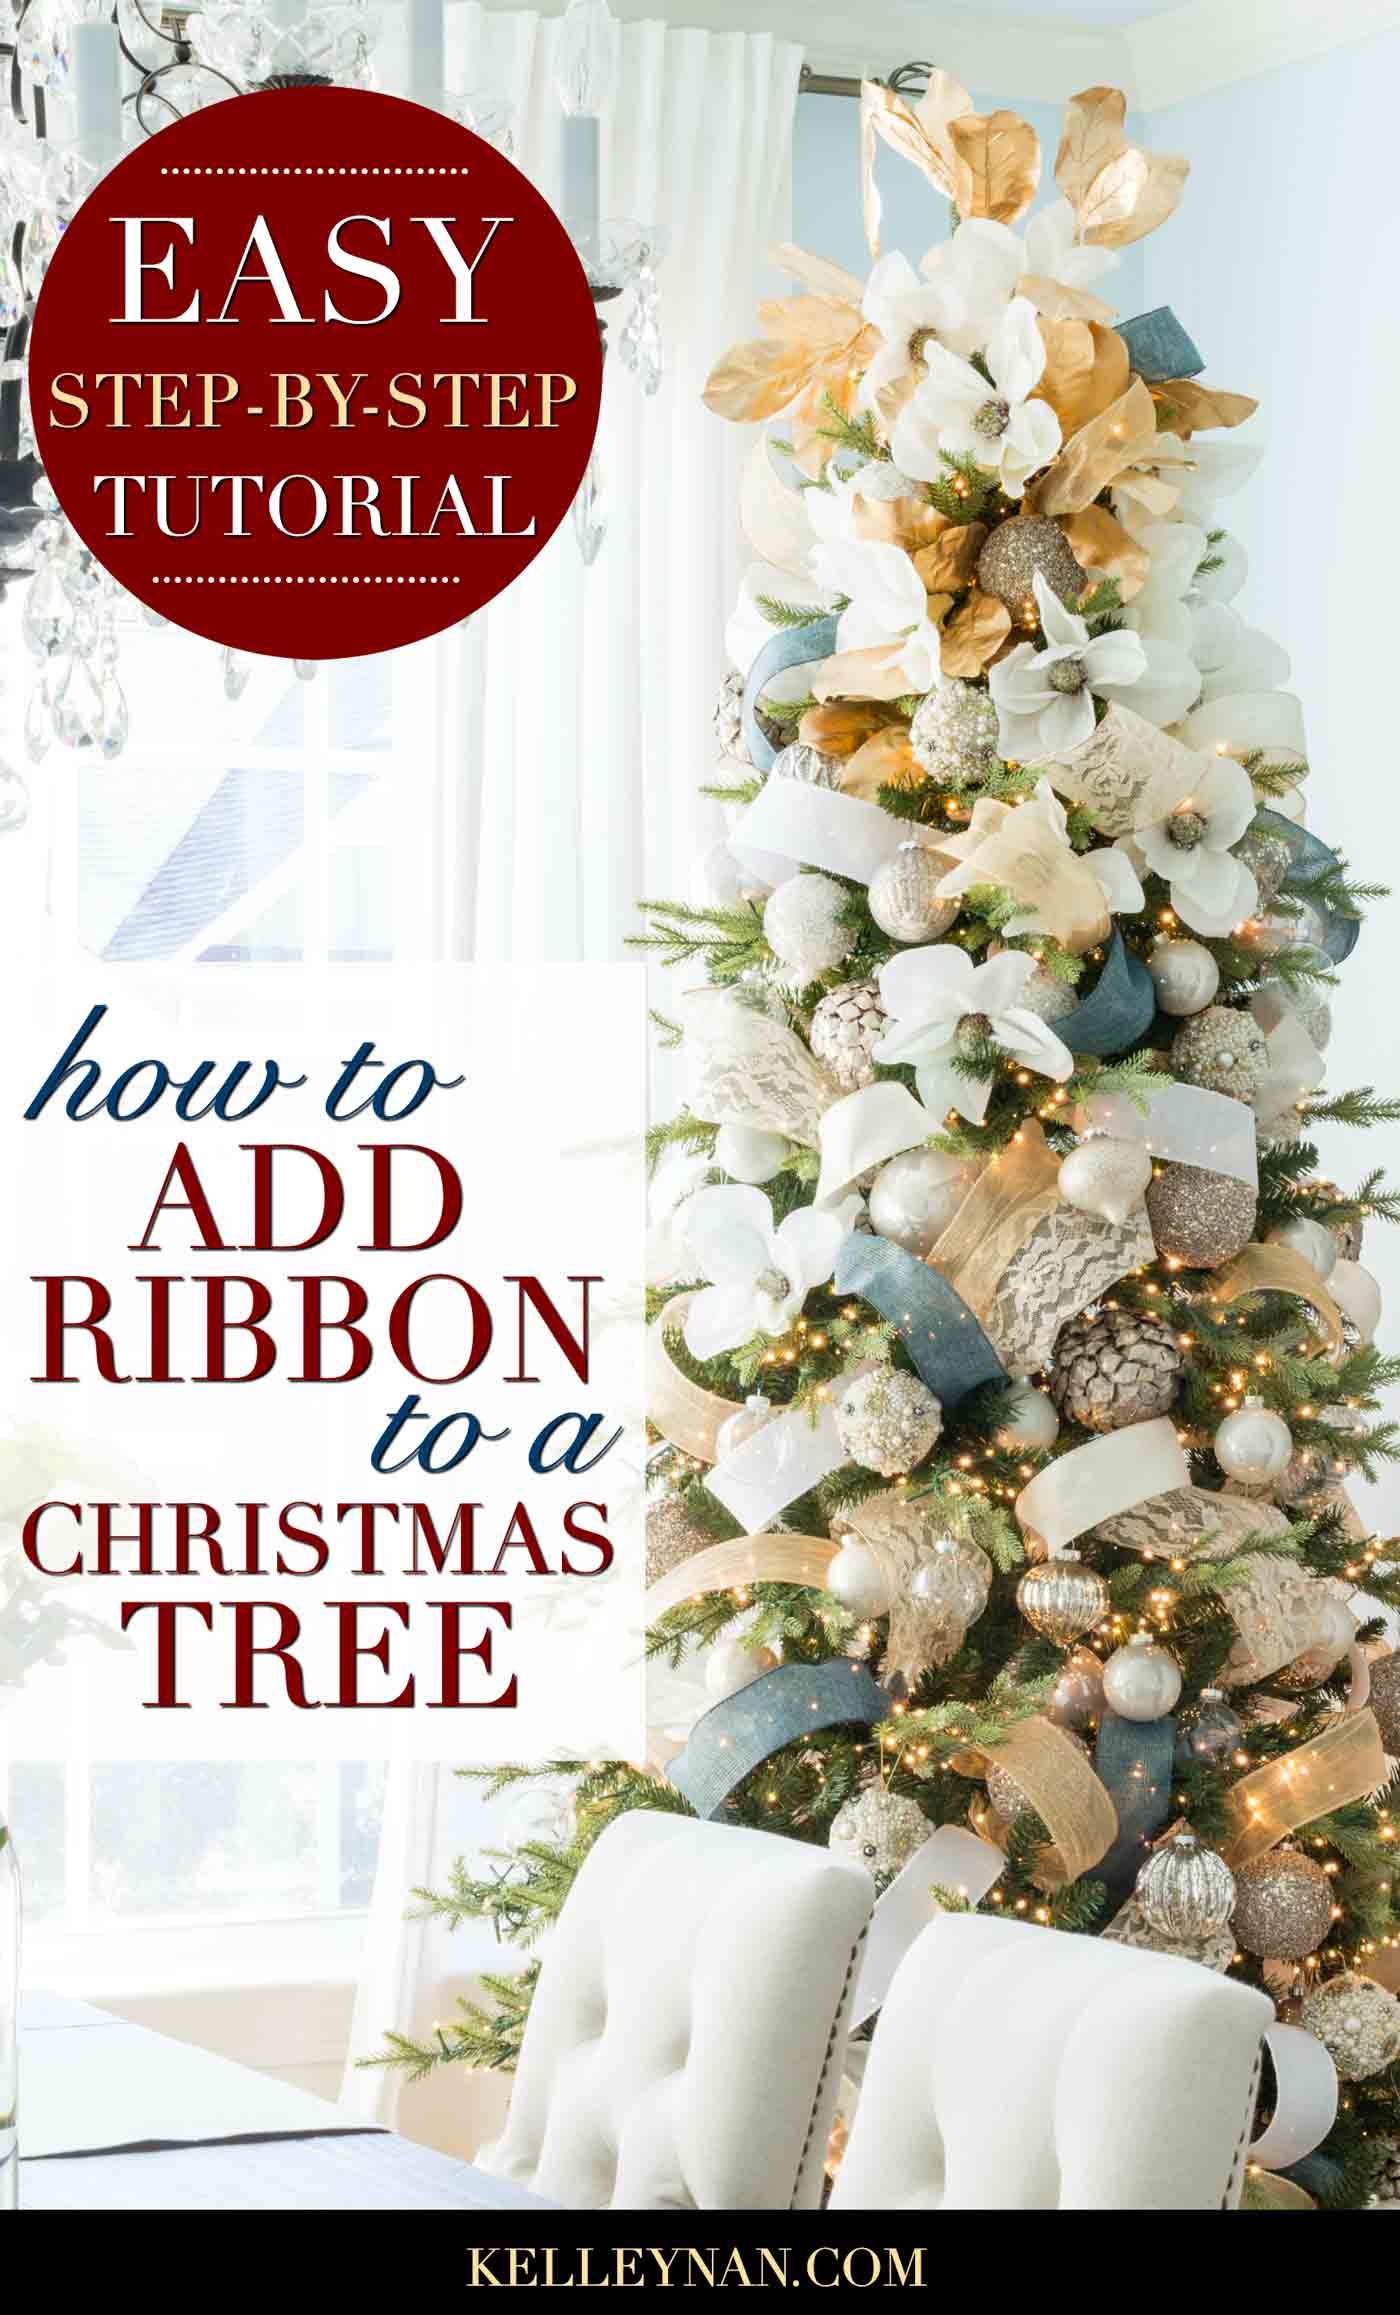
“How do you get your Christmas tree ribbon to do that?” is without a doubt, the number one question I receive during the holiday season. Today, sharing my secrets and how to decorate a Christmas tree with ribbon, in a step-by-step tutorial. More specifically, how to put ribbon on a Christmas tree by wrapping and tucking it to get that tufted, random look that fills out the tree. I used a few methods over the years before deciding on one Christmas tree ribbon technique that I use most often. Using a dining room Christmas tree, I documented the entire process from start to finish to show exactly how I go from a bare tree, to a tree that is filled with ornaments, picks, unexpected touches, and of course, ribbon! Pin this Christmas tree decorating tutorial to refer back to when you’re ready to start decorating and adding ribbon to your own Christmas tree. Below, I’m going to show how to take your tree from out-of-the-box-naked to looking something like this…
*Posts on KelleyNan.com may contain affiliate links. Click HERE for full disclosure*
You can find a recent video with step by step instruction of how to put ribbon on a Christmas tree here:
HOW TO PUT RIBBON ON A CHRISTMAS TREE
The number one rule when considering how to put ribbon on a Christmas tree is knowing — there are no wrong ways. Depending on the look you’re going for will determine your favorite method. If you’re looking for something more organic and minimalistic, you may prefer a thinner ribbon, fewer tufts, and not as many embellishments. But, if you’re wanting to know how to put ribbon on a Christmas tree with ribbon galore — that looks like the ribbon could almost be made of half ribbon — you’re in the right place!
HOW TO DECORATE A CHRISTMAS TREE WITH RIBBON
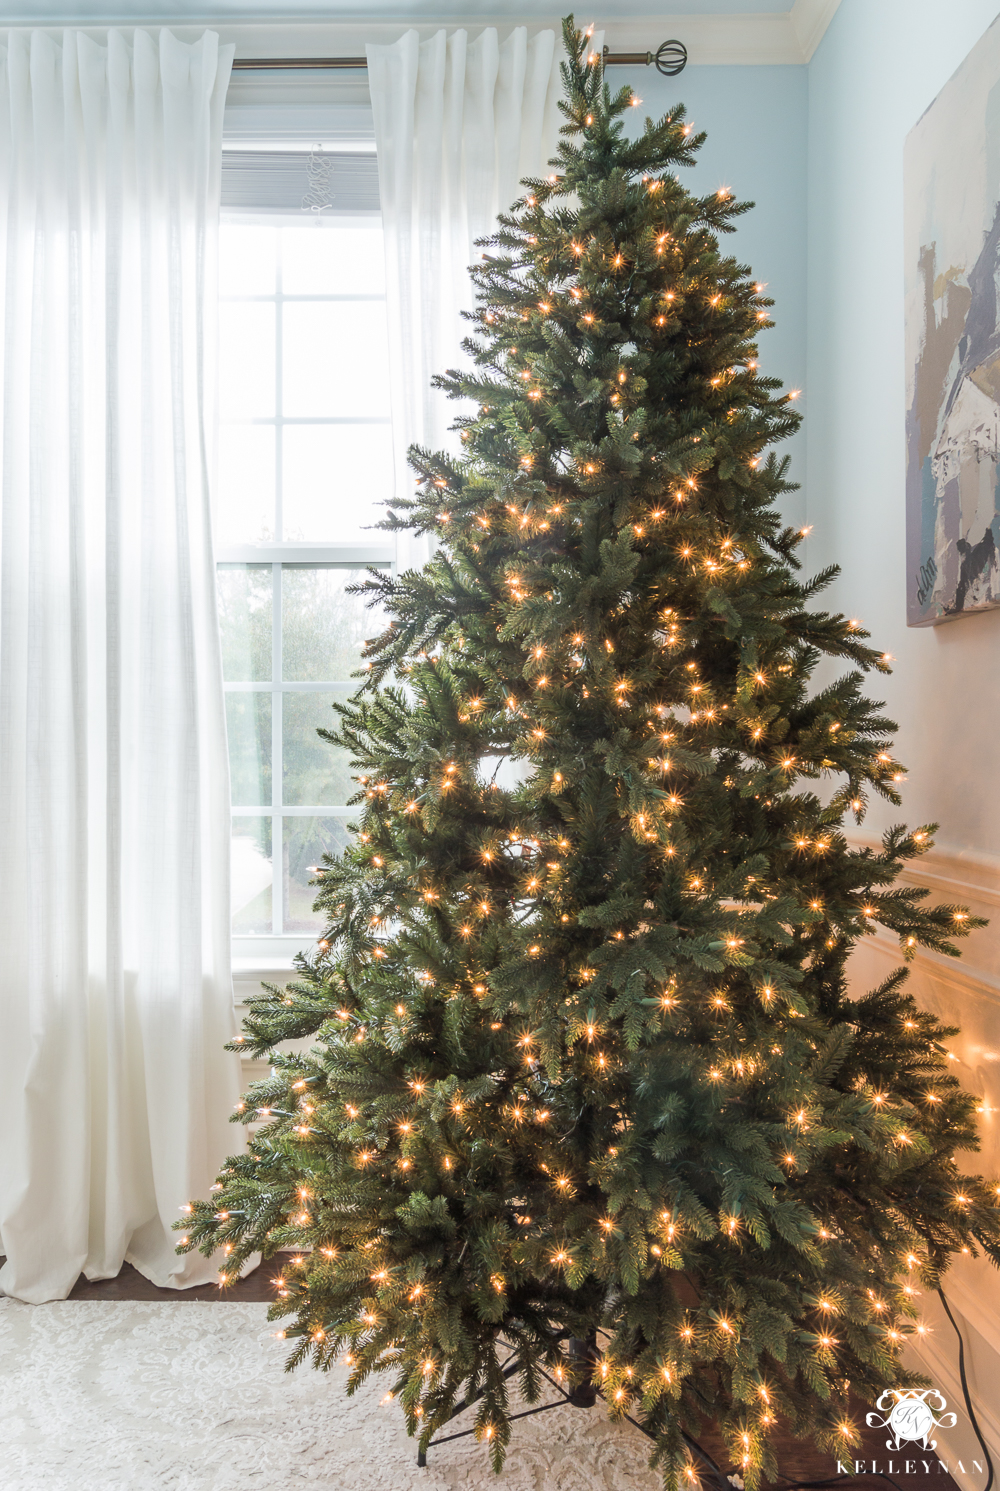
STEP 1: FLUFF YOUR TREE
Fluffing the tree is by far, my least favorite part of the tree decorating process. But, the type of tree you have makes a huge difference. For example- in our great room, we have a 9′ with all wire branches. But, in the dining room, we have a 7′ with a mixture of wire branches and more realistic branches that hold their shape well (you can see the latest version of the tree HERE). I love them both but the dining room tree takes a fraction of the time to fluff and prep. When you’re fluffing, don’t neglect the inside branches. And, don’t just fluff the branches; if they are wire, pull them apart. Of course, if you have a real tree, you can skip this part 😉
STEP 2: CUT & TUCK THAT CHRISTMAS TREE RIBBON
If you search online, you will probably see a big split on this but I always start with the ribbon. I can always add a little more at the end if needed but using Christmas tree ribbon first gives a good base and starting point. Something else you may see is that people tend to use the entire spool of ribbon as one long piece, wrapping and weaving until the ribbon is gone. If I cascade ribbon, I will use longer strips but 95% of the time, I use this method. I typically use ribbon in various sizes from 2″ to 4″ in width, with wired edges. Ribbon that is “meshier” works the best for sticking to piney branches. My favorite places to shop in-store for ribbon are Costco, At Home, Hobby Lobby, and HomeGoods. Costco has wide ribbon with 50 yards on the spool for $9.99, so that’s a good place to start ;). As far as how much? I don’t really have an answer. But, I use a ton. And, I use more with trees with gaps. You can always purchase and take back what you don’t use.
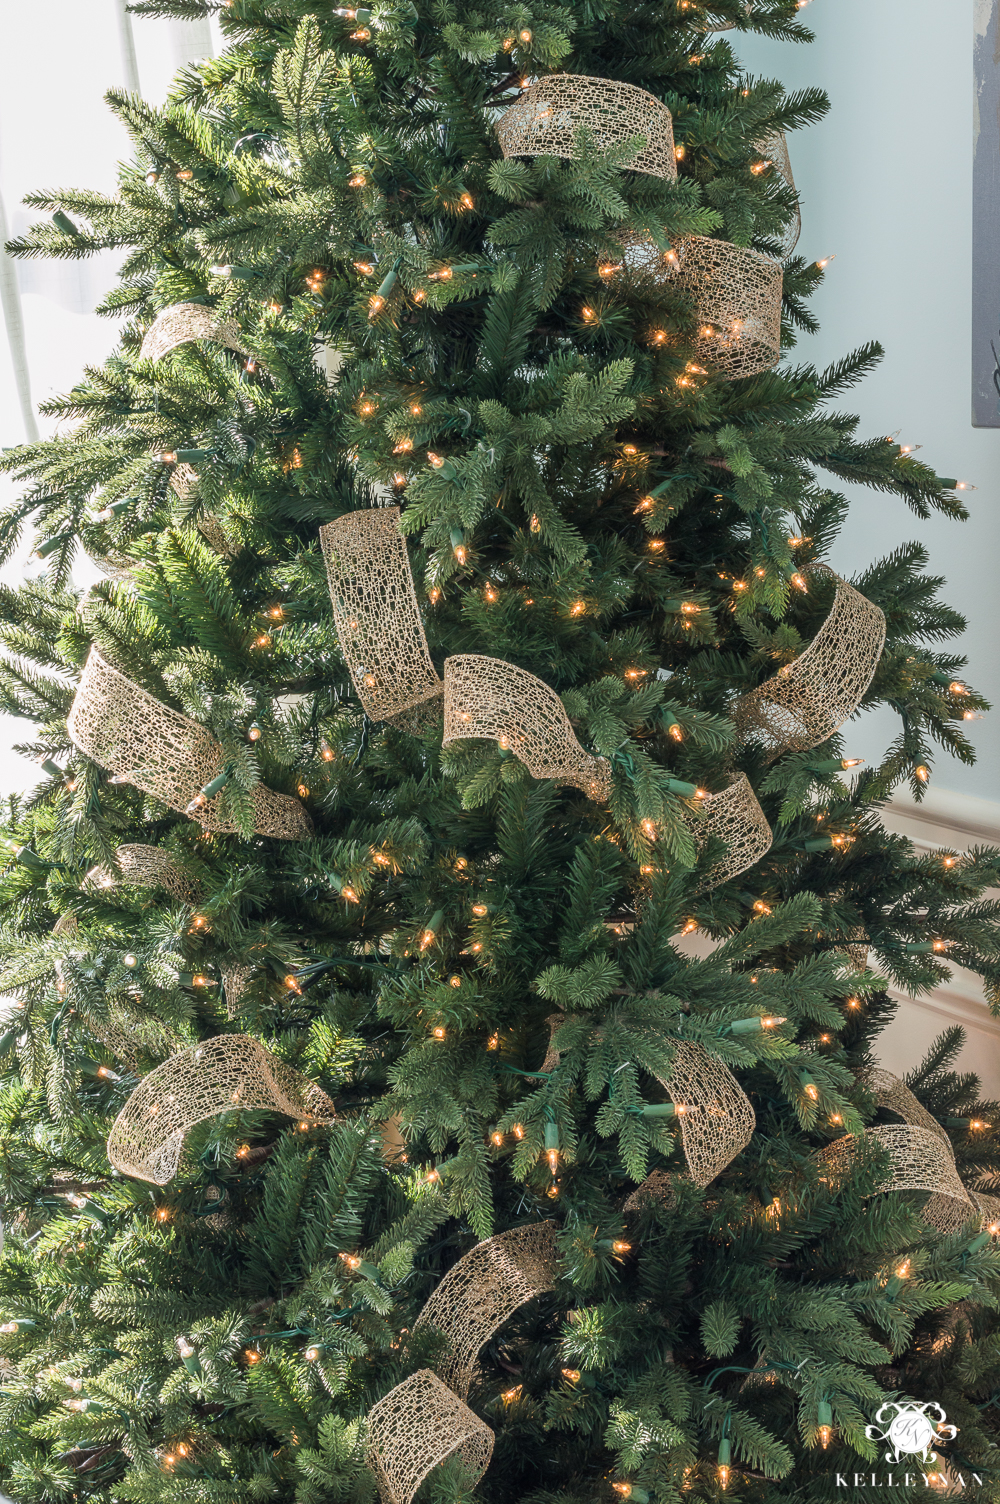
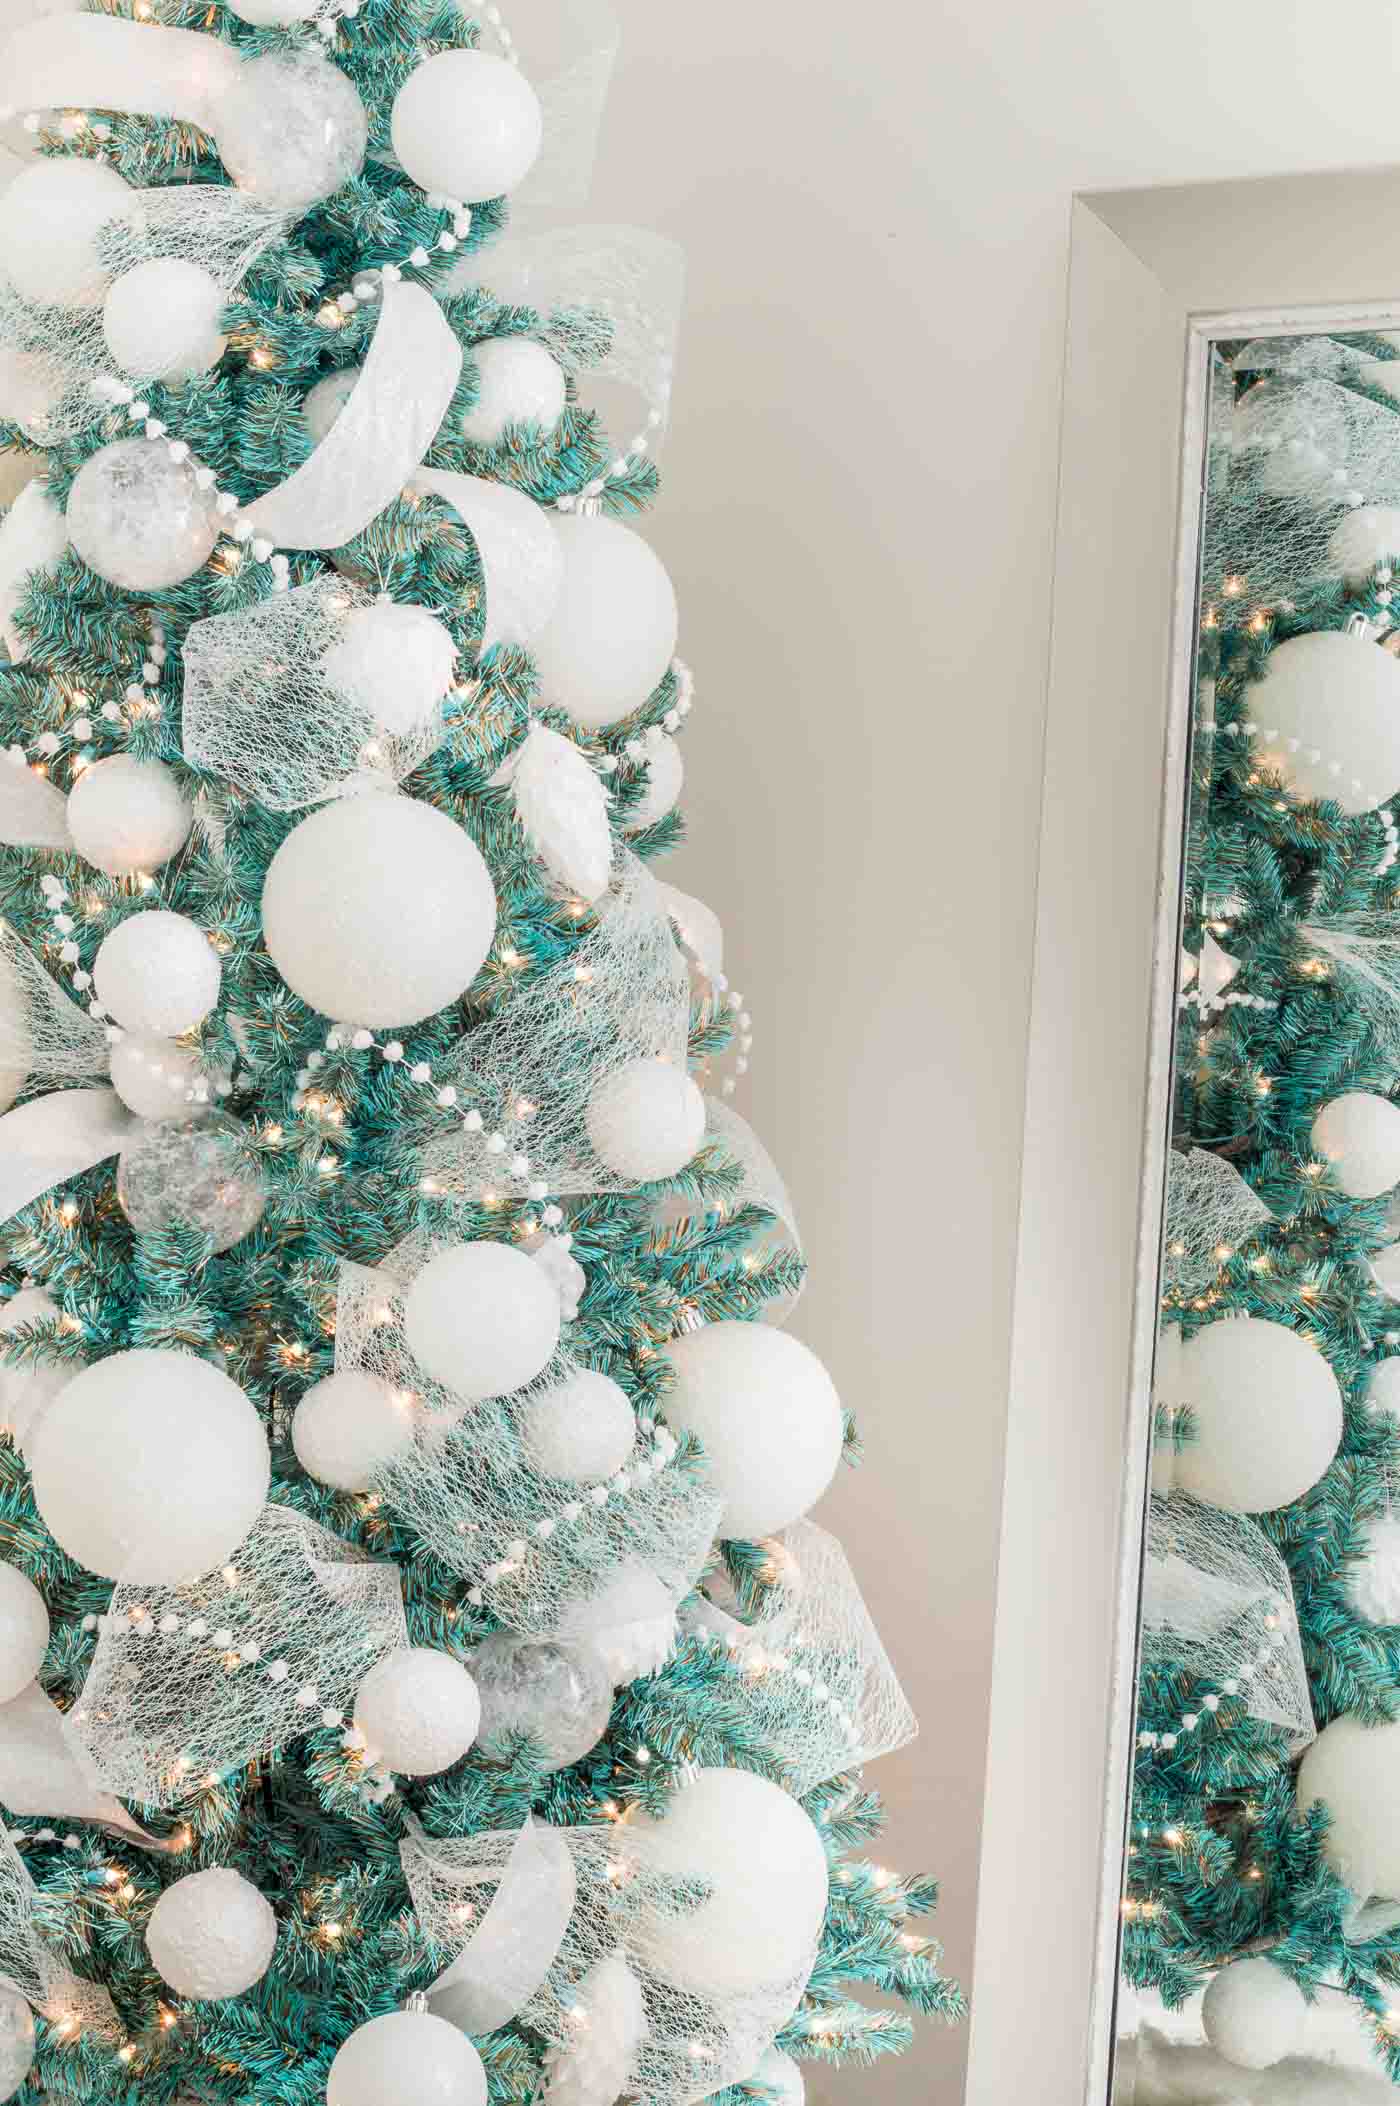
So, once you have your arsenal of Christmas tree ribbon, determine which ribbon you want to be most present. I used a 2.5″ mesh ribbon as my base on this tree. Cut strips that are around 3′ but don’t cut them all at once. Depending on the size of your tufts and how deep you go in the tree, you may want to modify the size. Keep in mind, using ribbon on your Christmas tree makes it easier to change the look of your tree each year. If you have a base of white/metallic ornaments, you can simply change your ribbon color and it changes the entire color scheme of the tree.
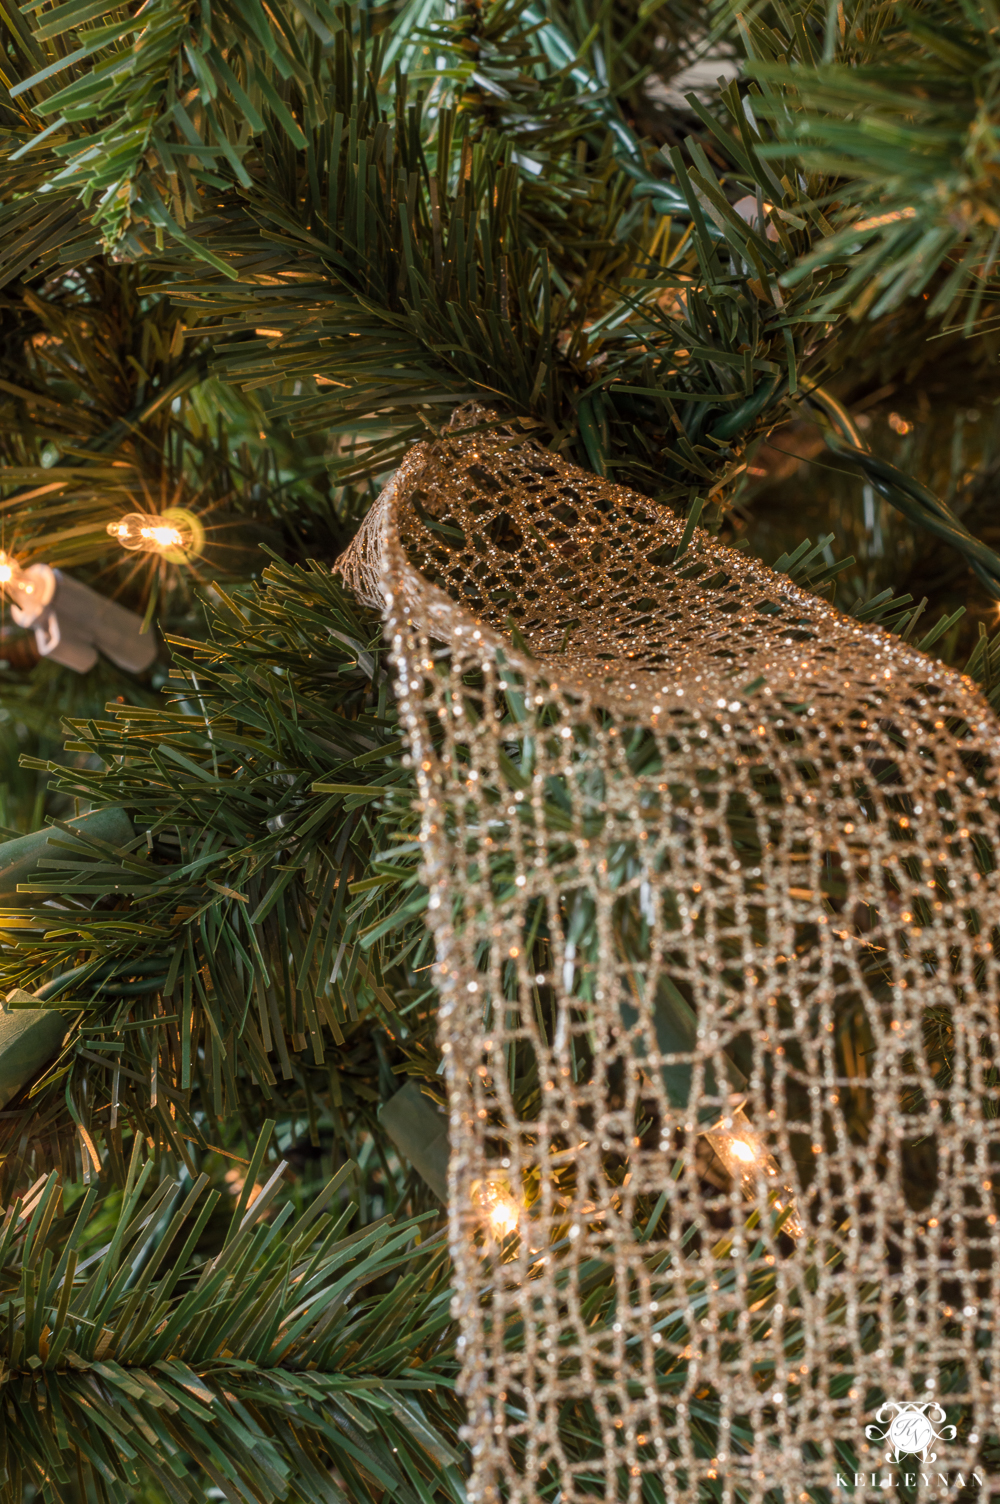
Take the end of the ribbon (I usually start in the middle of the tree), pinch the end together, and stick it in. I use my hands to feel around inside the tree for a good spot for the ribbon to stick. If the outward branches seem to “support” the ribbon, you don’t have to worry as much about securing the inside end to an actual branch. Meshy ribbon will usually just stick to the inside needles while more satiny/smooth ribbon may be to be secured a little more by bending an inside branch to pinch the end. Once the tail is secured, billow the ribbon out, kind of at a diagonal and bring the center in to secure the middle of the ribbon inside the tree. This should form one billowed tuft.
A few tips (this will make all the difference) – you don’t want the ribbon tuft to be pulled tight against the branches. You don’t want to see a taut wrinkle. When you are billowing, try to clear the outside branches into a big loop, but not so much that it sags. Also, when you are creating your loop, kind of push the ribbon upwards (as though you are almost pinching it back to the first secured end) instead of pulling it downwards. You can even turn it slightly sideways and have it “sit” on its side, on a branch.
Once you have secured the middle, take the rest of the ribbon, come back out (depending on the branch position with determine whether you come right back out where you went in, or, whether you bring the tail out a little lower). You want to form one more tuft with the ribbon so repeat how you created the first and then secure the tail just as you secured the other end. Again, if the branches are supportive and the ribbon is meshy/sticky, the inside branches may grab it enough. If not, you may need to slightly bend an inside branch to secure the ribbon. Two tufts from each 3′ strip is the goal. For the second piece, start at another place; I usually always go at a diagonal but mix up the direction. Here is what my first strips look like.
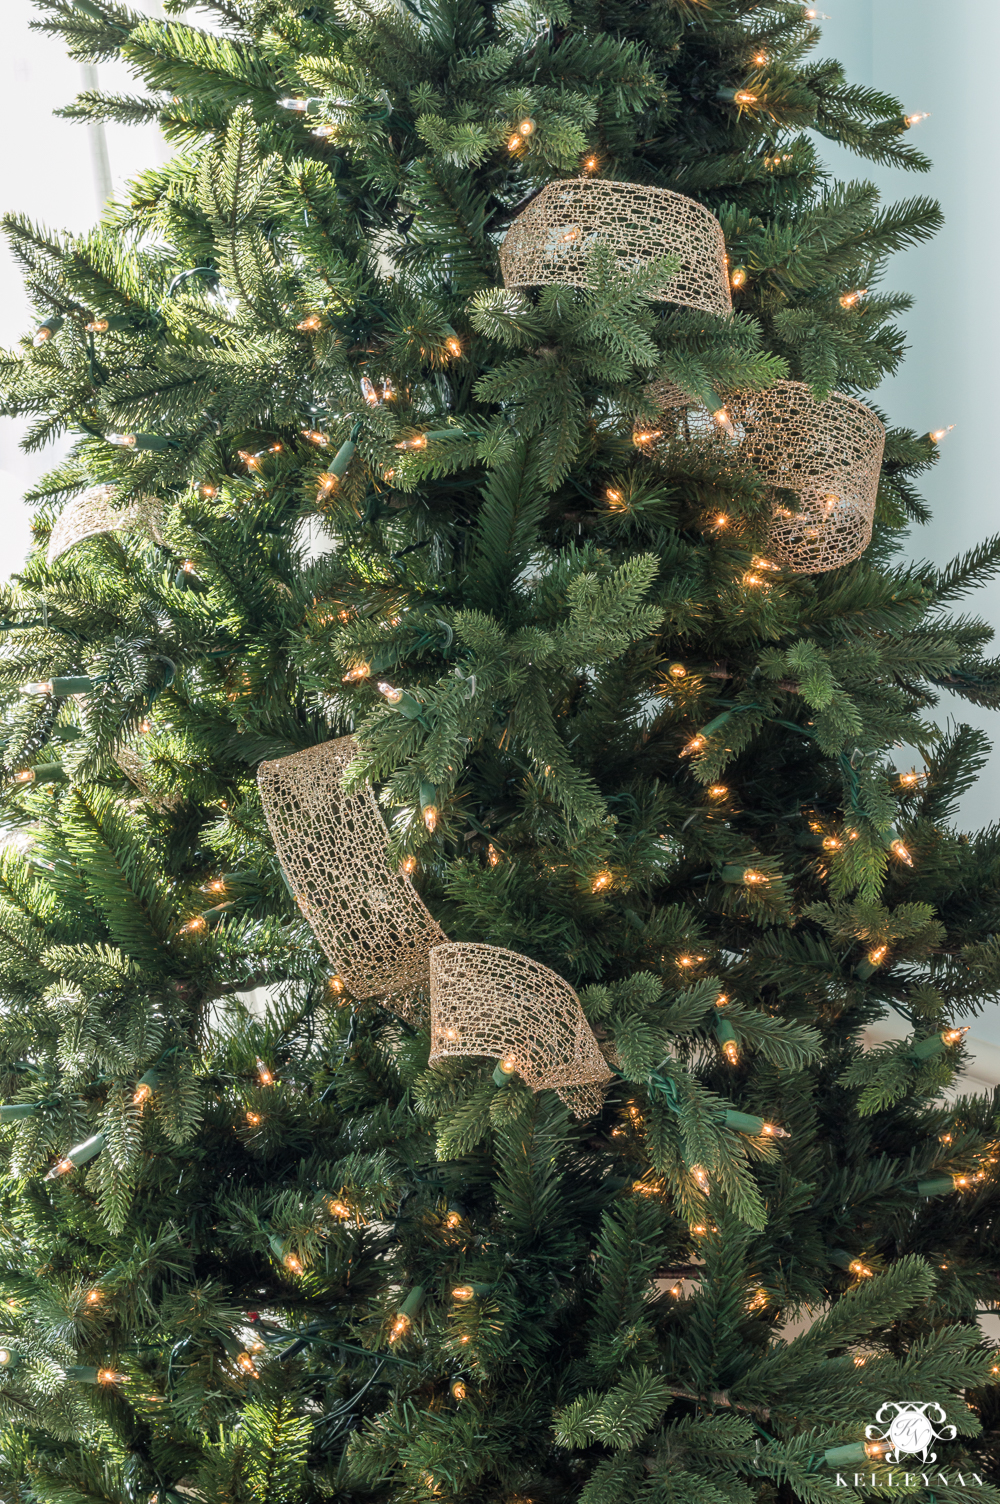
You don’t want a huge loop with the second being tiny, but they don’t have to be exactly the same size. Repeat all over the tree and don’t neglect the top. Full admission, I try to get back around the sides of the tree and if you do have some ribbon in the back, it can help look like it’s decorated if there are any gaps. But, it isn’t necessary, especially if you are trying to work with less ribbon. When you are fluffing, make sure you fluff the back really well; I continue to fluff as I go along.
For some ribbon — usually extra wide or extra narrow — I will cut the strip shorter (about 1-1.5′) only do one tuft instead of two. If your ribbon is difficult to work with, you can try this technique; see the image below for the result of using single “tufts”.
STEP 3: ADD MORE CHRISTMAS TREE RIBBON & REPEAT
Once I have a pretty consistent and thorough covering of the base Christmas tree ribbon, I will choose another to go in and accent. Don’t worry, if you decide you need more of the original ribbon when you finish, you can always add more! As a warning, this is kind of a difficult tree to show as my example because I did a few things out of order and used some ribbon I wouldn’t typically recommend. My second ribbon was a thinner, more satiny (but still wired) peach. You can see the wrinkles more easily and it’s more difficult to work with. As a rule of thumb, the wider the ribbon, the bigger your loops can be. Most thin ribbon can’t support itself as well and will need to have smaller loops (I actually did three tufts here). Start with a test piece first before feeling out your ideal length.
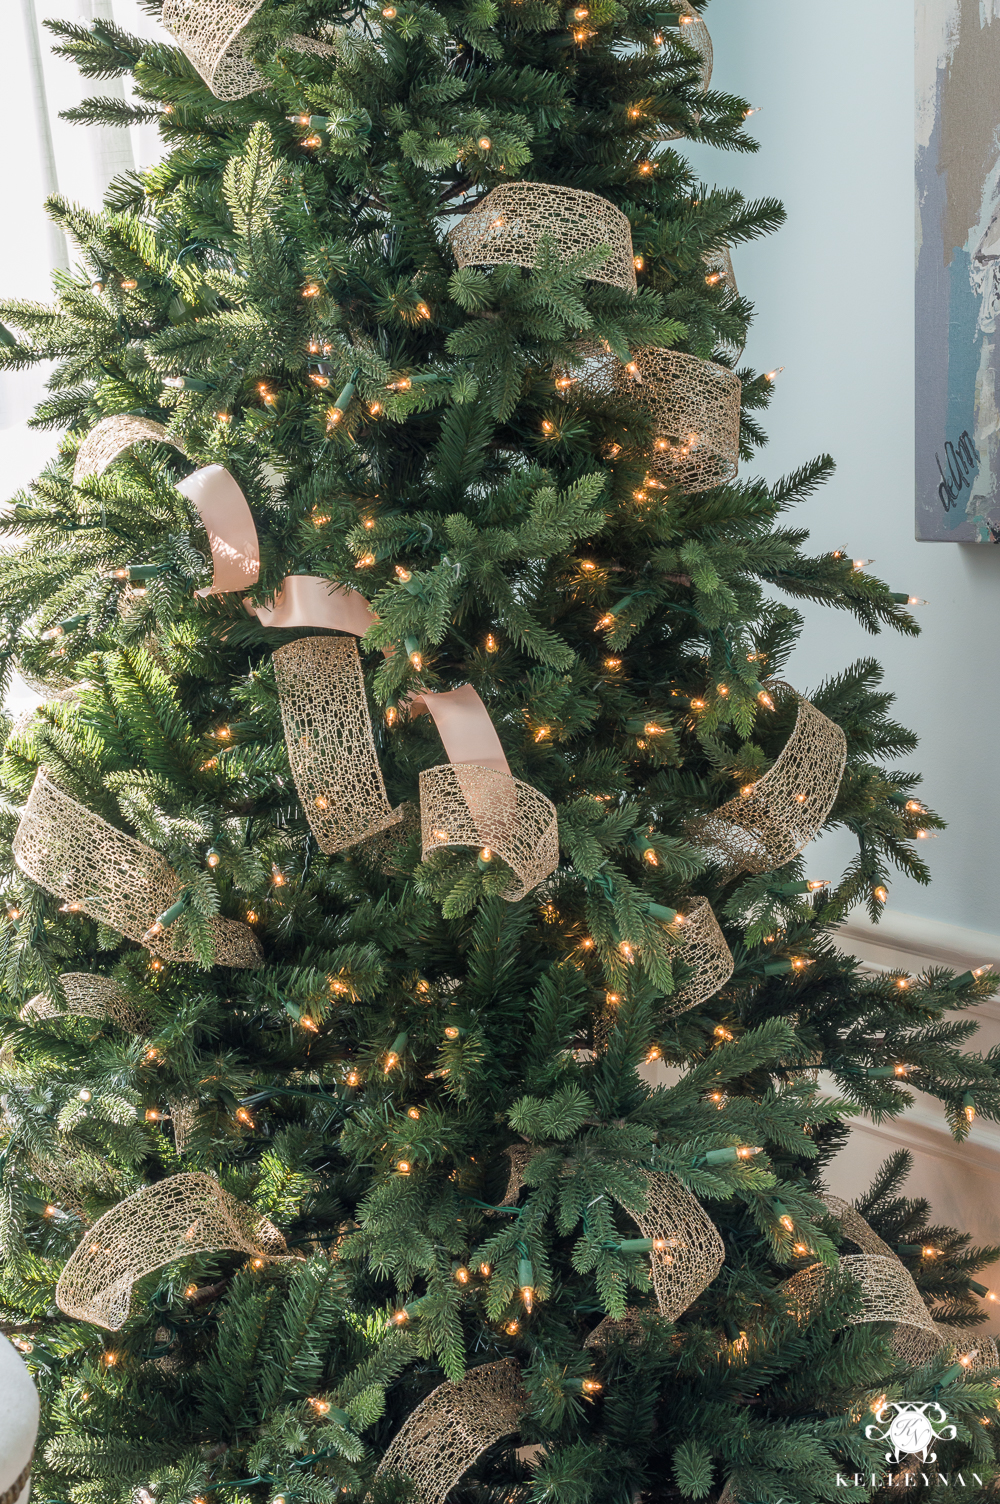
Use the same methods you used in the first round of ribbon, creating billowy (but likely smaller) loops, pushing upwards to create smooth, loose tufts. Don’t worry if you can see some tails and places where you pinch on the inside. We’ll cover those up later 😉
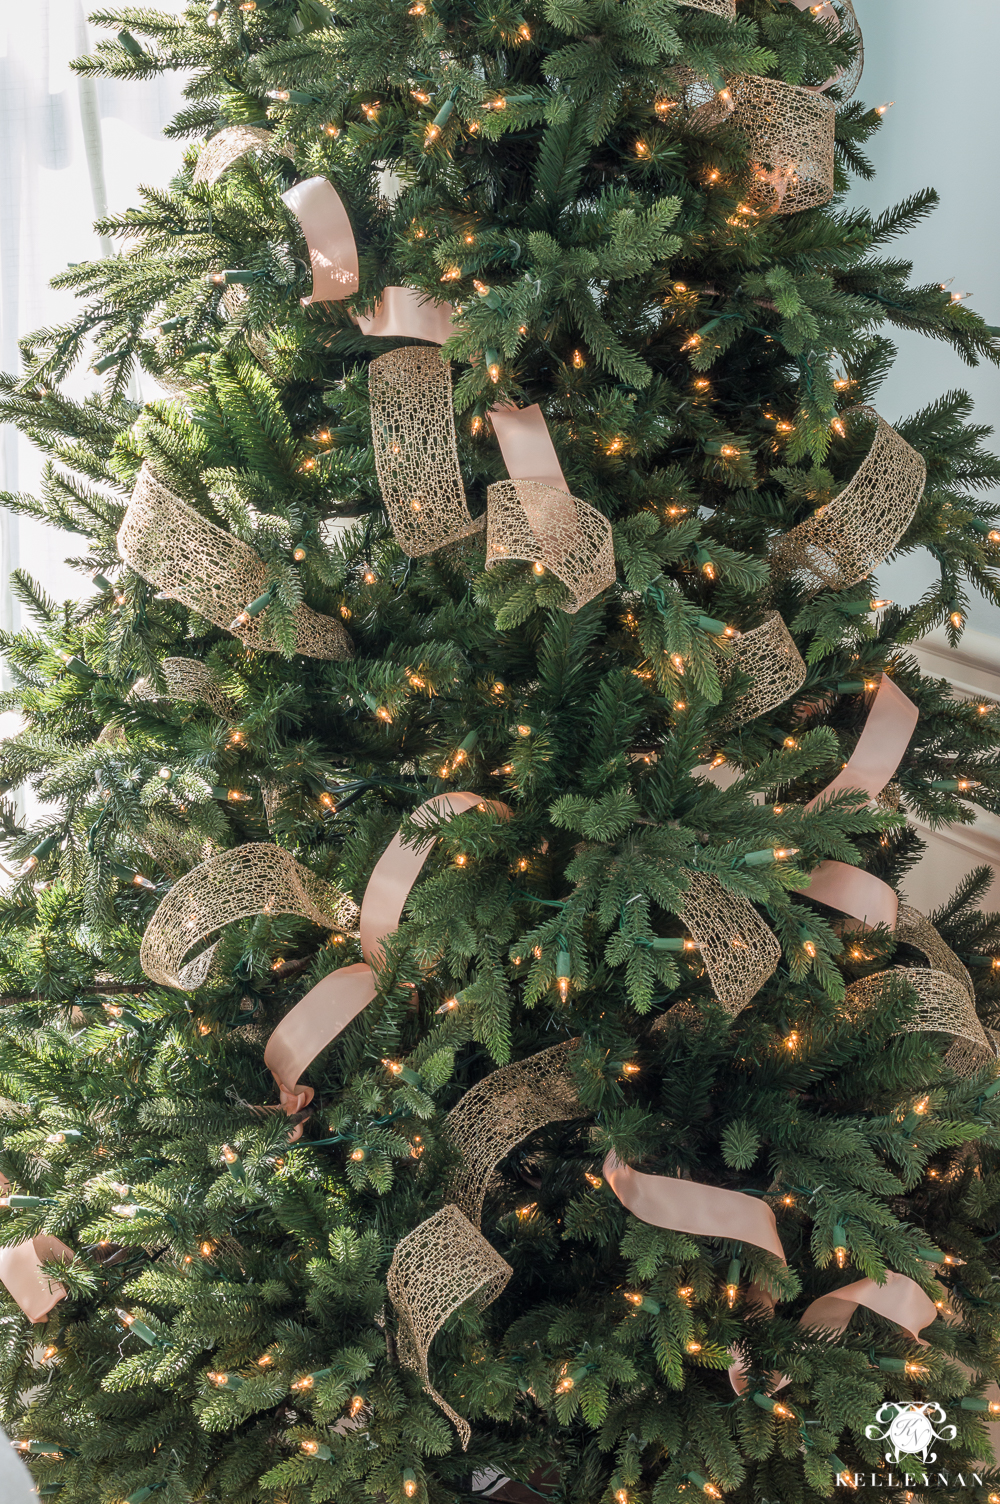
Repeat with each type of ribbon. One of my favorite things to do (which helps you with a thinner ribbon), is to layer two ribbons on top of each other and treat them as one strip. When they are in place, you can pull one to the side slightly to reveal the underneath. I started with a more vibrant green but ended up removing it – you’ll see why a little further down.
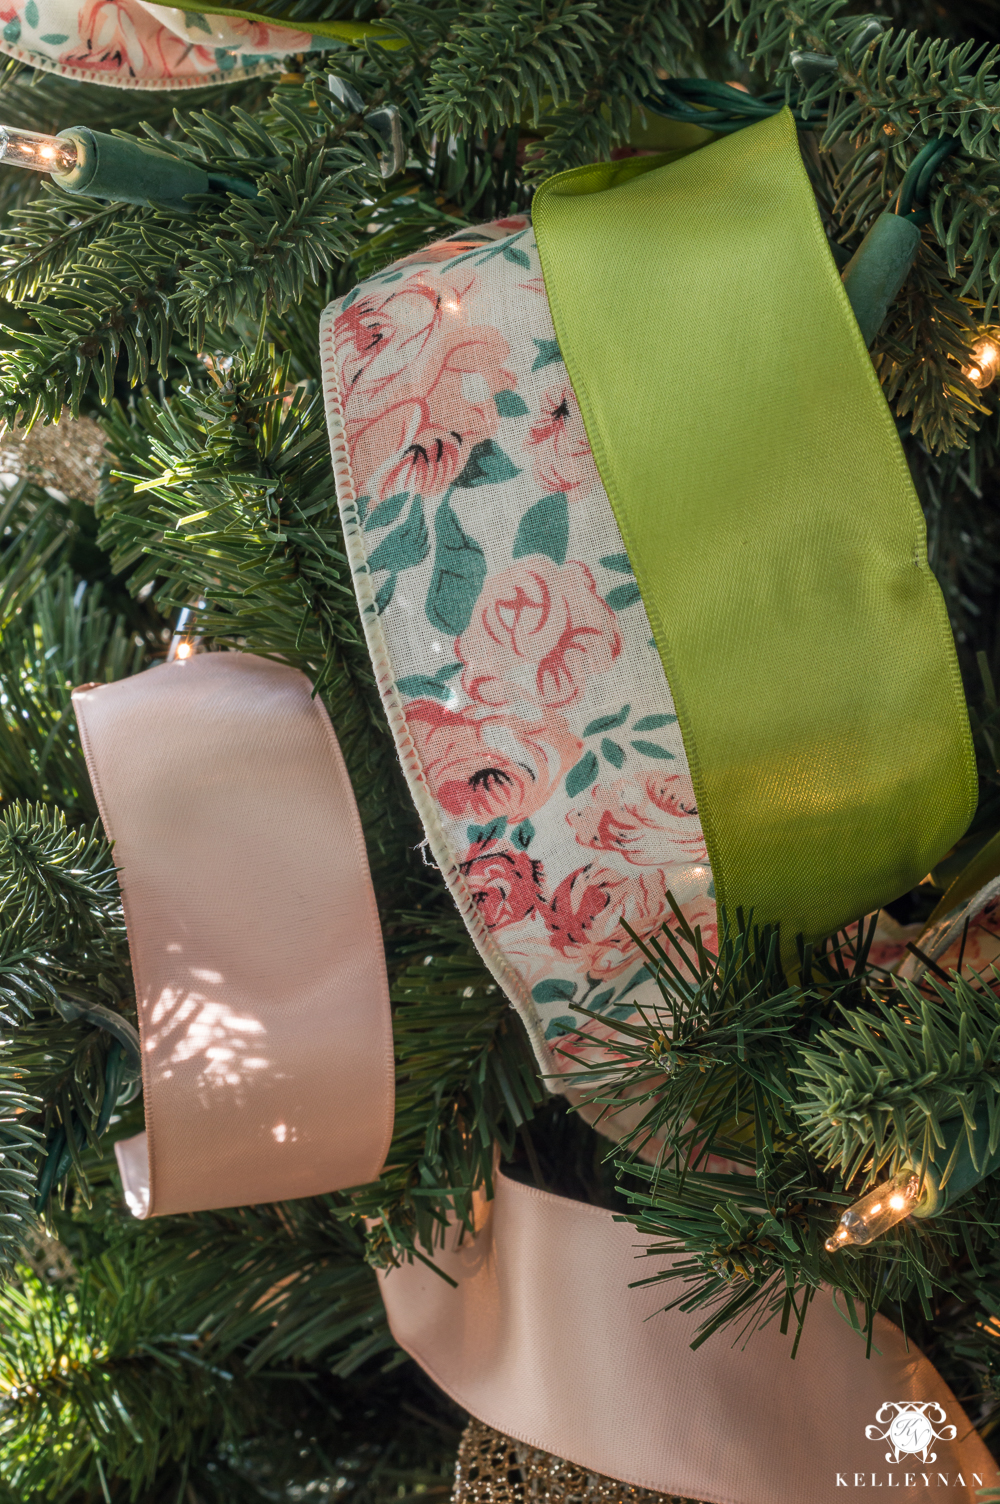
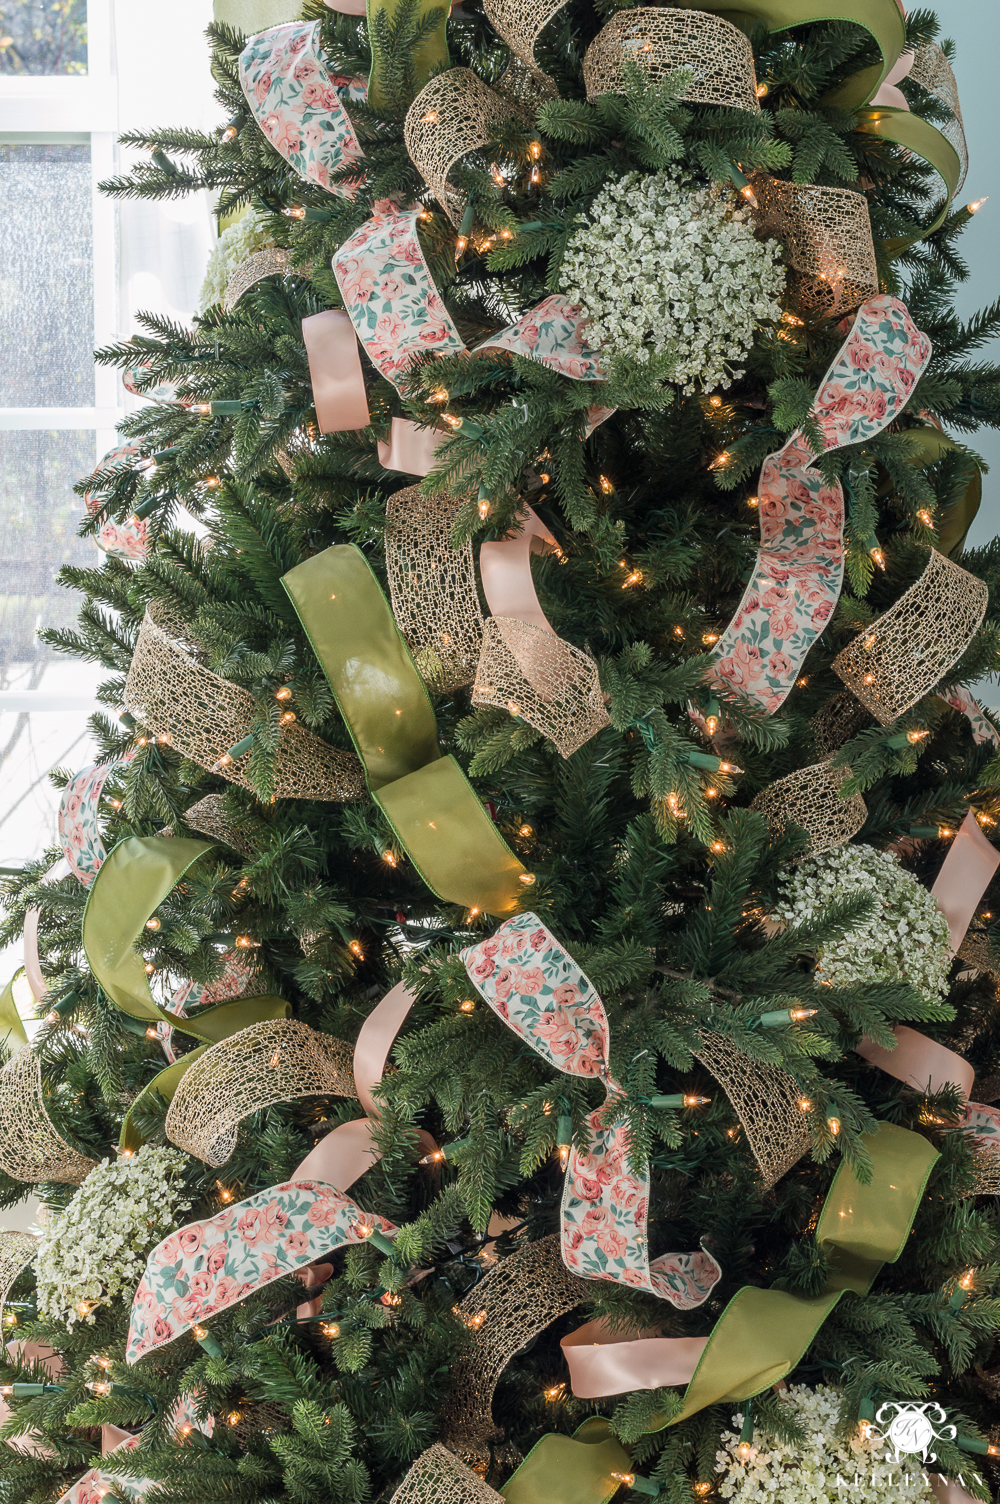
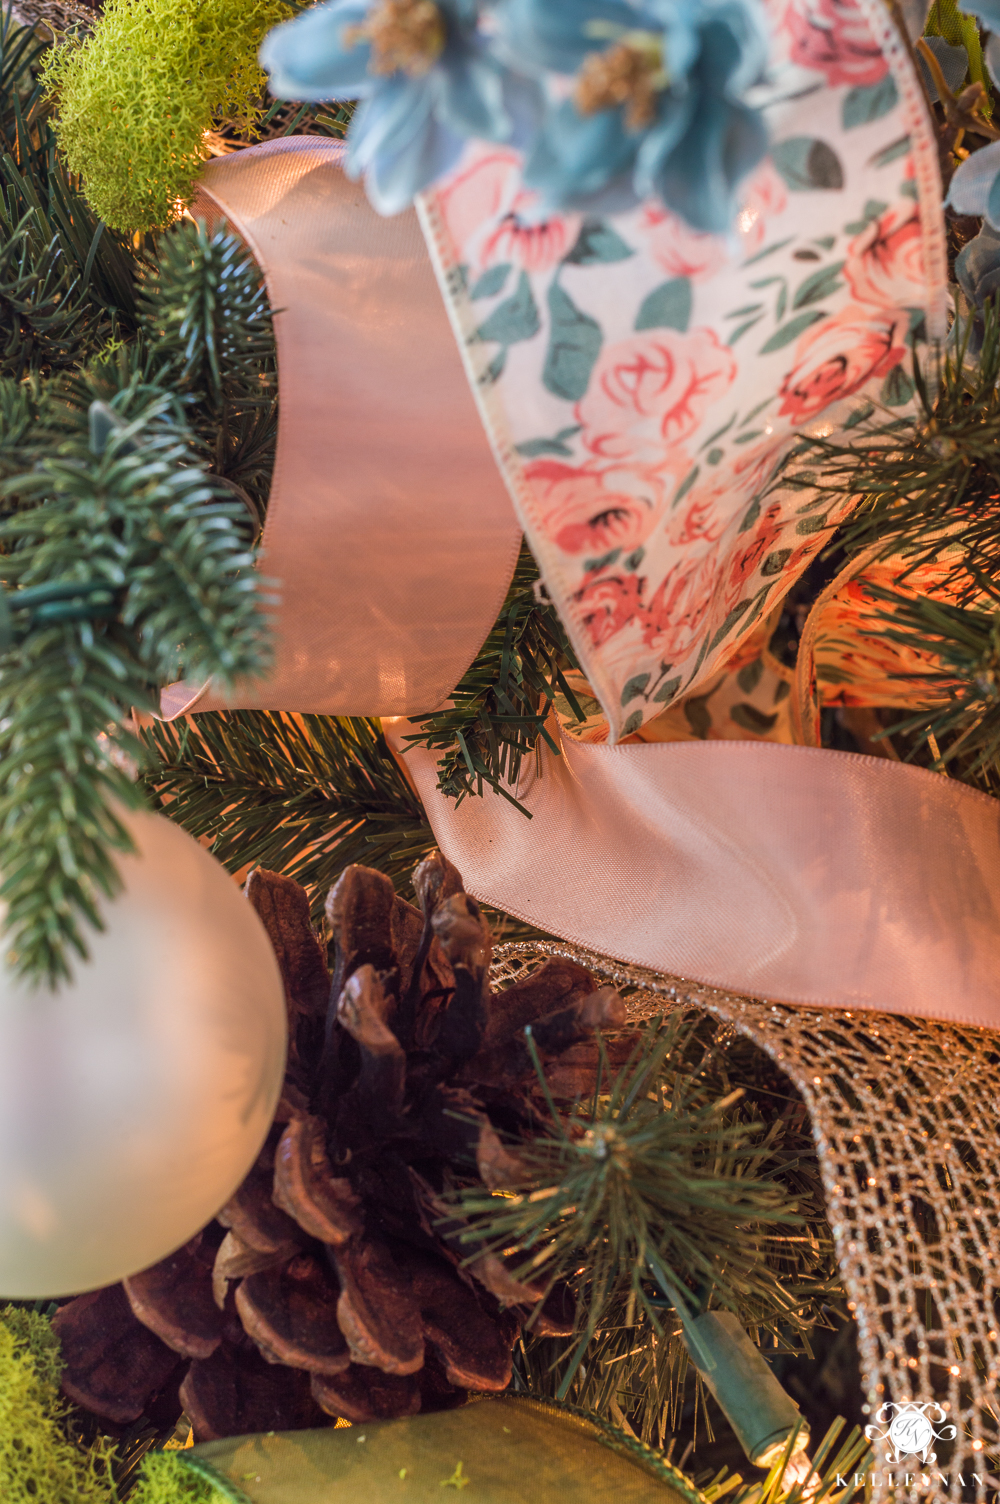
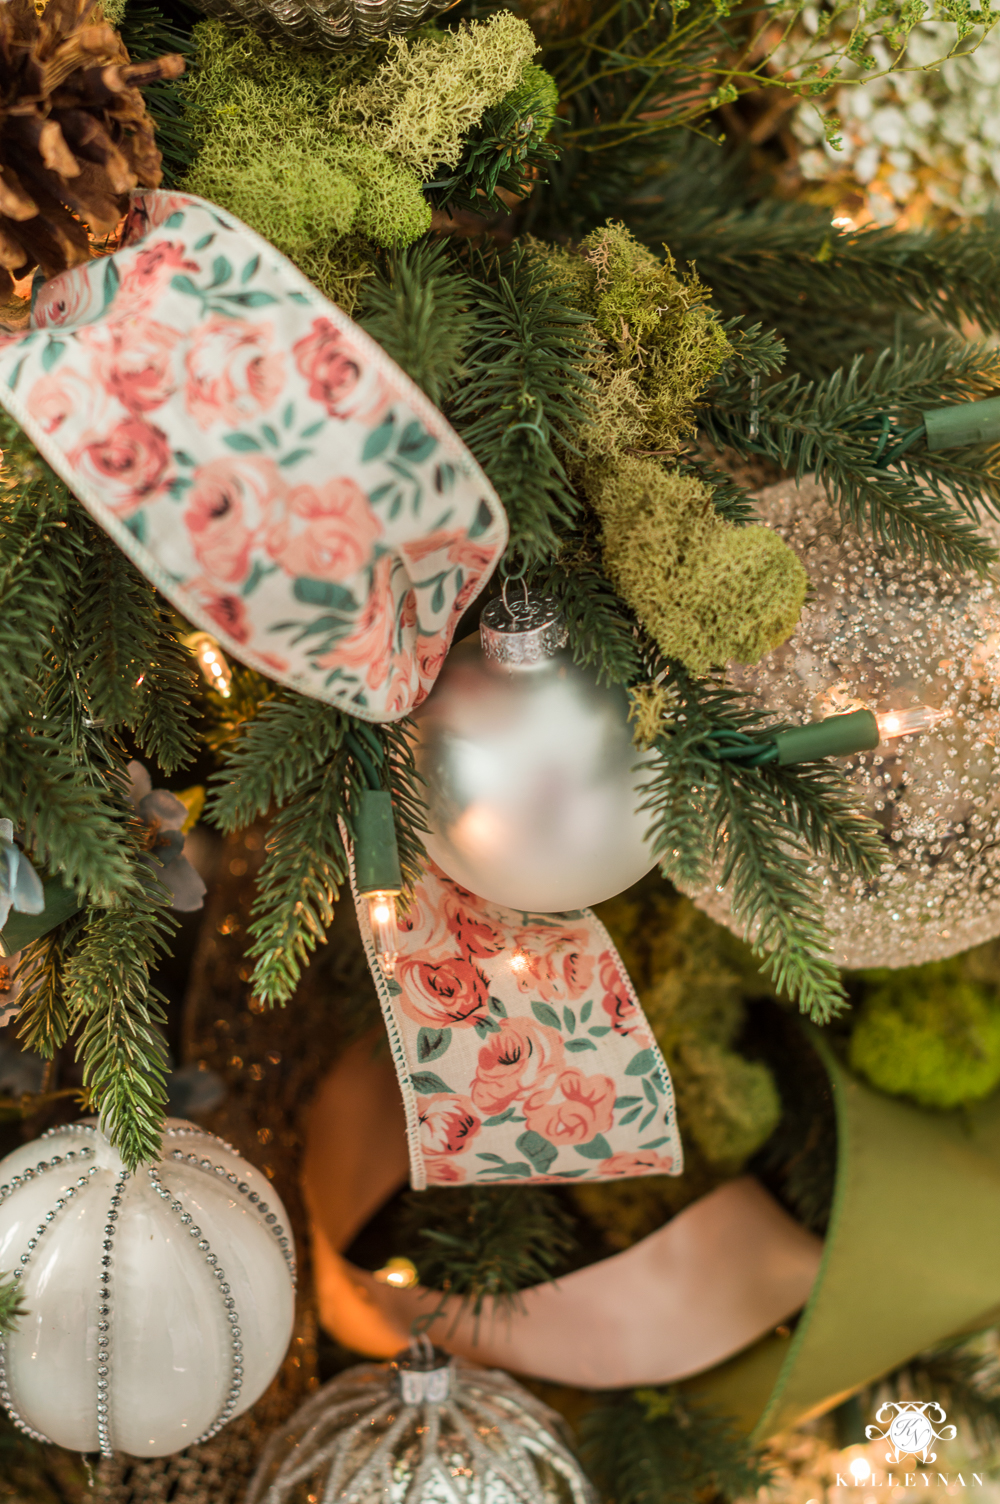
If I have a more busy/patterned ribbon, I add that last and in smaller quantities. I like it to be a little more subtle and usually, the patterned ribbon is fabric, in the regular ribbon section, and is more expensive than regular Christmas tree ribbon for just a few yards. The spools are usually much shorter too. I believe I used three spools of 4 yards each of the floral ribbon. You may notice that some of my floral fabric loops aren’t as deep. If you have to pinch it in between the surface branches, we can cover that up, too. Just try to go deeper where you can.
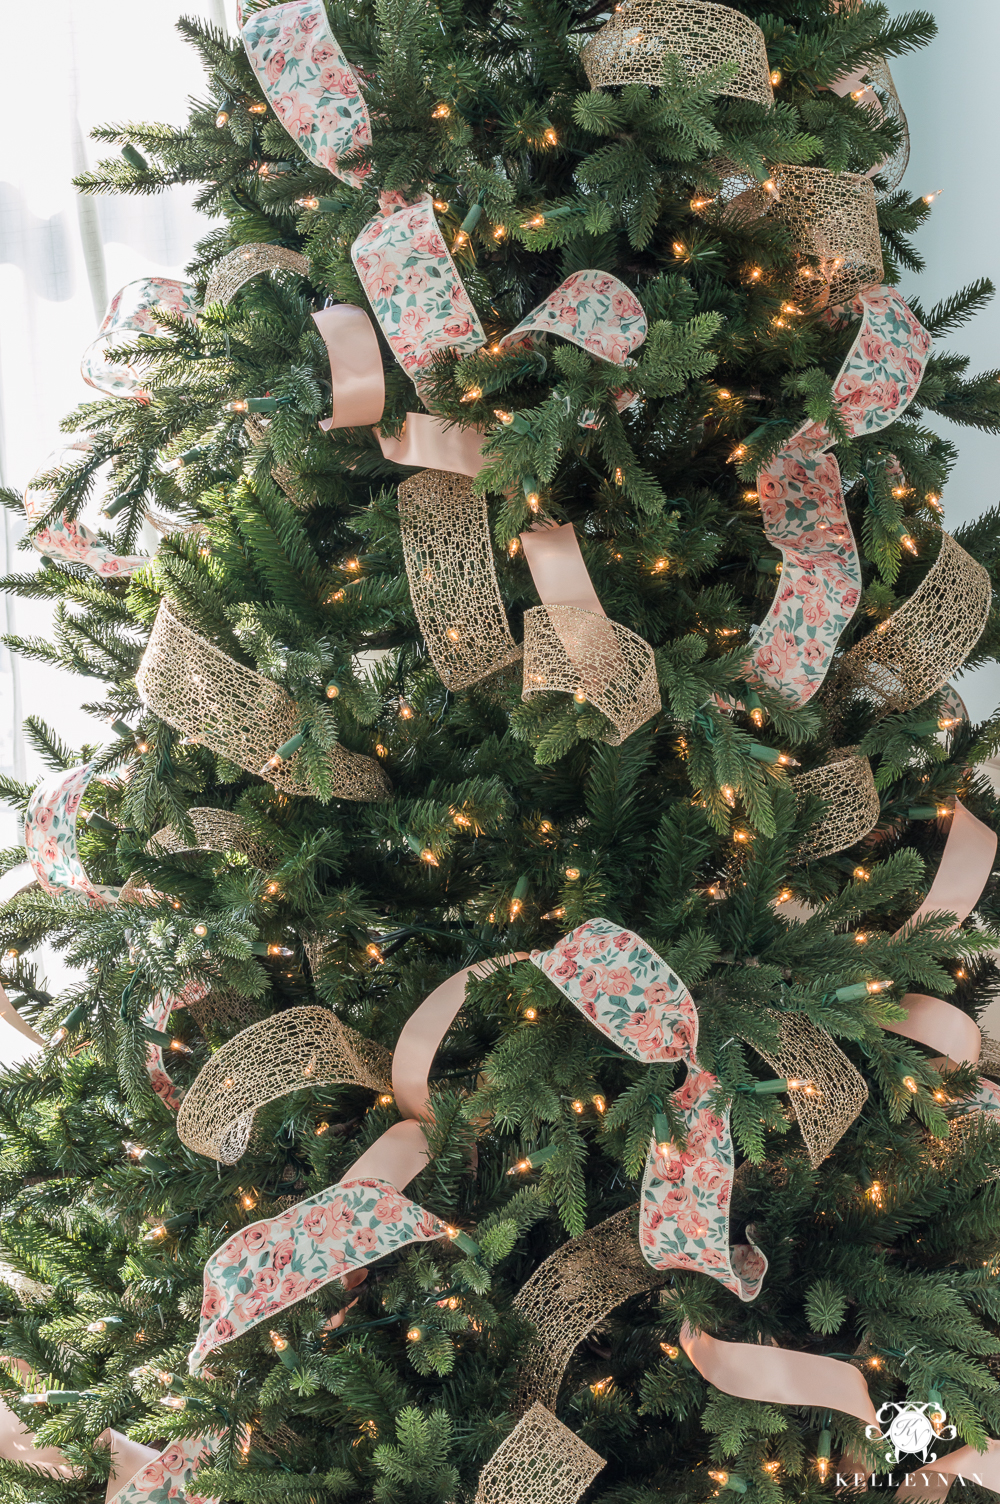
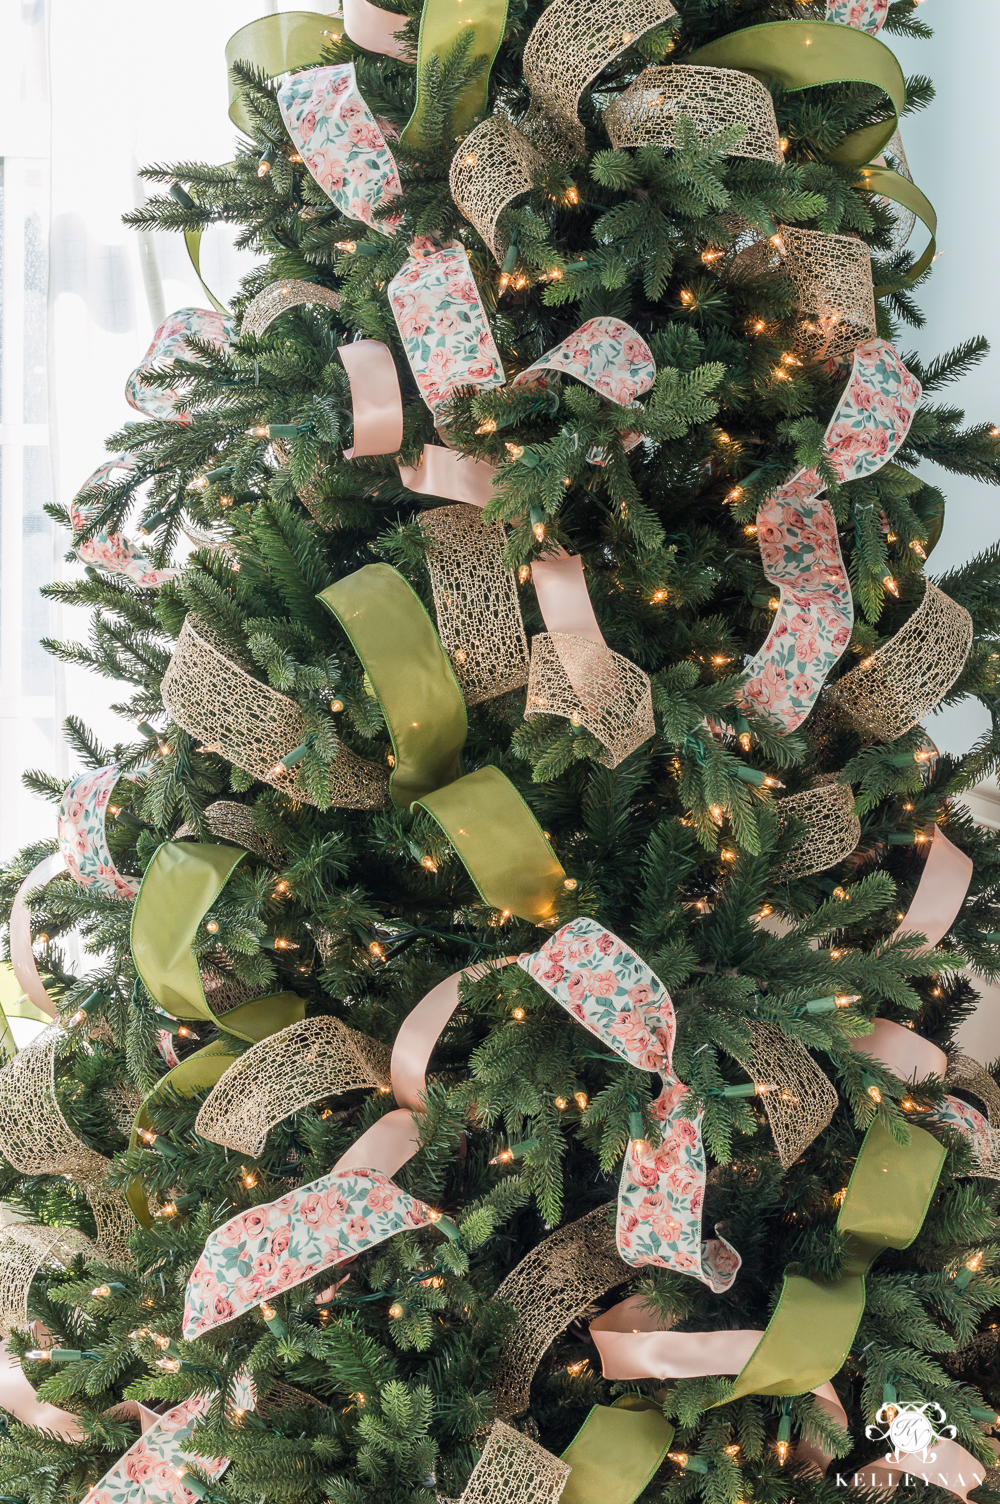
Lastly, I added a thick green ribbon, surveyed the tree, and ultimately added a few more pieces of the original gold. I used four types of ribbon total — by no means do you have to use four types, but at least two will keep things interesting.
STEP 4: BRING IN THE BIGGEST EMBELLISHMENTS
After the ribbon is secured, I add the next largest series of items. For you, it may be large ornaments but on this tree, I had huge floral stems that I incorporated first. Another tip- don’t feel like you are only allowed to select from the Christmas section/picks. I hit up the floral aisles to find coordinating stems. There are some beautiful finds in the fall sections that can be upwards of 80% off.
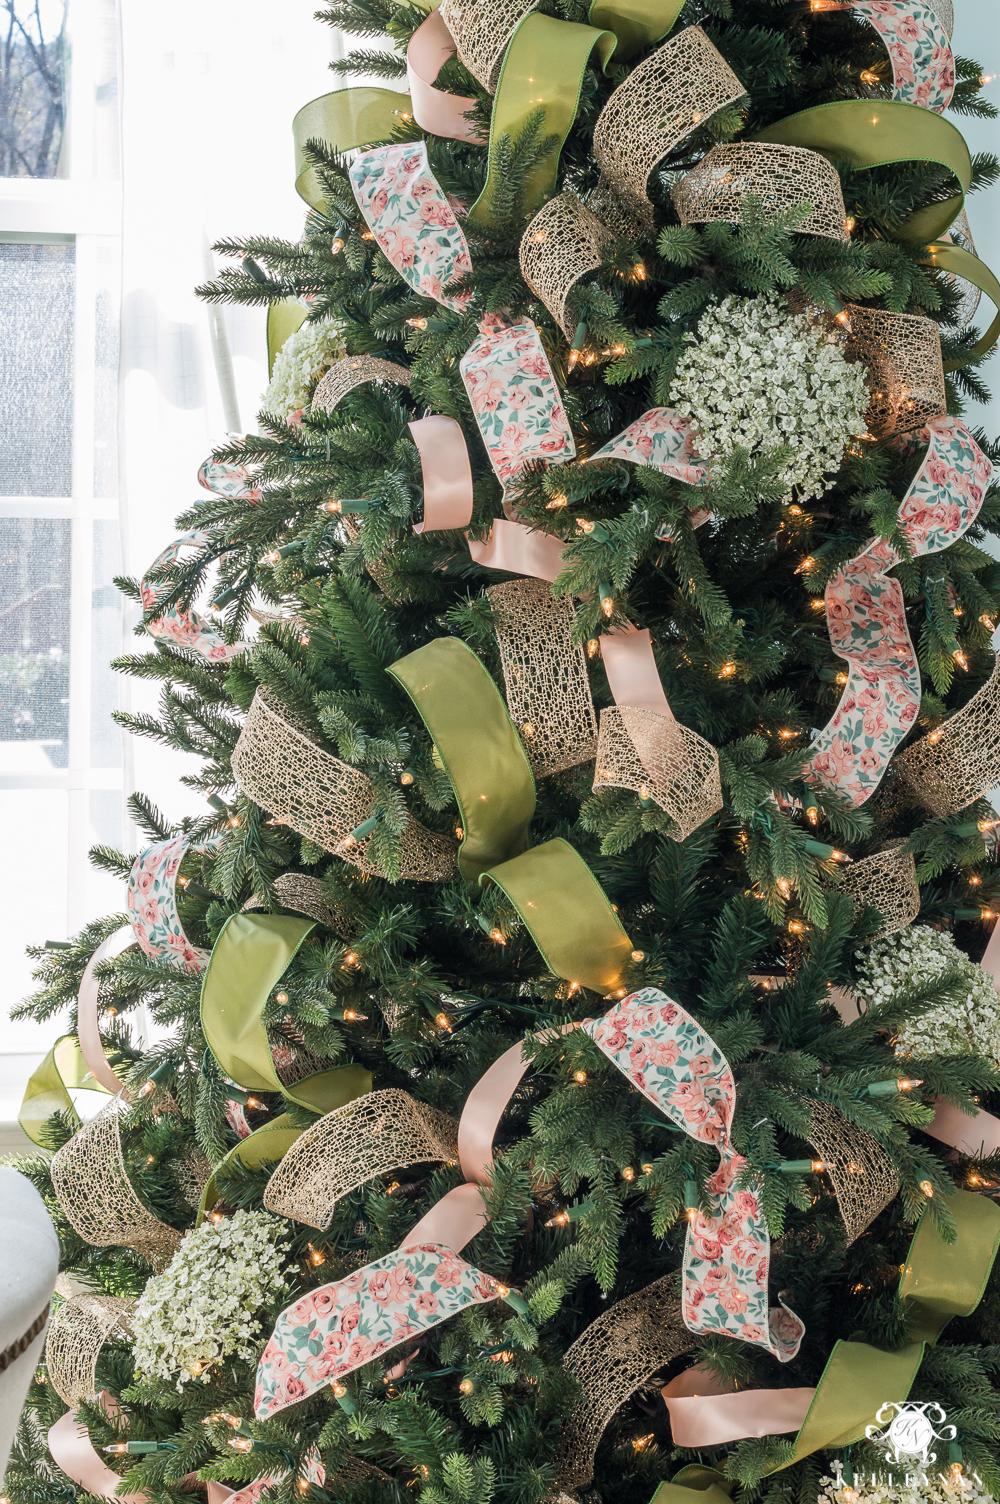
If the stem is too long, you can cut it to be a bit shorter. I bury the big items and nestle them in the branches, closer to the tree base. I like to fill in open spaces but also, don’t be scared to cover a little ribbon. You may need to adjust some ribbon tufts as you incorporate your big pieces. You can also use a couple different techniques; I use both in this tree. You can cluster a few like items together for an impact (think three red balls together all over), or, spread everything out evenly. I spread the snowball blooms out evenly.
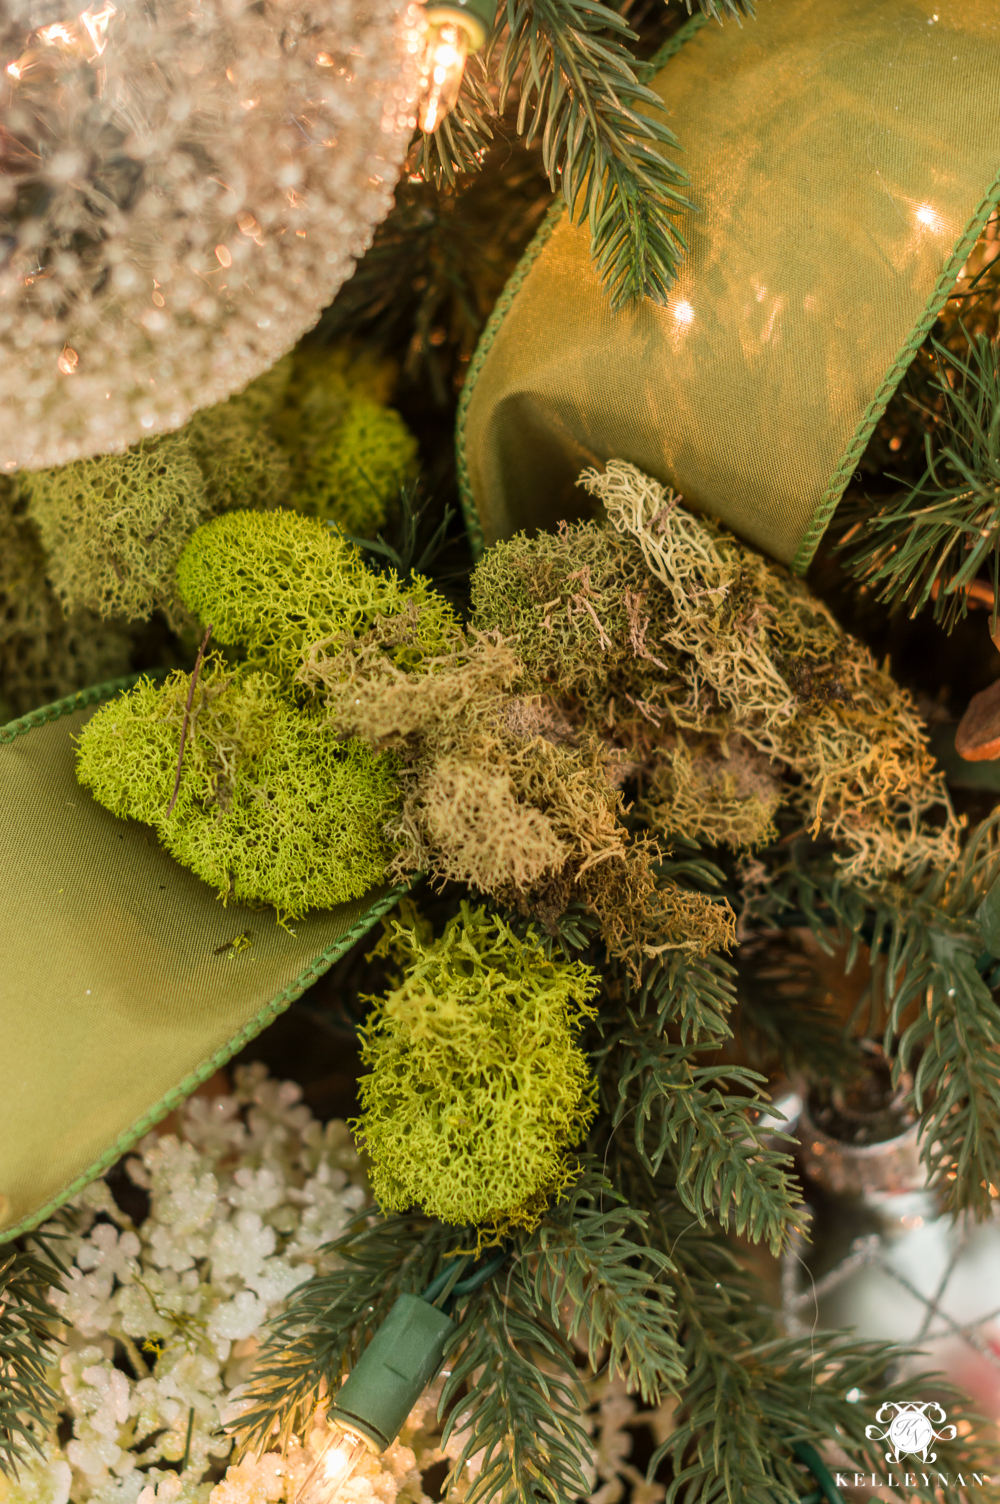
STEP 5: ADD FILLER
STEP 6: INCORPORATE A STATEMENT
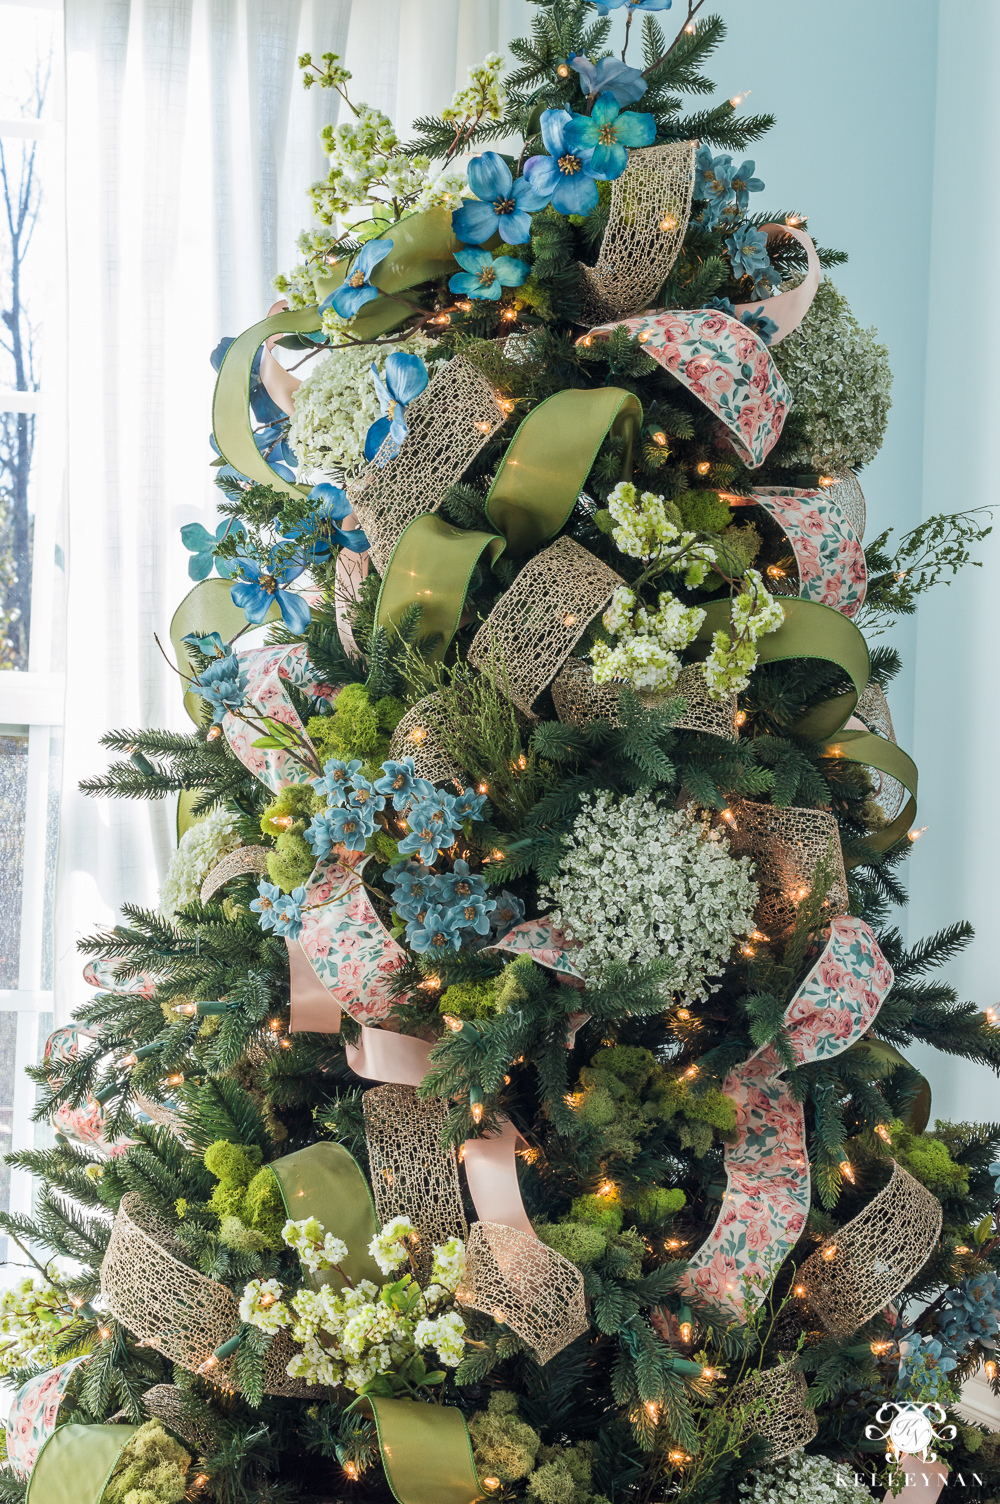
Before the statement up top, I actually stuck in other branches since they were on the larger side. Manipulate the flower branches (don’t just leave them as a straight cluster). I spread most of mine out (the smaller blue blooms were scored as fall for .90/a stem. I usually let the picks/stems that are more “stem-y” — with more movement — stick out more from the tree. This helps give a more natural, organic, whimsical feel. I saved a couple of bigger blue floral stems for the topper. Instead of spreading them out evenly like the others, I concentrated them at the top of the tree and kind of came down from there, winding them in a diagonal to create that focal statement. You can also create something similar with a series of picks, branches, or berries.
Here are a few more examples of a statement topper that winds and thins out. This “southern grace” Christmas tree had white magnolia blossoms and gold leaves that gradually thinned out…
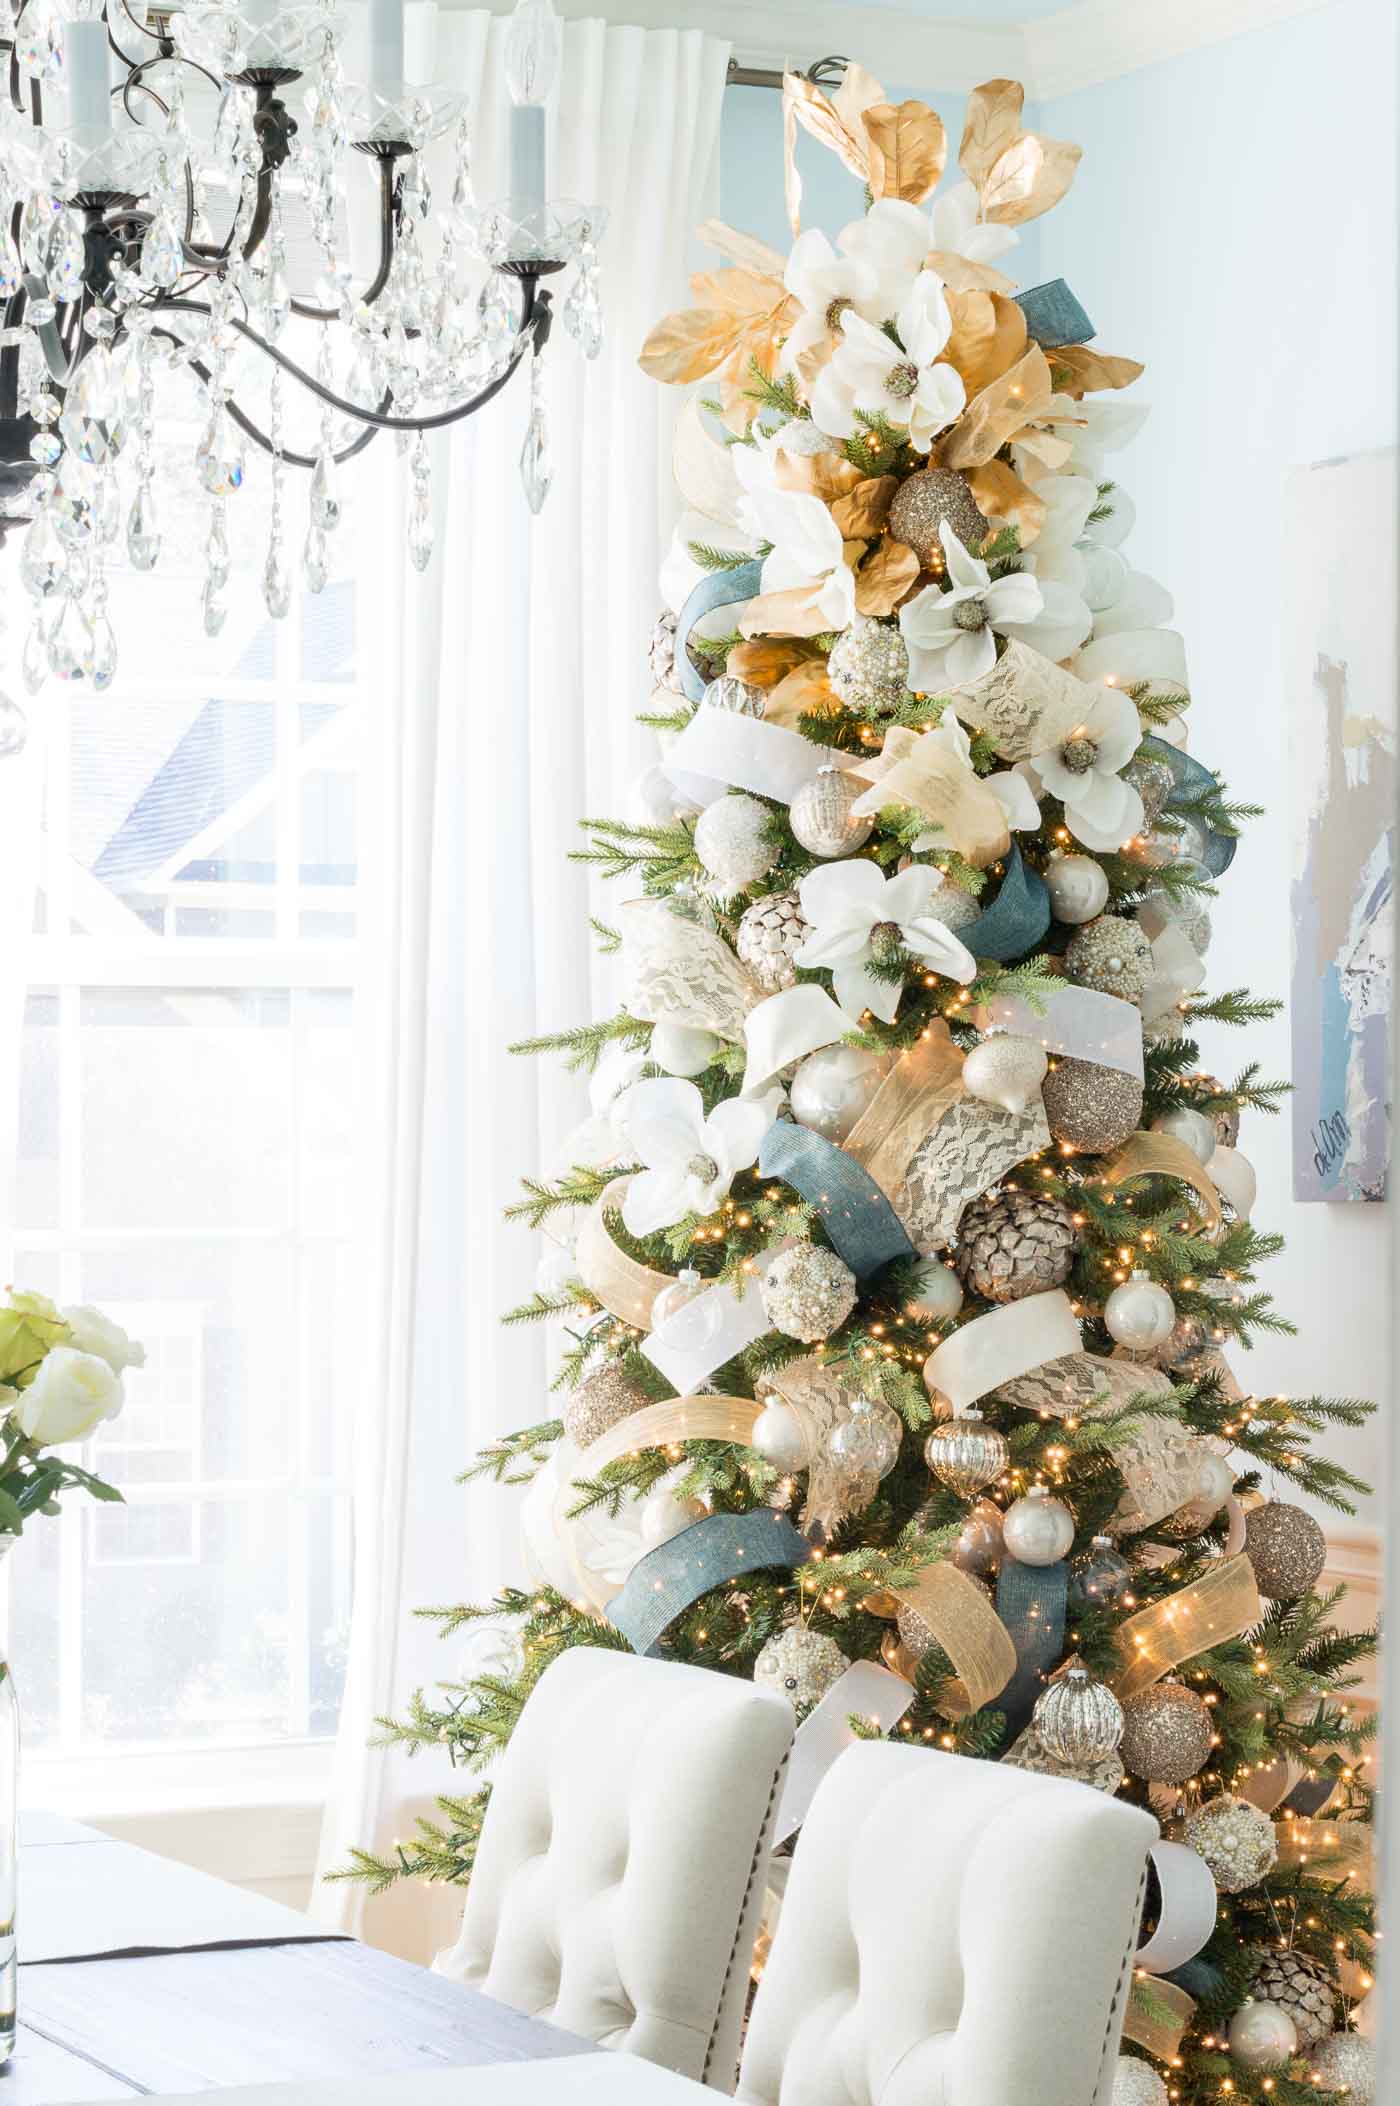
See more of this tree in my 2018 Christmas Home Tour
And this orchid — on one of my daughter’s nursery Christmas trees — was easy to position down at a diagonal.
See more of this Christmas tree in my 2019 Fairyland Christmas Nursery Reveal
Ok, back to the tutorial! See how full it’s looking? And we haven’t even added the actual ornaments! At this point, I went ahead and added the ornaments. No rhyme or reason, just random and all over. Again, if the ornaments are your biggest statement, you may not have huge floral stems and ornaments may immediately follow the ribbon portion. I nestle heavier ornaments inside on more sturdy limbs and lighter ornaments further out on smaller limbs. Some people only use big ornaments at the bottom and smaller on top but I like to mix all over. I also have more special, intricate ornaments that I mix with regular filler balls.
STEP 7: ADD ELEMENTS TO HIDE THE CHRISTMAS TREE RIBBON TRICKS
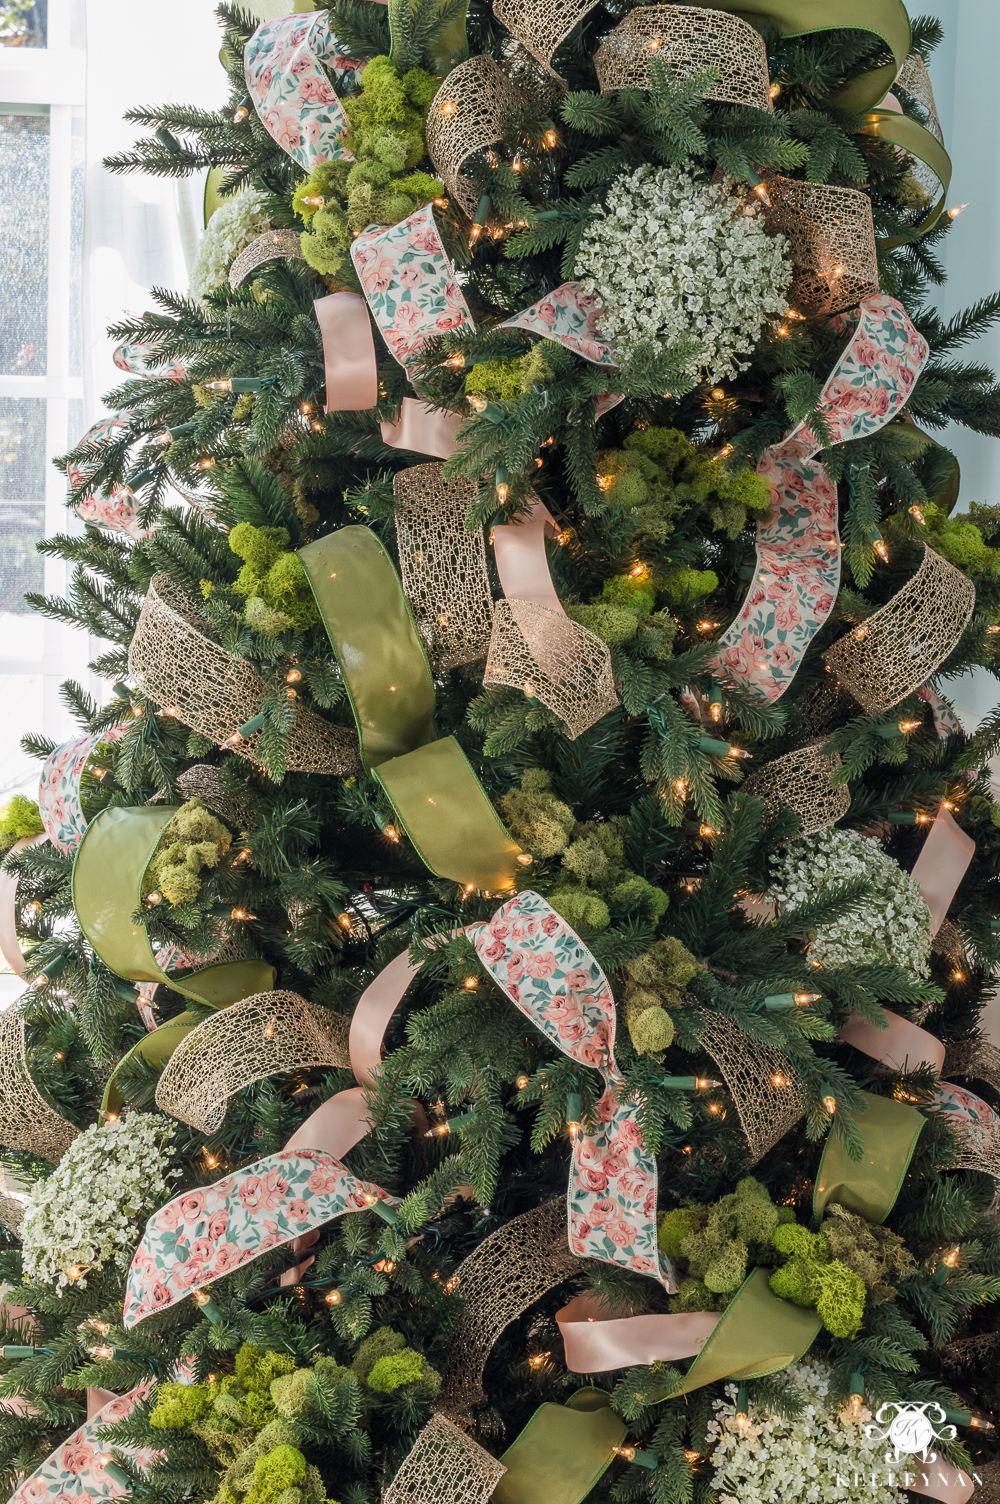
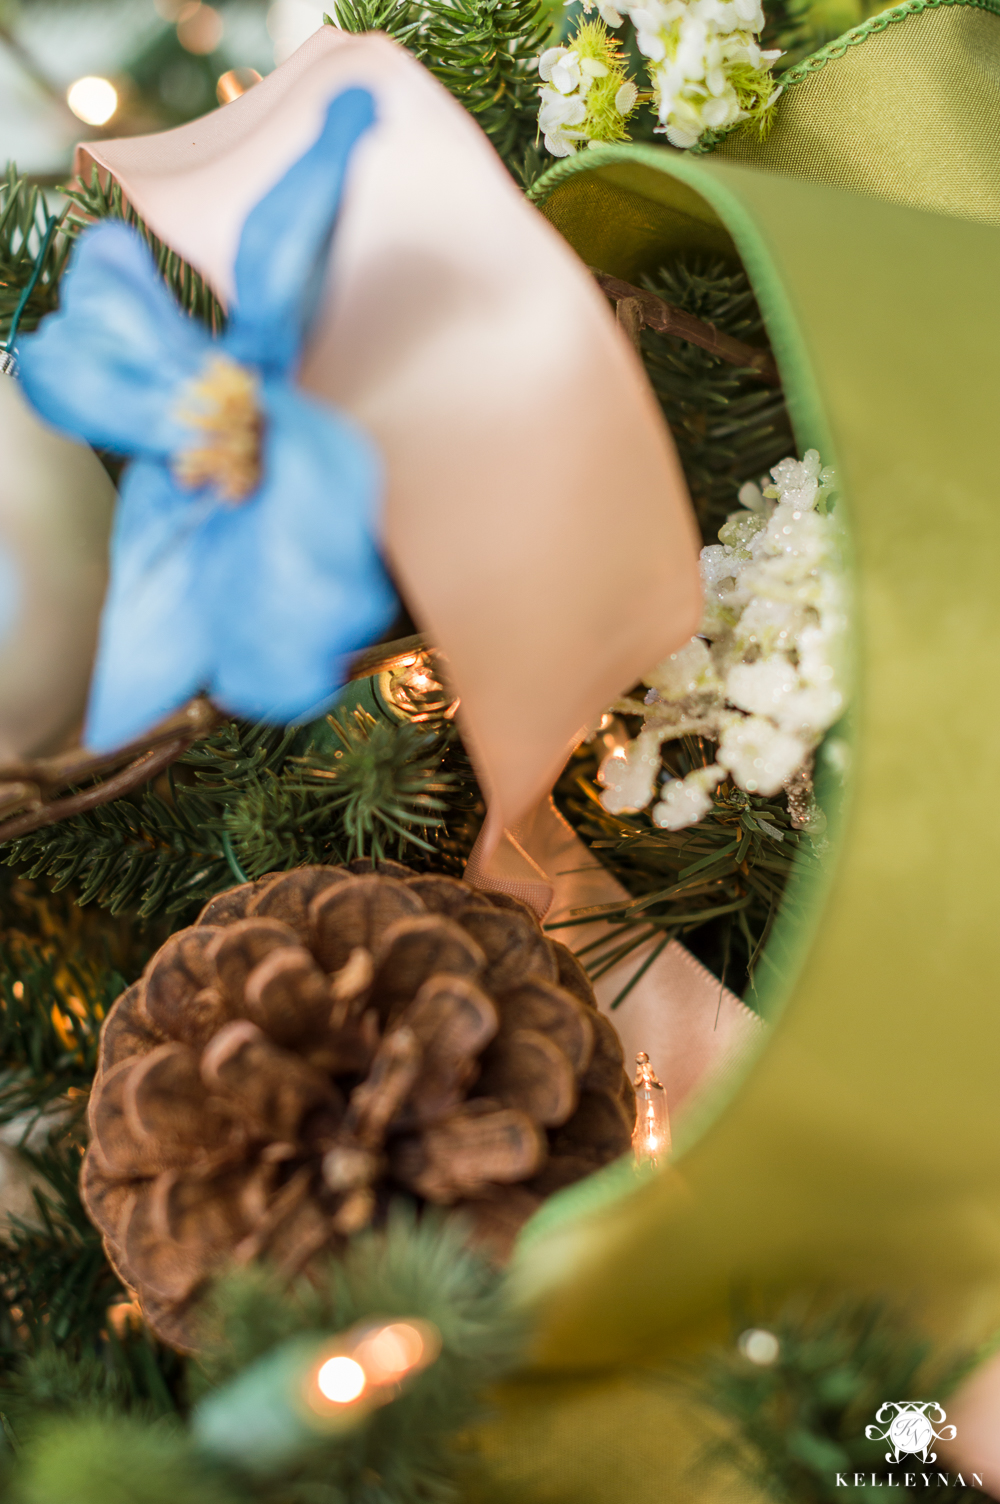
After the bigger elements, and then ornaments, I add in smaller picks — like berry sprigs (or in this case, dried stuff that I don’t really know what it is haha) — to start hiding more of the ribbon security areas.
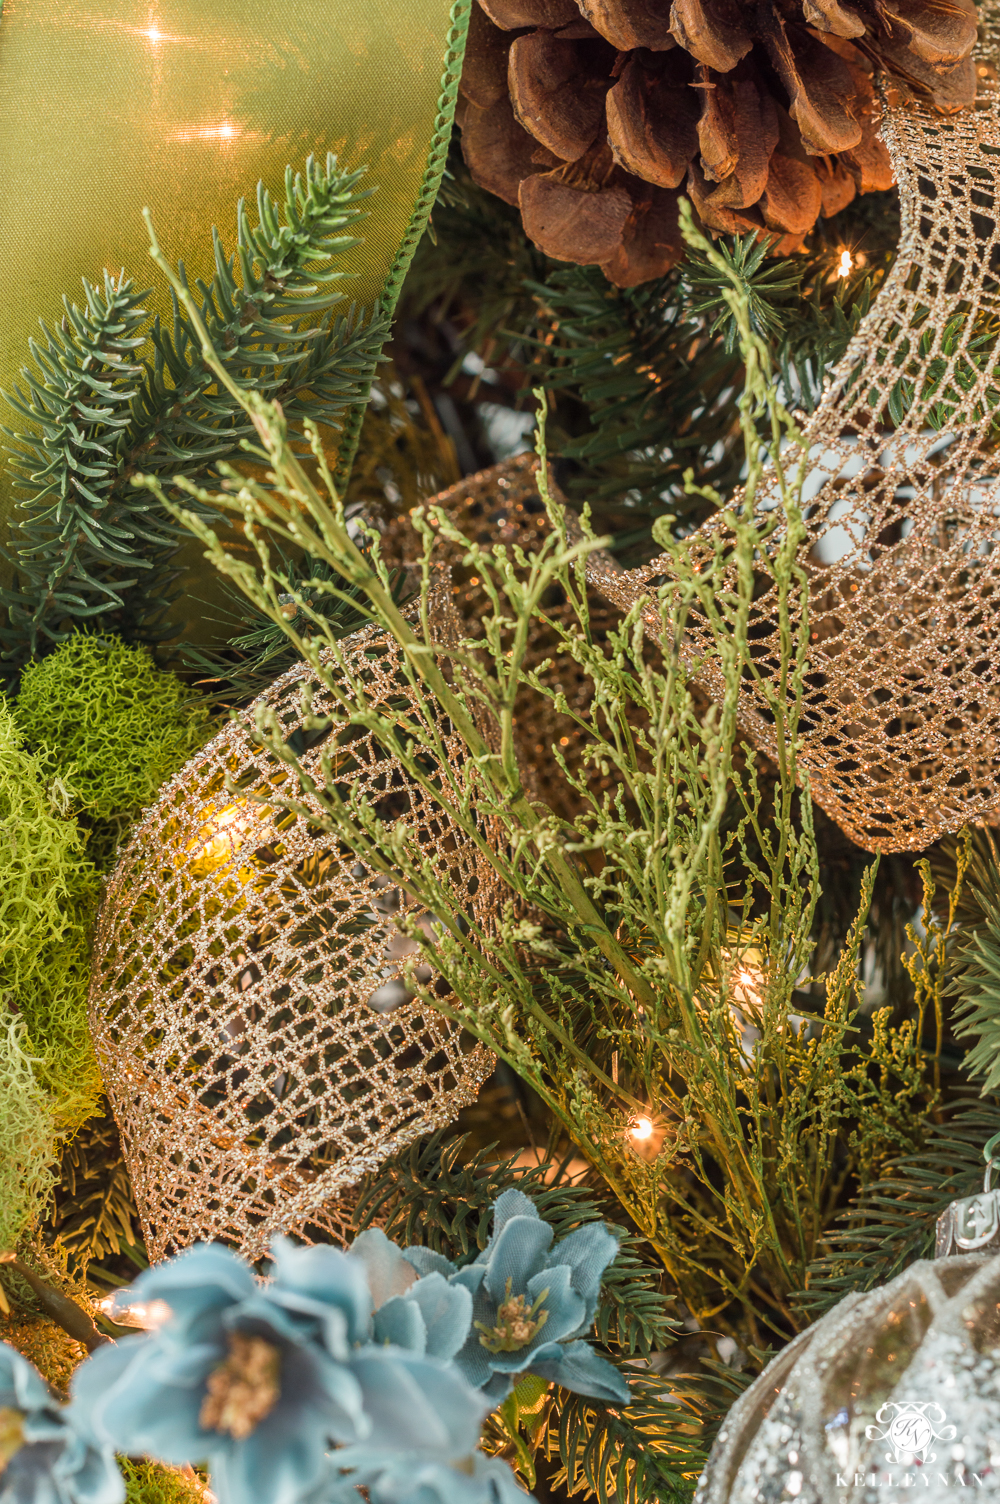
I also wedged pinecones in, perfect for the meadow tree (or most any Christmas tree 😉 ). These were really easy to use- even easier than actual hanging ornaments. They are a really inexpensive addition but as a caveat, if you use too many, it will take away from the luminance of the tree.
I also use ornaments to help cover those spots. See how everything is disguising the ribbon tucks?
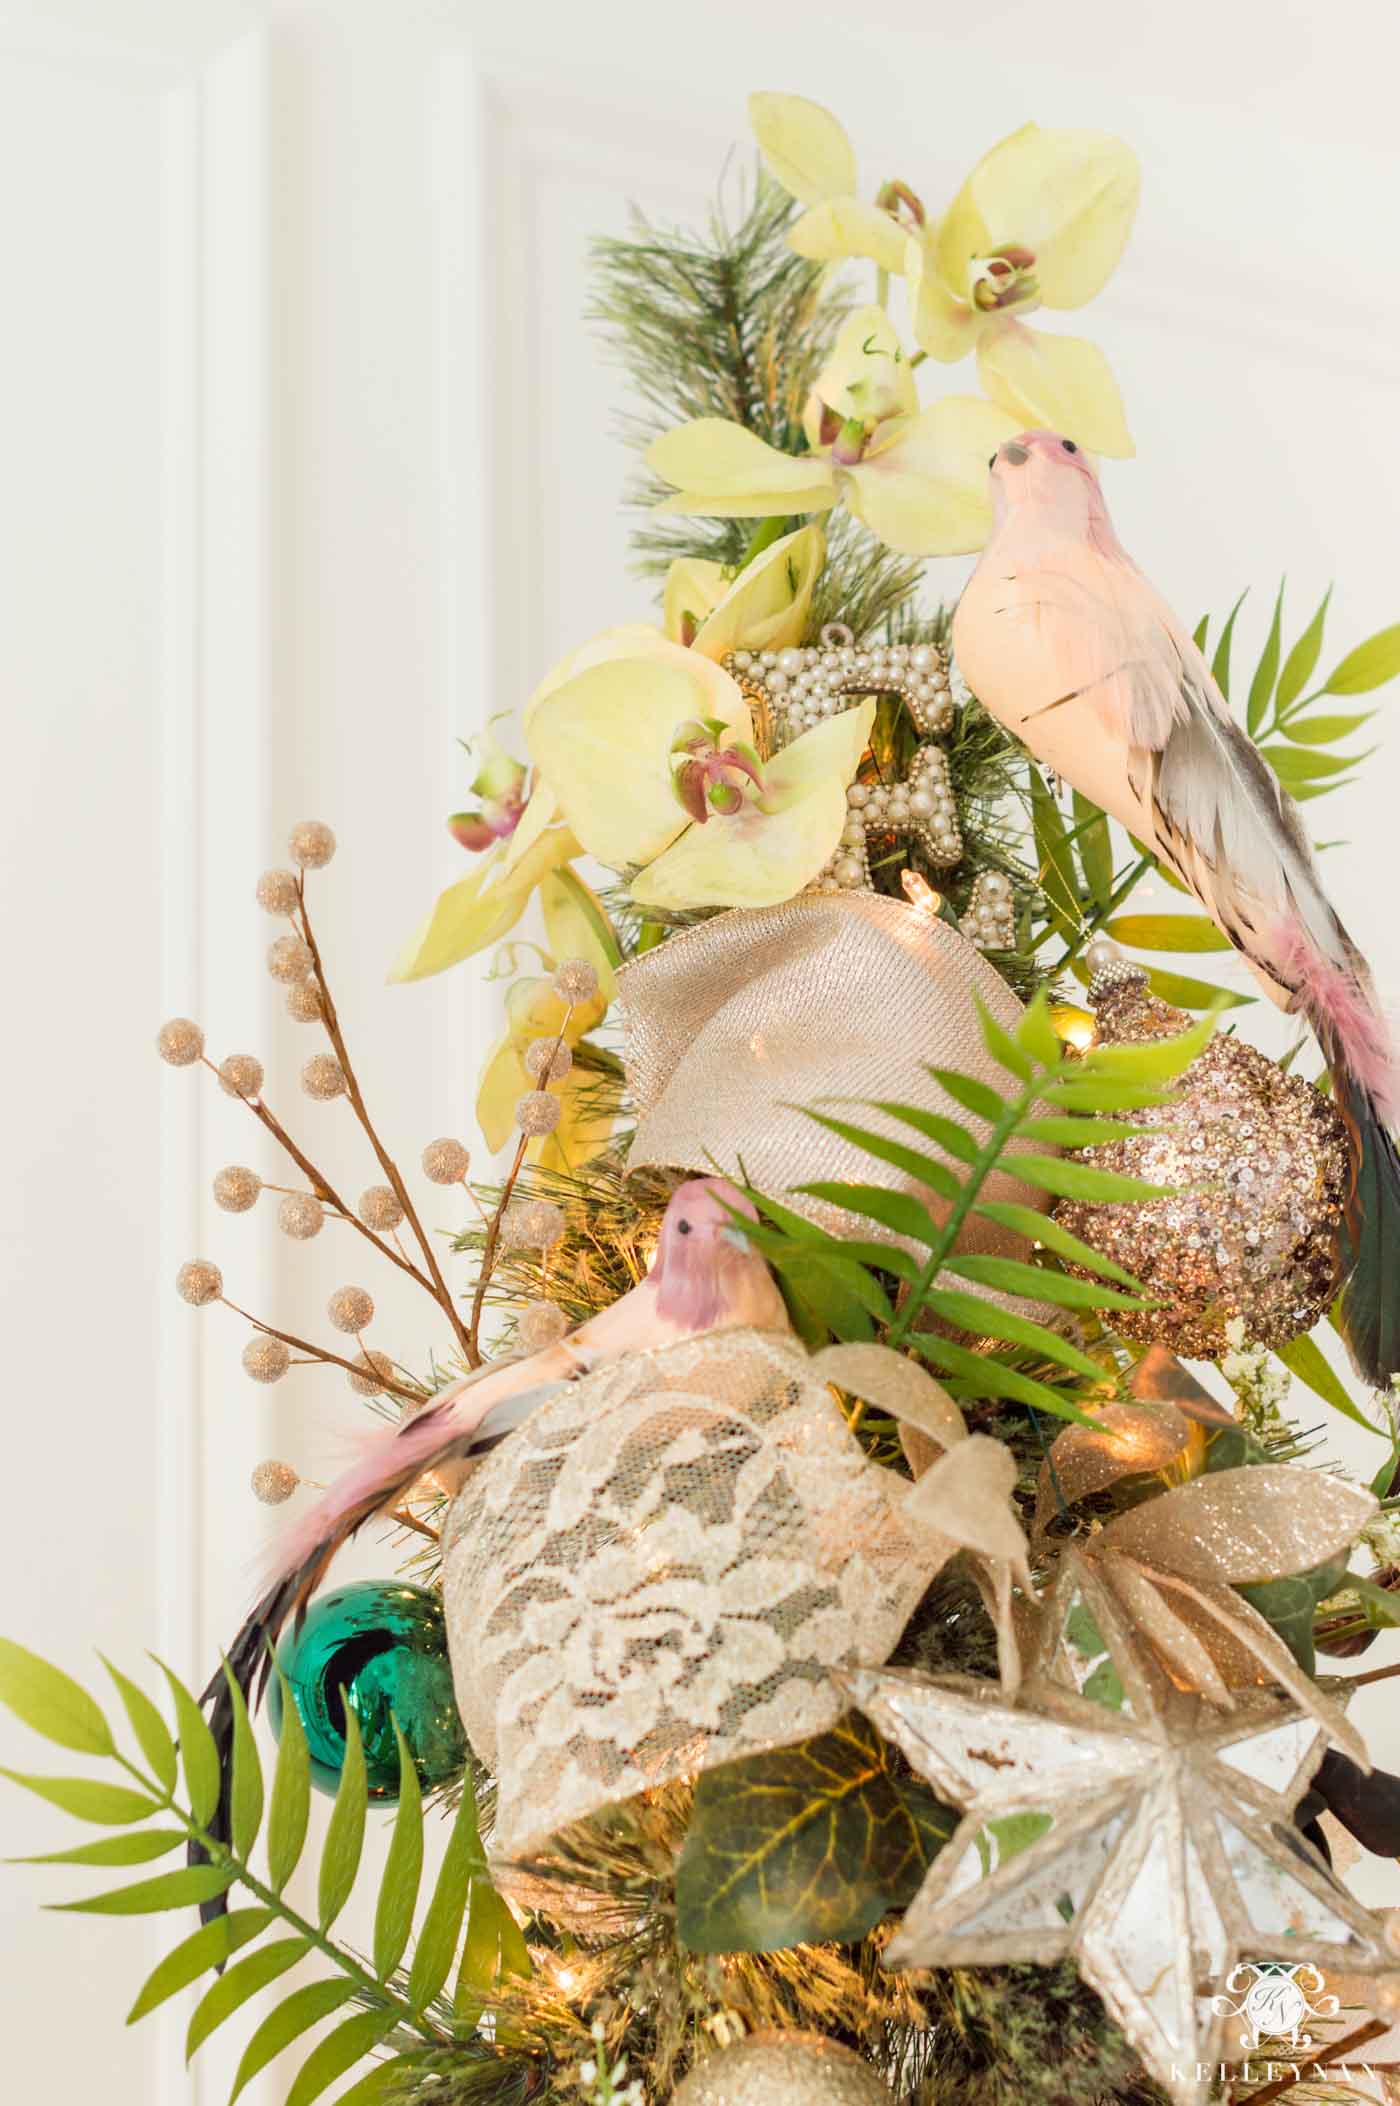
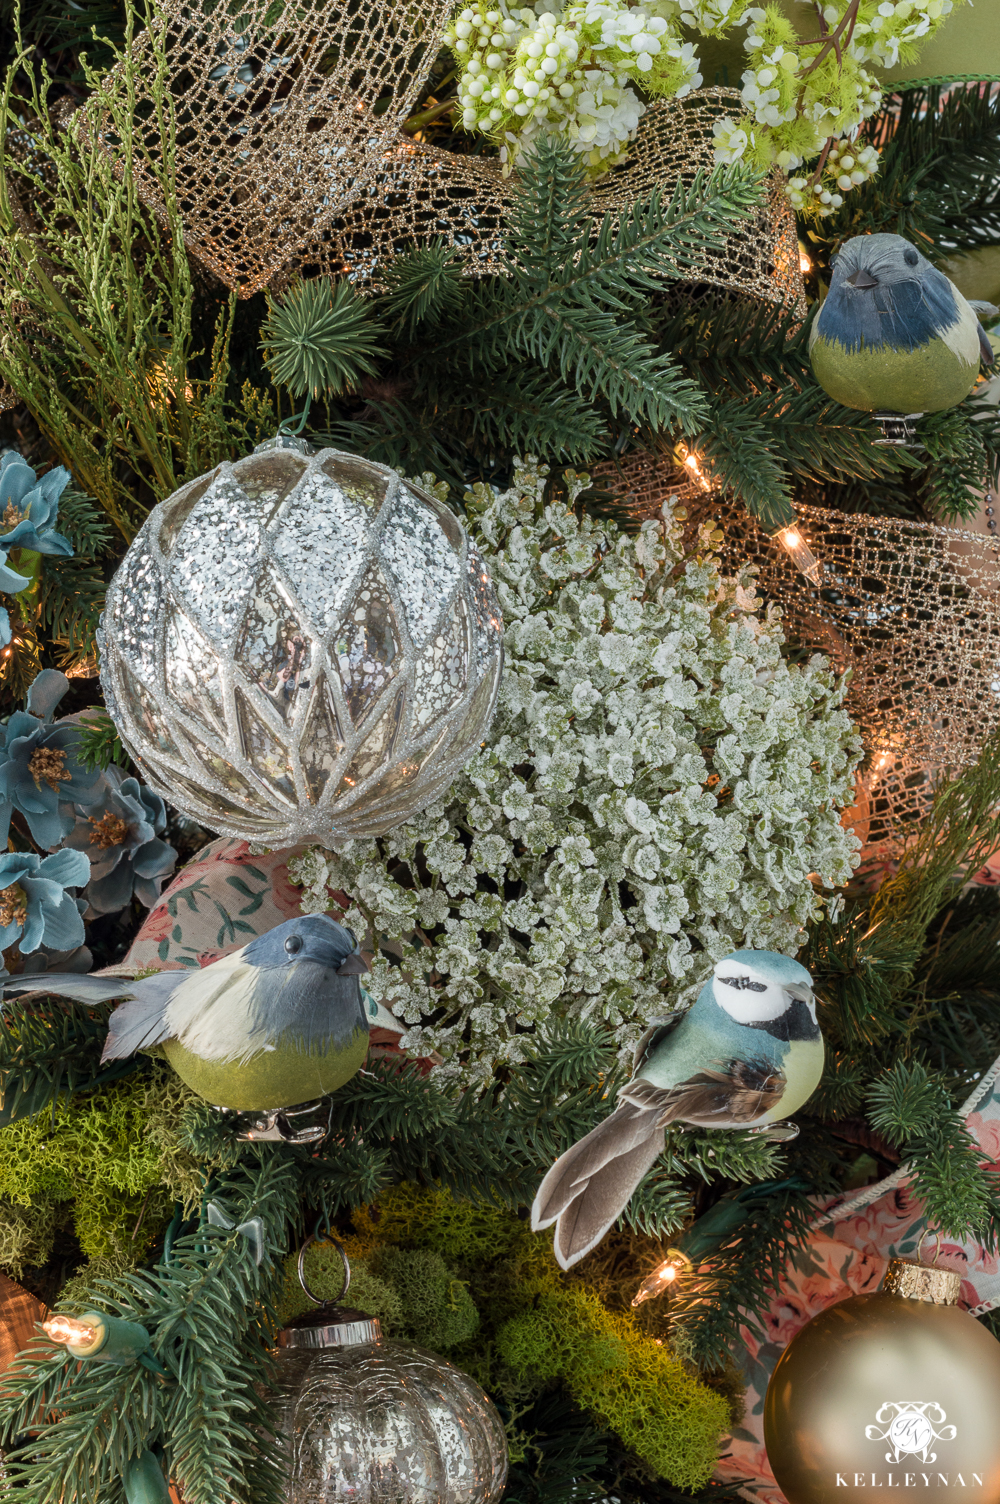
STEP 8: ADD A SPECIAL “MOMENT”
On this tree, once I finished everything, I added my sweet, subtle little cherry on top. I purchased a few birds and clustered them together as a little family in the upper 1/3 of the tree. I didn’t put them all over – just three sitting together. Dave loves “little things”, especially tiny animal things so this is his favorite part. 😉 And, he absolutely, specifically said not to share that haha
STEP 9: ADMIRE YOUR WORK
I step back a few times during each step to see which area needs more balance and when I think I’m done, I step back one final time to see if anything needs adding, adjusting, or even sometimes editing down. (Let’s be honest, in my trees, I typically go by more is more so that doesn’t really happen very often haha). There are gorgeous, simple, tasteful trees that are beautiful but I think my Christmas trees are one time when I can just keep adding and adding, and the more overpowering it is, the more whimsical and magical it is. If you can’t see the actual tree, totally fine! That just means you don’t have to have as high quality of a tree 😉

If you use any of this process, especially in applying the Christmas tree ribbon, I want to know! Shoot me an email to share – I would absolutely LOVE it.
Scroll & Tap to Shop Some Wire Ribbon Favorites

MORE DECORATED CHRISTMAS TREE EXAMPLES (WITH DIFFERENT THEMES & CHRISTMAS TREE RIBBON)
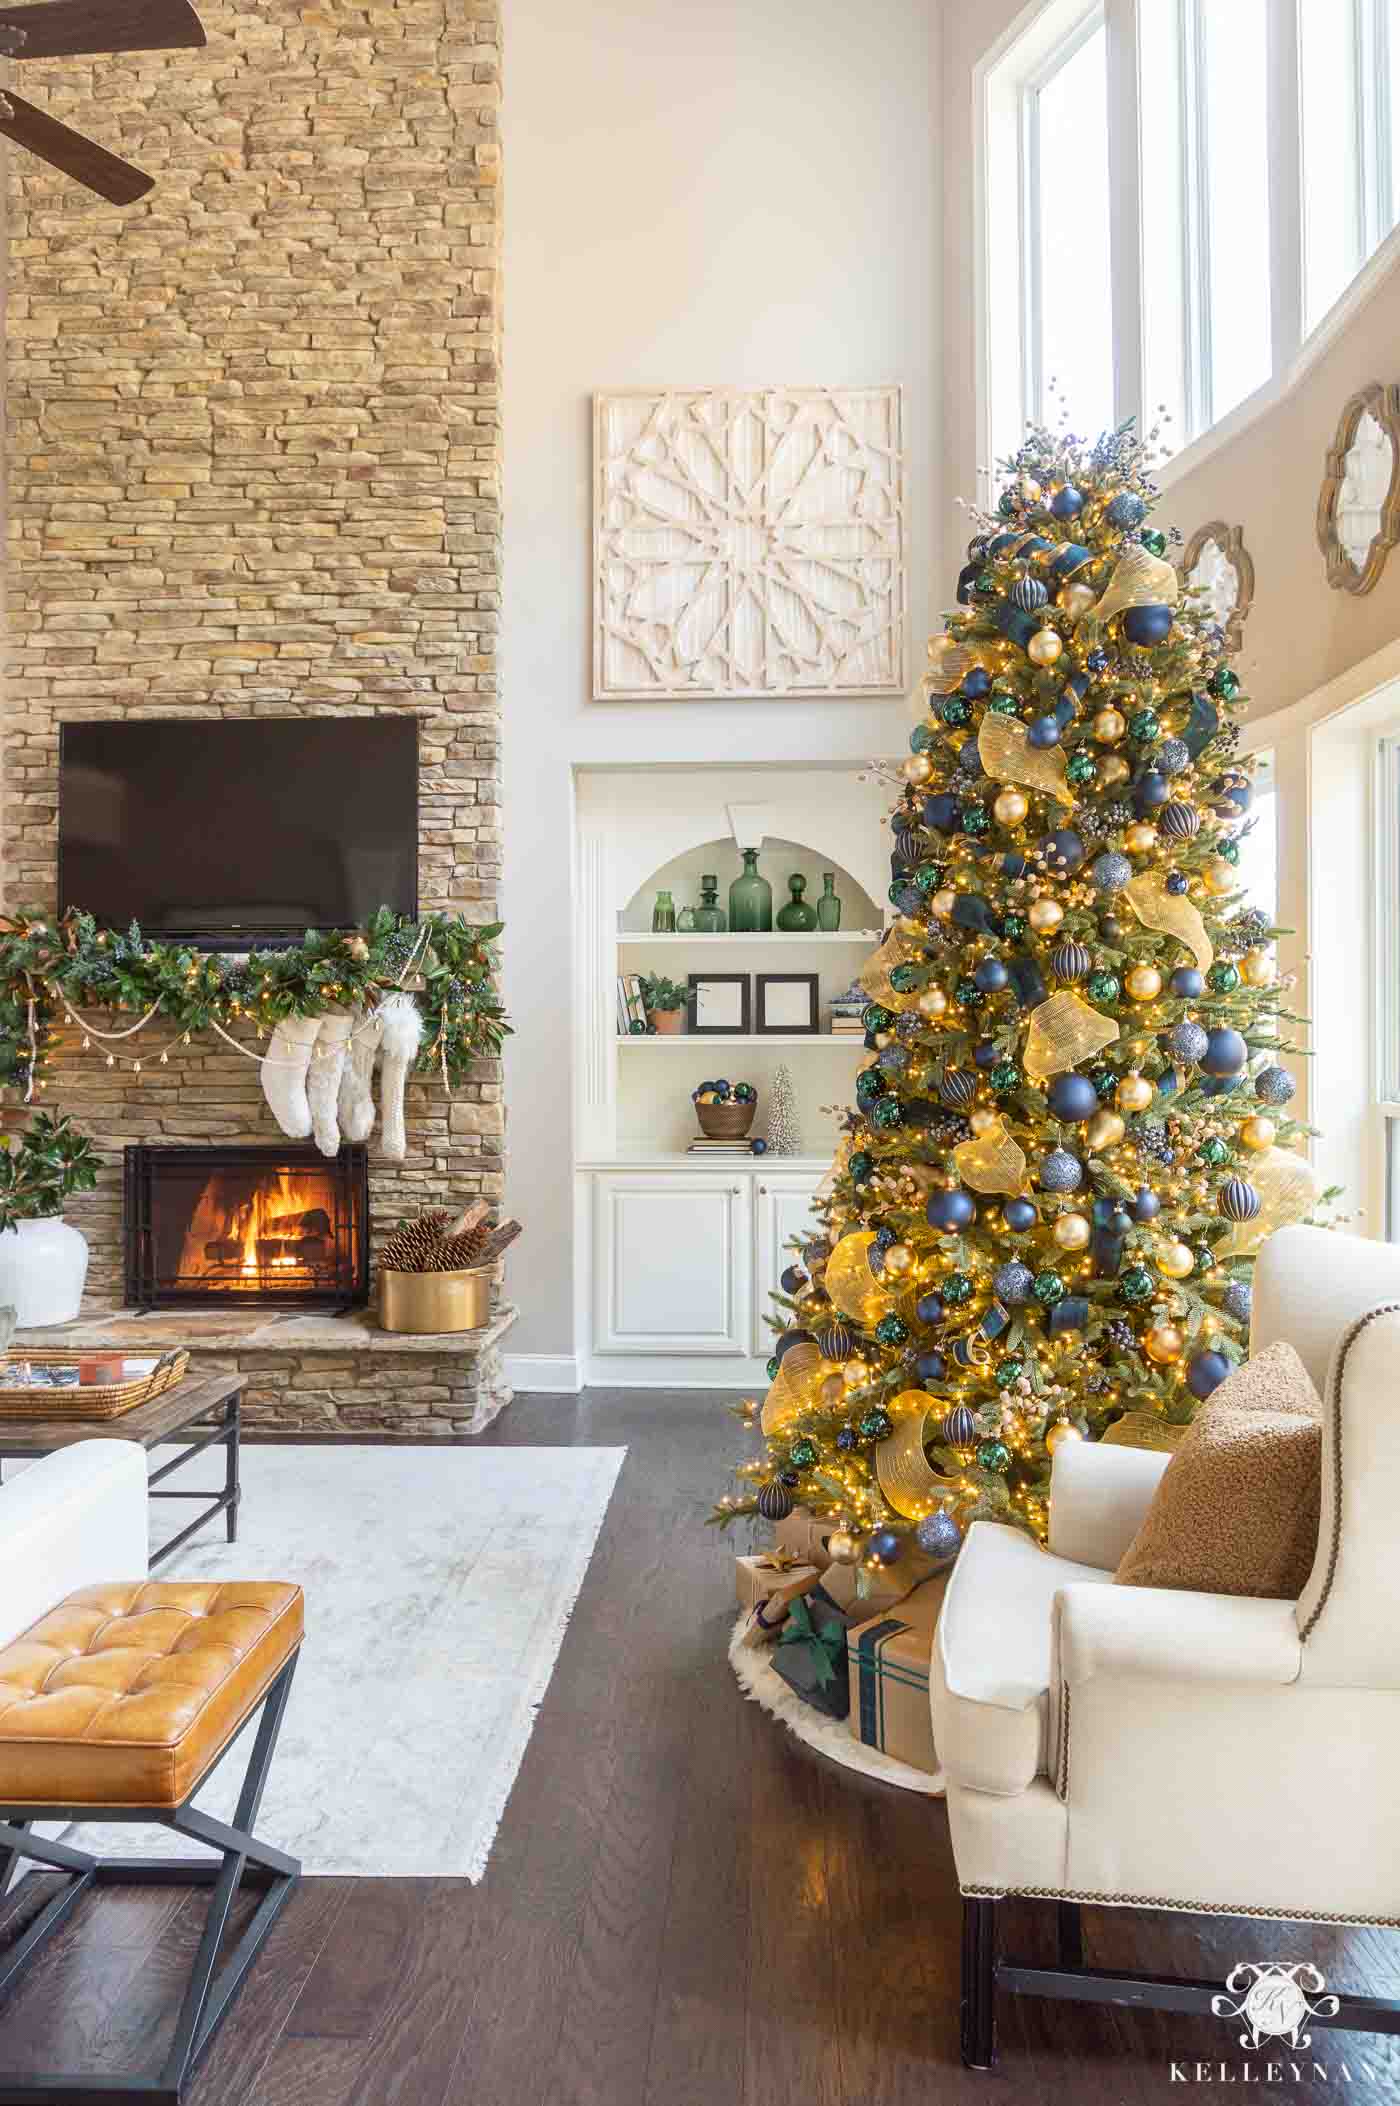
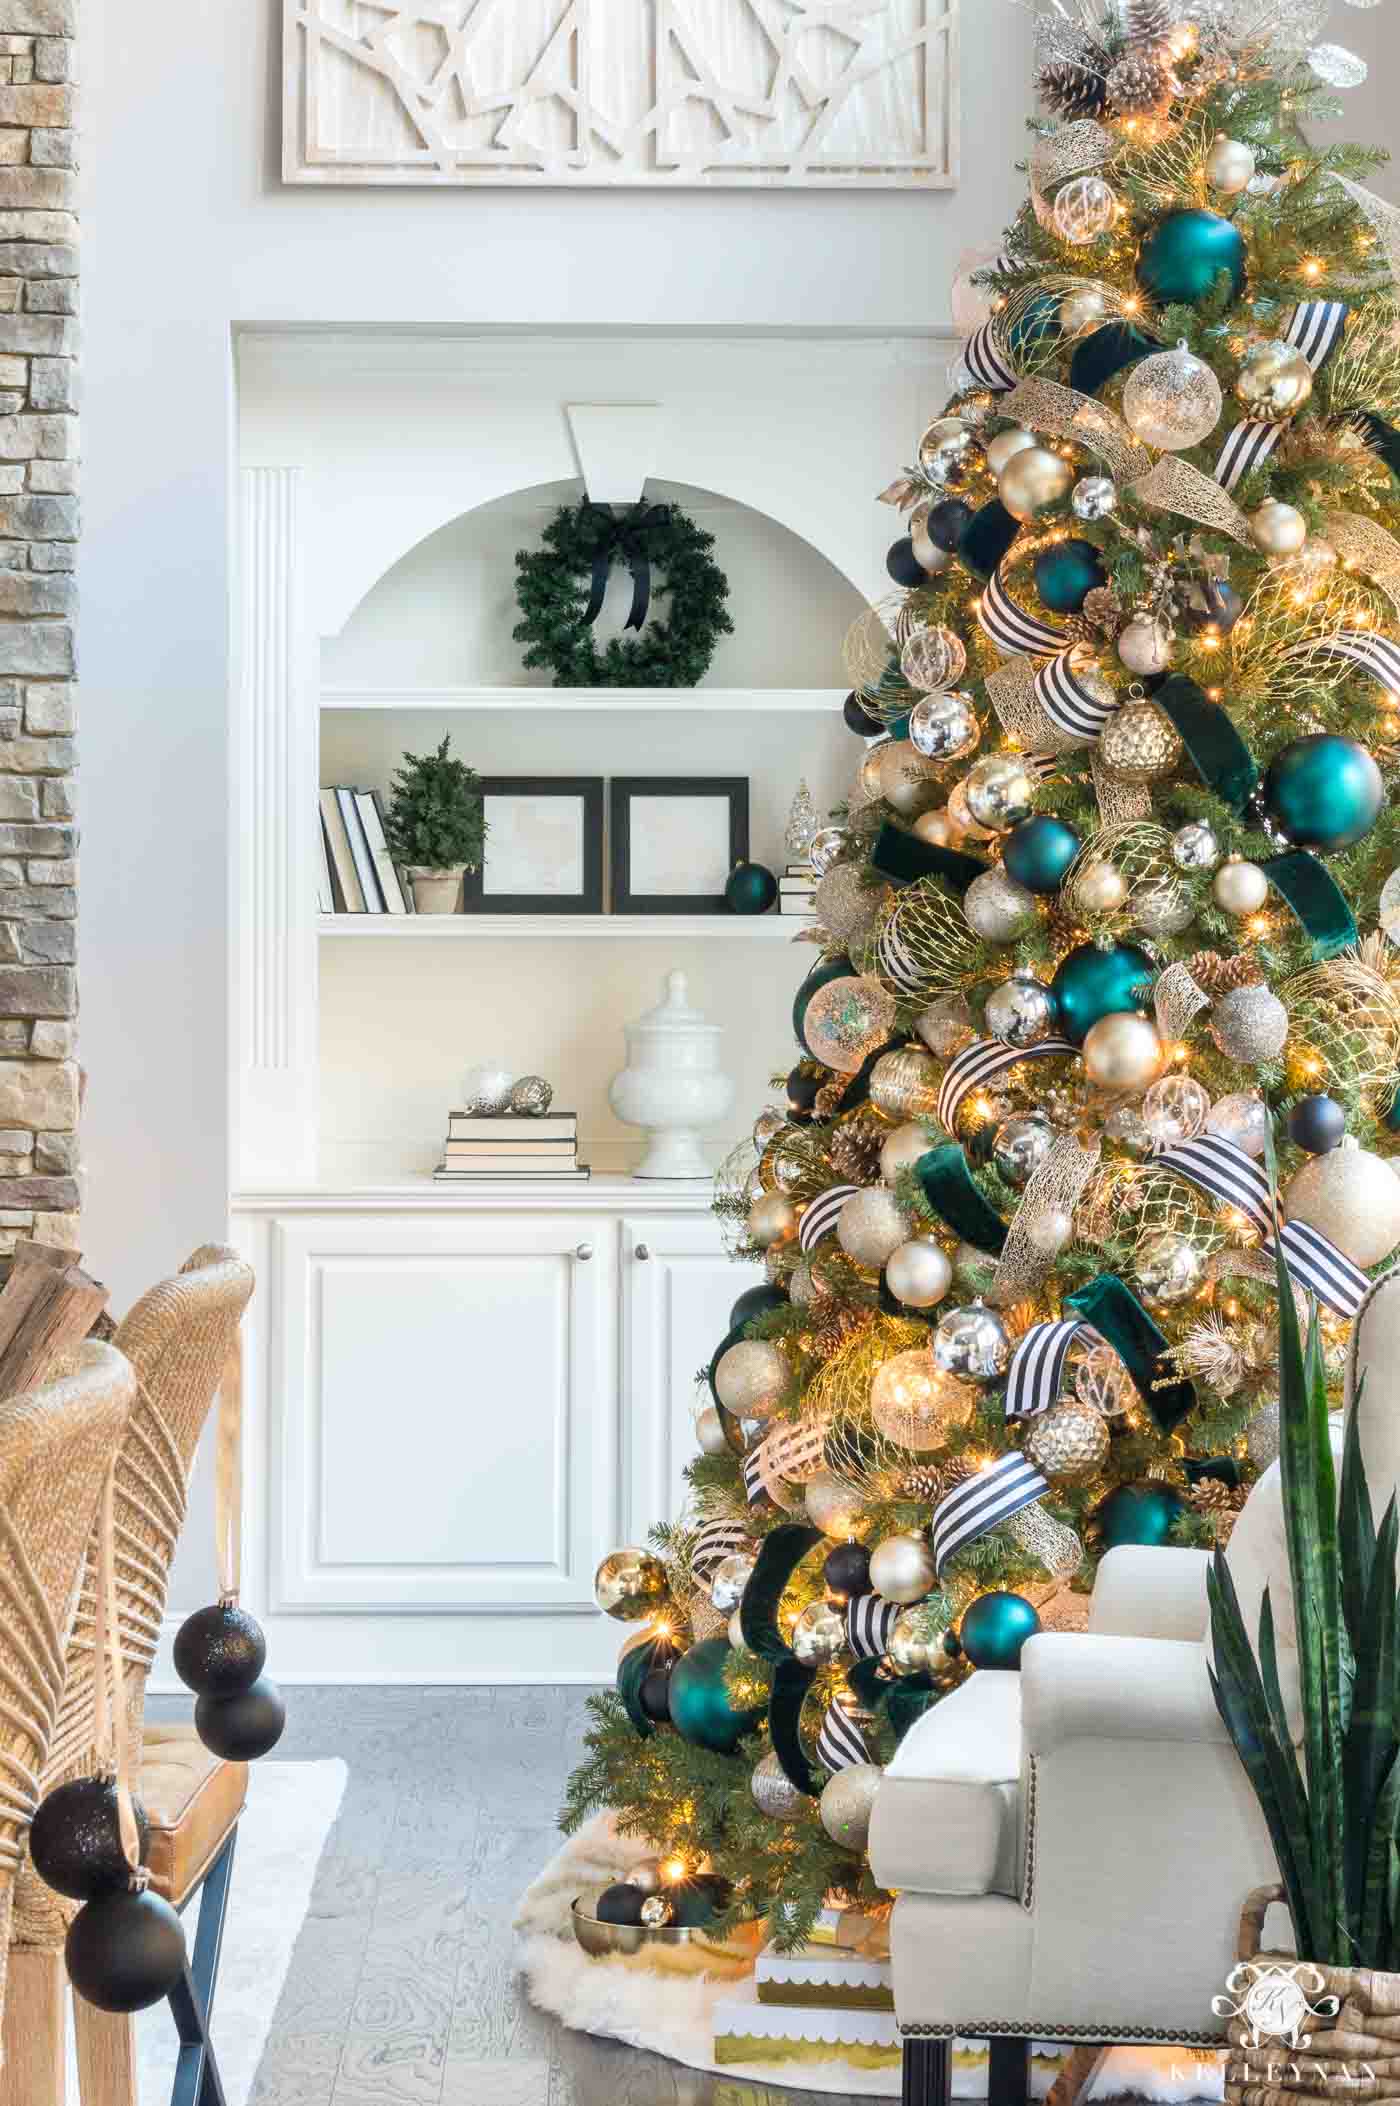
Here are a few of my other trees over the past few years, decked out for Christmas, using the same tree trimming and Christmas tree ribbon steps as above. Here’s a look at a few different themes in the great room…
Each year, I typically evolve a little and incorporate some new Christmas tree ribbon methods. This upcoming year, I’ve left some of the tails out and loose and draped on the tree. In this tree, I combined the Christmas ribbon tufts with some spirals. I just cut two pieces of ribbon to the same length (18″-24″), wrapped them around my fist (holding one end of the ribbon in that fist), and then pulled my hands apart to form a curly-q. You can tuck each end into the tree in a single tuft.
Sources: Wingback Chairs | Pillows
Sources: Sofa & Loveseat (performance ivory linen) | Coffee Table | Large Wood Wall Art | White Vase (on fireplace) | Rug | Teddy Bear Throw Blanket | Stockings | Wingback Chairs | Teddy Bear Pillows | Tufted Leather Ottoman | Brass Party Bucket | Green Glass Bottles & Decanters- At Home | Tree & Garland (Base) – Costco | Fireplace Screen
And here’s a couple from one of my favorite spots during the holidays — our master bedroom.
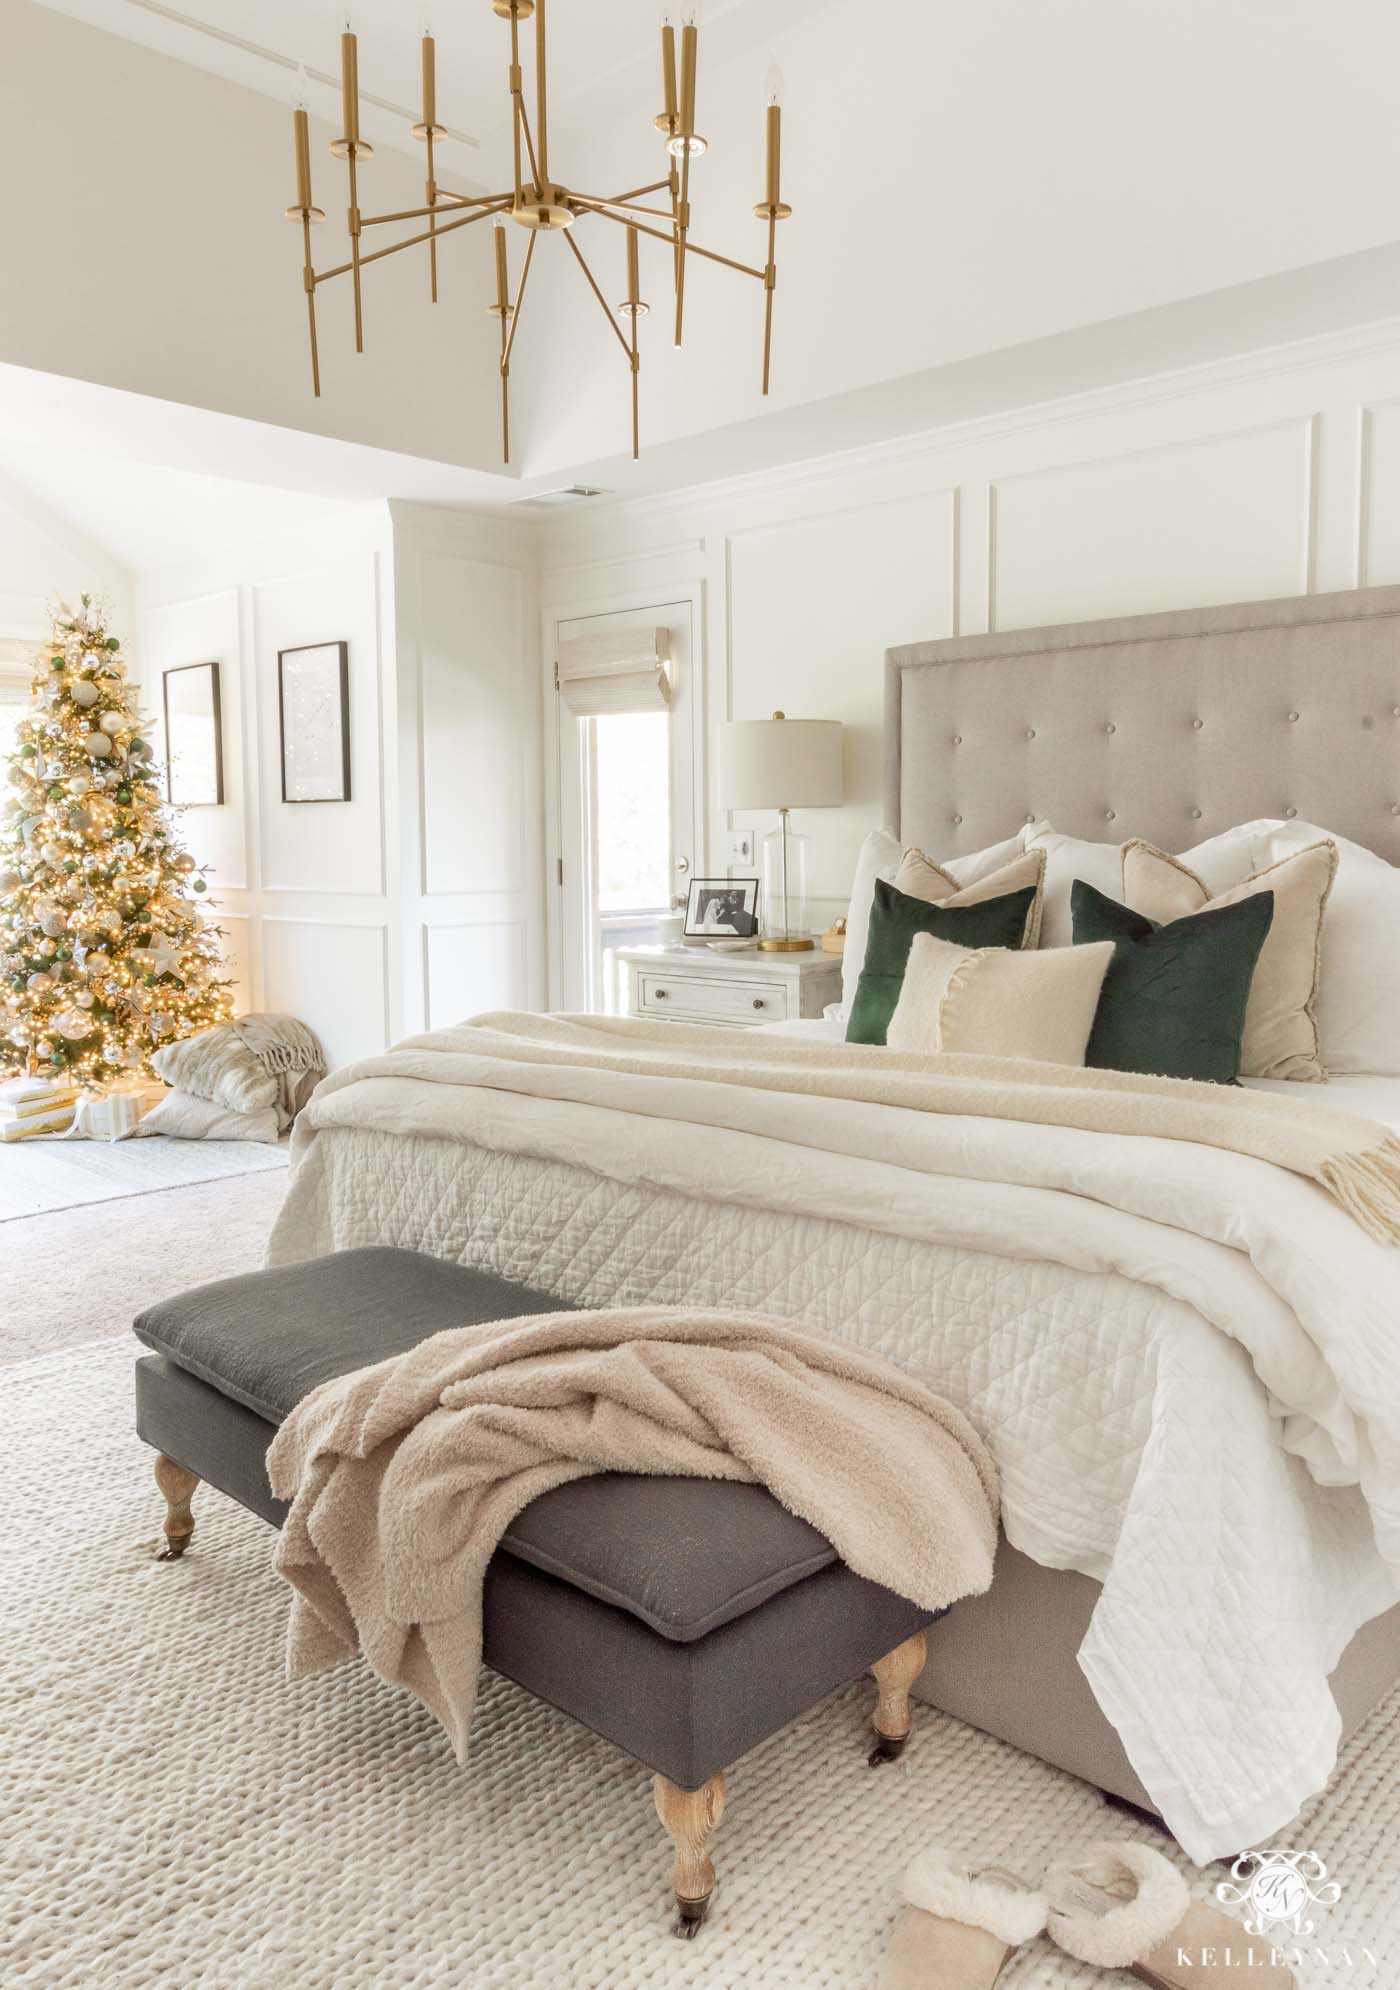
Sources: Bed | Bench | Rug | Chandelier | Belgian Flax Linen Quilt (white) | Belgian Flax Linen Duvet Cover & Euro Shams (white) | Barefoot Dreams Throw Blanket | Ivory Mohair Throw Blanket | Green Velvet Pillows (SIMILAR) | Nightstands | Table Lamps | Sheets (700 TC)


ENJOY THIS POST ON HOW TO PUT RIBBON ON A CHRISTMAS TREE? HERE ARE A FEW OTHER FAVORITE CHRISTMAS IDEAS…
- 2022 Christmas Home Tour
- 2021 Christmas Home Tour
- 2020 Christmas Home Tour
- Basic to Beautiful — How to Add Garland to Your Mantel
- 2019 Christmas Home Tour
- How to Flock a Christmas Tree
- Christmas Tree Themes
- Elf on the Shelf Ideas for Adults
To catch this year’s Christmas home tour and holiday ideas, if you aren’t already, subscribe to my emails at the bottom of this post to catch all the latest. You can also follow along with daily holiday projects by following me on Instagram @kelleynan HERE.


Thank you Kelly!! GREAT tips, very helpful. I’ll send you my tree pic soon. Can’t wait to try this out!
Laura
Beautiful trees. I am doing red,black and white this year with possibly red and white roses. I have many beautiful red and white roses that I used for a valentine banquet and they are the beautiful ones that look real. I am using black and white ribbon and red ribbon. I am going to cluster my ornaments this year. I made many of my ornaments and I have many white ornaments that I used in a Christmas wedding. So I am excited to see what it looks like. I did a beautiful light blue and silver and white several years ago with items I used in my pastor’s daughter’s wedding. I loved that look also. The ribbon I found for it was beautiful.
Hi Marilyn and thank you for taking the time to stop by! It sounds like your Christmas tree will be beautiful this year. I also love that you look for Christmas tree decor outside of the Christmas decor sections. I do the same and it certainly provides lots of inspiration for different looks. I hope you have fun decorating and have a marvelous Christmas!
KELLEY NAN. OH KELLEY NAN. This has GOT to be the MOST beautiful tree I HAVE EVER SEEN. The blues, and especially the moss!!! Omg!! I looooove the moss! You’ll be seeing that on my tree next year!
What a special gift you have shared for all in this tutorial. I love your meadow tree…especially the sweet little birds!
Bravo! First tree I’ve seen this year that inspires me to do something different! Love it!
Me too!
Kelley, like your mom, I love the birds too!! Such a great tutorial:) xoxo
Absolutely stunning – thank you for the ribbon tip. I struggle using the entire roll of ribbon going around and tucking.
Question. – if you cut all your ribbon 3’ pieces how do you store them for next year???? I always just roll the entire roll of ribbon back on spool to store. Thanks
Hi, Cheri! I actually take them down, stack them on each other, and then just fold in half to fit on top of the ornaments in the ornament totes 😉
Thanks for the tutorial! My husband loves the birds too in our tree; it’s his favorite thing! Your tree is stunning! Thanks for the tips!
We need a Youtube video of you doing this!!! Can’t wait to do some of these tips!
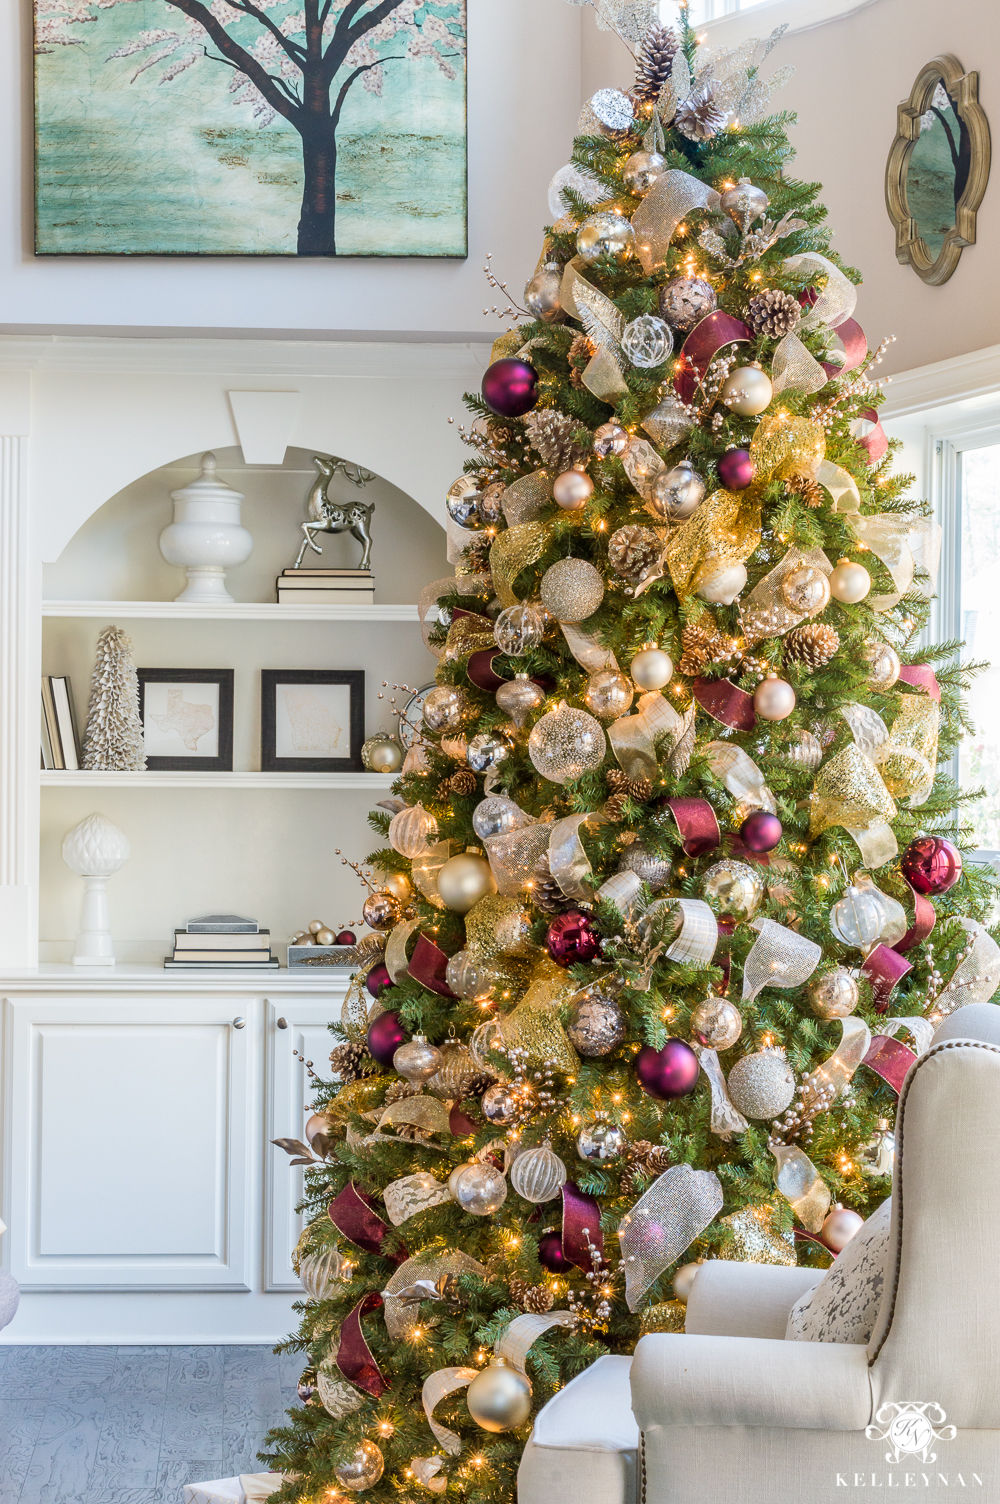
You’re so creative! Particularly love the Gold, Wine, and Silver tree. The ornaments on every tree look so elegant. Wondering where you find such great ornaments without breaking the bank. Thanks for an excellent tutorial!
Hi Jodi, Thank you so much for your kind note. Through the years, I’ve built quite the arsenal of ornaments that I keep stored by color. That way, I can source from those when I create new trees/color combos. Hobby Lobby is typically my first “go to” at the beginning of the season when they begin their Christmas discounts. Please stay tuned for this year’s trees!
Thank you for sharing your priceless tips and inspiration. For years I’ve wanted to use ribbon for my tree, but had not idea where to begin. I can’t wait to start decorating this year. I’ll definitely email you pictures!
Kelley, it’s gorgeous! Great tutorial as well. Thanks for sharing it all, and tell Dave not to be too embarrassed; my husband, Greg loves all of the little Hallmark ornaments and is pretty particular about their visibility on the tree. LOL. Have a Happy Thanksgiving! Toodles, Kathryn @TheDedicatedHouse
This is gorgeous! Thank you for the tutorial but I don’t think mine will look as nice as yours. Maybe, with practice. I add birds, baby’s breath and pine cones to mine, as well. My balls are gold & red. I’ve never thought to add non traditional coloured ribbons. Time to change up my tree.
This is a great tutorial and it’s a gorgeous tree. So gorgeous.
Hi Kelly
Girl! you have the most awesome taste in home decorating. Thanks for the tree tutorial and sharing your ideas with us. This is beautiful as well as a time saver for me. I plan on silver and chocolate with Tiffany blue color scheme decorations this year. Please keep up the good work! Have a Blessed Thanksgiving.
Kathy
Gorgeous as always!!! I’m excited to put up my tree this year! We move into our new house in the 15th of December!
Love your master bedroom too!!
Love this tree! Girl…you got it! Great tutorial, too. ~~ Susie from The Chelsea Project
Susie, THANK YOU!
Beautiful! Could you share where you got the blue and green birds?
Hi, Cindy! I found them at Michaels 😉
Wow, this X-mas Tree is stunning. I also appreciate all your tips and suggestions.
Hi, Tamara! It was actually a HomeGoods find- it was recent so they may still have it!
Mary
November 22, 2017
Kelly, great tutorial, I am going to try your ribbon application. Haven’t got my tree up yet but you have given me lots of ideas. Can’t wait to start.
Mary, I hope it turns out exactly as you envision! xoxo
What a great and comprehensive tutorial, thanks Kellynan. I always put ribbon on last, but end up rearranging ornaments after the fact to accommodate the ribbon. Will definitely try it first next time, great tips!
Beautiful tree and great tips Kel! xoxo
My tree ribbon turned out perfect this year! I normally either swirl it around the tree, or cascade it down. Making these little random loops is a much better method! I only used one ribbon (I was at a remote location and didn’t have a second one), but it still looks fantastic! Thank you so much!
Stephanie, I am so glad!! Merry Christmas!
I can’t wait to use your tutorial to do our tree this year. Thank you!
Thank you for sharing! I keep seeing ribboned trees, love the look, but didn’t know where to begin. Your post breaks it all down into easy steps! Beautiful tree!
Lauren, I am so so glad! I hope it is helpful!
I was specifically looking for something to better guide me in ribbon “garlanding” this year as my attempts in the past never quite hit the mark of what I envisioned in my head. Then I came across this tutorial of yours Kelley and I got quite excited …. it was EXACTLY what I had been looking for in terms of inspiration! And I subscribe to the same theory of “more is more” too so two for two right there! I will most definitely send you pics of the finished product and thank you for the tips!
Naomi, I am so so glad!! Happy decorating!! And i look forward to it 😉 xo
Kelley!
Thanks SO much for this post. I followed it and successfully completed by first Christmas tree with ribbon. I mentioned you and your post on my recent Christmas tree/tour blog post. Have a look!
Hi Kelley,
Can you tell me where you bought your tree? Its beautiful!
Hi, Christine- this is a Balsam Hill and the exact model is linked in the post 😉
Wow…..I’m speechless!! And that doesn’t happen often!! 🙂 The 3′ length thing vs. keeping the ribbon whole…….such a great tip!! Thank you for this great tutorial on how you make your trees so incredible!
My question is, how many of a particular item-a certain style and color of ornament, large flowers, etc. to use. If you find only 3 great ornaments that support your theme, is that enough, or should you keep looking for something else that you can find more of?
Linda, I think it just depends. I definitely only have 3 of some ornaments but they coordinate with others.
Nice decorating Christmas tree. I like your decorating idea. You share info is really useful. Great blog. Thanks!
Dear Kelly Nan,
Thank you so much for this tutorial, I will send you a pic when I have done our tree as you have totally inspired me. I believe that you could make a sack of spuds look fabulous and glamorous!
Best regards
Heather
Heather, I would LOVE THAT!! Here’s to a beautiful Christmas season!
I loved this, I try and do some thing different every year with my tree, my nieces come and can’t wait to see each years tree. This year iam going to use your method and do a ribbon and flower tree. Thank you so much for the inspiration.
Oh, how fun!! Wishing you the best of the season xoxo
After 30 years of trees this one is my favorite. It’s fabulous. Ty for the ribbon idea!
Hi! I stumbled you your blog after looking for a tutorial on how to add ribbon to my tree. Your instructions were so helpful, not just regarding the ribbon placement but also adding ornaments and statement pieces. I don’t really like traditional red and green, so your floral tree with greens and blues were just my style! I used it for inspiration for my tree this year and it’s the first time I’ve been pleased/excited with the final product 🙂 Wish I could send you a pic because I love it so much. Thanks again!
Thanks so much for the tutorial.. watch it last year, but so helpful to see it again;) Your home is so beautiful and I love all your beautiful trees! Excited for you to have your 1st Christmas with Eliza 😍
I am here directed from pinterest … i want to see some new idess and i just got that you have some good i think great ideas ..thanks
Kelley, thank you so much for your tips and tricks. I’ve watched many tutorials over the years and I’ve always been happy but yours is by far the best. Perhaps you could add a video next year ? 😉
I can’t wait to try this on my tree. I’ve never cut the ribbon before, and excited to try your technique.
Thanks again, I’ve always loved your blog
A.S
Ani, that means SO MUCH! I definitely need to do a video! Hopefully, I can plan for that! Thank you so much for your feedback!
Thank you so much for posting this! I am excited to try it this year! Have you ever tried to do this on a real tree? Do you think it would be more difficult since the branches are not bendy?
Thanks again!
Hi, Rachel! I haven’t but I bet the needles will grip ribbons that are more “meshy” better. If you have trouble with them sticking, try a little bit of thin wire! best of luck to you!
Hi Kelly. Thank you for the inspiration! I’m in a new home and wanted a new, more “formal” looking tree for my main room, and I REALLY didn’t want to have to incorporate red. I found your post and 48 hours later had a sliver, white and green tree that’s covered in bows and flowers and all sorts of other things that caught my eyte at Hobby Lobby. I’m THRILLED with the result. Would love to share a photo with you, but don’t see a way to upload …
Thanks again for the inspiration. Can’t wait to catch up on all your other posts now!
With the moss…did you just basically set them on the branches? Does it stay or cause a little mess? I love the idea of using moss!
I did! And just kind of pushed it into the branches. It stayed put 😉
I appreciate this tutorial so much. I’ve always wanted ribbon on my tree to look like this but never tried. This is the year! Can I ask what you mean by “bending up” the ribbon?
Hi Daisy, Thank you so much for taking the time to stop by! As you make the ribbon loops, insert the loop at an upward angle. I have also filmed my method and its on IGTV on my Instagram profile, kelleynan. I hope you have a very Merry Christmas!
Hi Kelley! I love ALL of your trees! I’m working with a real tree this year and wanted to know when you’d recommend adding the lights???
Thanks,
Naila
You are so talented!!!
This is THE best Christmas tree tutorial I have ever seen! I feel so hopeful that I will have a very pretty tree this year. The ribbon tip is awesome. Everything is explained so well and you have great tips. Your trees are absolutely gorgeous! You have de-mystified tree decorating <3 Now to go decorate my tree!
I can’t wait to try the ribbon again. Have wanted that for the last several years but could never make it work! Hopefully not that I have seen your tutorial I candidacy it. I decorate my tree in silver and white and want to incorporate gold thus year so new ribbon will help het me started!
Hi Sylvia, I have used and evolved this method over the years. It’s a great starting point for my trees. I hope this tutorial has helped you. Your color scheme this year sounds lovely!
WOw!!!, amazing, this is exactly what i always to do
Your trees on this post are so pretty! My question is where on earth do you Store all of them?!
Thank you for your help with my tree this year. It was the most beautiful I’ve had so far. We were blessed to have it chosen for the place of a family member’s marriage proposal. Merry Christmas!
Laurie, thank you! What a compliment to you that your tree was chosen for the most romantic life event. ❤️❤️❤️
Thanks so much for the beautiful pictures and excellent instructions! This post inspired me to do something different with my tree this year. The ribbon took it to a whole new level!
BTW, I’m a technical writer, and I really am impressed with how clear these instructions are. 🙂
Melanie, I am so happy I could help. I have never tired of adding the ribbon. I also appreciate your comment on the instructions. Thank you! 🙏❤️
Oh wow! thanks for explaining step by step process….. This year I will decorate Christmas tree myself by following these steps
Hi James, It is great that you are thinking ahead. I hope this will help you this Christmas!
Very beautifully explained.. I am going to apply all these steps to decorate Christmas tree on this year Christmas. Thank you so much!
Hi James, Thank you so much for taking the time to visit. This method has really stood the test of time and works very well for me. I love that you are planning ahead for Christmas!
Thank you for a good idea about the fall section, it will help to save. And I love Christmas tree decorated with flowers it becomes more romantic with them
Hi Mia, Thank you! I so glad you were able to find a tip that helps. I agree that flowers can add so much to the tree and there are so many wonderful options these days. I hope you have a very Merry Christmas!
Can you give some suggestions on different Christmas tree themes?
Hi Rebecca, Just search “Christmas” on my blog. I have tons of Christmas tree themes from this and past years. I hope you have a wonderful Christmas season!
Your home is beautiful.
Selena, Thank you so much for taking the time to visit and for your sweet note. I hope you have a wonderful Christmas season! xoxo
Thank you for the great tips! After I found a new way to apply ribbon to a Christmas tree, the tips just keep coming. I had a vision of how I wanted my tree and had a good idea of how to do it. Thanks to you I was able to execute my vision with ease! All your tips were perfect and I can’t thank you enough. Merry Christmas and happy Decorating!
P.S. I absolutely love your trees, each of them are just gorgeous. I wish there was a way for me to share a photo of my tree.
Tyler, Your sweet note means the world to me! Thank you and I’m so happy that you found some tips that were useful to you. I bet your tree is gorgeous. Merry Christmas to you and yours!
I cut 12″ strips for the uppermost part of the tree, and 18″ for the rest. I used ornament hangers as hooks on each end to attach to inner branches. Your tree trimming ideas are inspiring and beautiful. I will try to post on your instagram. Thanks, Judy
Hi Judy, Thank you for taking the time to stop by and for your kind note. It sounds like you are well underway to having your tree decorated. I hope you have a wonderful holiday season!
Such a good article!!!! This was incredibly helpful. Thank you for explaining in detail and adding the photos
Samantha, Thank you for taking the time to stop by! I am so happy to know this post was helpful to you and hope you have a very Merry Christmas!
Thanks so much for the tips on how to add ribbon to your tree. I used your method this year and am pleased with the results!
Beth, I am so happy that this post was helpful to you. Thank you for taking the time to leave a note!
Thank you for the guidance on how to apply the ribbon. I used your technique this year and I think my trees look spectacular. Thanks for sharing.
Hi Karen, Your kind note really brought a smile to my face. I’m so glad to know that this tutorial was helpful to you and I imagine your trees are beautiful. I hope you and yours have a very Merry Christmas!
Thanks for decorating with red & wine! I have those colors & never thought to mix them.
Hi Erna, I loved decorating that tree in all the red tones and am so happy to know that this post has prompted you to consider the same color palette. Have a very Merry Christmas season!
Found this post after already putting my ornaments on and really want to use ribbon. Should I take all the ornaments off and start over or do you think I can give this ribbon technique a shot with the ornaments already in place?
Thank you for visiting, Misty. I think you should certainly try adding the ribbon with the ornaments already in place first, before you remove the ornaments you’ve already added to your tree. Look for any gaps/spaces that would benefit from ribbon. I hope you have a wonderful holiday season!
Thank You, for the great tips, I am excited to get started.
Thank you for taking the time to stop by, Connie! I appreciate your note and hope this post was helpful to you.
Thank you for the great tips. I have always wanted to try the ribbon and I think you nailed it. My 🌲 will be different this year 🌲♥️
I am so happy to know this post was helpful to you and I would love to see what you do! Merry Christmas!