My last post on the master bathroom was over two months ago. And, it was the day before demo day. After sharing the initial plan, I haven’t been back to report any updates so I’m definitely tardy to dish about the progress! After everything was ripped out and the plumber and electrician came for an initial visit, we sat and waited for a while. While I tried to stick to choosing and ordering things that were readily available and in stock (limiting my options since there is such a long lead time on so many materials and products right now), a good bit of our tile was delayed for a bit. Once that arrived, rebuilding and installing started speeding up quickly and it seems like at least someone has been here doing something every day since. As of now, I’m hopeful the remodel — and flood fixes — will be completed by the end of next week. Today, I’m running through an overview of the master bathroom progress — what’s been completed, what we have left, and a few lessons (and challenges) we’ve learned and faced along the way.
*Posts on KelleyNan.com may contain affiliate links. Click HERE for full disclosure.
*Sources can be found at the bottom of the post.
See the final Bathroom Reveal HERE.
What’s the Status on the Flood Repairs?
If you remember in my initial flood post HERE, the accident affected the master bathroom, connected master closet, office bathroom, garage, and went down into the basement. The only space we really planned to make an investment in and totally renovate was the master bathroom. That said, stay tuned because I’ll be sharing a few projects that have since transpired as a result of the flood we hadn’t initially planned on (of course 😉 ).
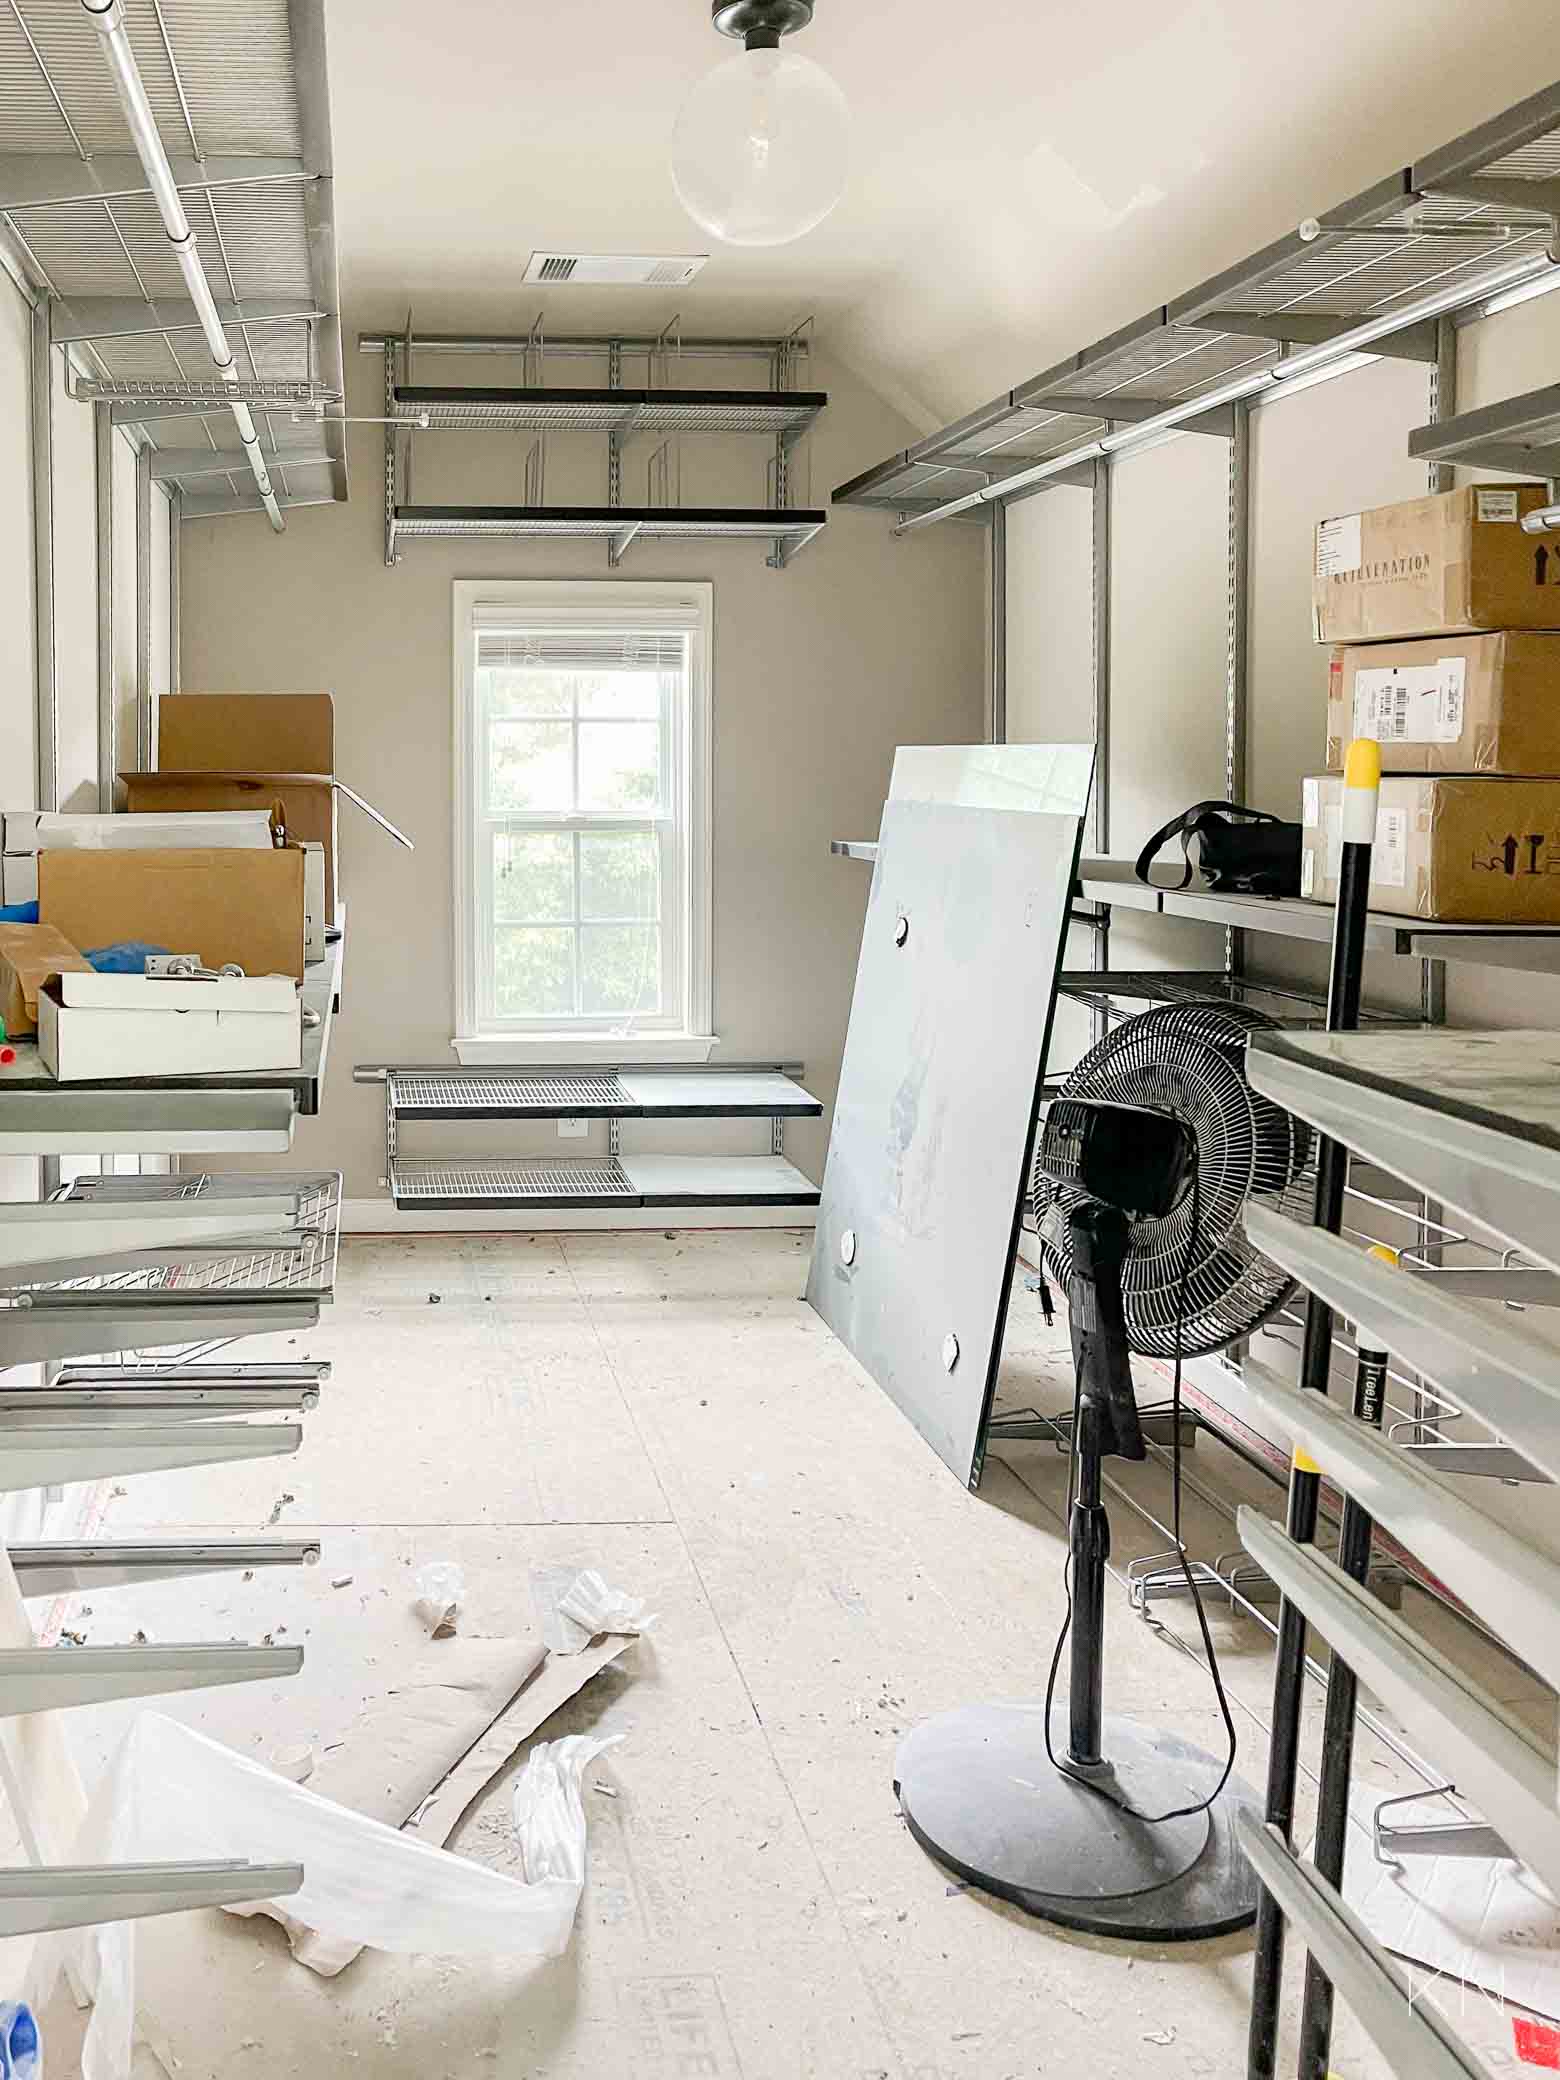
The basement was unfinished and just had to dry out and have some insulation replaced (which we are doing on our own). The garage was completed last week and after secondary inspection, and while there was a lot of work that had to be done on the drywall ceiling, we were able to forego some of the more involved replacements we had initially planned for. Aside from the ceiling drywall repair, we left the walls alone, had the painters paint the ceiling in a basic ceiling white, and replaced the lighting. Formerly, there were two long shop-style lights in the front of the garage which weren’t great, especially for Dave to do any work in there at night. Our contractors suggested using four round puck-style LED lights in all four corners and wow. The garage is so much more evenly lit, it’s so much brighter, and they are so discreet and nice looking. The garage is still filthy with dust and such and boxes for the bathroom are still stacked up. Once the items from the boxes migrate into the bathroom, we will take a day to clean, re-organize, and start using the garage to its full capacity again.
The master closet’s carpet and baseboards had to be ripped out, but that’s it. New baseboards have been installed but we aren’t repainting. Connected to the master bathroom, the closet is essentially right in the middle of the construction zone — also covered in dust and filth. It also houses several items awaiting installation. Before we move back in here, we’ll be going through clothes, shoes, jewelry, etc. and will *hopefully* be strict in only bringing back the things we actually wear and use. It’s a good opportunity to sort, purge, and organize, so I’m excited to experience the “after”.
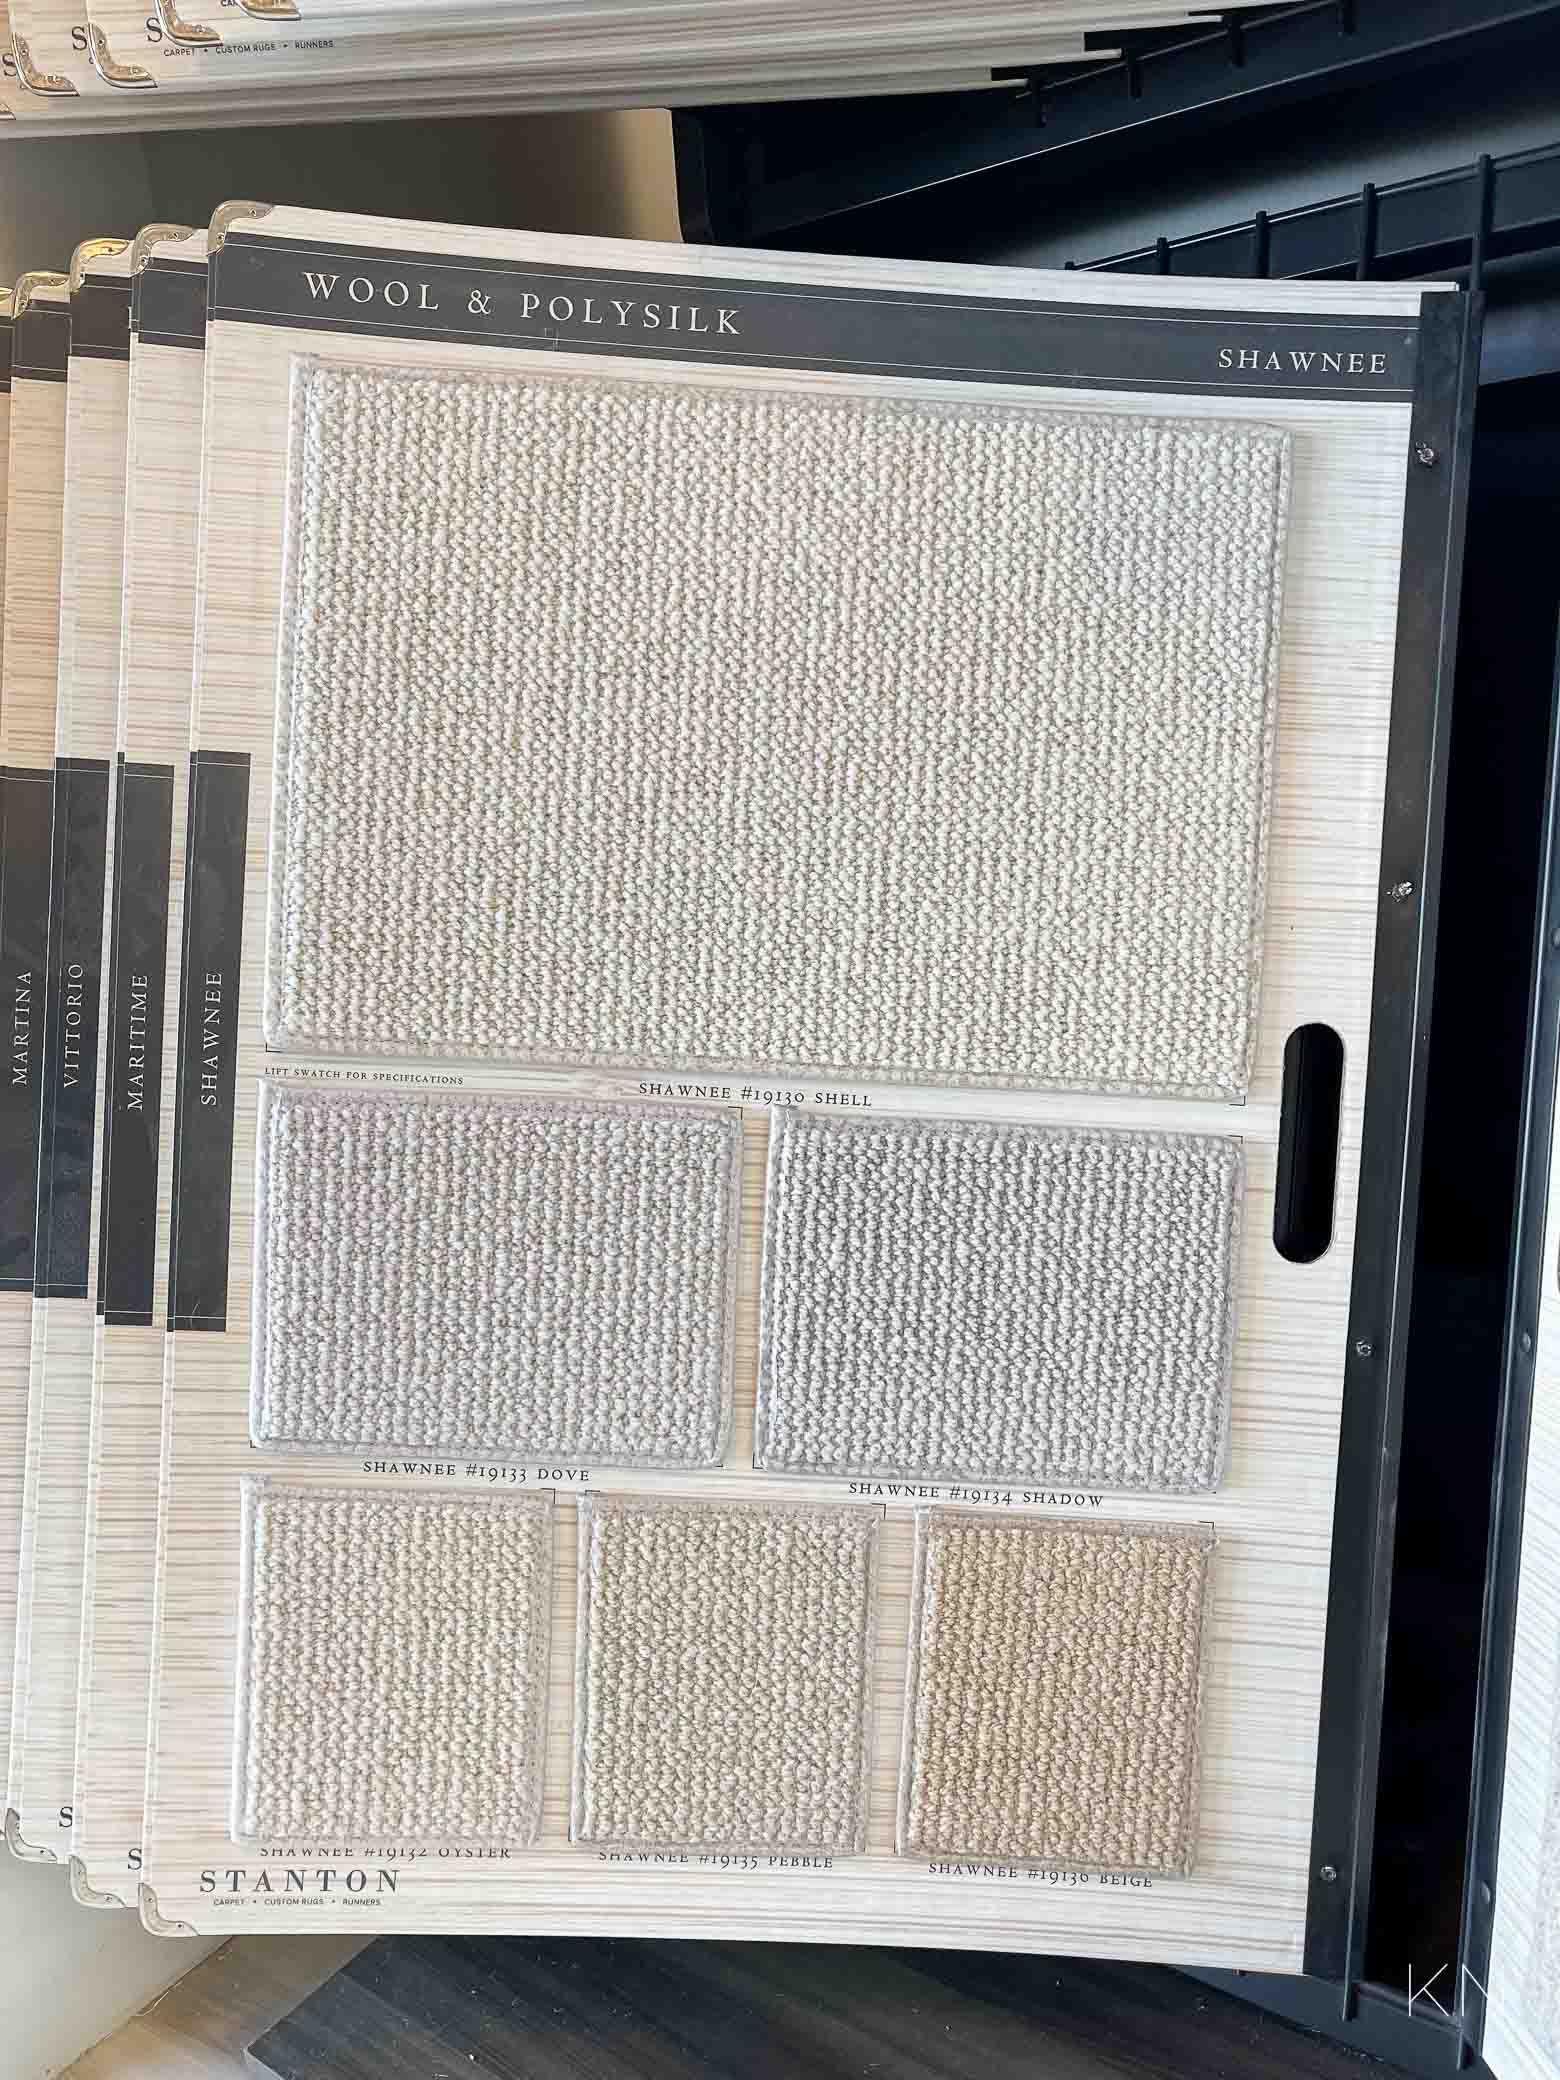
The carpet is ready to go, but we won’t have it installed until the master bathroom is finished. As much as I’ve missed my bathrooms, I’ve missed my closet more. We went for simple, affordable carpet, but it actually saved us money not going with the least expensive. Most of the carpet rolls that were on the cheaper side came in 12′ portions. But, a few in the mid-range came in 13’2″ lengths. So, being able to purchase one single roll instead of two with a ton of excess saved us some money. I opted for the top sample in the below photo.
We’ll get to the office bathroom next week so be sure to subscribe to emails HERE to catch that post when it’s released 😉
Master Bathroom Reno Progress
Once the shower space was determined and the plumber and electrician came out to stub in, run wires, and install some of the basics, the master bathroom flooring was one of the first “fun” things to happen. I went for THIS 12″24″ tile in black, laid in a herringbone pattern. I love the grayish movement in the tile — it’s a bit hard to see right now because the floor is dirty, dusty, and streaked with construction debris. I was a little nervous going in a pattern with such large tiles — and I can’t remember who, but someone tried to deter me — but I love the result! I also went with a gray grout and was shocked when I saw the result. When it dried, it gave way more contrast than I anticipated. I even checked to make sure it wasn’t accidentally white grout that was used. But, within a day, I was happy with my accidental “mistake”. I had originally wanted the grout to blend in more with the tile but the contrast really lets you see the pattern.
It’s recommended with typical tile jobs to account for 10-15% extra but in a herringbone pattern, to purchase an extra 20% since there are so many cuts. This floor took a good two full days, just to lay the tile. But, our tiler was incredibly precise and even started at the point where the center of the laundry room door met the center of the closet door — which I really appreciated.
![]()
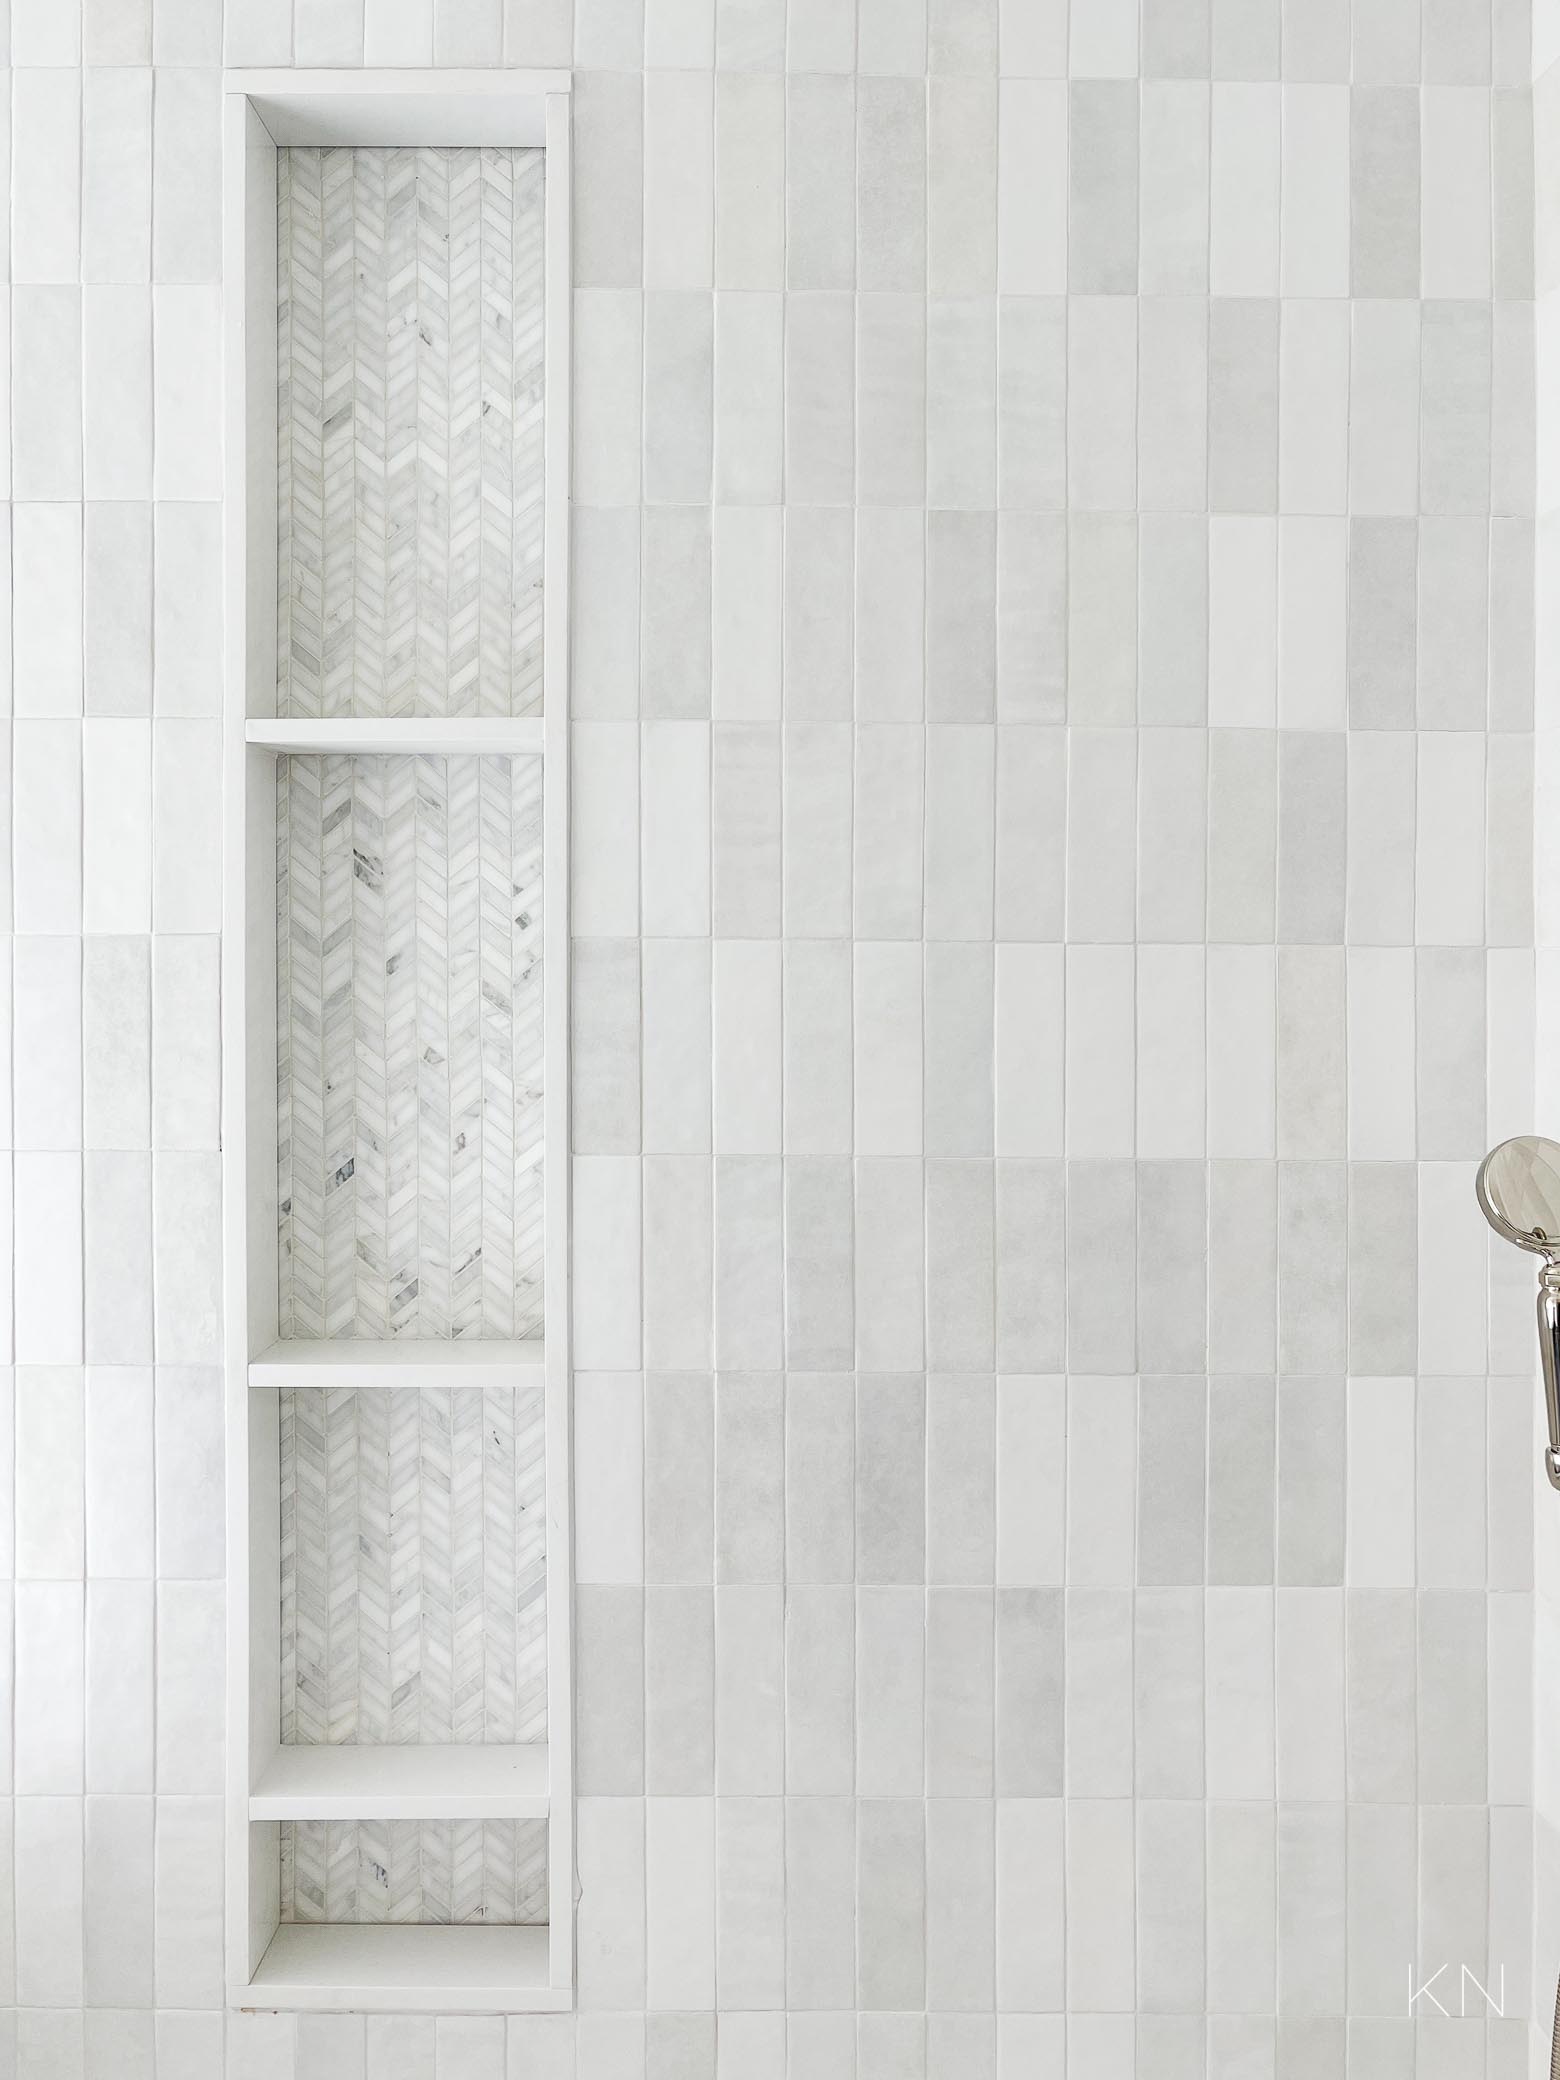
The shower tile was the next to be installed. The white Cloe tile 2.5″x8″ rectangles won me over when I saw the varied colors in person. From stark white to light and medium gray — some warmer, some cooler — I thought it would be an easy way to coordinate with any finishes and other tiles I chose. It has a classic feel with a modern twist — especially in the stacked vertical pattern I chose to have it laid. I went with a white grout and used the Cloe pencil tile for the edges.
When I saw the Calacatta chevron tile, it was over for me. And, seeing it in person, once I had my mind on it, there were no substitutes. I even looked at similar — still Calacatta marble — samples at other places and they didn’t compare. This tile was a bit more pricey, but keeping it to the shower niche and floor helped keep the cost more manageable. I used 18″x 36″ tiles for the outside of the shower curb and 3″x12″ tiles on the inside of the curb — both from the same Calacatta collection. It coordinates with the varying tones of the Cloe tile beautifully but gives just a little more interest. I’m going to have to do some serious research on care and preservation 😉
One of my favorite design features is the elongated tall shower niche. A solid surface fabrication company sourced white quartz to top the shower curb, line the niche, and to serve as shelves. I envisioned the top section the most dramatic and oversized at a height of three tiles tall with each of the following shelves spaced evenly, falling at two-tile heights. The bottom shelf is low enough to serve as a place to prop my foot for shaving (which is how I determined where the bottom of the niche would start). But… once the niche was assembled, instead of the spacing being “3,2,2,2”, the installers had positioned the shelves at “3,3,2,1”. Their project manager has been incredibly kind, apologetic and accommodating, but with the shelves being epoxy-ed and a high risk of the Calacatta mosaic tile being demolished by taking it all out and starting over, I think I’m going to accept the shelf placement as-is. For an element I had put so much thought and planning into, I’d be lying if I said this error wasn’t heartbreaking. Not because I think it looks awful, but because the cost of this niche in itself was quite a bit and a silly mis-step made it into something different than I had planned.
There is a lot of clean-up that has to be done to the niche and the top piece of quartz has to be replaced — they are actually coming out this week to hopefully get it in better shape but like I said, those shelf placements are 99.9% likely to remain as they are.
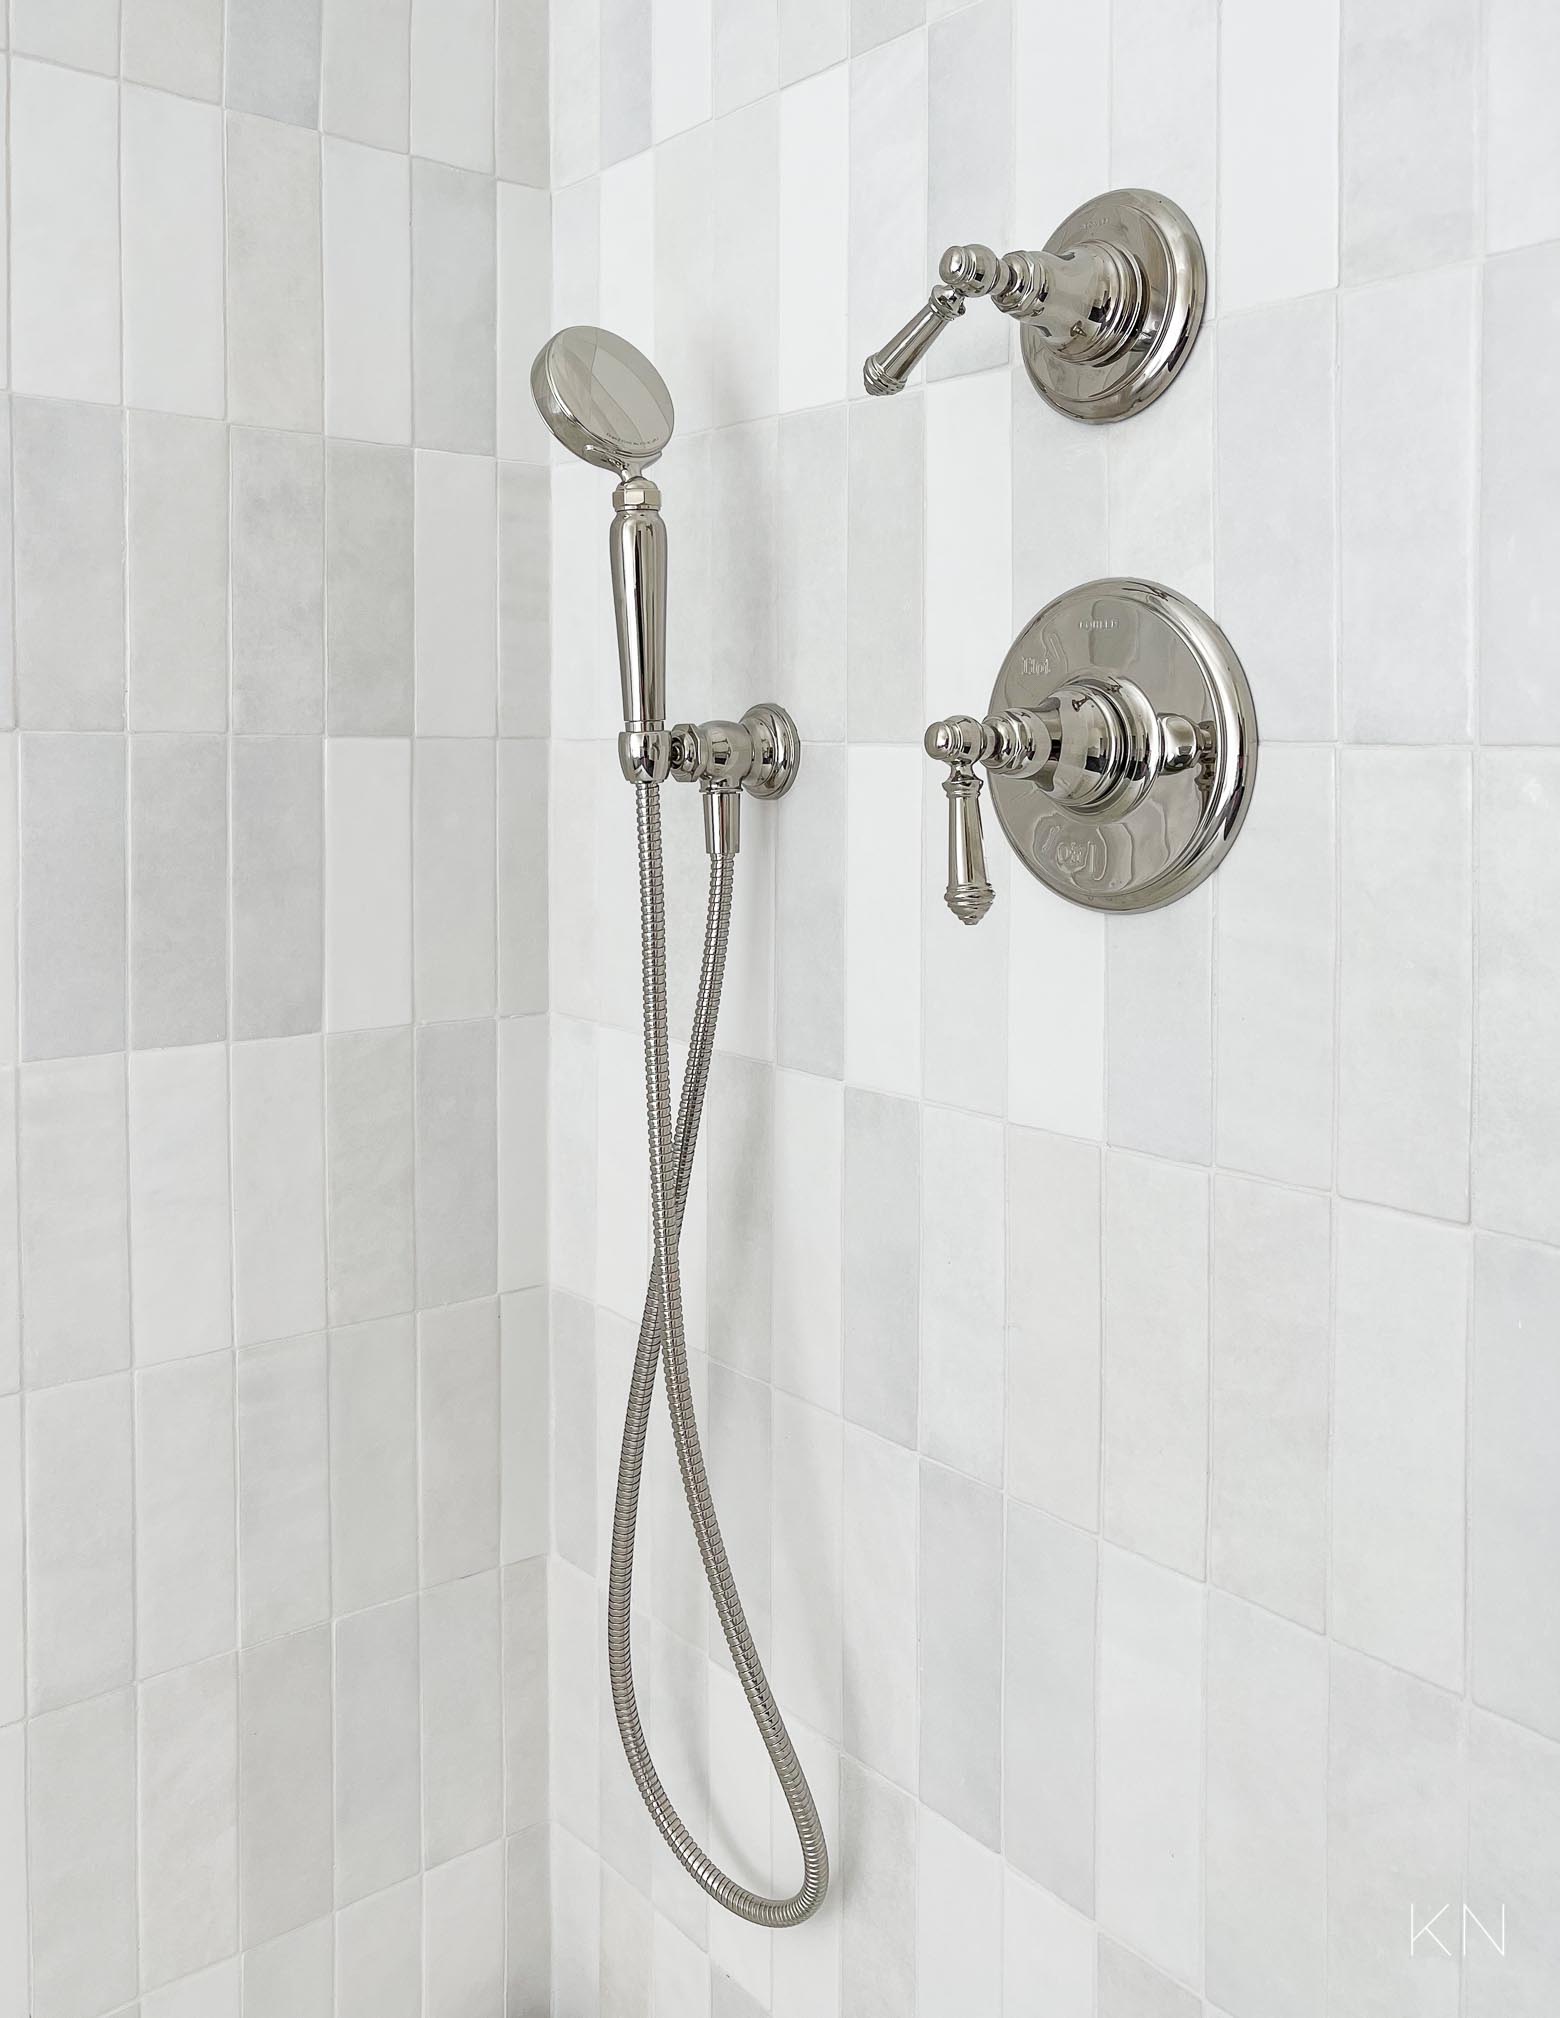
Moving on from what is still a bit of a sore spot ;), along with the tile, the shower system had a longer lead time than anything else I ordered. With 10 components, we are still waiting on the shower arm to arrive. I love what I’ve seen of it so far — I know next to nothing about plumbing fixtures but I will be asking if the lever on the hand shower trim kit can mimic the downward position like the main shower valve trim. Something else I wish I realized ahead of time is if it were up to me, I would have asked about the possibility of installing the hand shower a little higher… Once we the bathroom complete and we’re in business, I plan to enjoy it in its entirety, but still want to point out a few of these things along the way, just in case it’s helpful for any of you who may be facing a build/reno.
You can find a full source list for the shower system here (the finish I opted for is polished nickel):
- Shower Arm & Flange
- Shower Head
- Hand Shower
- Valve Trim (lever style)
- Transfer Valve Trim (lever style)
- Handwasher Holder & Supply Elbow
- 60″ Hose
- Valve
- Valve
- Transfer Valve
Don’t judge! There’s a LOT of clean-up that will have to be done after the bulk of the bathroom is finished. And, I don’t just mean “cleaning” — there are a lot of touch-ups, clean-ups, grout work, etc. that will need to be done.
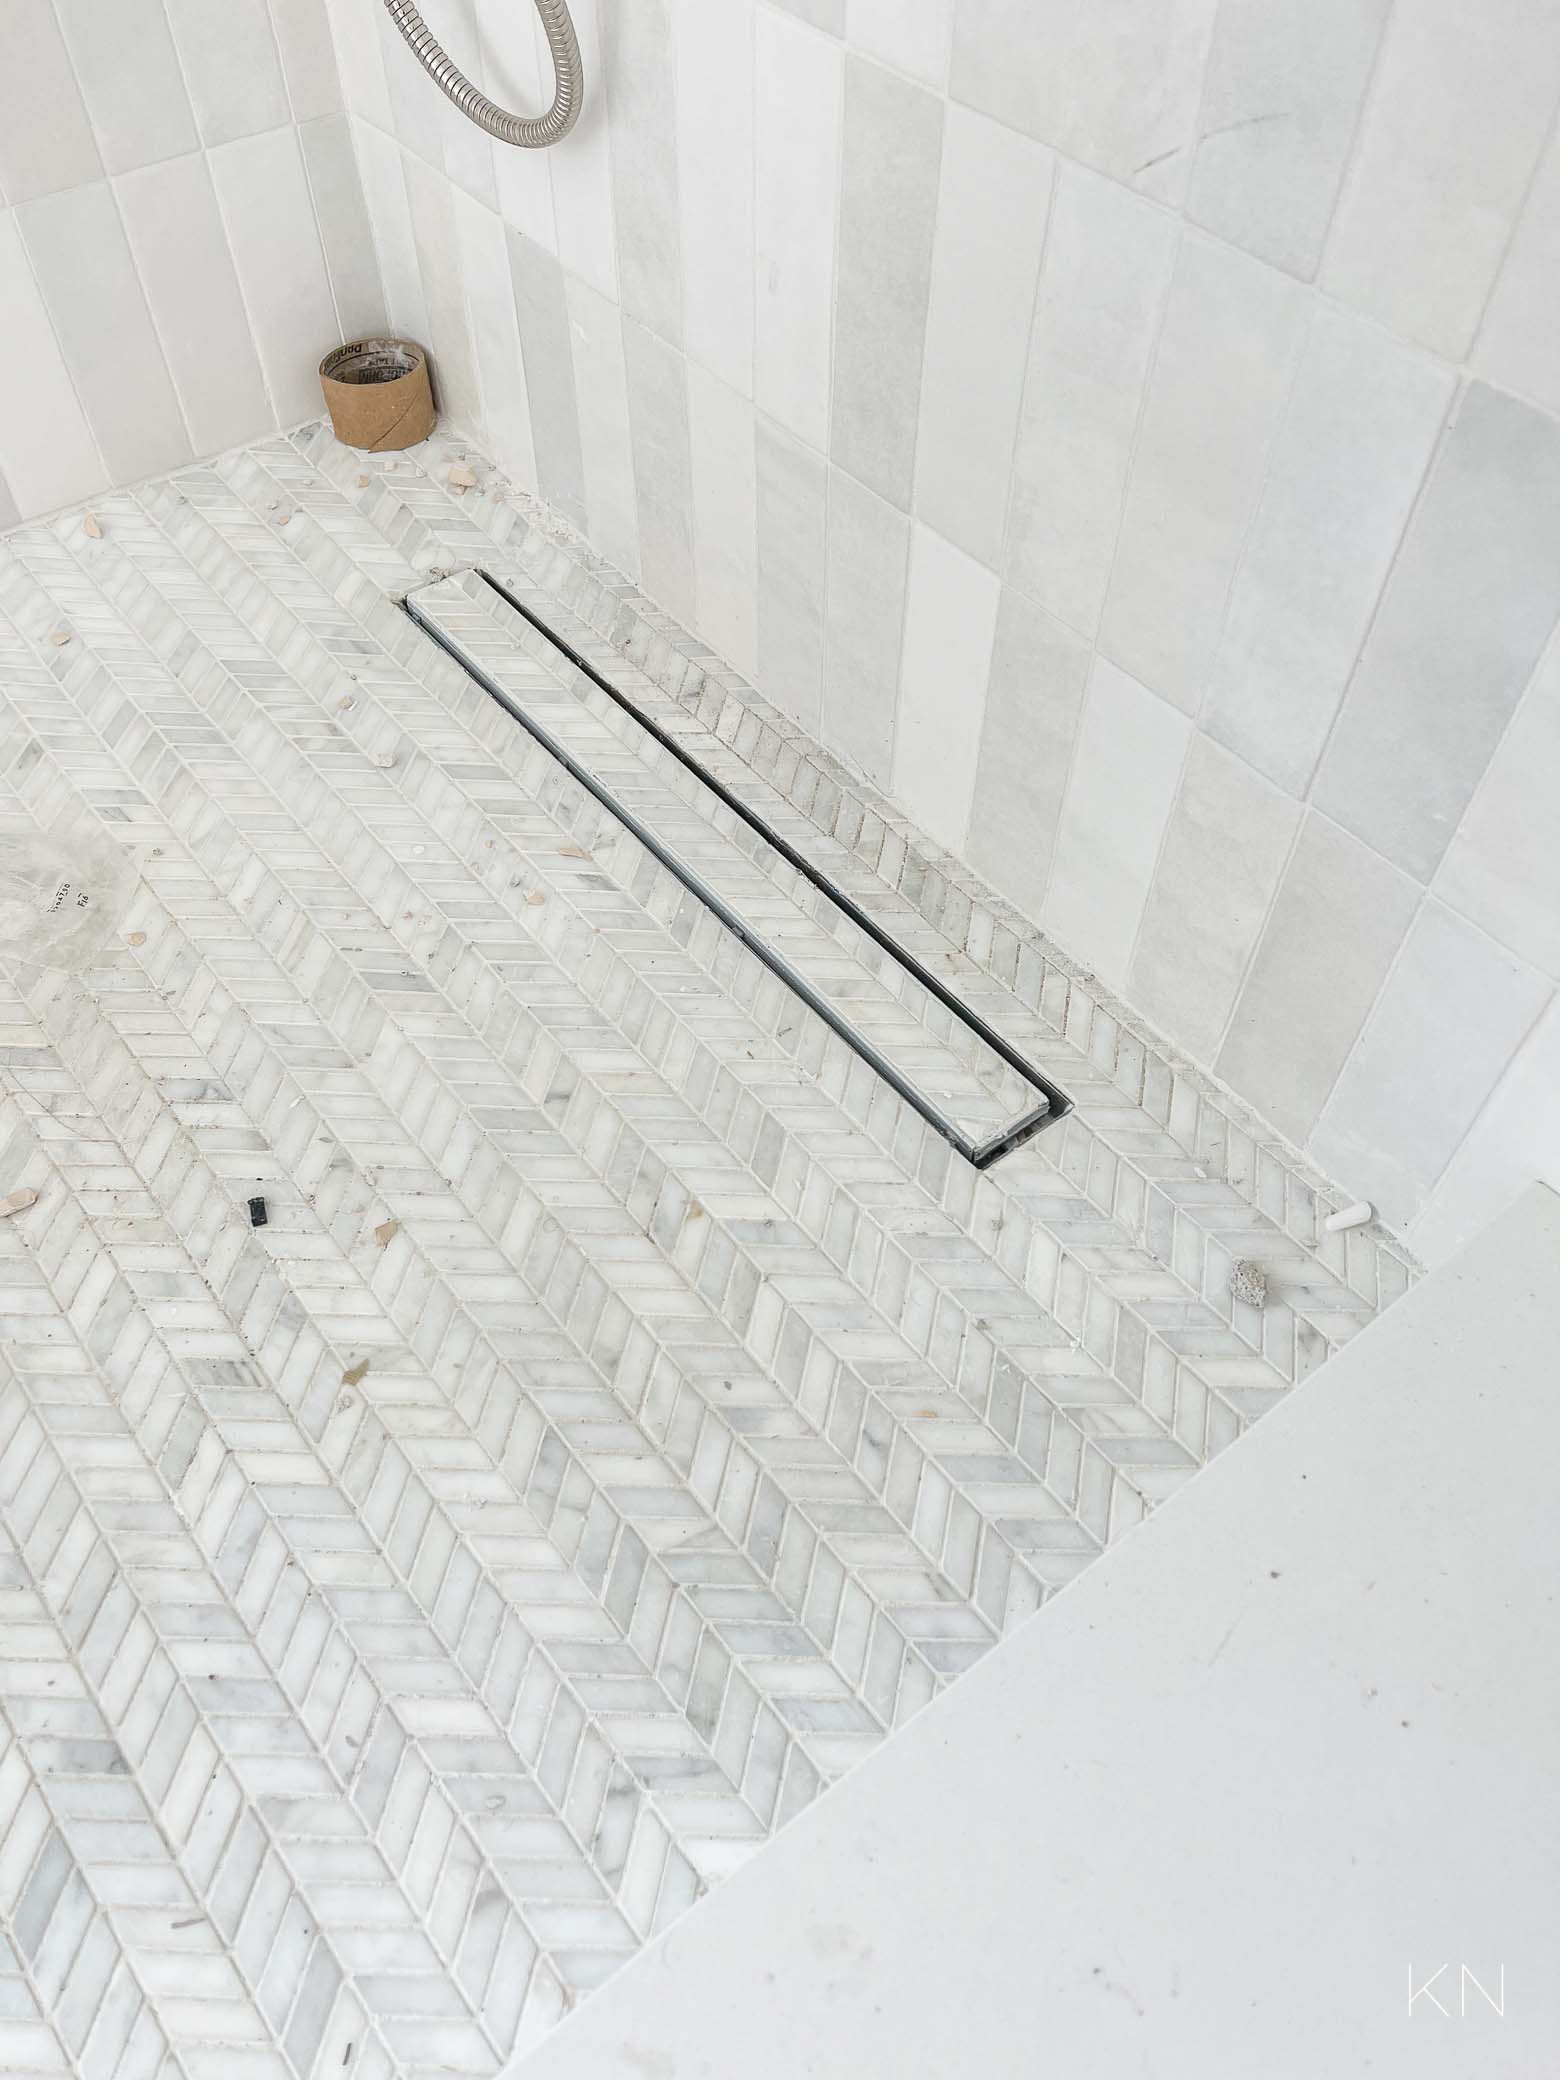
Here’s a look at the tile-in linear shower drain — again, it will have to be cleaned up a bit, but I love how it looks (and will hopefully like how it functions 😉 ). I went for the 24″ option but they have several sizes available HERE.
A simple conversion I asked about at the beginning of the project was the possibility of getting a can light over the shower. My contractor steered me toward a fan/light combo — still more powerful than my current ugly fan that didn’t do much to resolve the shower moisture — and would keep the ceiling from being cluttered with fans and lights. We have a vaulted slope and corner over the shower but they were able to position it and install it still over the shower, just centered from one angle and more toward the edge on the other side. The removed the old fan and patched the empty space. I also requested for the light to be on a dimmer so they installed two switches — one for the light and one for the fan.
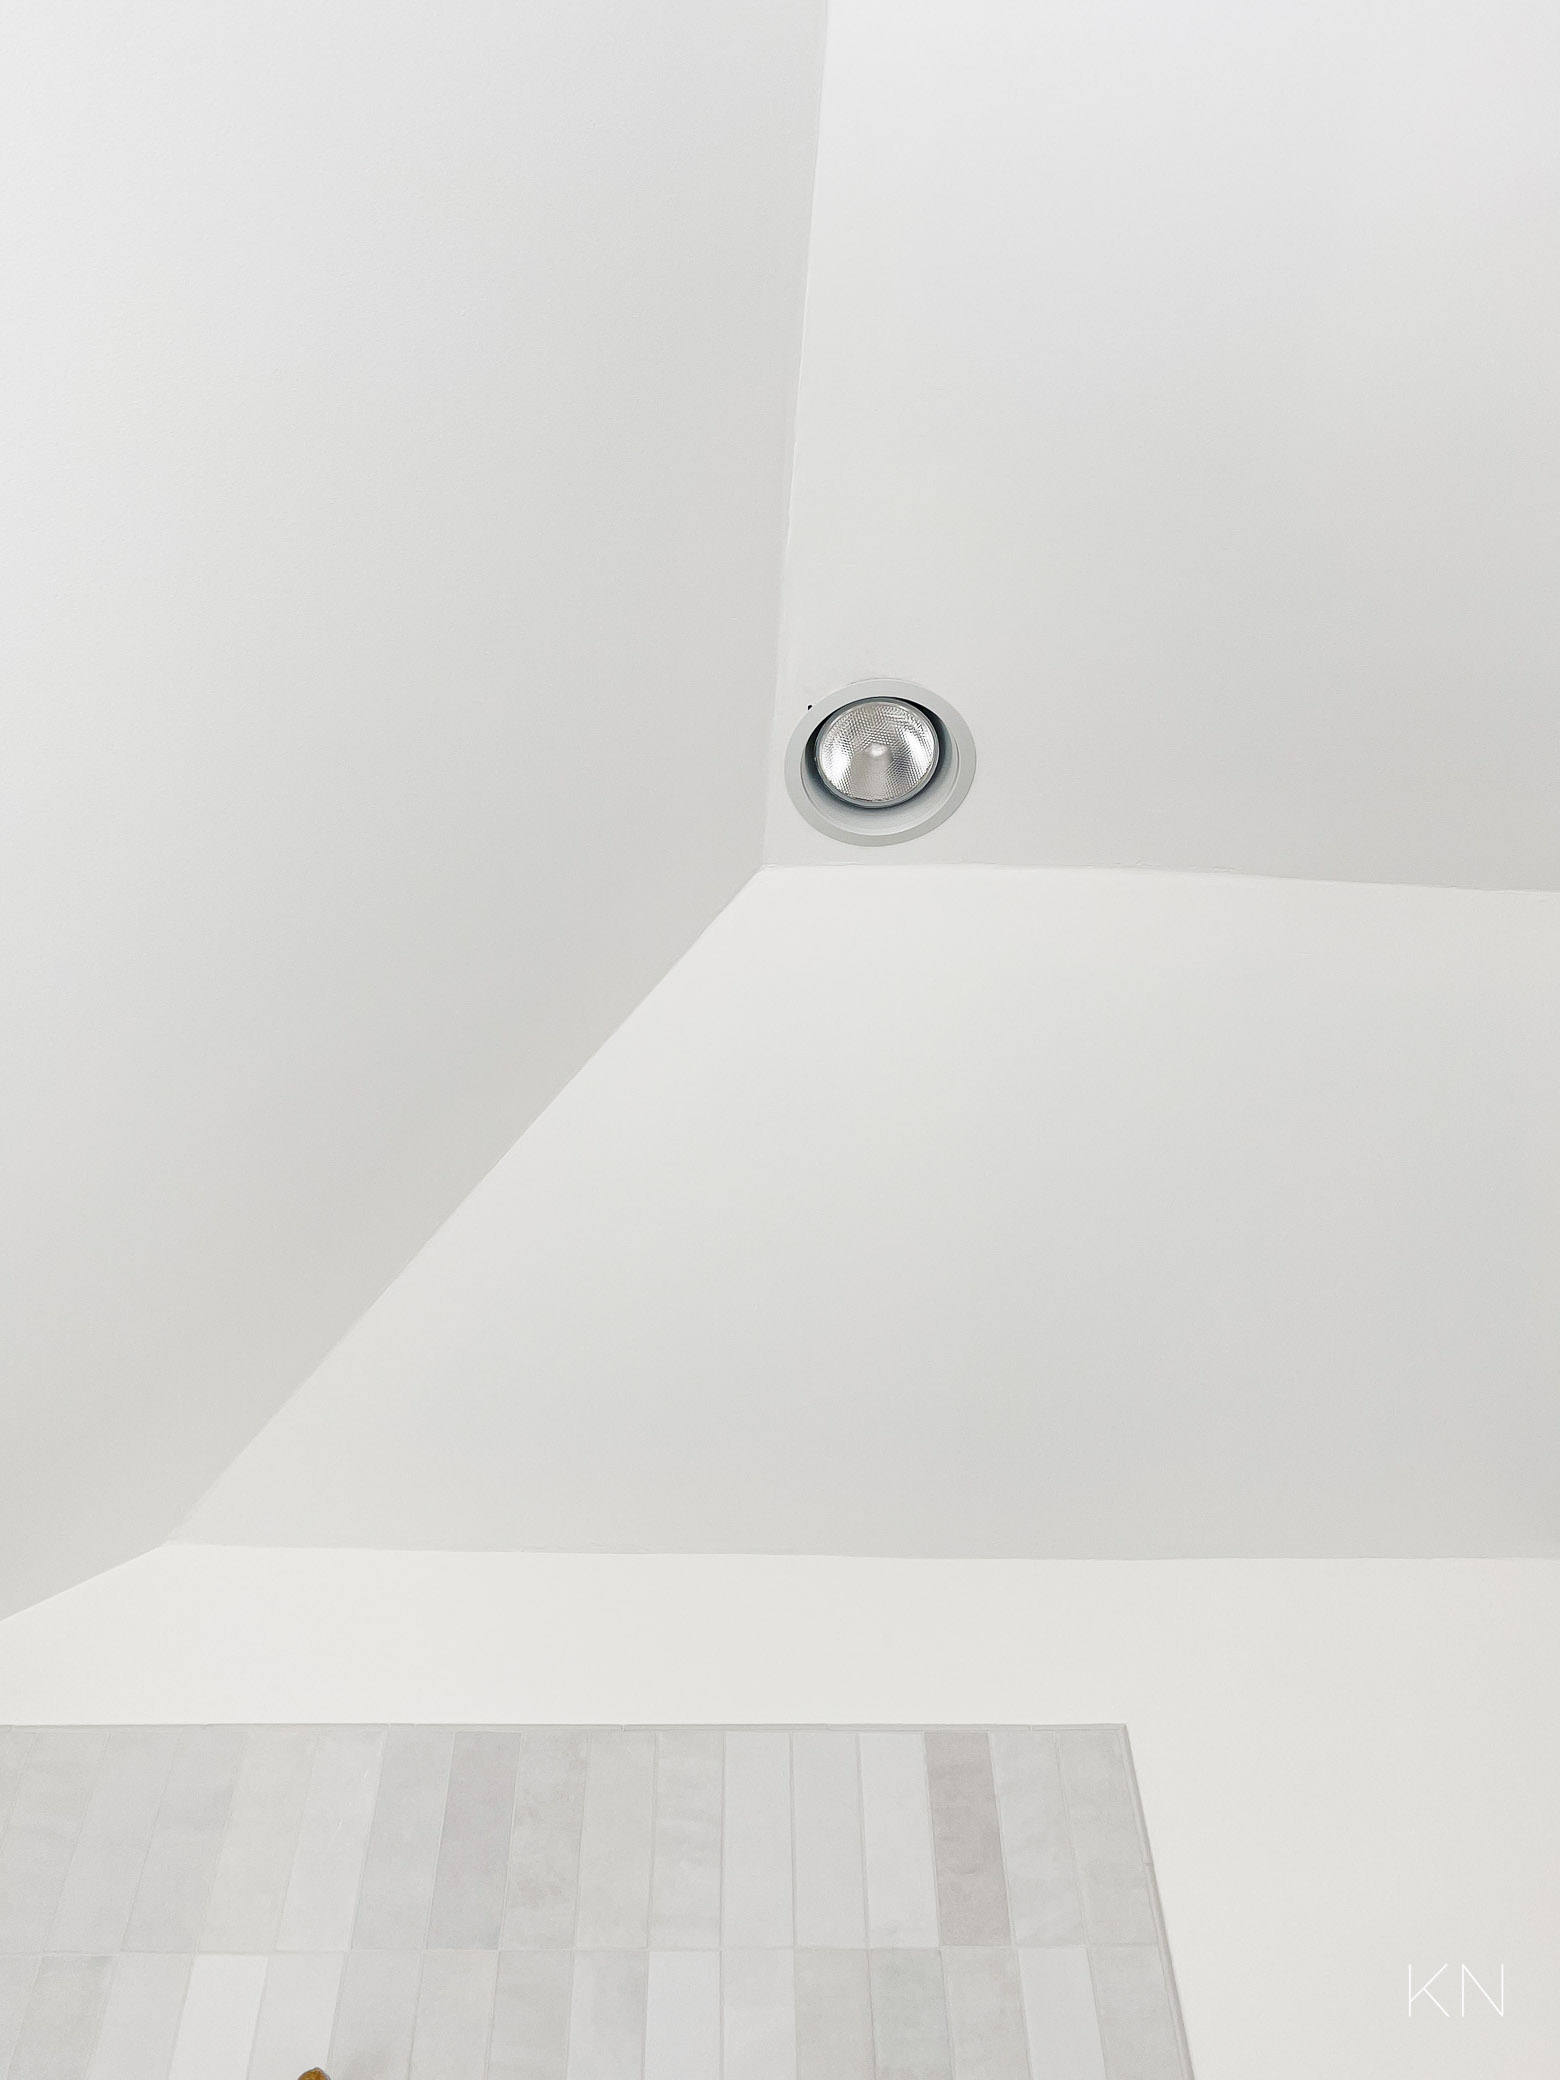
At night, it is so dang nice. I can’t even describe the ambiance and vibe when I dim that single light — it gives a total hotel vibe. And, I love that I can have the light on without the fan. This little night peek will probably be the biggest “peek” I give before the reveal…
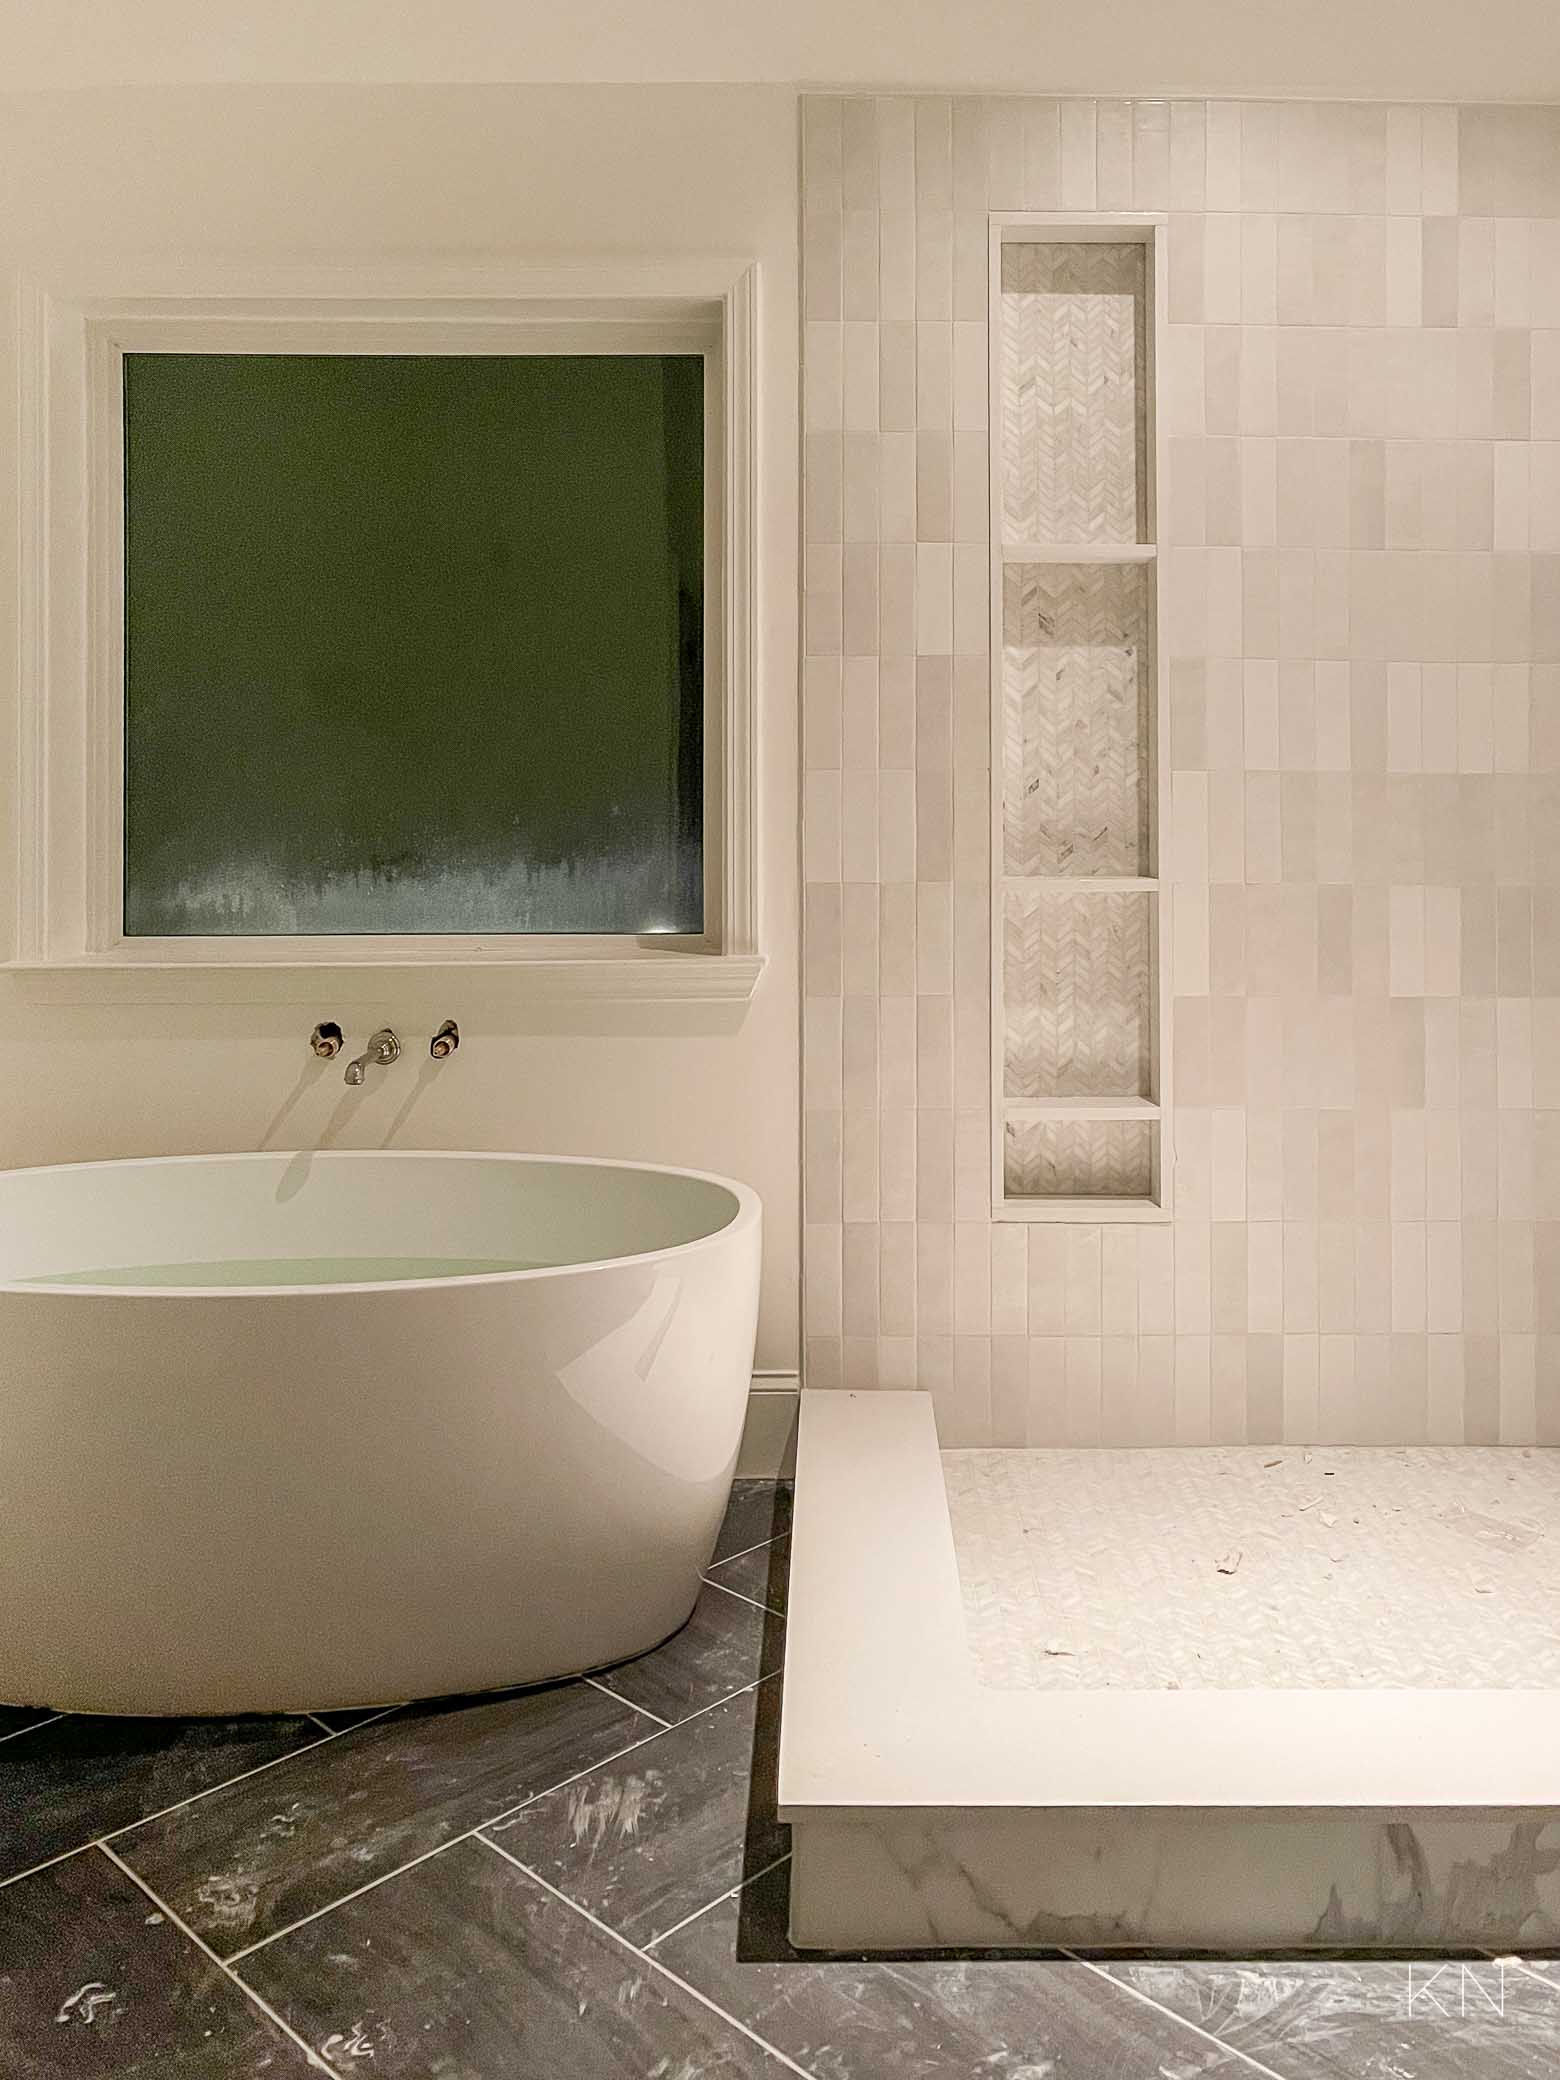
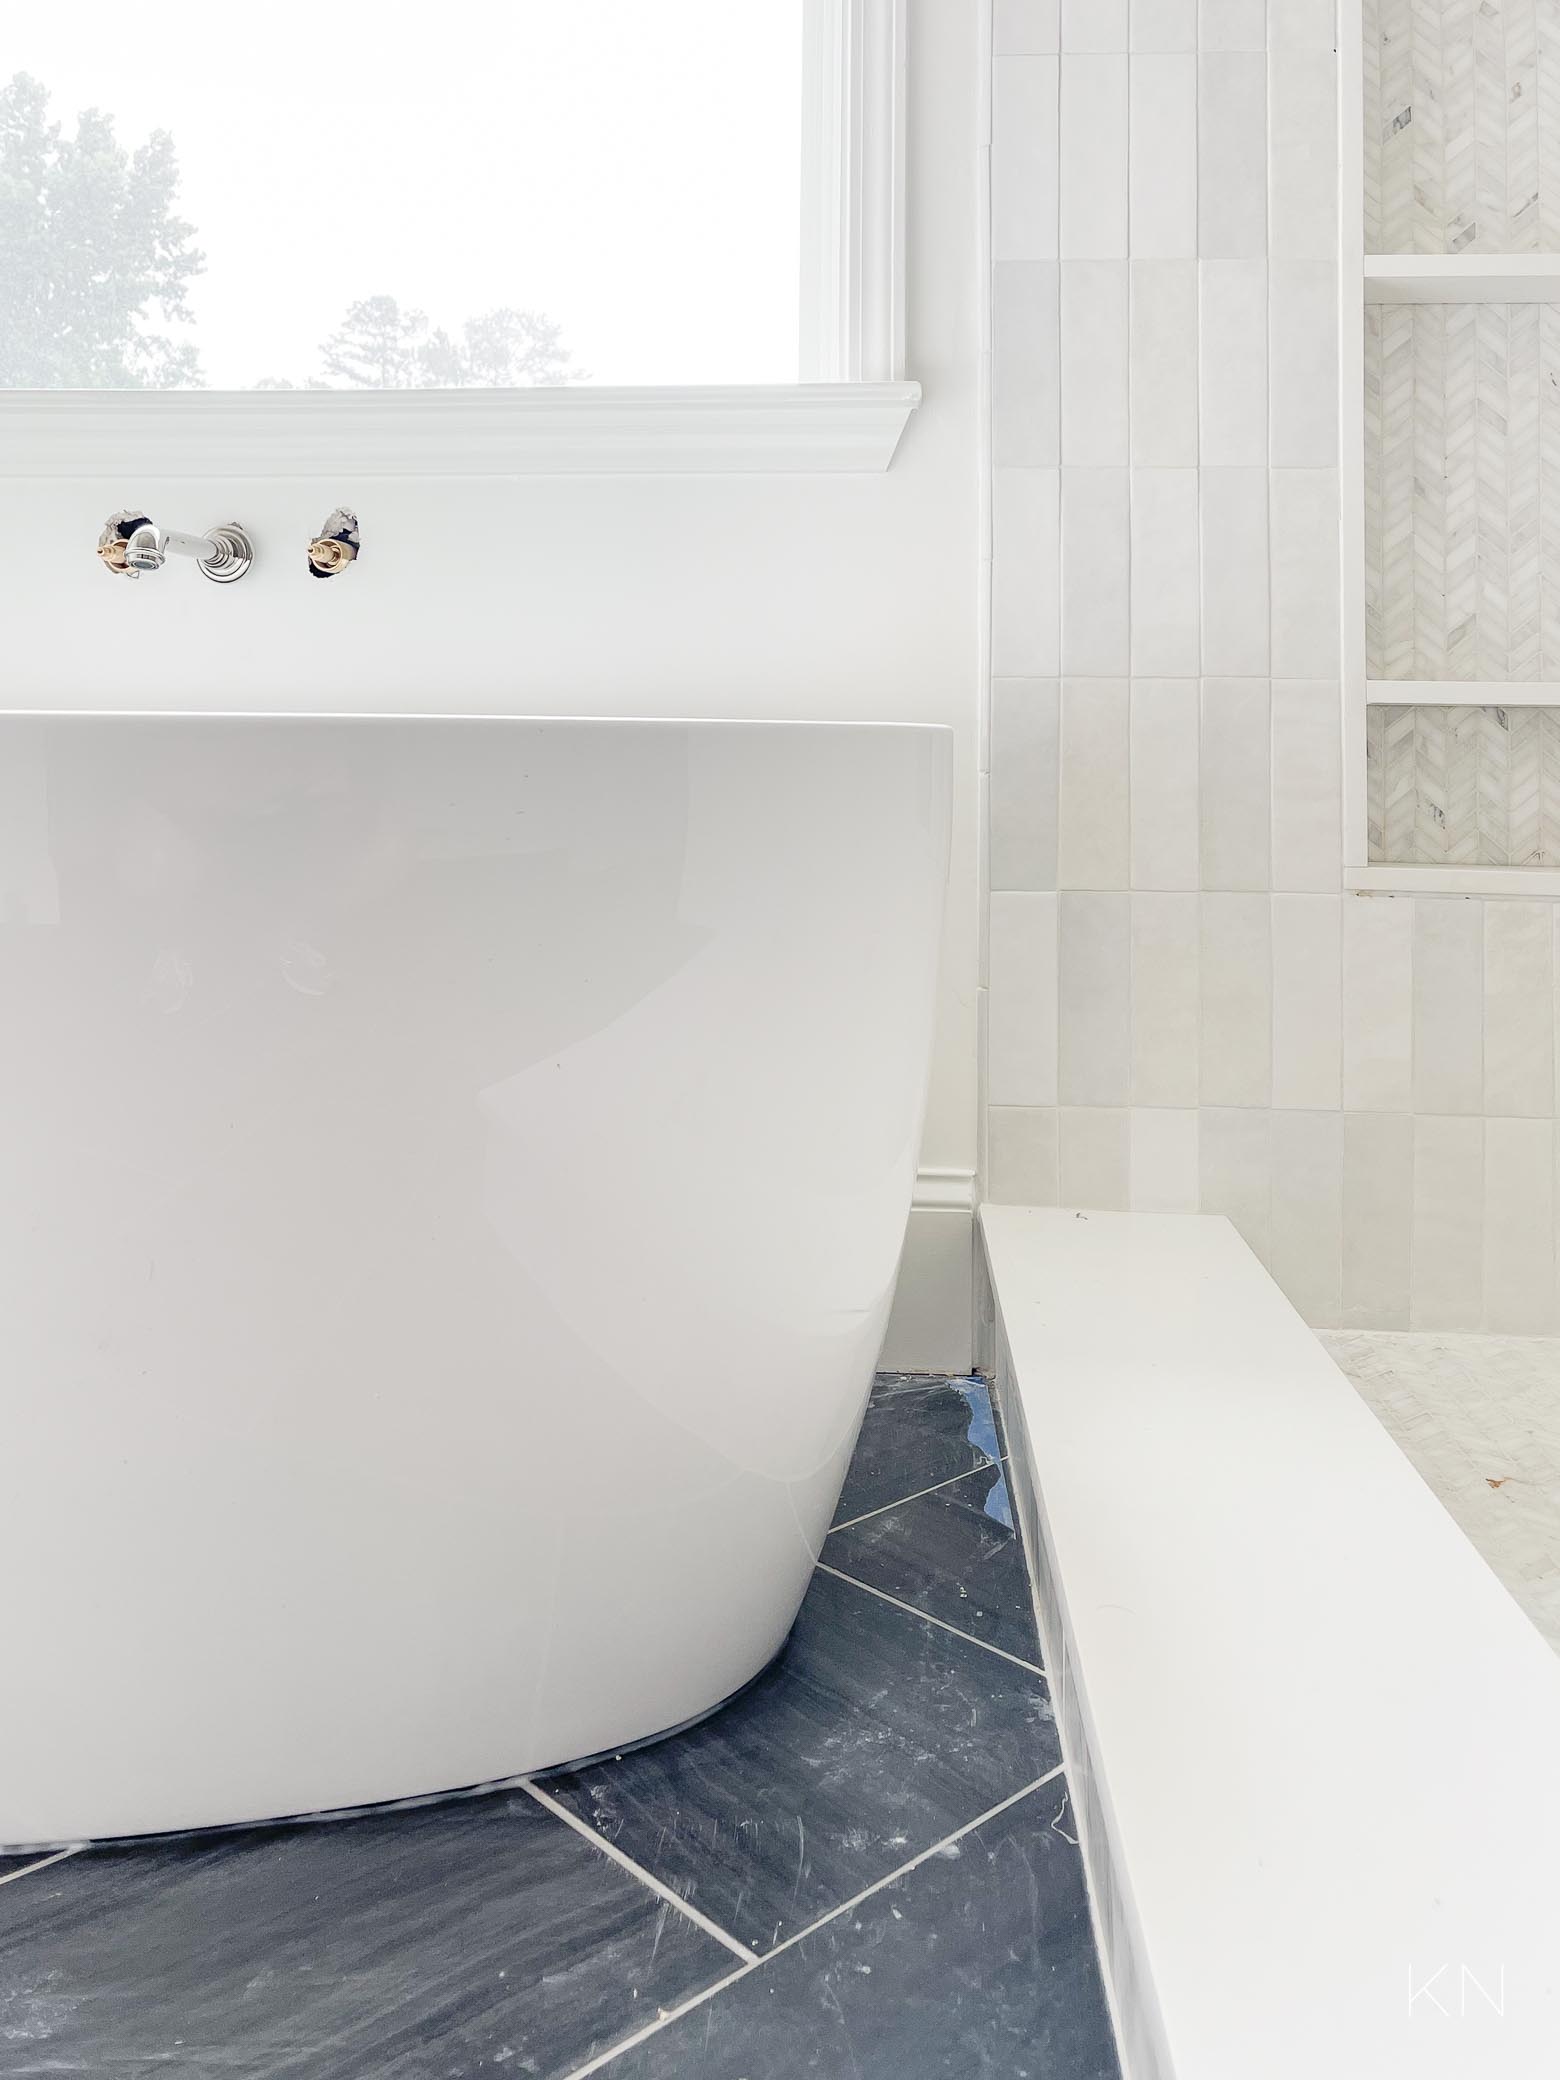
The shower glass installer is coming later today and the drywall around the tub filler knobs still has to be fixed as the holes were cut too large. We went with a 55” tub and I’m so glad we didn’t go any larger!
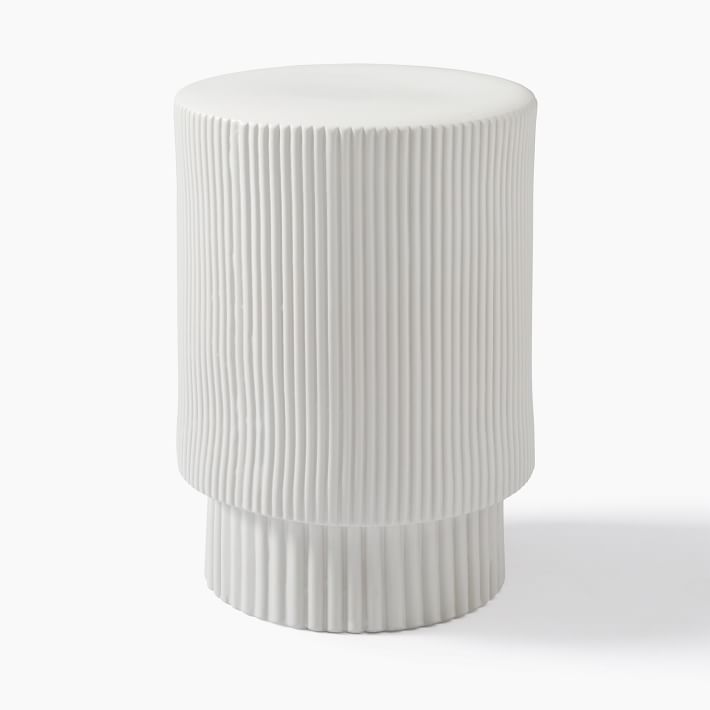
I also ordered THIS small fluted side table (in the white 13″ option) to go beside the tub. It isn’t supposed to arrive until the end of the month but I think it will be the perfect size.
I went with THIS handle for the glass shower door in polished nickel to complement the same look as the plumbing fixtures.
As a warning/tip, make sure you specify baseboards! I think our contractor assumed we wanted the same as what we had — which were dinky and about 3″ tall. While we still have those in some of the upstairs rooms, the ceilings in this bathroom are MUCH taller and with a remodel, we had an opportunity to go a bit taller and more grand. We had them remove and reinstall a 7.5″ version and it made a world of difference.

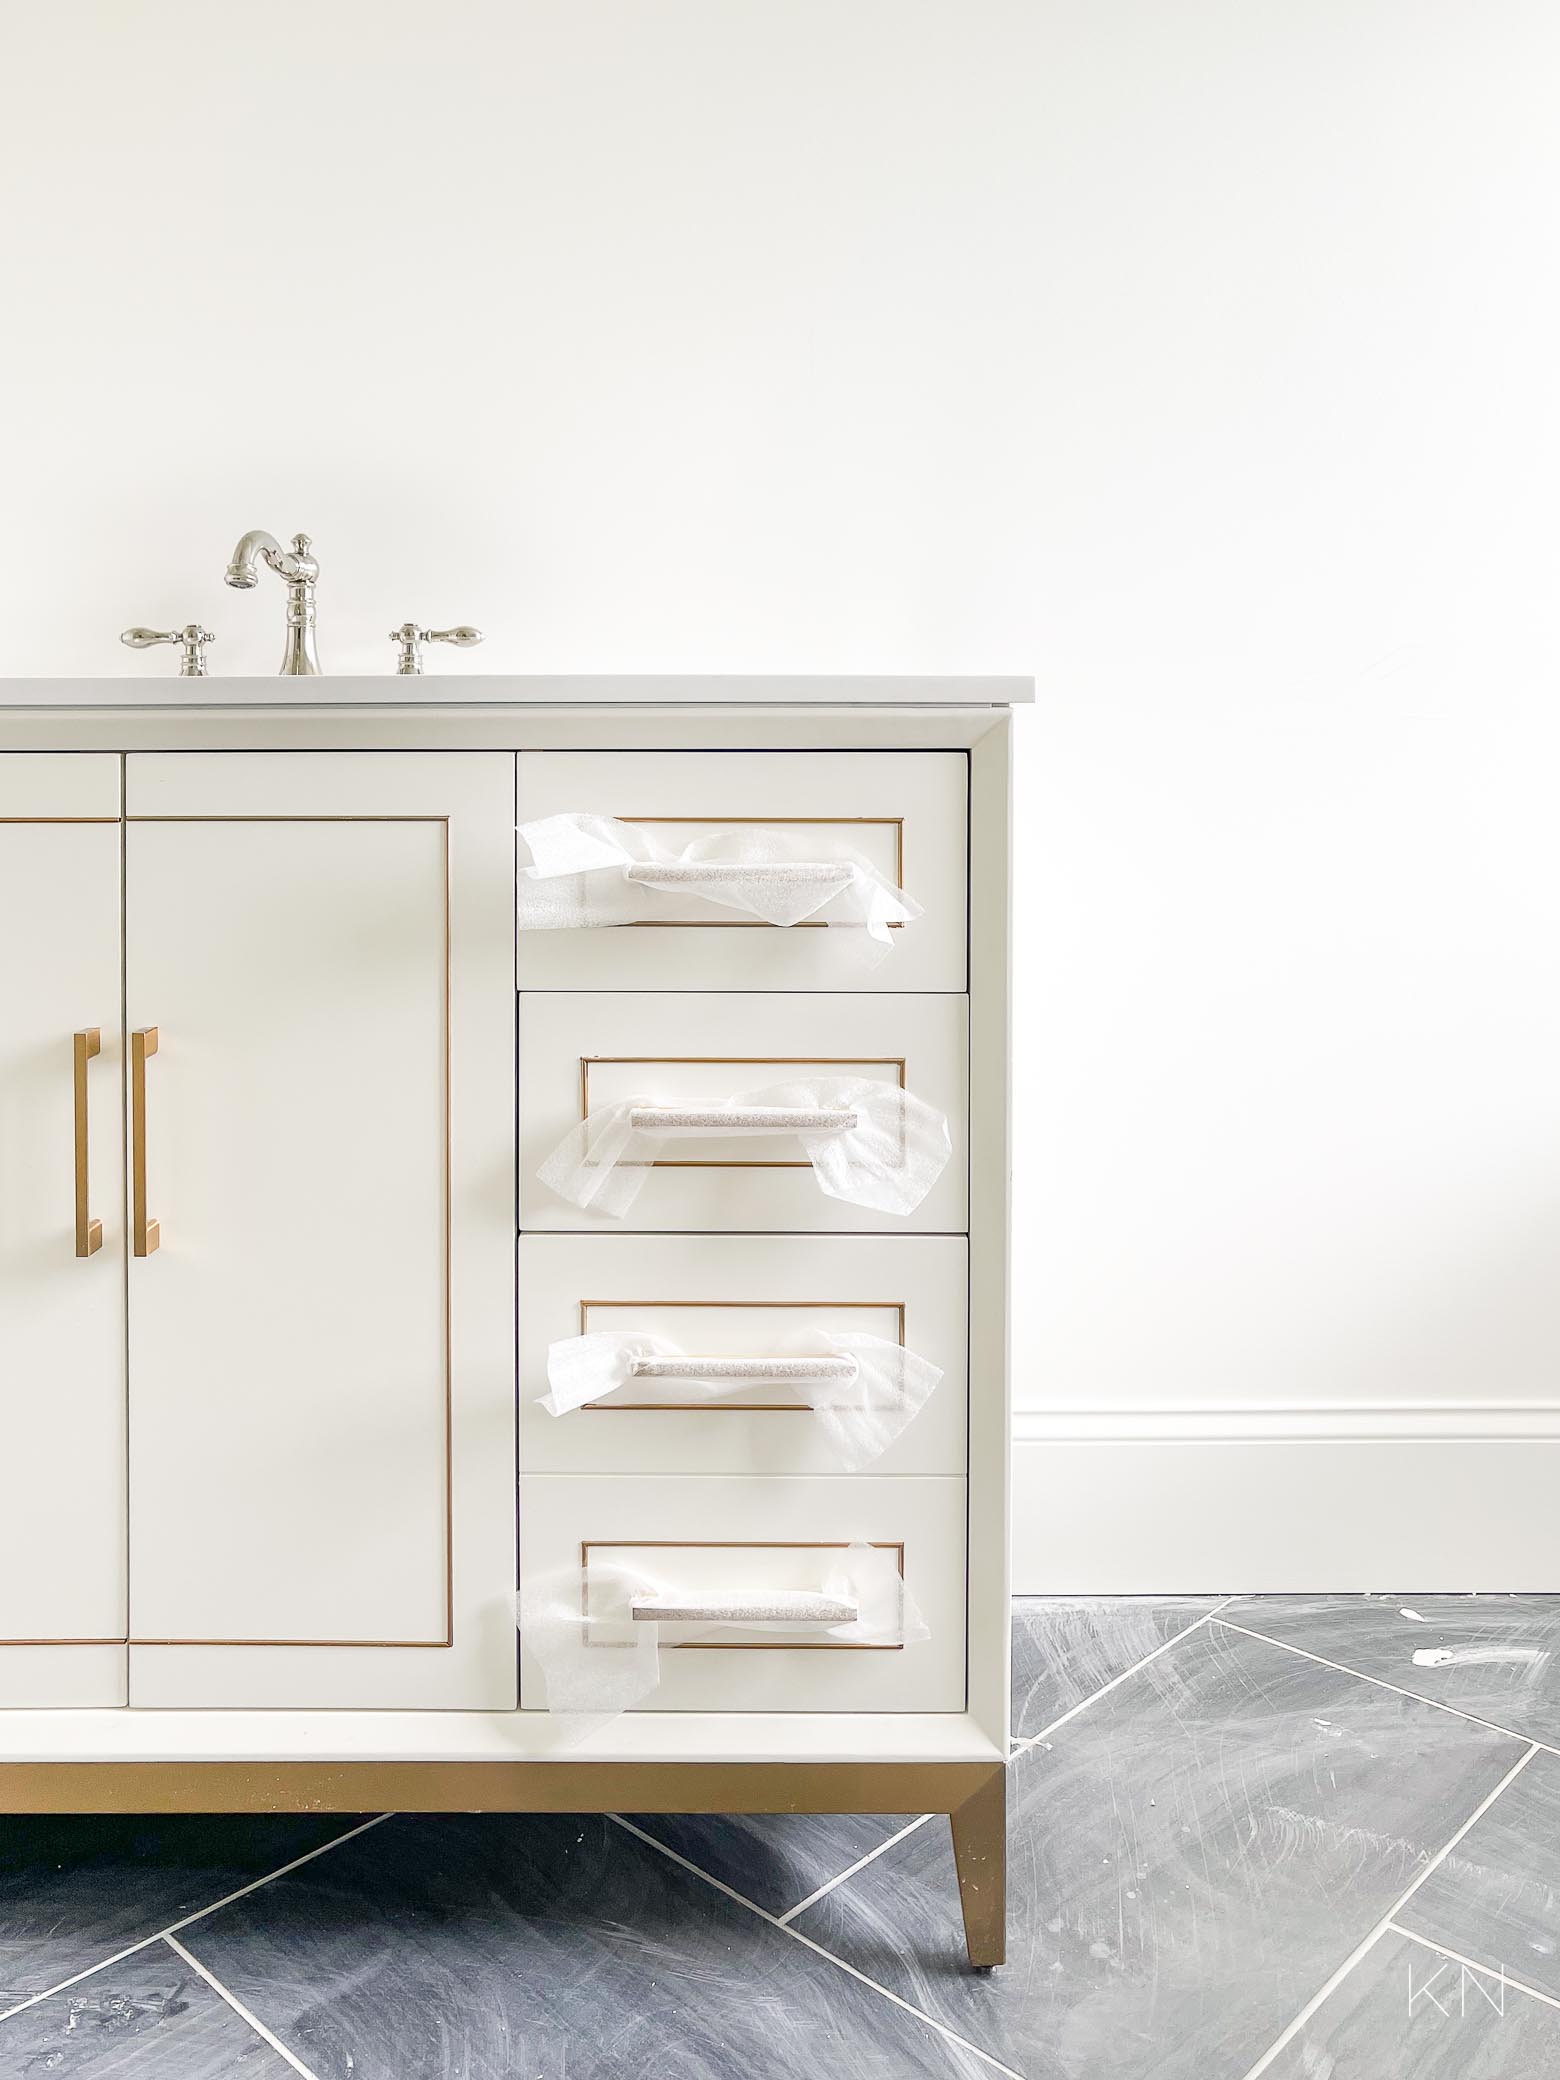
Shortly after, the vanities were installed… but not before the initial plumbing had to be redone. Once the cabinet guy got the vanities upstairs, he said if we installed as is (the plumbing was in the floor), the vanities 1. wouldn’t be centered, 2. would have to be cut into, and 3. we wouldn’t be able to use some of the drawers. Um… that wasn’t an option. So, he lined the vanity up on each wall and indicated where the plumbing would need to go and also the electrical outlet. The electrician came out and installed the outlet and the plumber had to come back out and re-route the plumbing to the wall. But — the vanities… I LOVE THEM! They have a small backsplash that isn’t installed just yet and I’m keeping most of the protectors over the pulls for now but they’re so pretty in person and I am stoked for all the drawer space. The vanities come in a couple of color and countertop material options — I chose the white with white granite top.
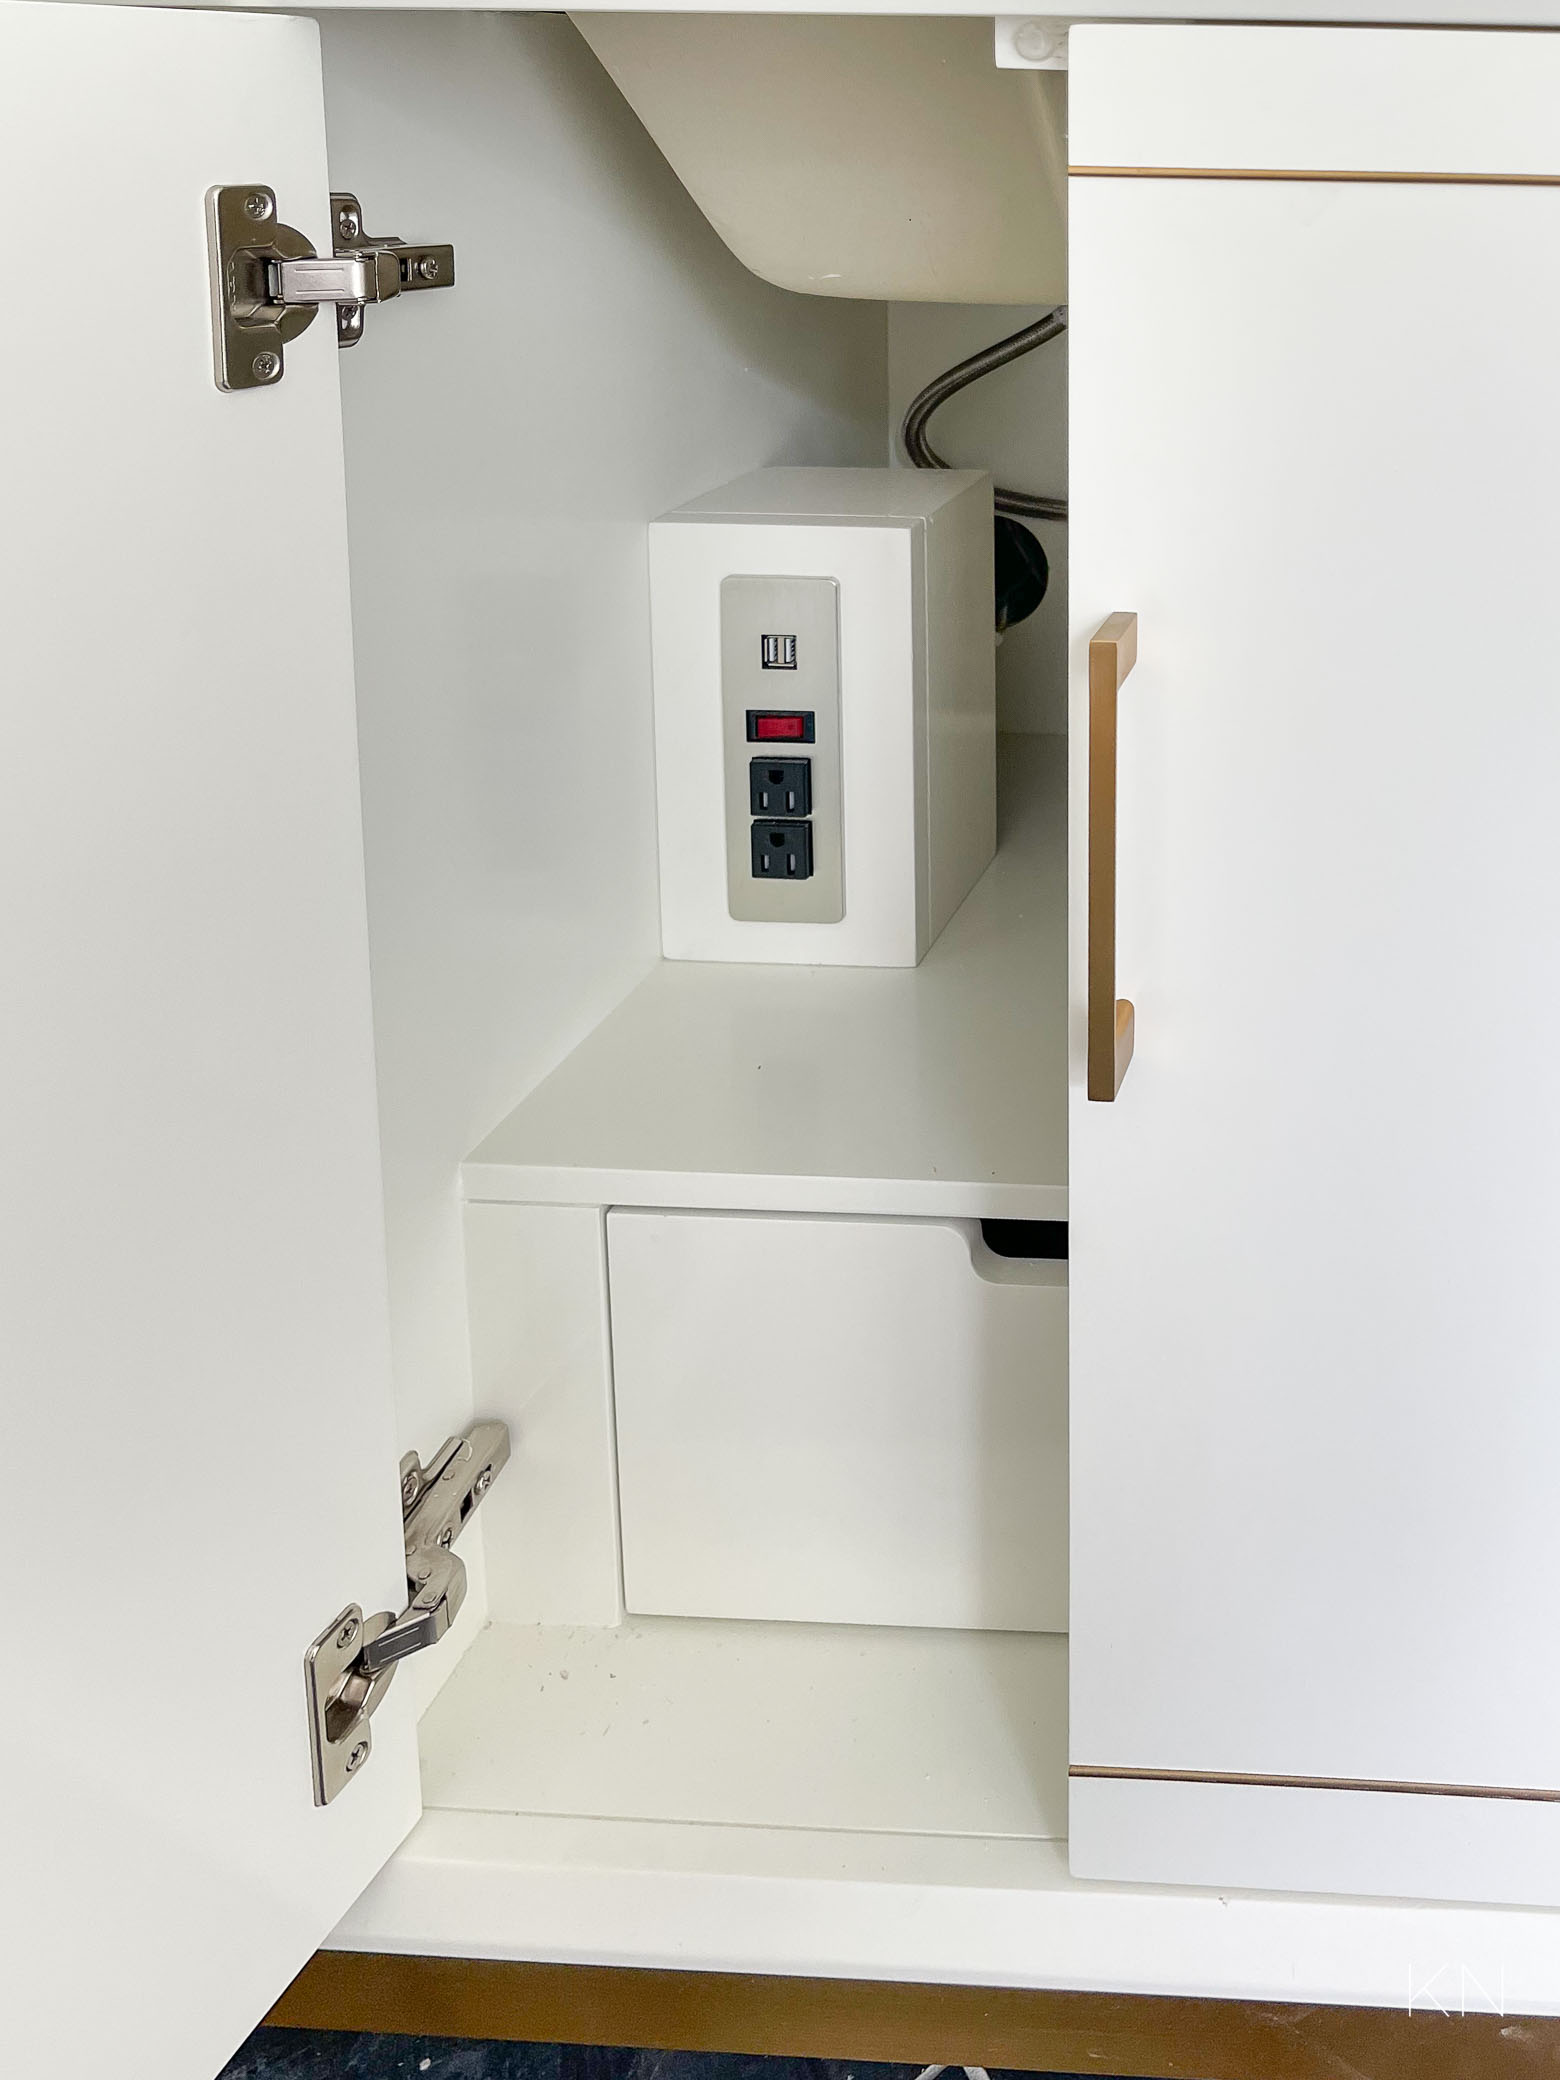
I also love this little space where I can charge all my devices and even use the outlet for my hair tools.
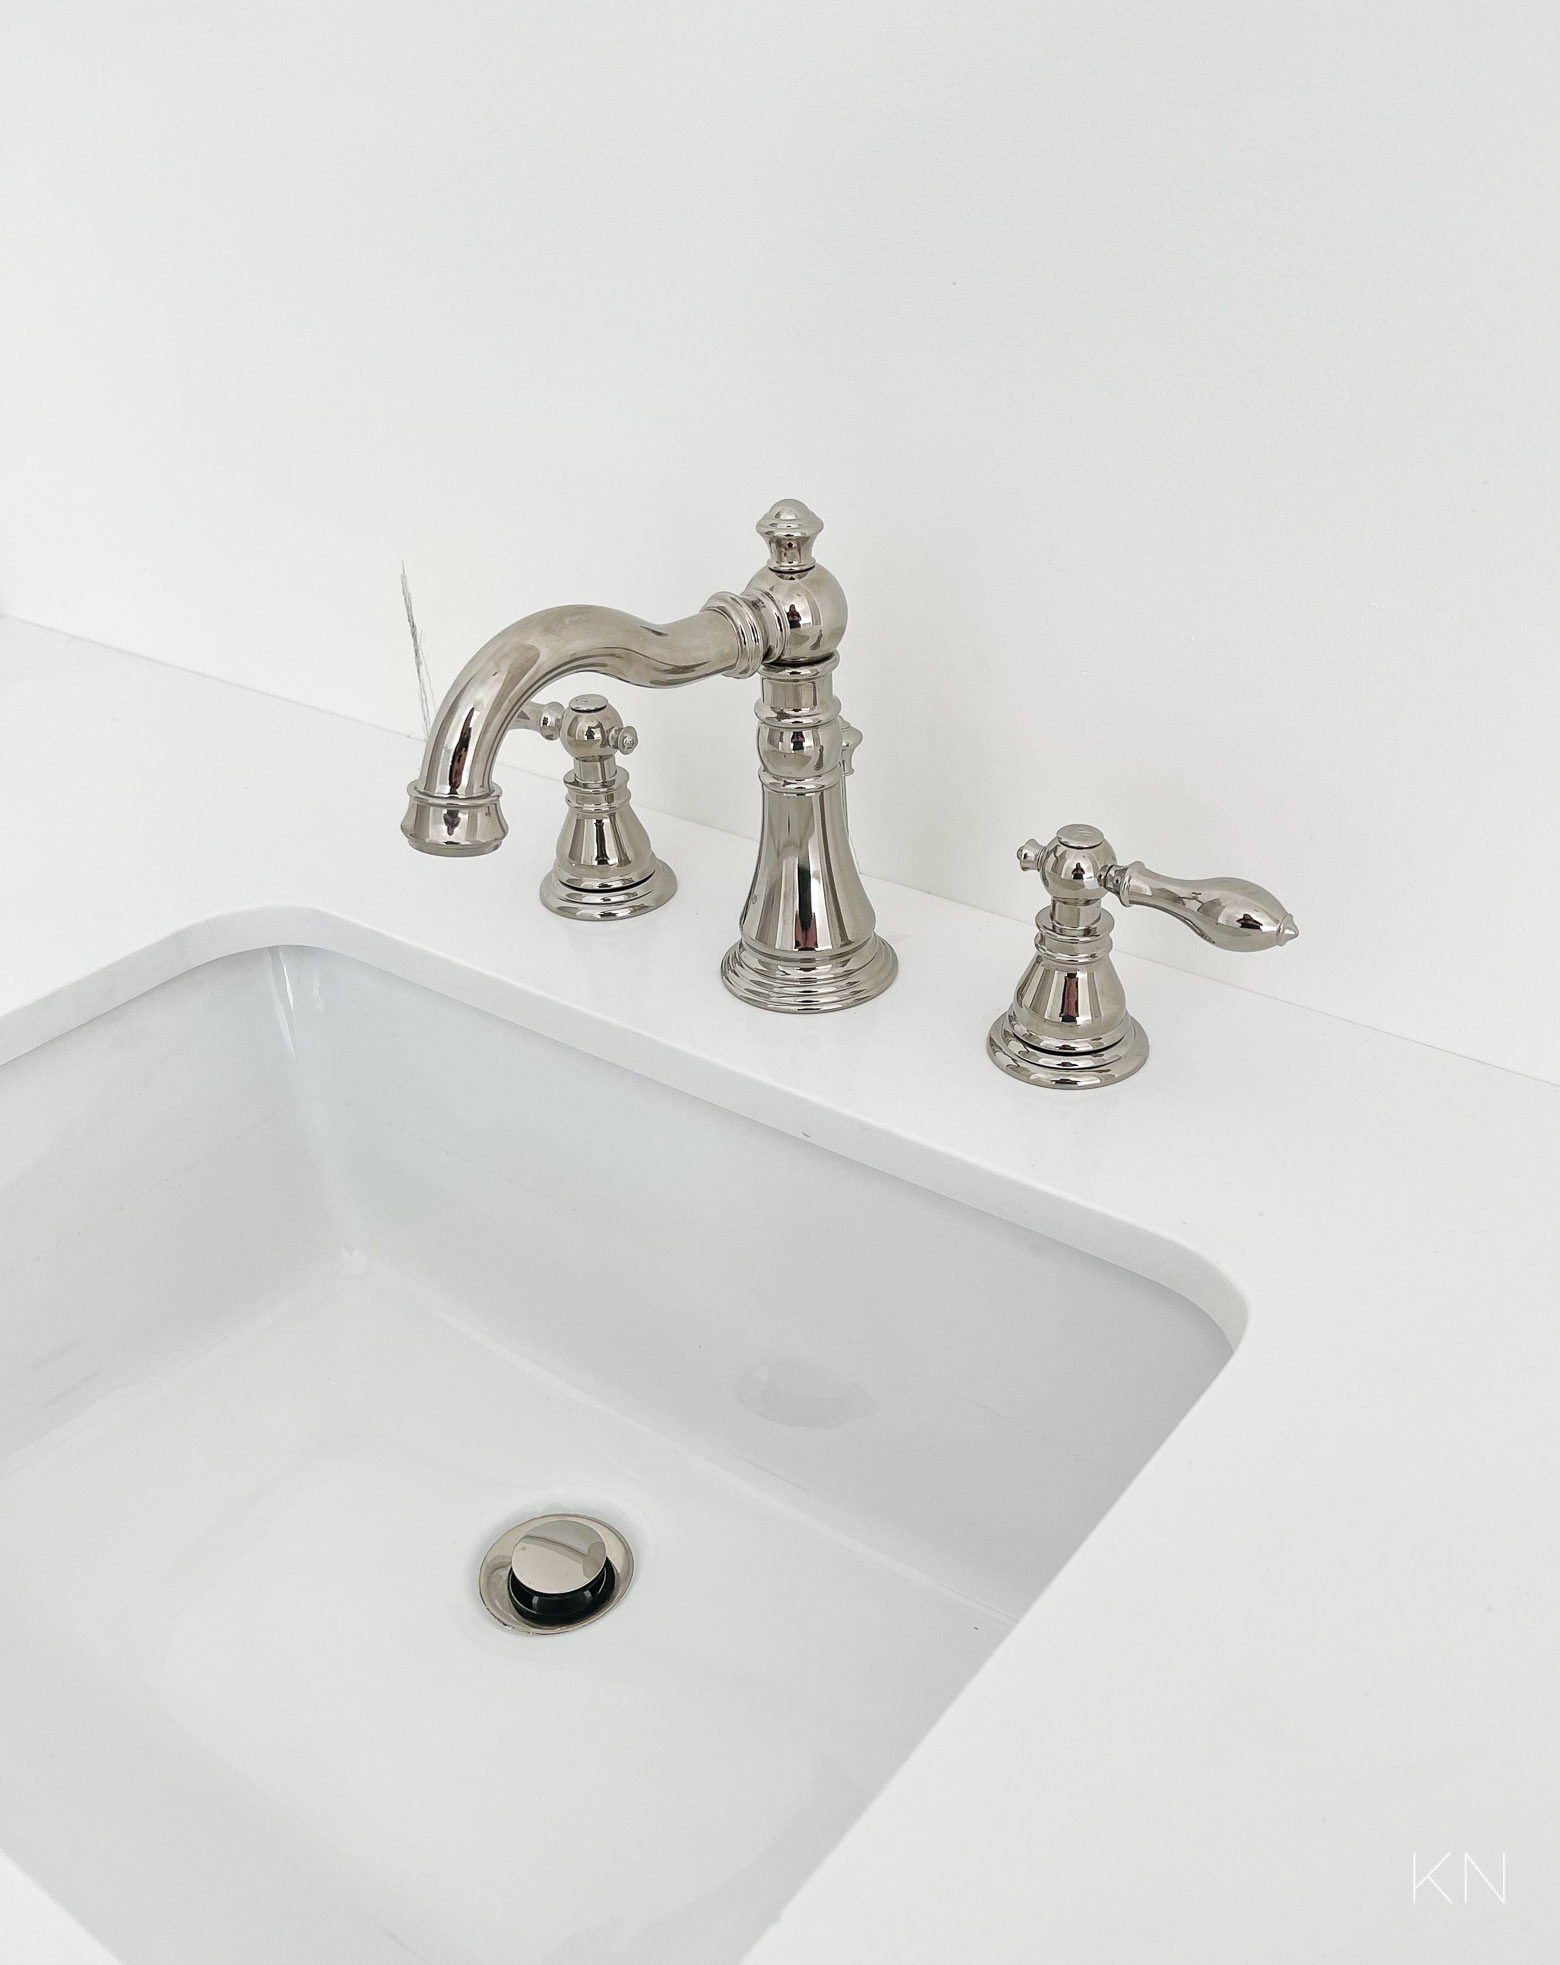
The vanities have brass hardware but I went for polished nickel faucets. The mirrors above the vanities will also be brushed brass and the sconces that will flank the mirrors are polished nickel.
So… What Still Needs to Be Done?
I’m so glad I have a contractor on this project to manage all the people and moving parts because there’s so much to keep straight. To my knowledge, these are the things that still need to be done.
- have shower niche fixed
- shower glass installed
- ordered window treatment samples but need those to come in, select, order, then install
- install vanity backsplashes
- hang mirrors
- hang sconces
- drywall repair above tub to install tub filler knobs
- tighten tub drain
- order and install motion lights below the vanities
- waiting for shower arm to come in — install shower arm and head
- hand shower valve trim angled down?
- clean up! including but not limited to grout, paint, baseboards
- seal marble pieces
- install closet carpet
- clean top to bottom
- accessorize — shop for a few pieces of fun decor (bath mats/rugs, pretty soap dispensers, etc.)
- move back in and organize!
So, we’re getting there! I’m anxious for it to be complete and am excited to share — after the reveal, I plan to break down different aspects in more detail, answer questions, etc. To make sure you catch the reveal — along with the other upcoming projects — you can subscribe to my emails HERE.
See the final Bathroom Reveal HERE.
Master Bathroom Sources
Tap to Shop


This is absolutely stunning!!! I love all the detail. I, myself, am not a “detail” person so appreciate all the extra hints/tips you’ve included. I don’t know if I love your floor tile or shower tile more.
I wonder if I leave my bathtub running if I can get a makeover like this in my house too 😉
Can’t wait to see it all together! The project management alone on this job had to have been full-time for you 🙂 Great job.
Hi Jennibell, Thank you for taking the time to visit this post and share in my painful saga. 😉 I hope that detailing some of the challenges I experienced will be helpful to others. I can’t wait until everything is finished and I can reveal the “new” master bathroom. I would further suggest that if you decide to do the makeover, make it happen without a flooding incident. lol Please stay tuned and I look forward to showing the completed project soon.
I can’t wait to see the end of the project. You are very creative. I would need a ladder to get in the tub!! Keep posting I enjoy reading & seeing everything!
It all looks fabulous!!!! I can’t edit yo see it all finished.. I’m sure you know but glass for showers come in clear and clear.. our first set of doors we got had a blue tint to them so is your wanting clear be sure to ask to make sure ..
Hi Judi, Thanks so much for the glass door tip. They are coming to install them tomorrow, so I hope this step in the project goes off without a hitch!
Hi Dianne, Thank you so much for taking the time to view the progress. I appreciate your kind note and hope I won’t need a ladder for the tub.
Oh Kelly your bathroom is coming together beautifully! I love the floor tile and how you went with a herringbone pattern.
I’m still purging as I slowly put my house back together. It’s been over a year. Last summer was spent having contractors jackhammer through our concrete subfloor to replace busted cast iron pipes. The water backed up and flooded the laundry room. End of last summer, we finally had new flooring installed. Went with LvP. Installers did a horrible job and after four attempts to make it right, from Sept to April; I ripped it all out (yes myself), sold it and went to a different floor company and had hardwood installed. Should a, could a but didn’t. Let contractors talk me into something. Never again. So, purging as I move stuff back in, which is taking some time but is so worth it!
Really looking forward to your finished project and the Kelly touch you will give it. ❤️
Hi Vanessa, Thank you so much for taking the time to visit this post and for your kind comments. I am so so sorry you’ve had such a time with your terrible experience. It sounds like you learned a lot and did a lot. I say, YAY for you! Good luck with your purge and I will be doing the same thing soon. I’m sure your “Vanessa” touch will be worth all of your effort.
Kelly, your bathroom is looking fab! Love all your details and the drain too! The vanity looks stunning and so functional, what a great choice. I so understand your comment about the “clean up” geez. We are building a pool and pool house and it’s take a year and a half! Clean up is still going on! Renovation and new building is no easy task! Glad yours has gone “fairly smoothly” all things considered. Can’t wait to see the final!
Hi Denise, Thank you so much for stopping by and taking the time to leave your kind note. Who knew there would be so many details in this redo? I have certainly learned a lot about the questions one needs to ask first. I am so anxious to reach the finish line on this one! It sounds like you are up to your elbows in changes. I wish you the best that your finish is successful. I know you will love the result and hope the angst becomes a distant memory soon!
Hi! Do you have a source for the shower fan light? Also curious why you said you wished the handheld shower head was hung higher up? Thanks
Hi Nanci, I do not have a source yet for the shower fan light, as it was provided by the electrician. For the placement of the handheld shower head, its location has really grown on me, but because both heads can function at the same time I probably would have positioned it higher.
Hi, did you use white grout for the shower floor tile as well?
Can’t wait for the final reveal!
Hi Katie, Thank you for taking the time to stop by! Yes, I used white grout for the shower floor. Hopefully, this long lasting project will be completed soon.
i realize this is an old post now but I’ve stumbled onto it via Pinterest, and I just wanted to say, as a designer, I think the 3/3/2/1 looks intentional (like the rule of thirds) and I’m into it! Maybe you wanted the top to align with the shower glass, or perhaps I’m misunderstanding what you wanted it to look like, but I hope you stopped stressing about it 🙂
Sarah, Thank you for taking the time to stop by and for your kind note! The niche shelves no longer bother me today and I’m so happy it was added. My main point of irritation was that my instructions weren’t followed from the beginning. 😉
Was your shower niche prefabricated or did your crew have to custom build it?
Thank you for stopping by, Devin. The niche was not prefabricated…the tile contractor built it to my specifications (or rather, as the post states, there was a misstep in following my exact specifications, but it’s working out just fine!)
Hi. What is the dimension of your shower niche? We are building a similar style on our shower and trying to decide on dimensions.
Hi Kelly, The shower niche is approximately 12″ wide (which is also the width of the tile and the space between the studs.) It is nine tile lengths high, which is approximately 68″. I wish you the best on your shower change!