We’re coming up on one year of my mom’s official relocation to Georgia and October will mark one year since she closed on her house! Since then, she’s been slowly but surely making adjustments to her home, settling in, and making it her own. And since then — and despite several requests for updates — I think I’ve shared… nothing haha. But today, since I’m in the midst of my own more involved projects and transformations, I thought it would be a good time to visit her house and share a few easy kitchen upgrades and modifications she’s made in that space. I’m talkin’ simple upgrades you can make to a builder grade kitchen over the course of a weekend. Or, maybe even a well-planned Saturday 😉
*Posts on KelleyNan.com may contain affiliate links. Click HERE for full disclosure.
As a little back-story refresher, she used a local builder who was building homes in a neighborhood with an awesome setting, great lot sizes, and trees all around. Her homesite, specifically, is amazing. If you’re familiar with this kind of building process, selection involvement for homes varies from builder to builder, but they are able to move quickly by having only a handful of house plans and a limited number of finish options and customizations. Our neighborhood builder worked a similar way but admittedly, they weren’t nearly as limited in offerings and input as my mom’s home builder. Even so, the house plan and layout itself is perfect for my mom — she loves it!
Speaking from experience and mistakes I made when we built, I steered her away from cosmetic upgrades for which she would pay a premium with the builder. I “upgraded” way too much for things I still didn’t love but just thought they were better than the basic offering. Since then, I’ve continued to evolve our home and switch fixtures and such so all that “upgrade” money was just wasted. For more permanent hard materials (like floors), by all means, I’d go ahead and upgrade if there’s an option you like.
Her kitchen layout was pre-set and these were the items she could choose:
- a cabinet color from a single collection of cabinets (ironically, the basic “white” option she went with was considered an upgrade *insert major eye roll*
- hardware color (but the selection had to be applied every fixture/piece of hardware in the entire house)
- a granite countertop color from a few granite countertop color options
- backsplash tile from a limited selection and grout
- *I think cabinet height*
- wall paint color for the house (again, finite selections but luckily they offered SW Alabaster which is what she went with)
- flooring for the house
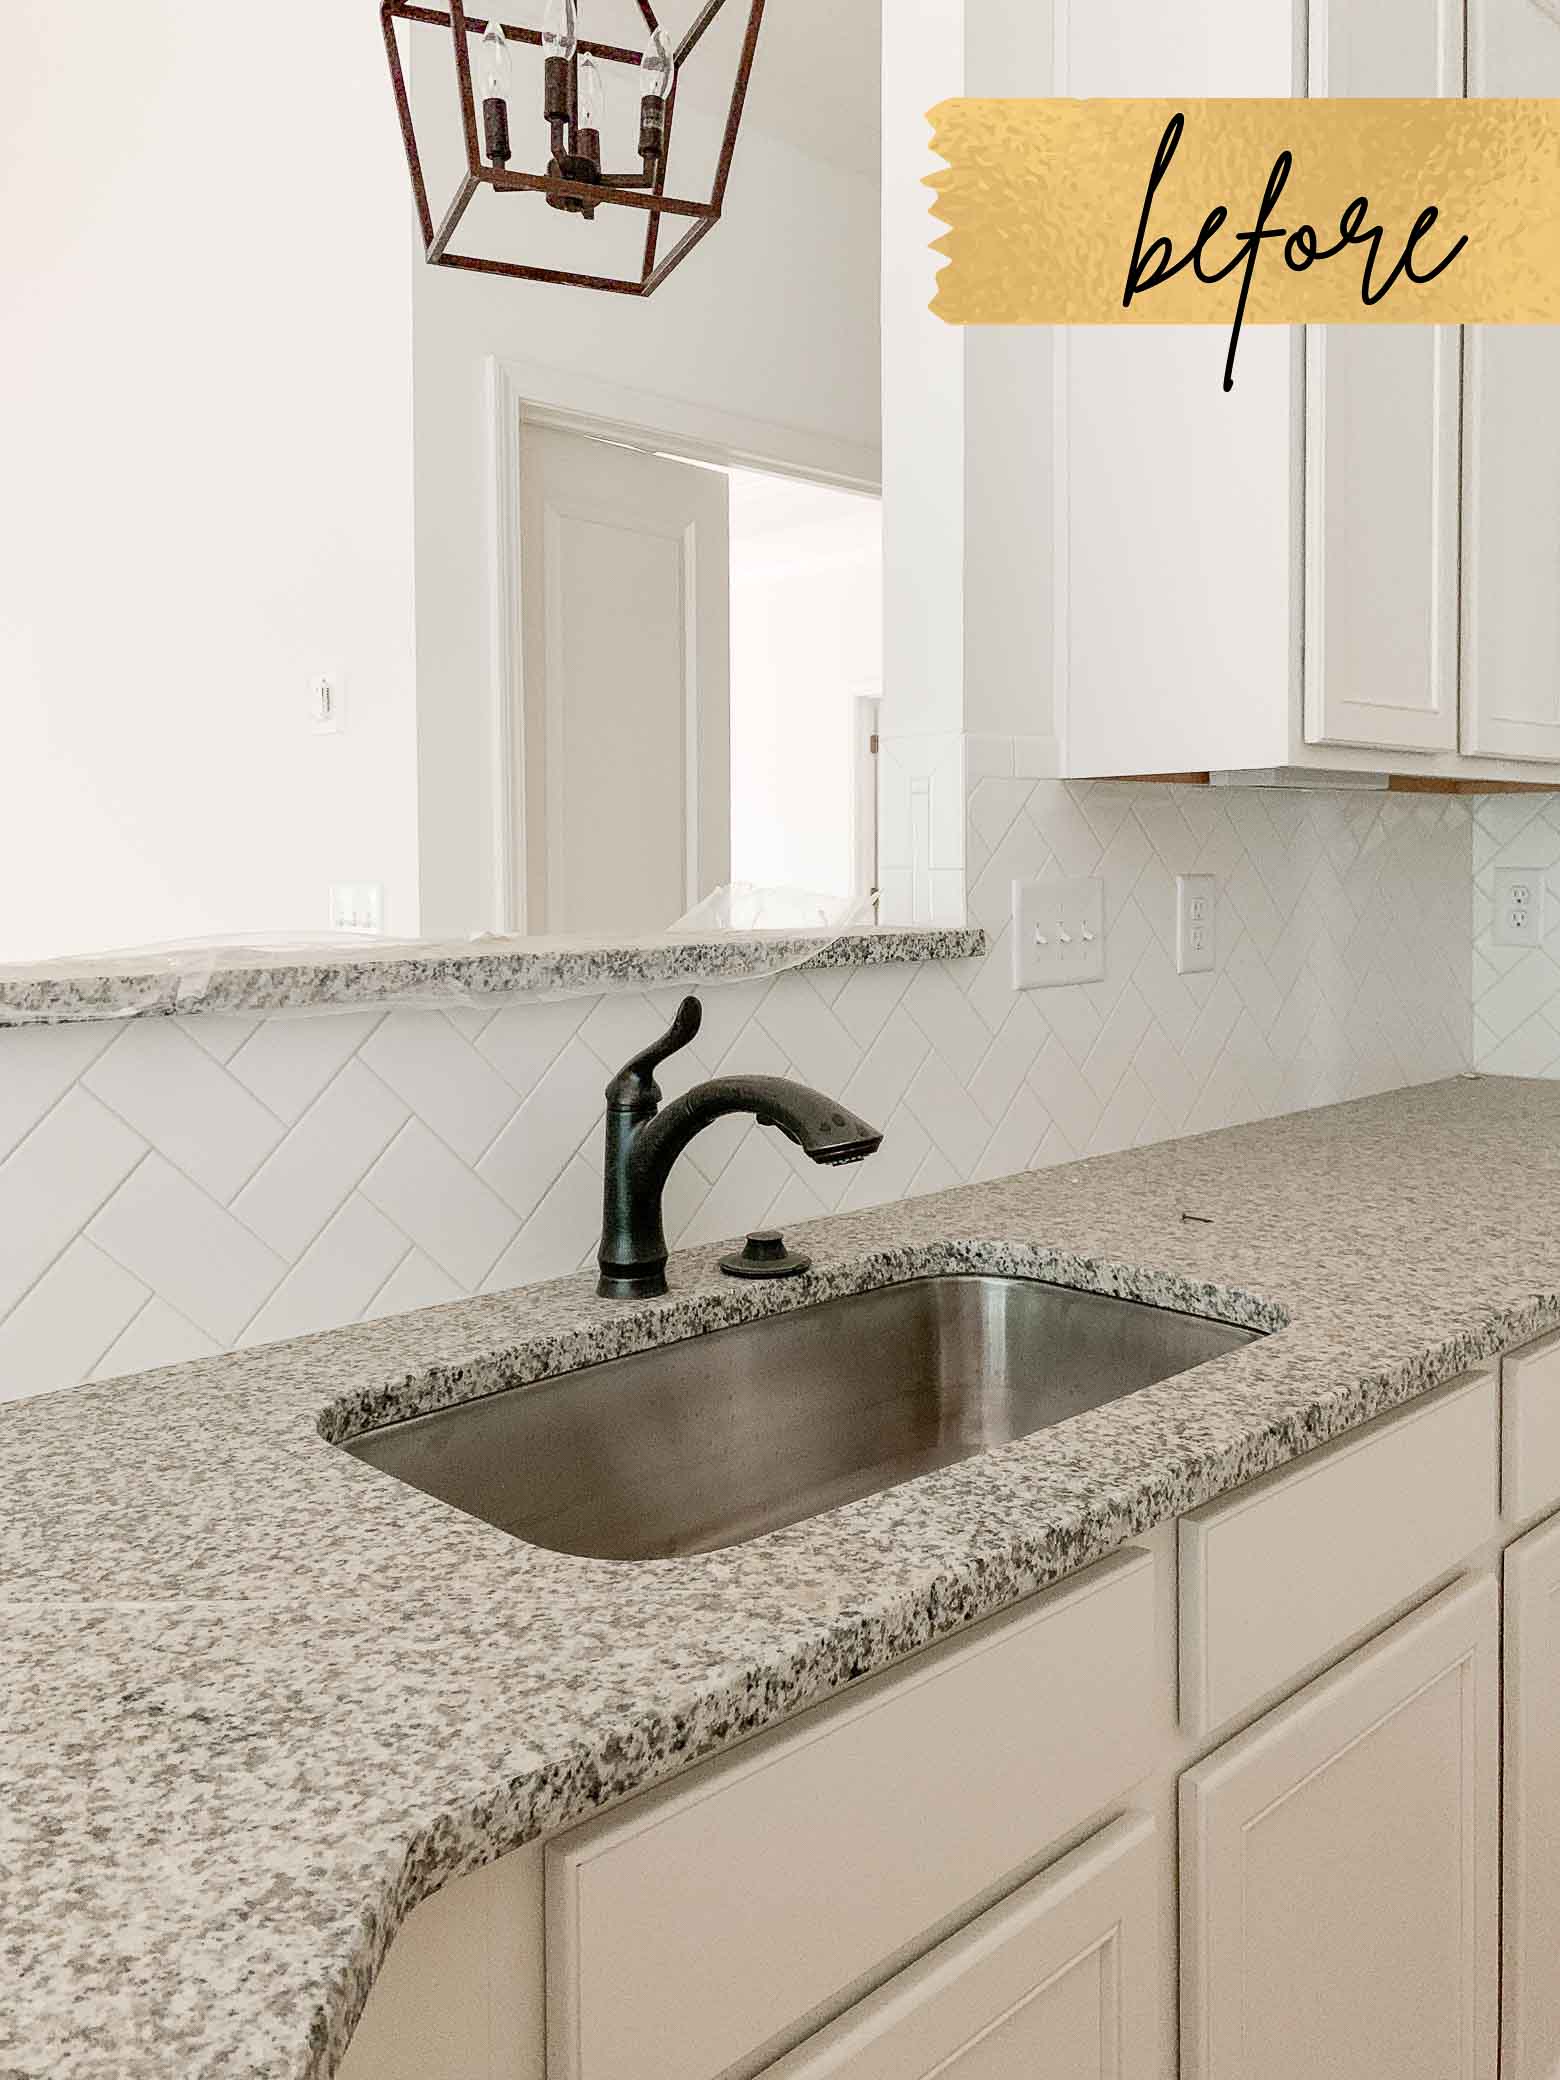
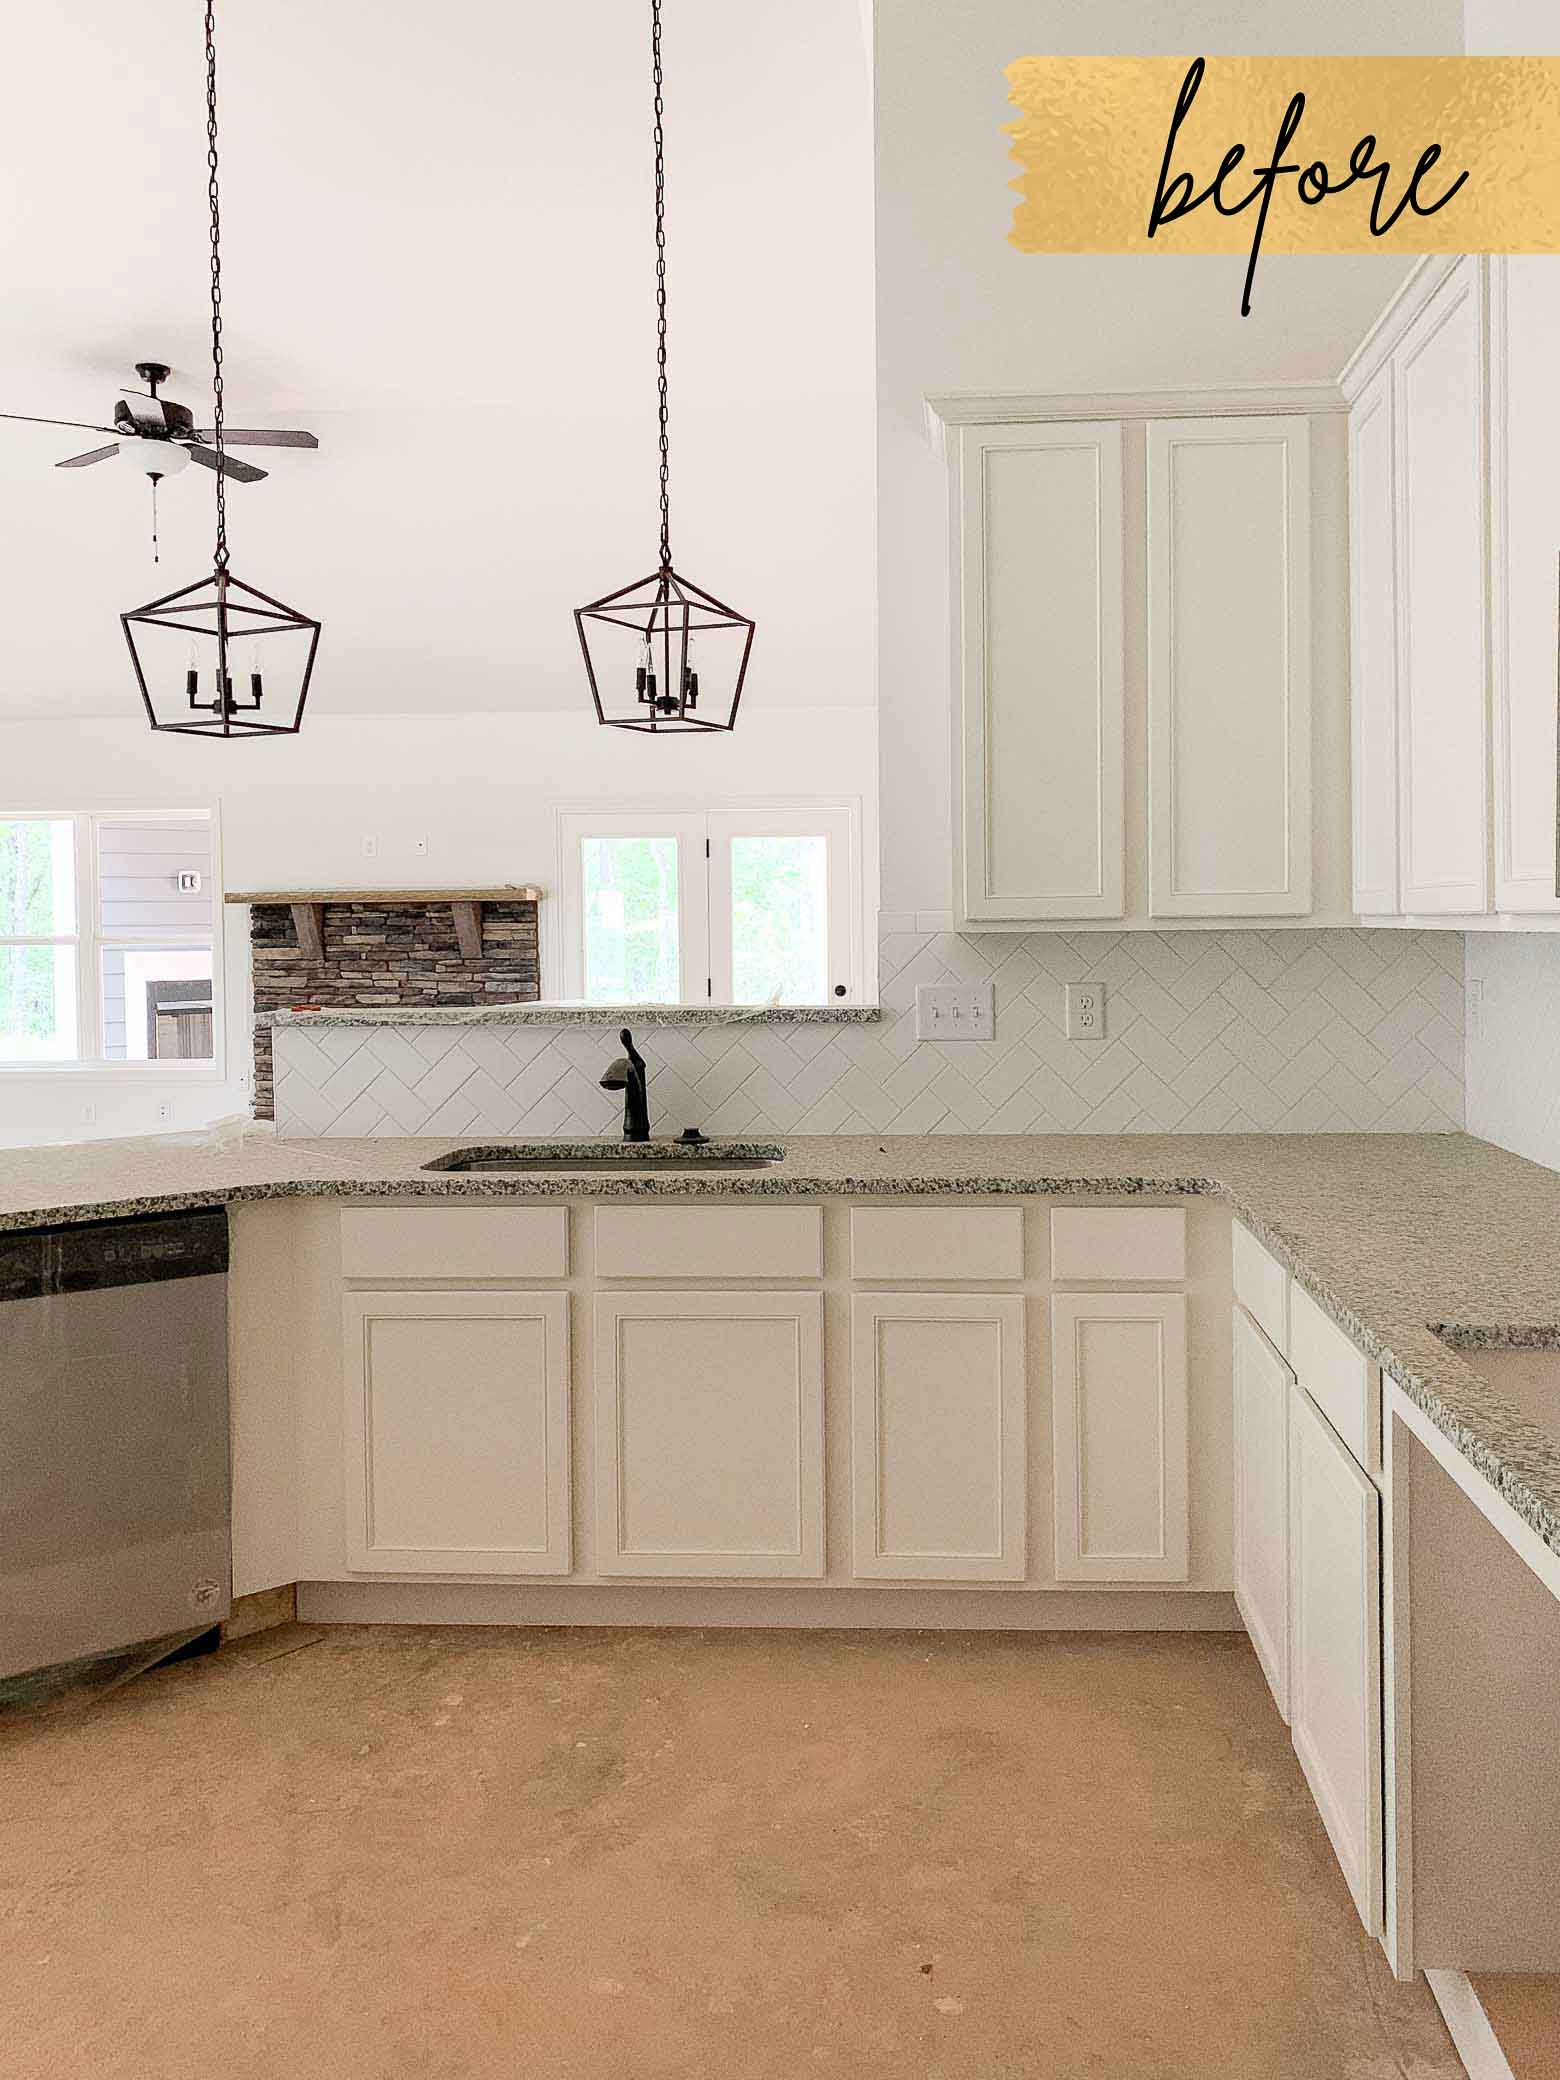
While she had to work within the confines of her builder’s strict customization policy, there were a few specifications she was able to make which I’ll share. But before we get any further, let’s take a look at what her kitchen looked like at closing…

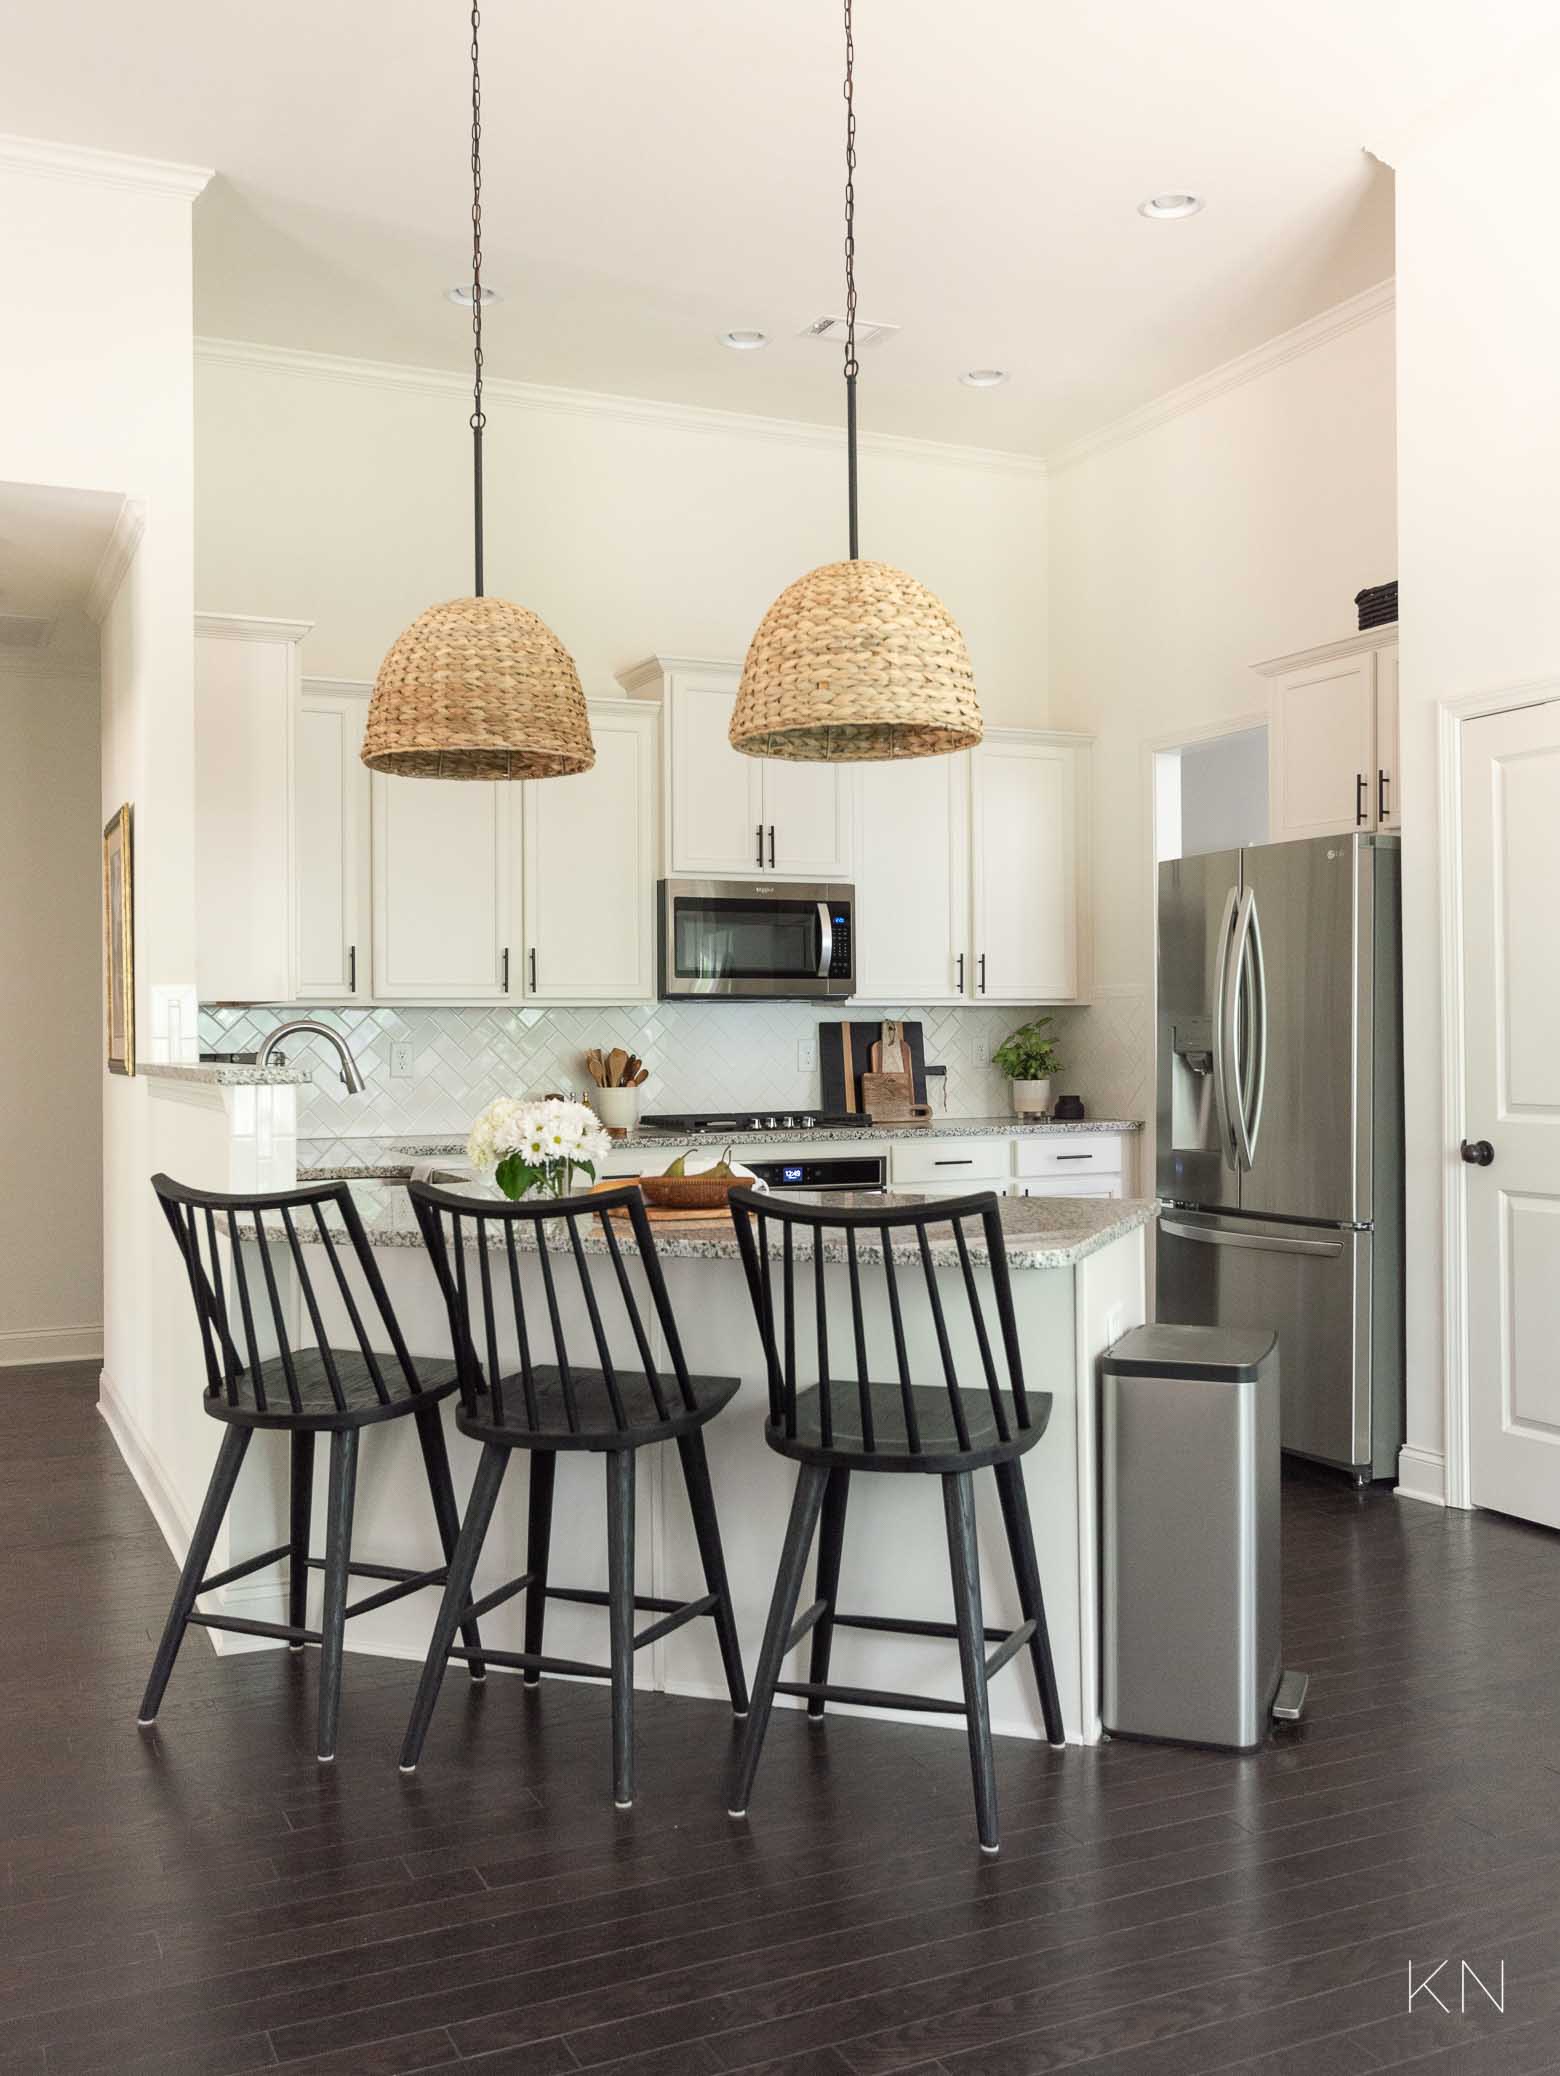
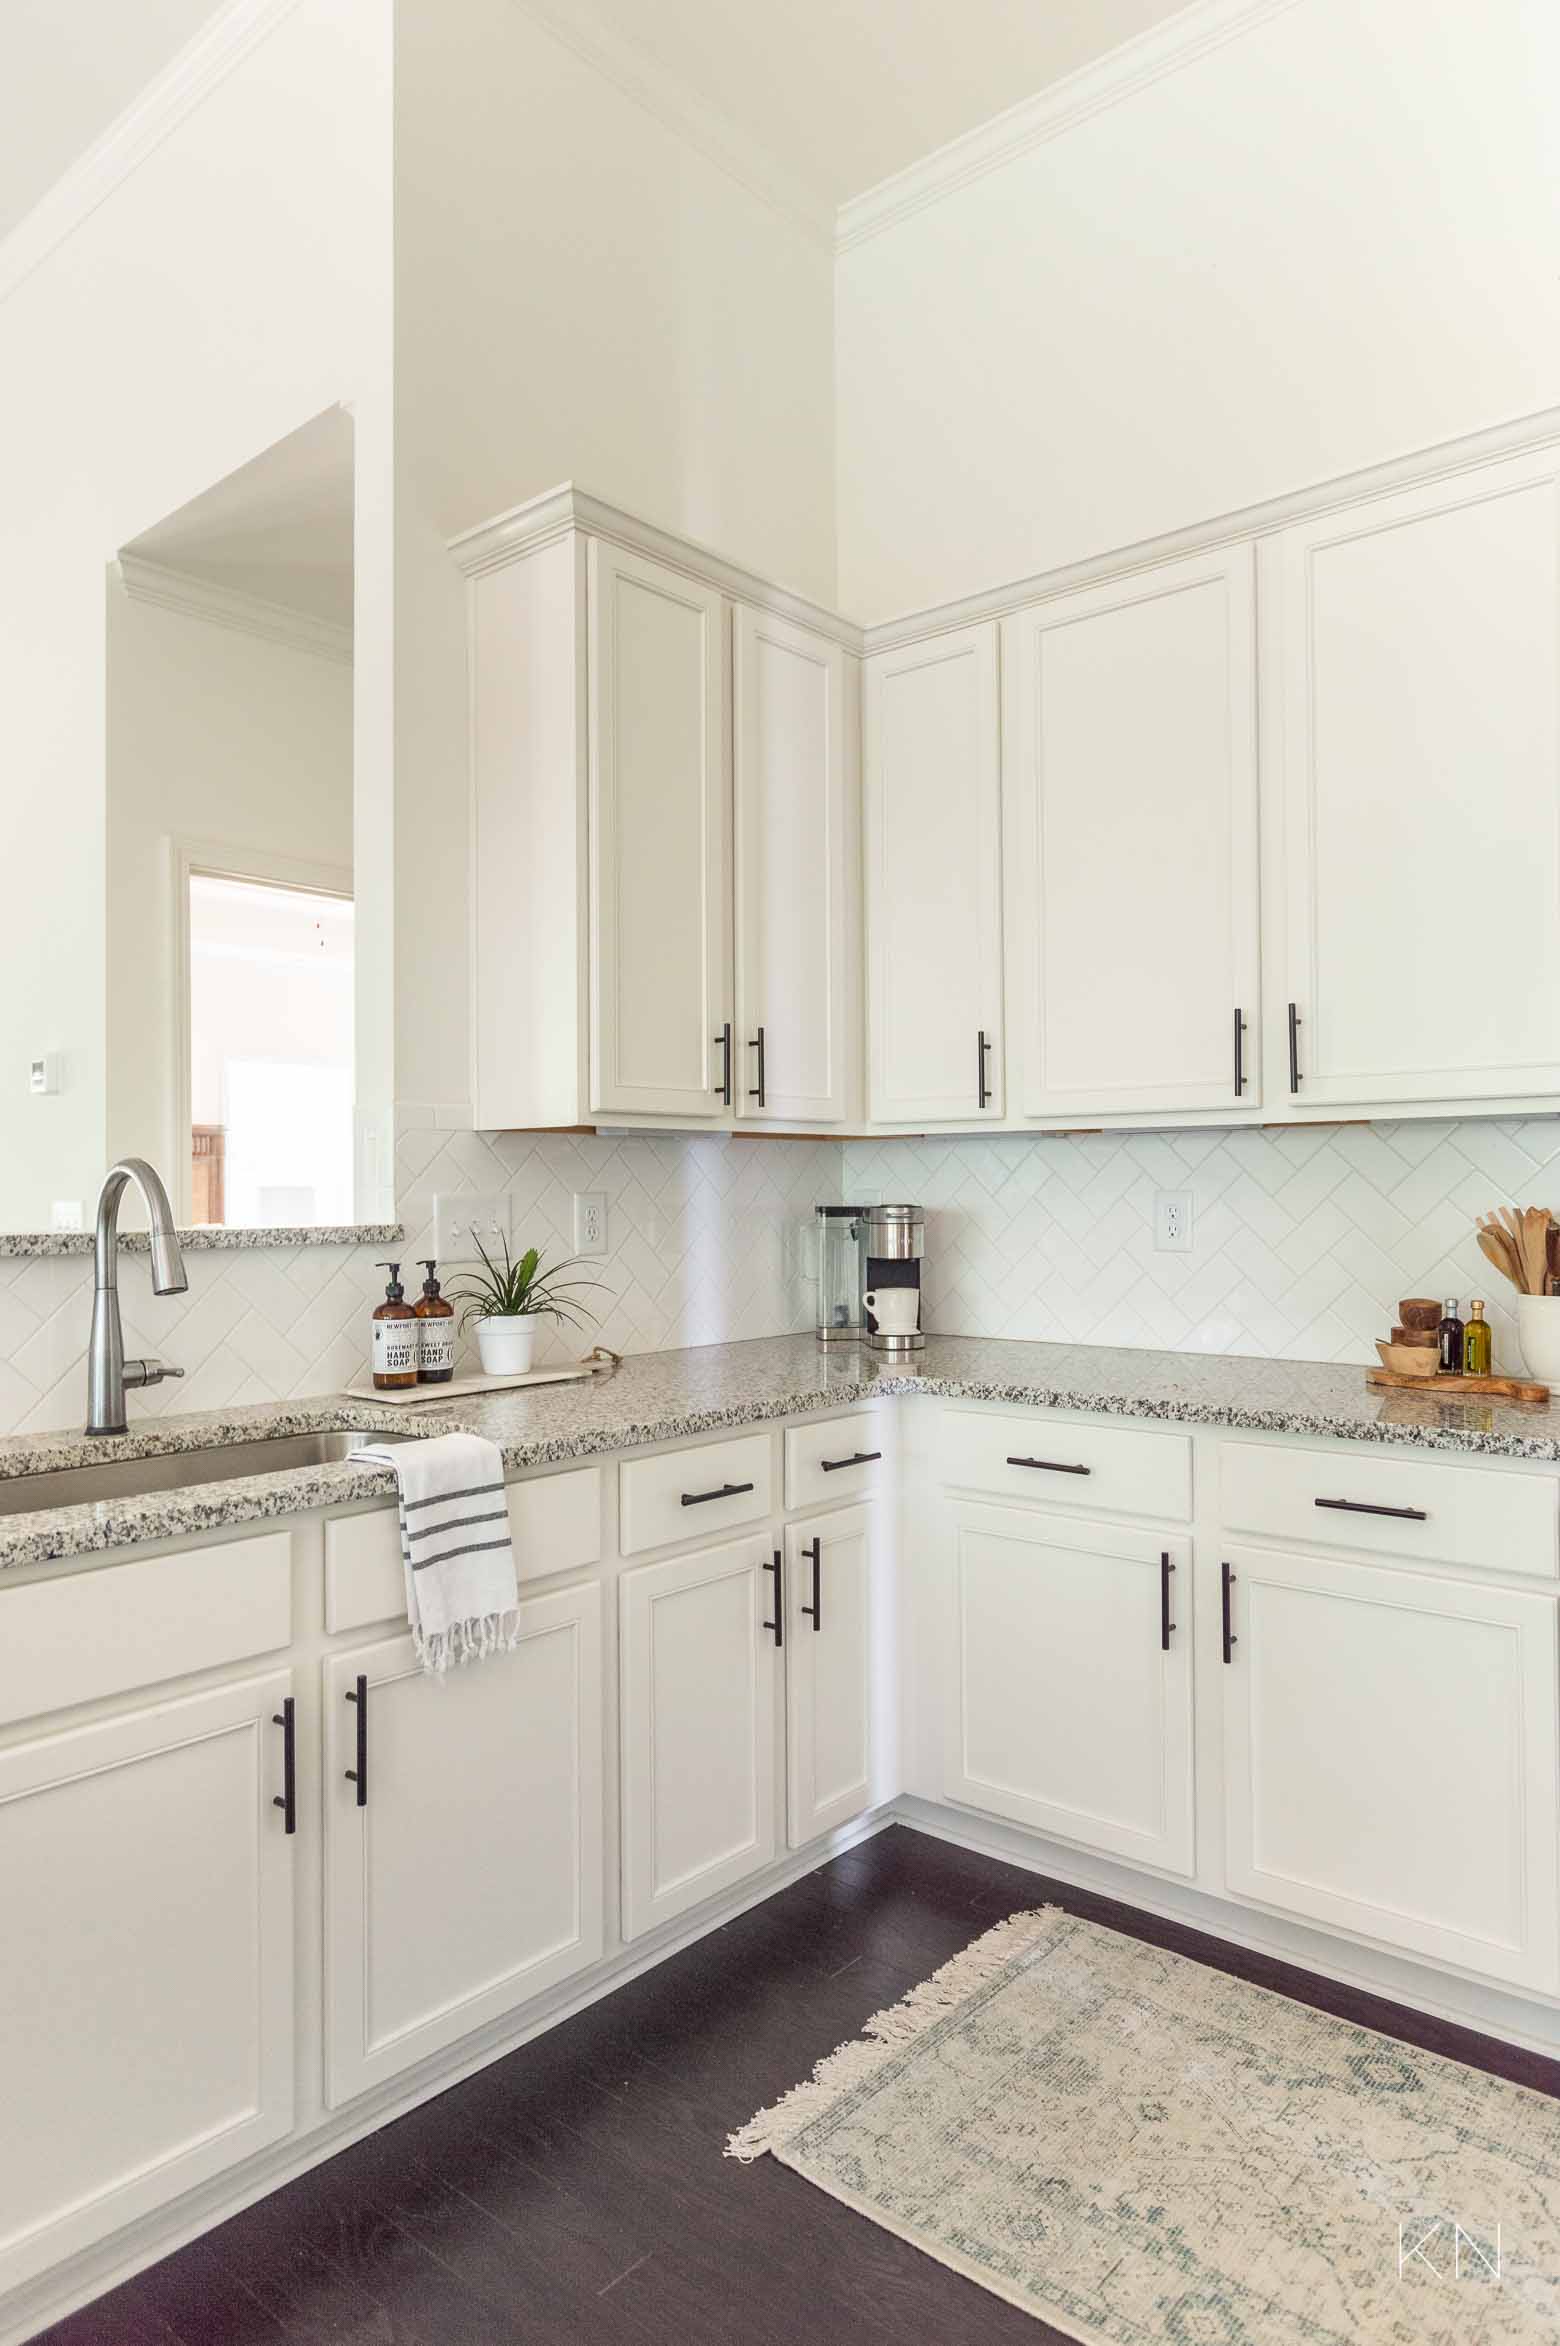
And with all the same bones, here’s what it looks like today.
We’ll go through the easy upgrades post-closing in just a bit, but first, let’s chat about builder upgrades she was permitted to and did choose to make with her builder.
Builder Kitchen Upgrades: The Considerations
Even though her cosmetic options were limited, there were some functional adjustments she was able to make during construction that made sense.
- While they wouldn’t omit outlets, they would allow outlet additions. She actually has two pantries — one larger just through the doorway to the right but also a smaller one within the kitchen. Should she decide to dedicate a portion of that smaller pantry to a coffee station, or even house an appliance inside, she added an outlet on the small pantry wall about halfway up. There were other strategic places she added outlets in her home and maybe that needs to be a post all on its own?
- I mentioned cabinet height earlier — I believe she had to specify whether she wanted a standard lower height or upgrade with taller cabinets. With as tall as her ceilings are especially, she went for the taller cabinets.
- She added drawers pull-outs within several lower cabinets.
- She opted for soft close cabinets for a minimal cost.
- As I mentioned, I don’t even know what color “white” her cabinets are, but just having them “white” was an upgrade. Changing cabinet color isn’t a simple nor inexpensive change, so definitely try to do what you want with the builder.
- She added under cabinet lighting.
- Kind of random and while she couldn’t omit outlets, they did allow her to omit the phone jack that was supposed to be included — right smack dab in the middle of her backsplash.
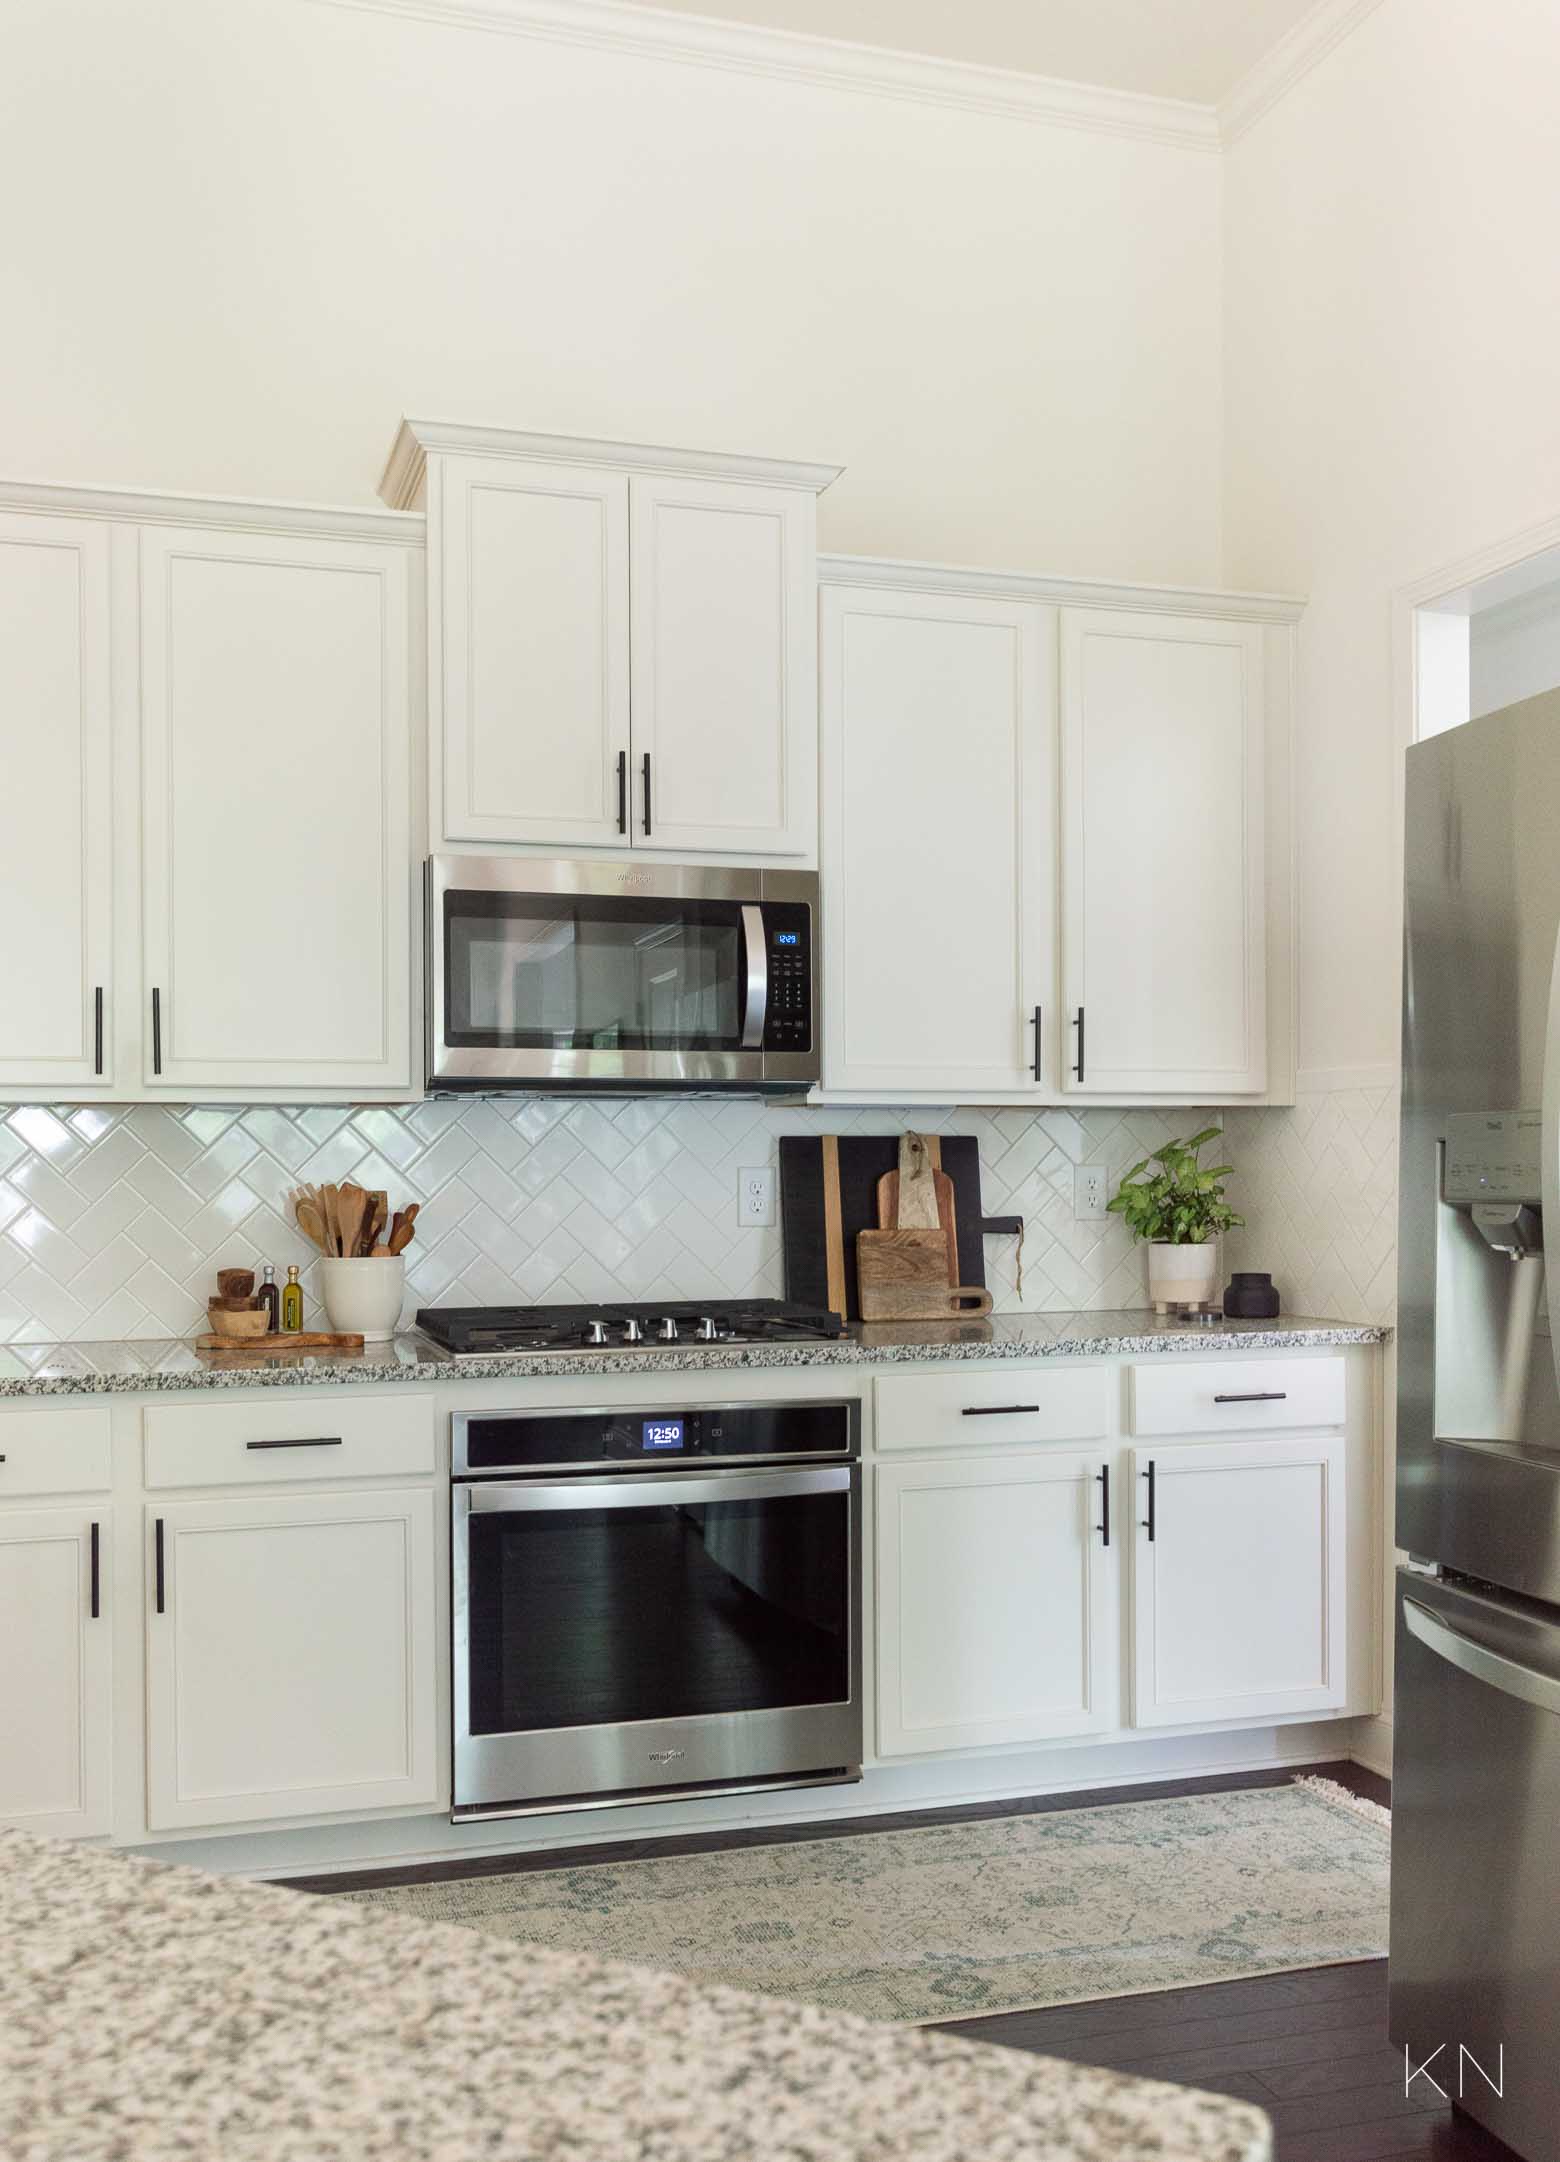
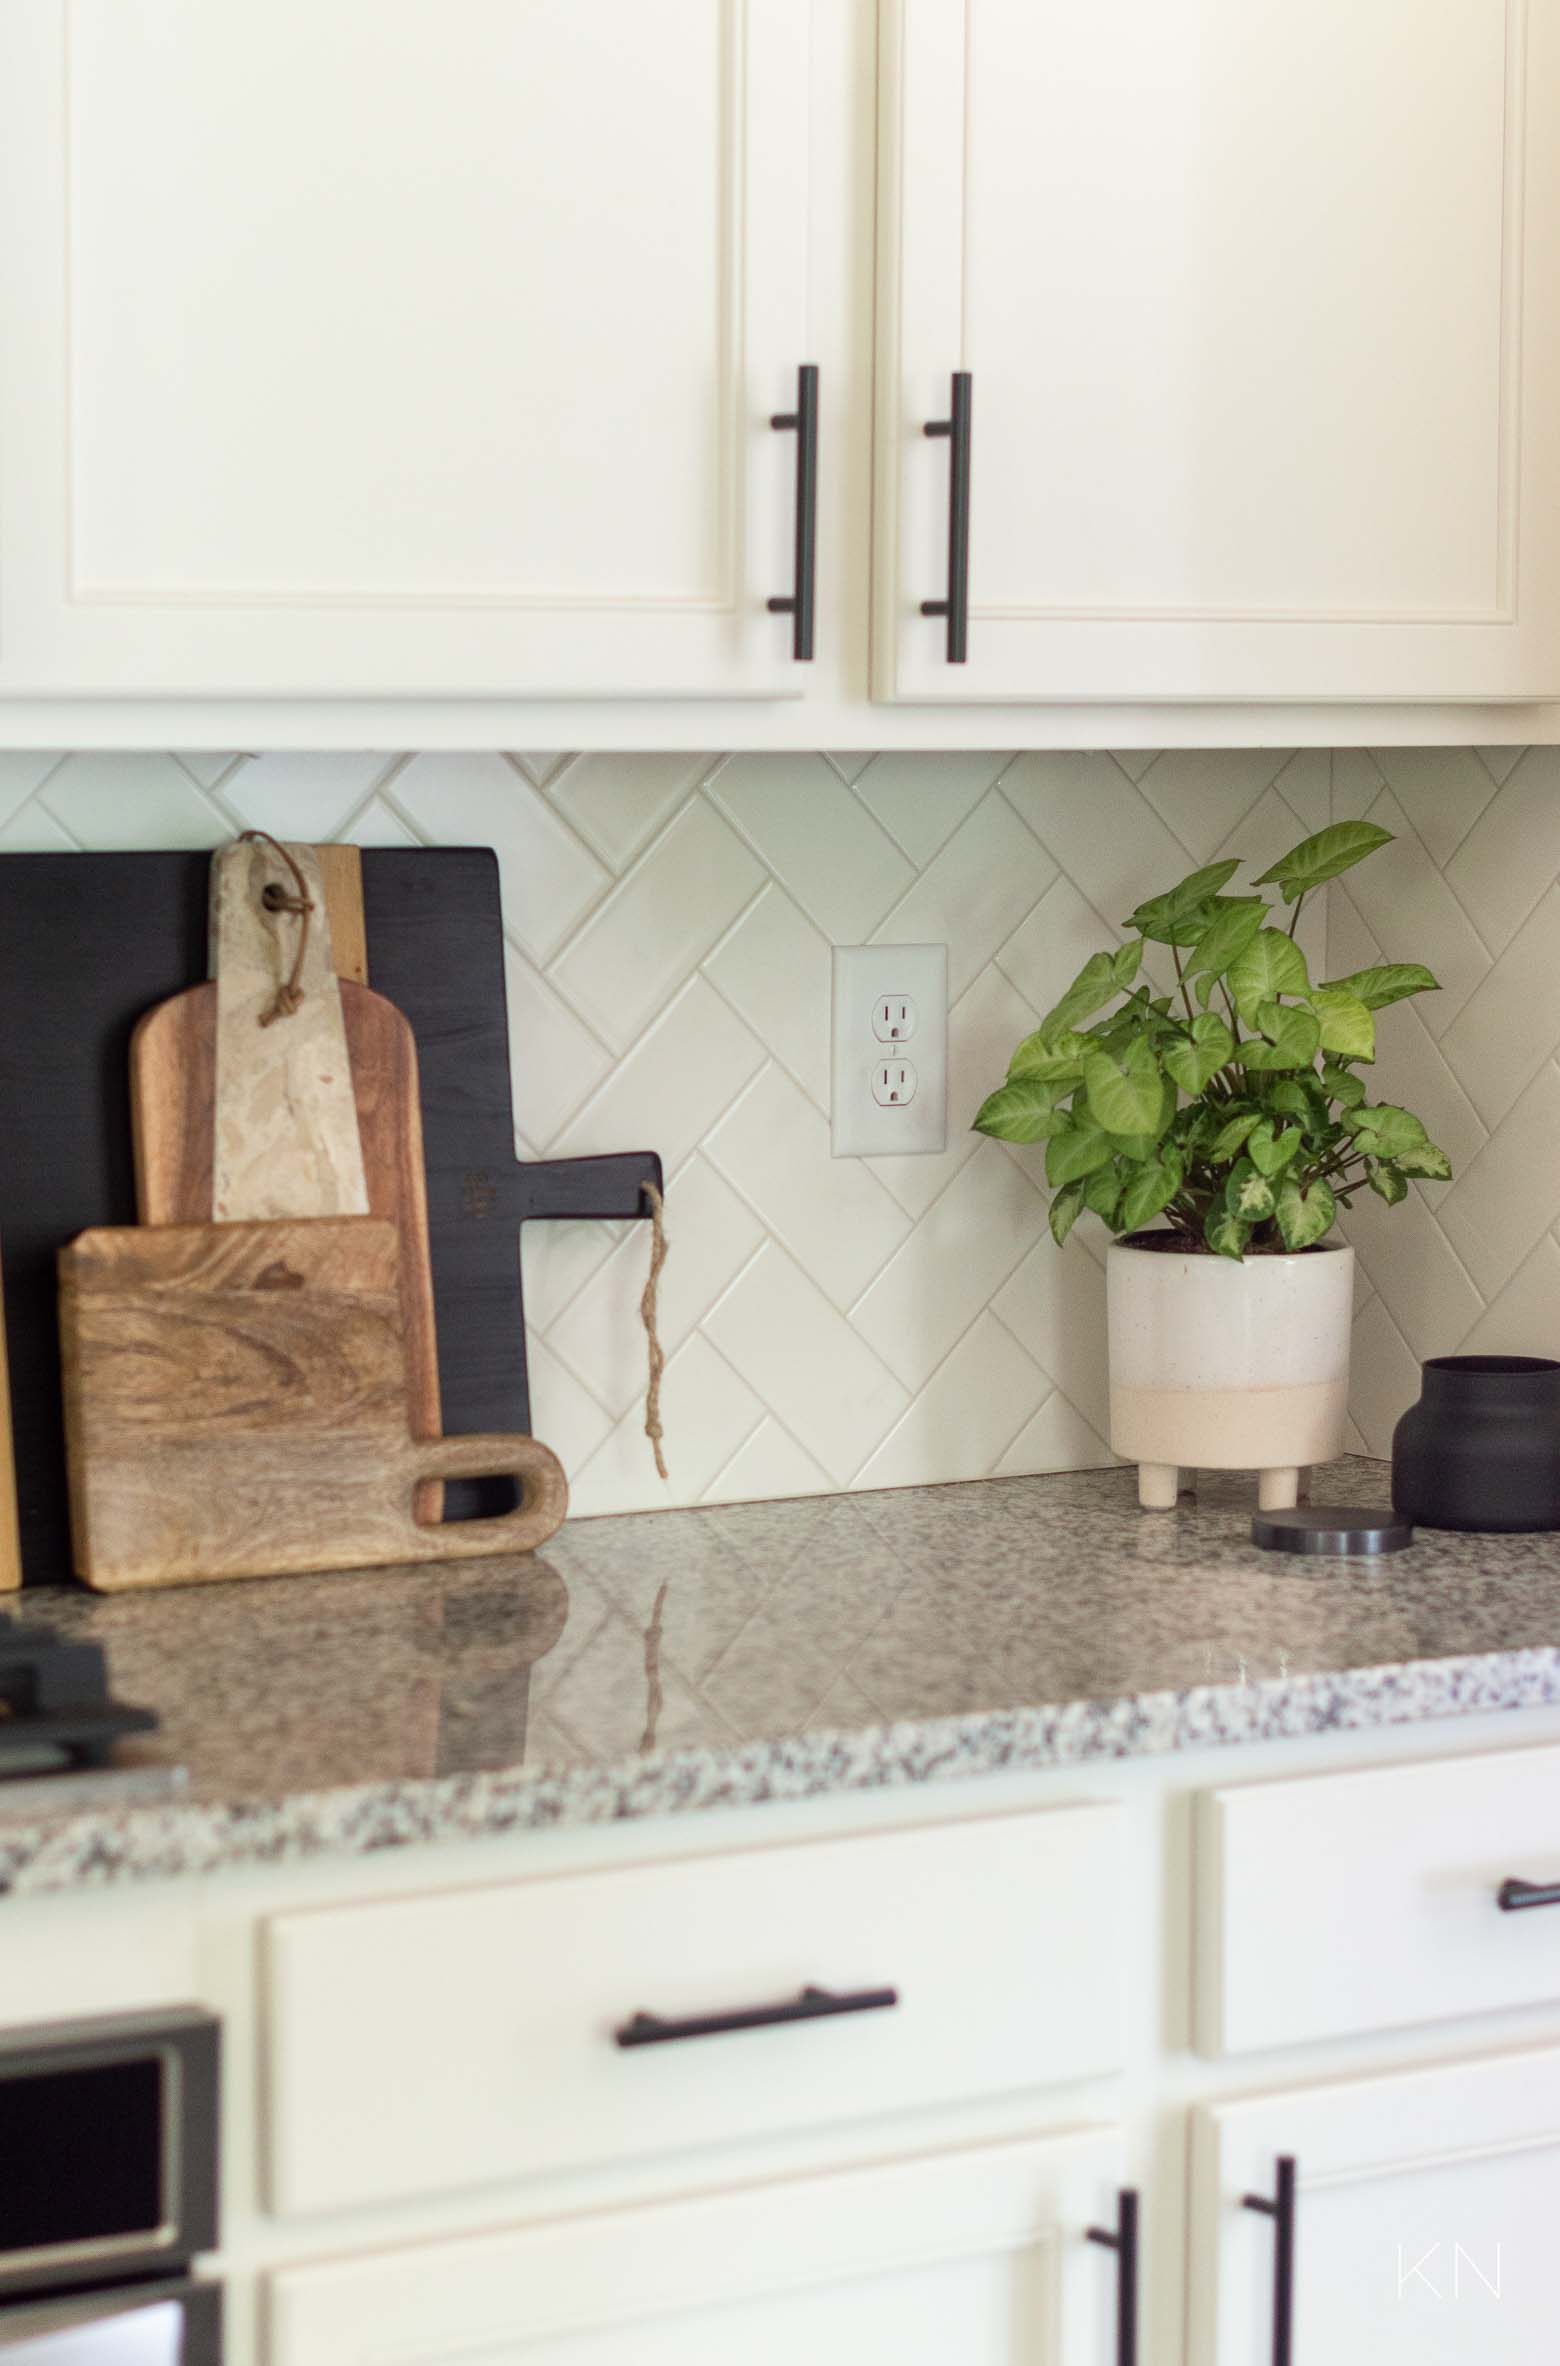
- With only limited tile options, she went with a classic white subway tile. But, they did agree to laying it in a herringbone pattern. Just enough to zhoosh it up!
Sources: Runner | Black Cheese Board | Marble Acacia Cheese Board | Olive Wood Cheese Board | Olive Wood Salt Keeper | Volcano Candle | Cabinet Pulls
 Sources: Black Cheese Board | Marble Acacia Cheese Board | Volcano Candle | Cabinet Pulls
A lot of builder “upgrades” come at a premium cost addition. Yes, there may be some items you opt for to simply not have to worry about them later, but seriously consider saving where you can in any projects you’re willing to take on at a later date.
Builder Grade Kitchen Upgrades
Options and costs will vary from builder to builder, but if you aren’t happy with your selections from the builder or the costs associated with upgrading to something else, wait and allow the builder to install the most basic included items. Most will also not install anything you’ve purchased on your own. It’s worth the ask but the answer will likely be “no”. Let’s chat about the three easy changes my mom’s made in her kitchen since closing.
1. Install Your Faucet
When I was building, there was a basic faucet and then faucets that were considered “upgrades”. But, the cost for an upgraded faucet wasn’t just the difference between faucet A. and faucet B. — it was substantially more. With my mom’s house, there literally wasn’t an option — except for color. But, you don’t choose the color of the faucet you want — the color is whatever “finish” color you choose for the whole house which would include door knobs, cabinet pulls, lighting finishes, etc. So, whether you don’t want to pay a premium to the builder for a better faucet or if you don’t have a choice, changing your faucet is an incredibly easy project for someone skilled in plumbing. It also can make a big difference aesthetically. Here’s what her builder faucet looked like…
And this was after she installed THIS smart Delta faucet. She actually doesn’t have the Google voice assistant (also works with Amazon Echo) activated, but the single touch to turn it on and off is awesome. With the voice assistant, you can command the faucet to fill a certain measurement of water, or even program it to know how much to fill a water bottle, dog bowl, coffee maker, etc.
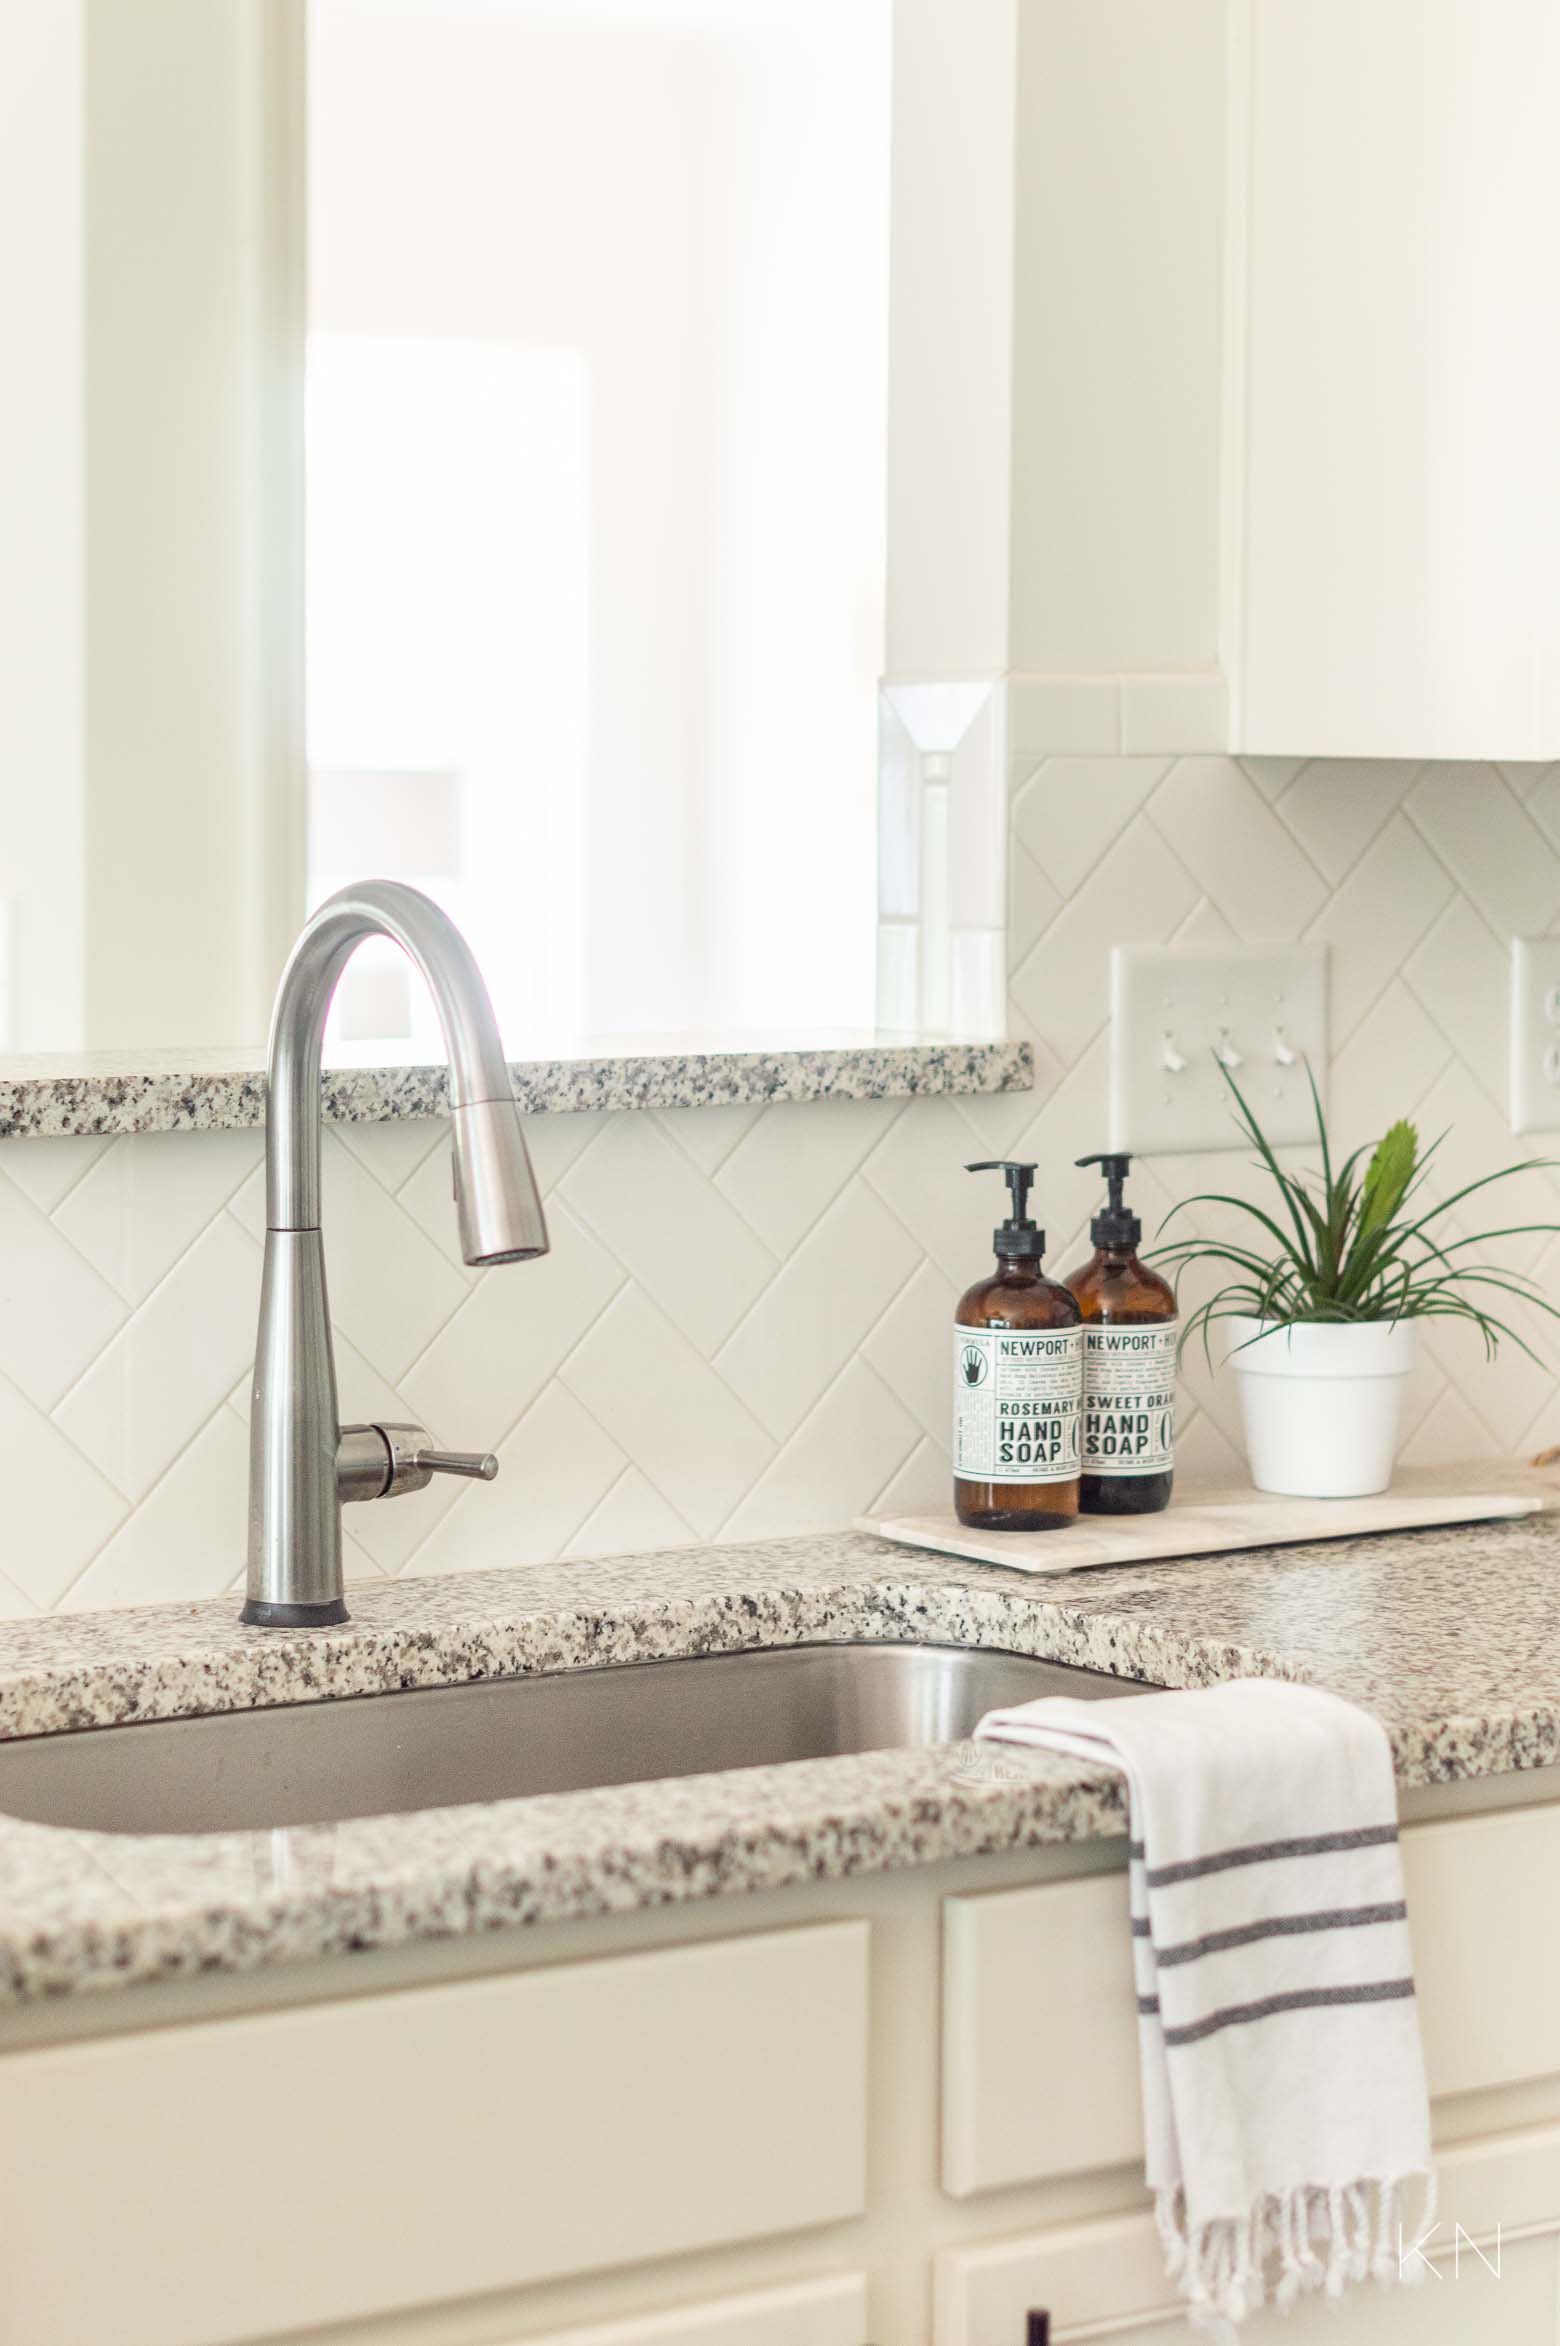
Sources: Faucet | Turkish Hand Towel
Bottom line, unless you love other options your builder has when it comes to sink faucets, shower faucets, or any plumbing fixtures for that matter, wait and replace them on your own.
Sources: Faucet | Turkish Hand Towel | Cabinet Pulls
2. Choose Your Lighting
In the “before” photo above, did you notice that there were actually three awkwardly positioned lights? I shared the below image just before my mom closed last year, but omitting the pendant on the far left wasn’t something the builder was willing to do. There were two lights not totally centered over the counter height bar, and then a random third pendant off to the far left. Dumb.
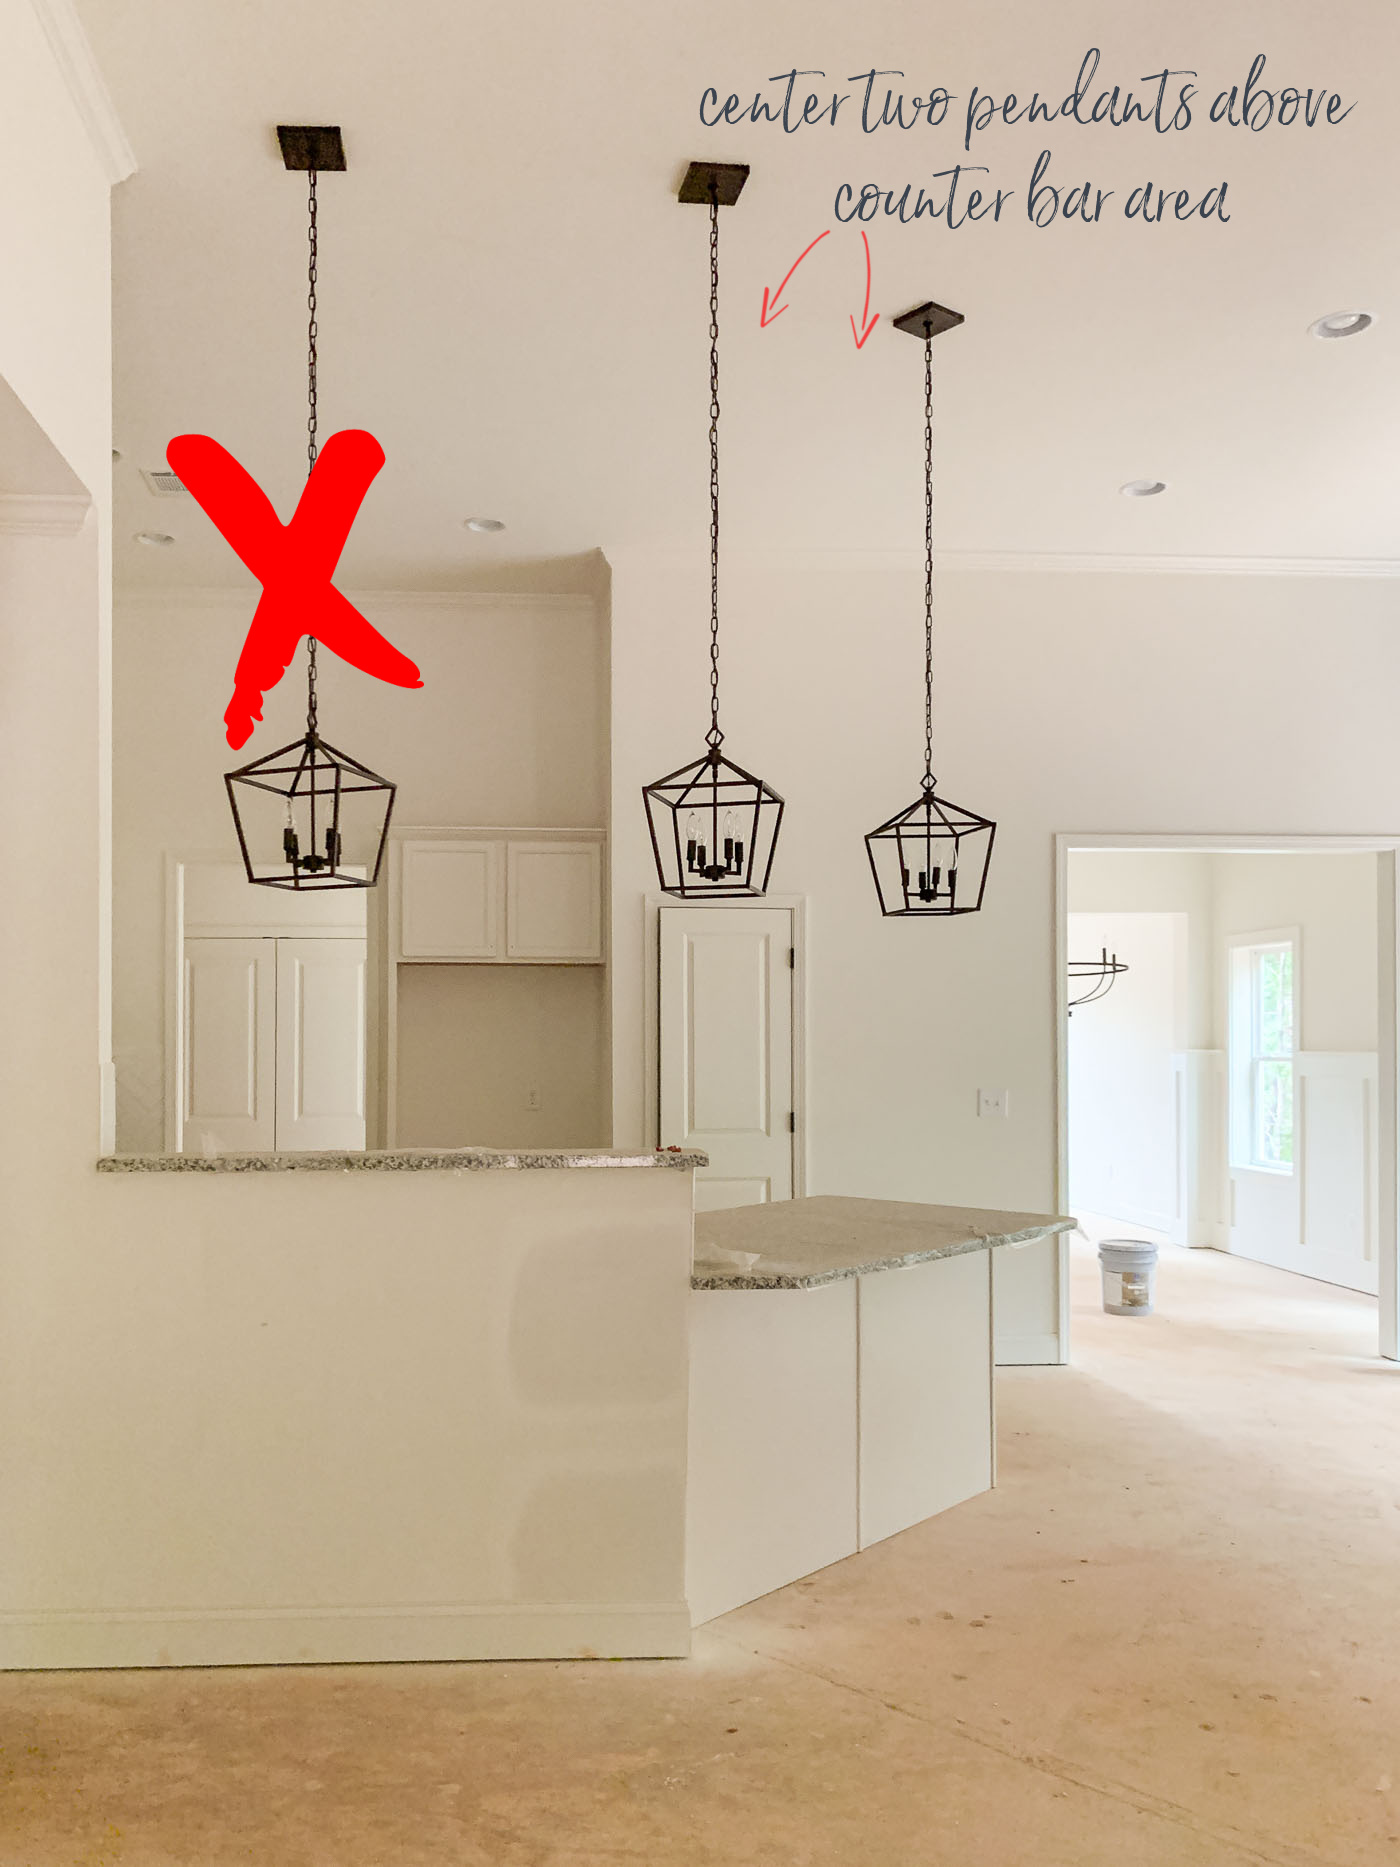
I haven’t seen this before, but it is rare should you actually need to change not just lighting but lighting placement. For her situation, one light had to be omitted and one of the two remaining pendants did have to be shifted; but even so, a skilled electrician/handyman should be able to take care of that. Again, just a weird issue hopefully none of you have but totally repairable should you find yourself in a similar circumstance 😉
Lighting is an incredibly personal preference and such an easy way to tie the room together. In this case, there was so much black and bronze metal happening everywhere against white cabinets and walls, it was a bit harsh and even a little cold. I like a nice clean iron lantern pendant as much as the next person but it just wasn’t right with everything else in the space. So, she changed then pendants to a water hyacinth basket style. We actually found these at Lowe’s for a crazy awesome deal — they are near twins to THIS basket pendant from Pottery Barn and about 1/5 of the price! I actually have a post on 16 awesome basket pendant lights — for a variety of styles — you can find HERE.

Sources: Counter Stools |Faucet | Turkish Hand Towel | Cabinet Pulls
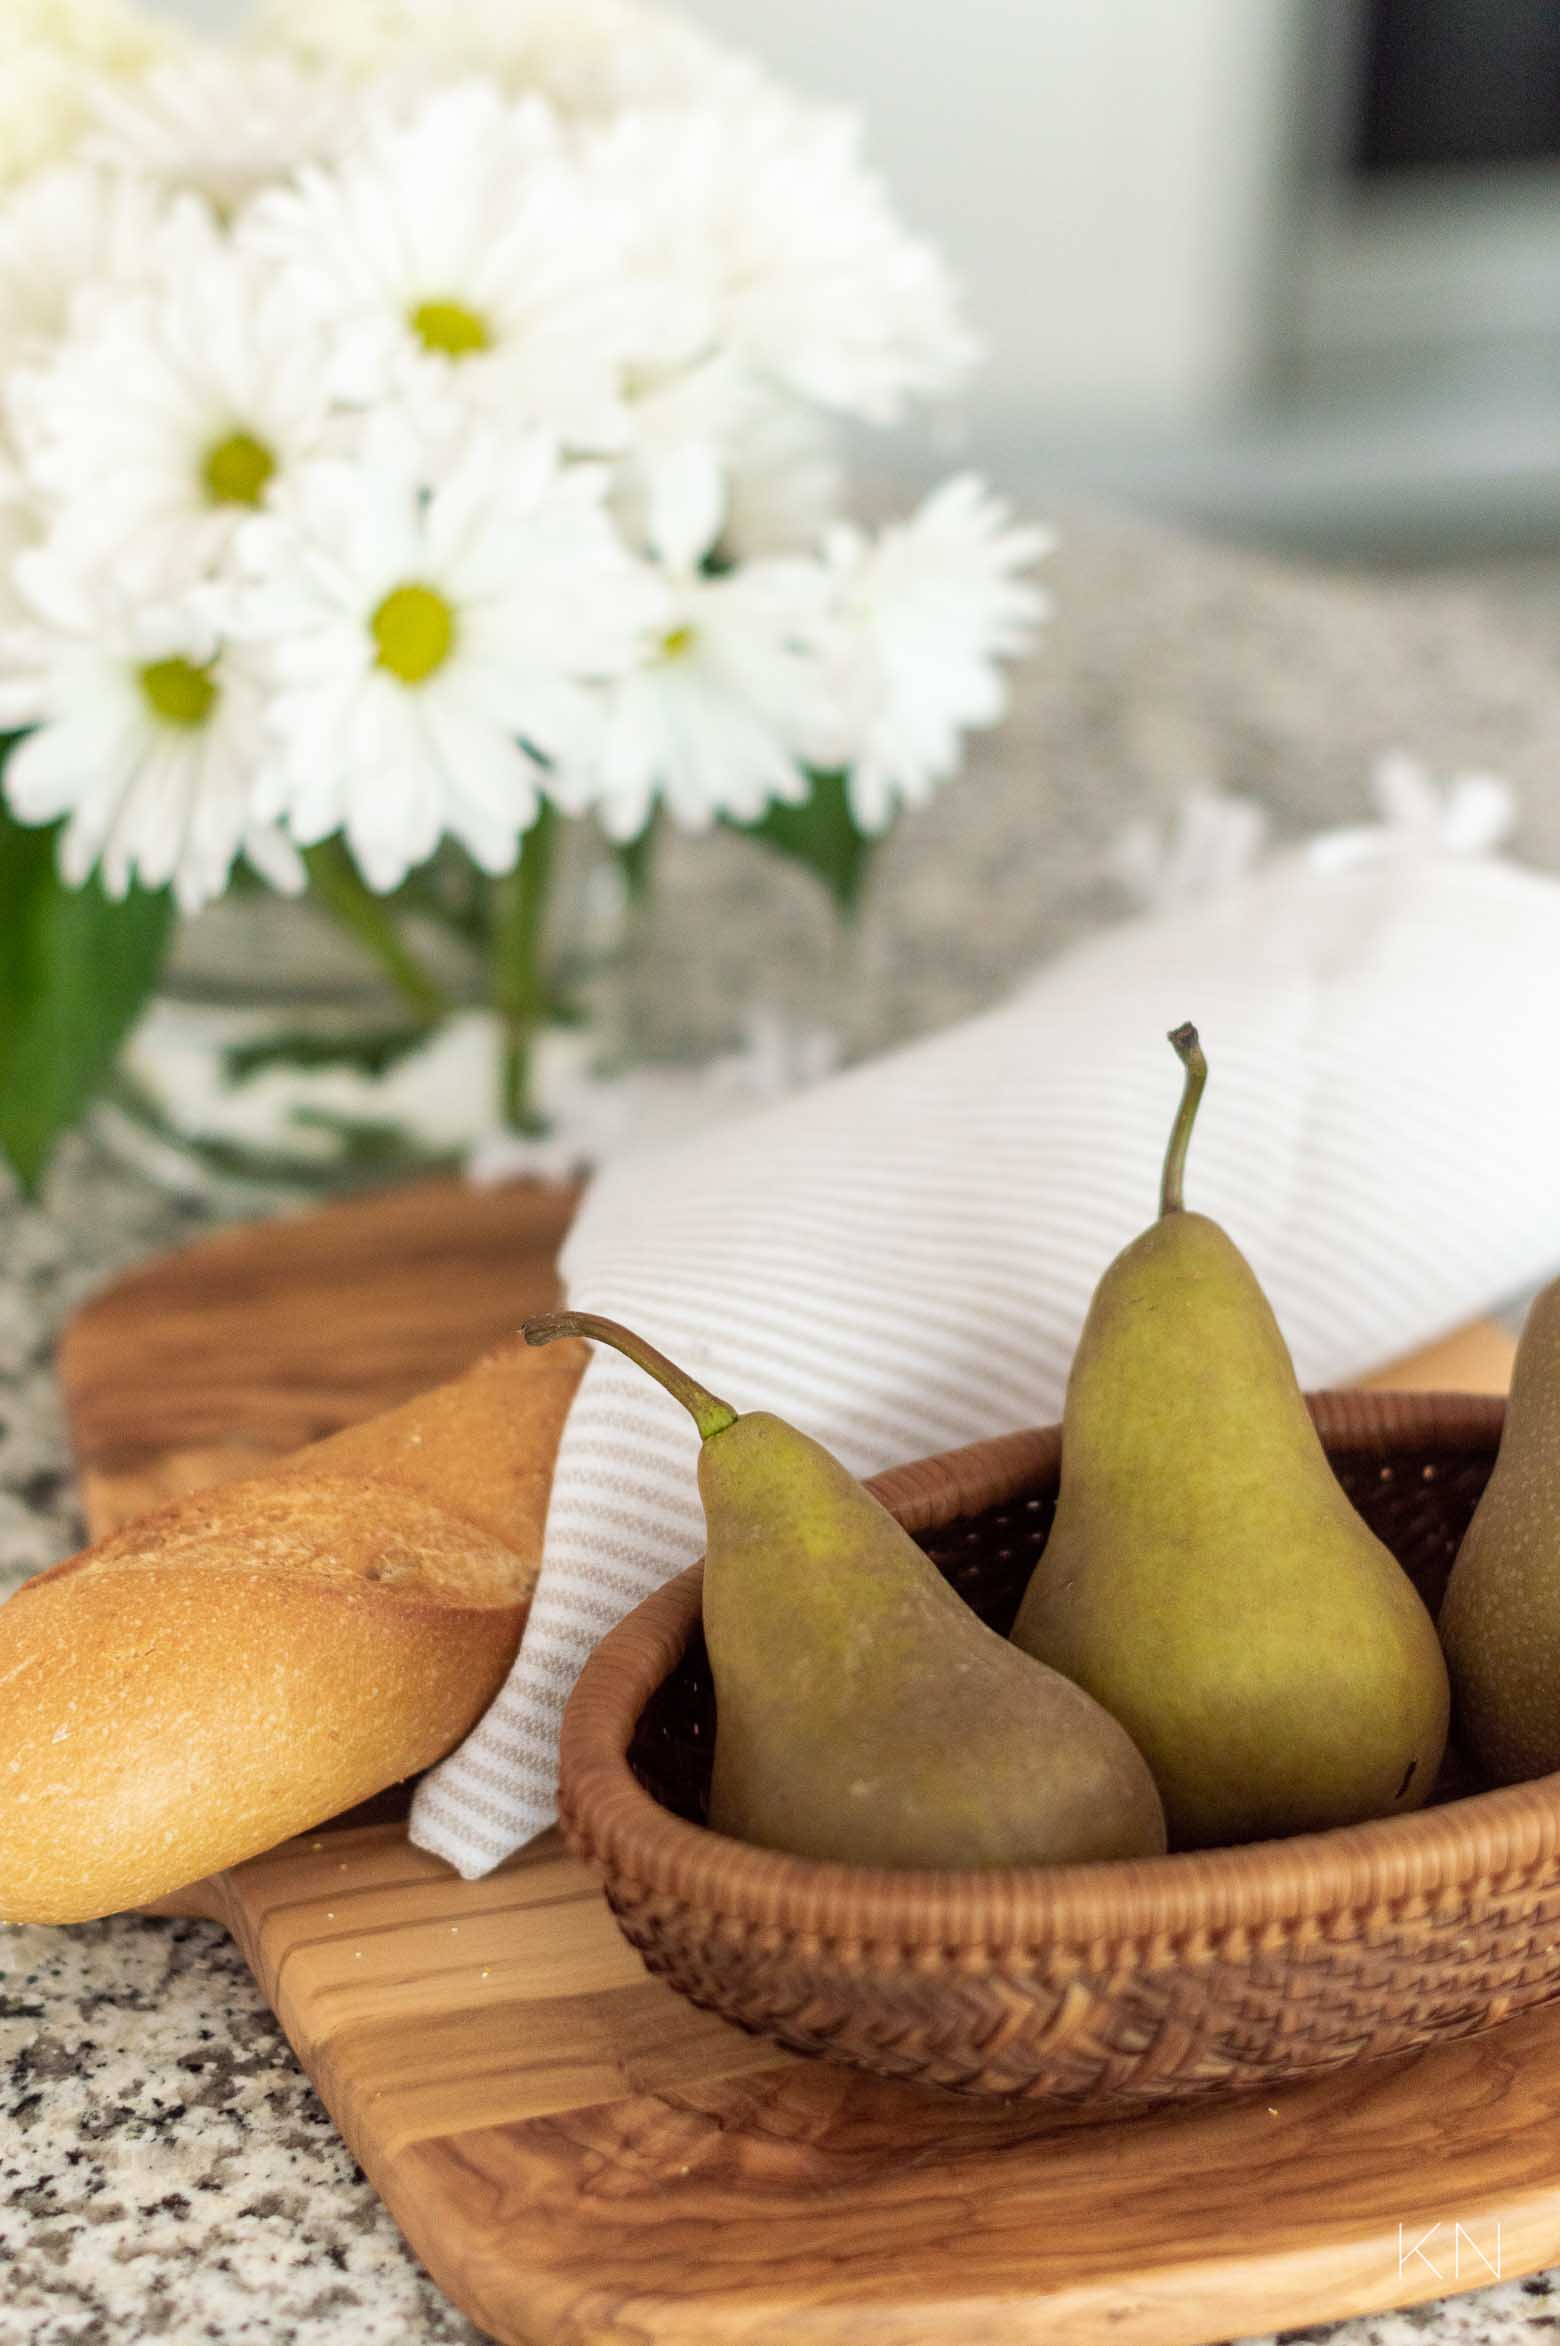
Along with the natural woven shade lights she subbed in, her mixed woods she has on display and other accessories help to warm the space.
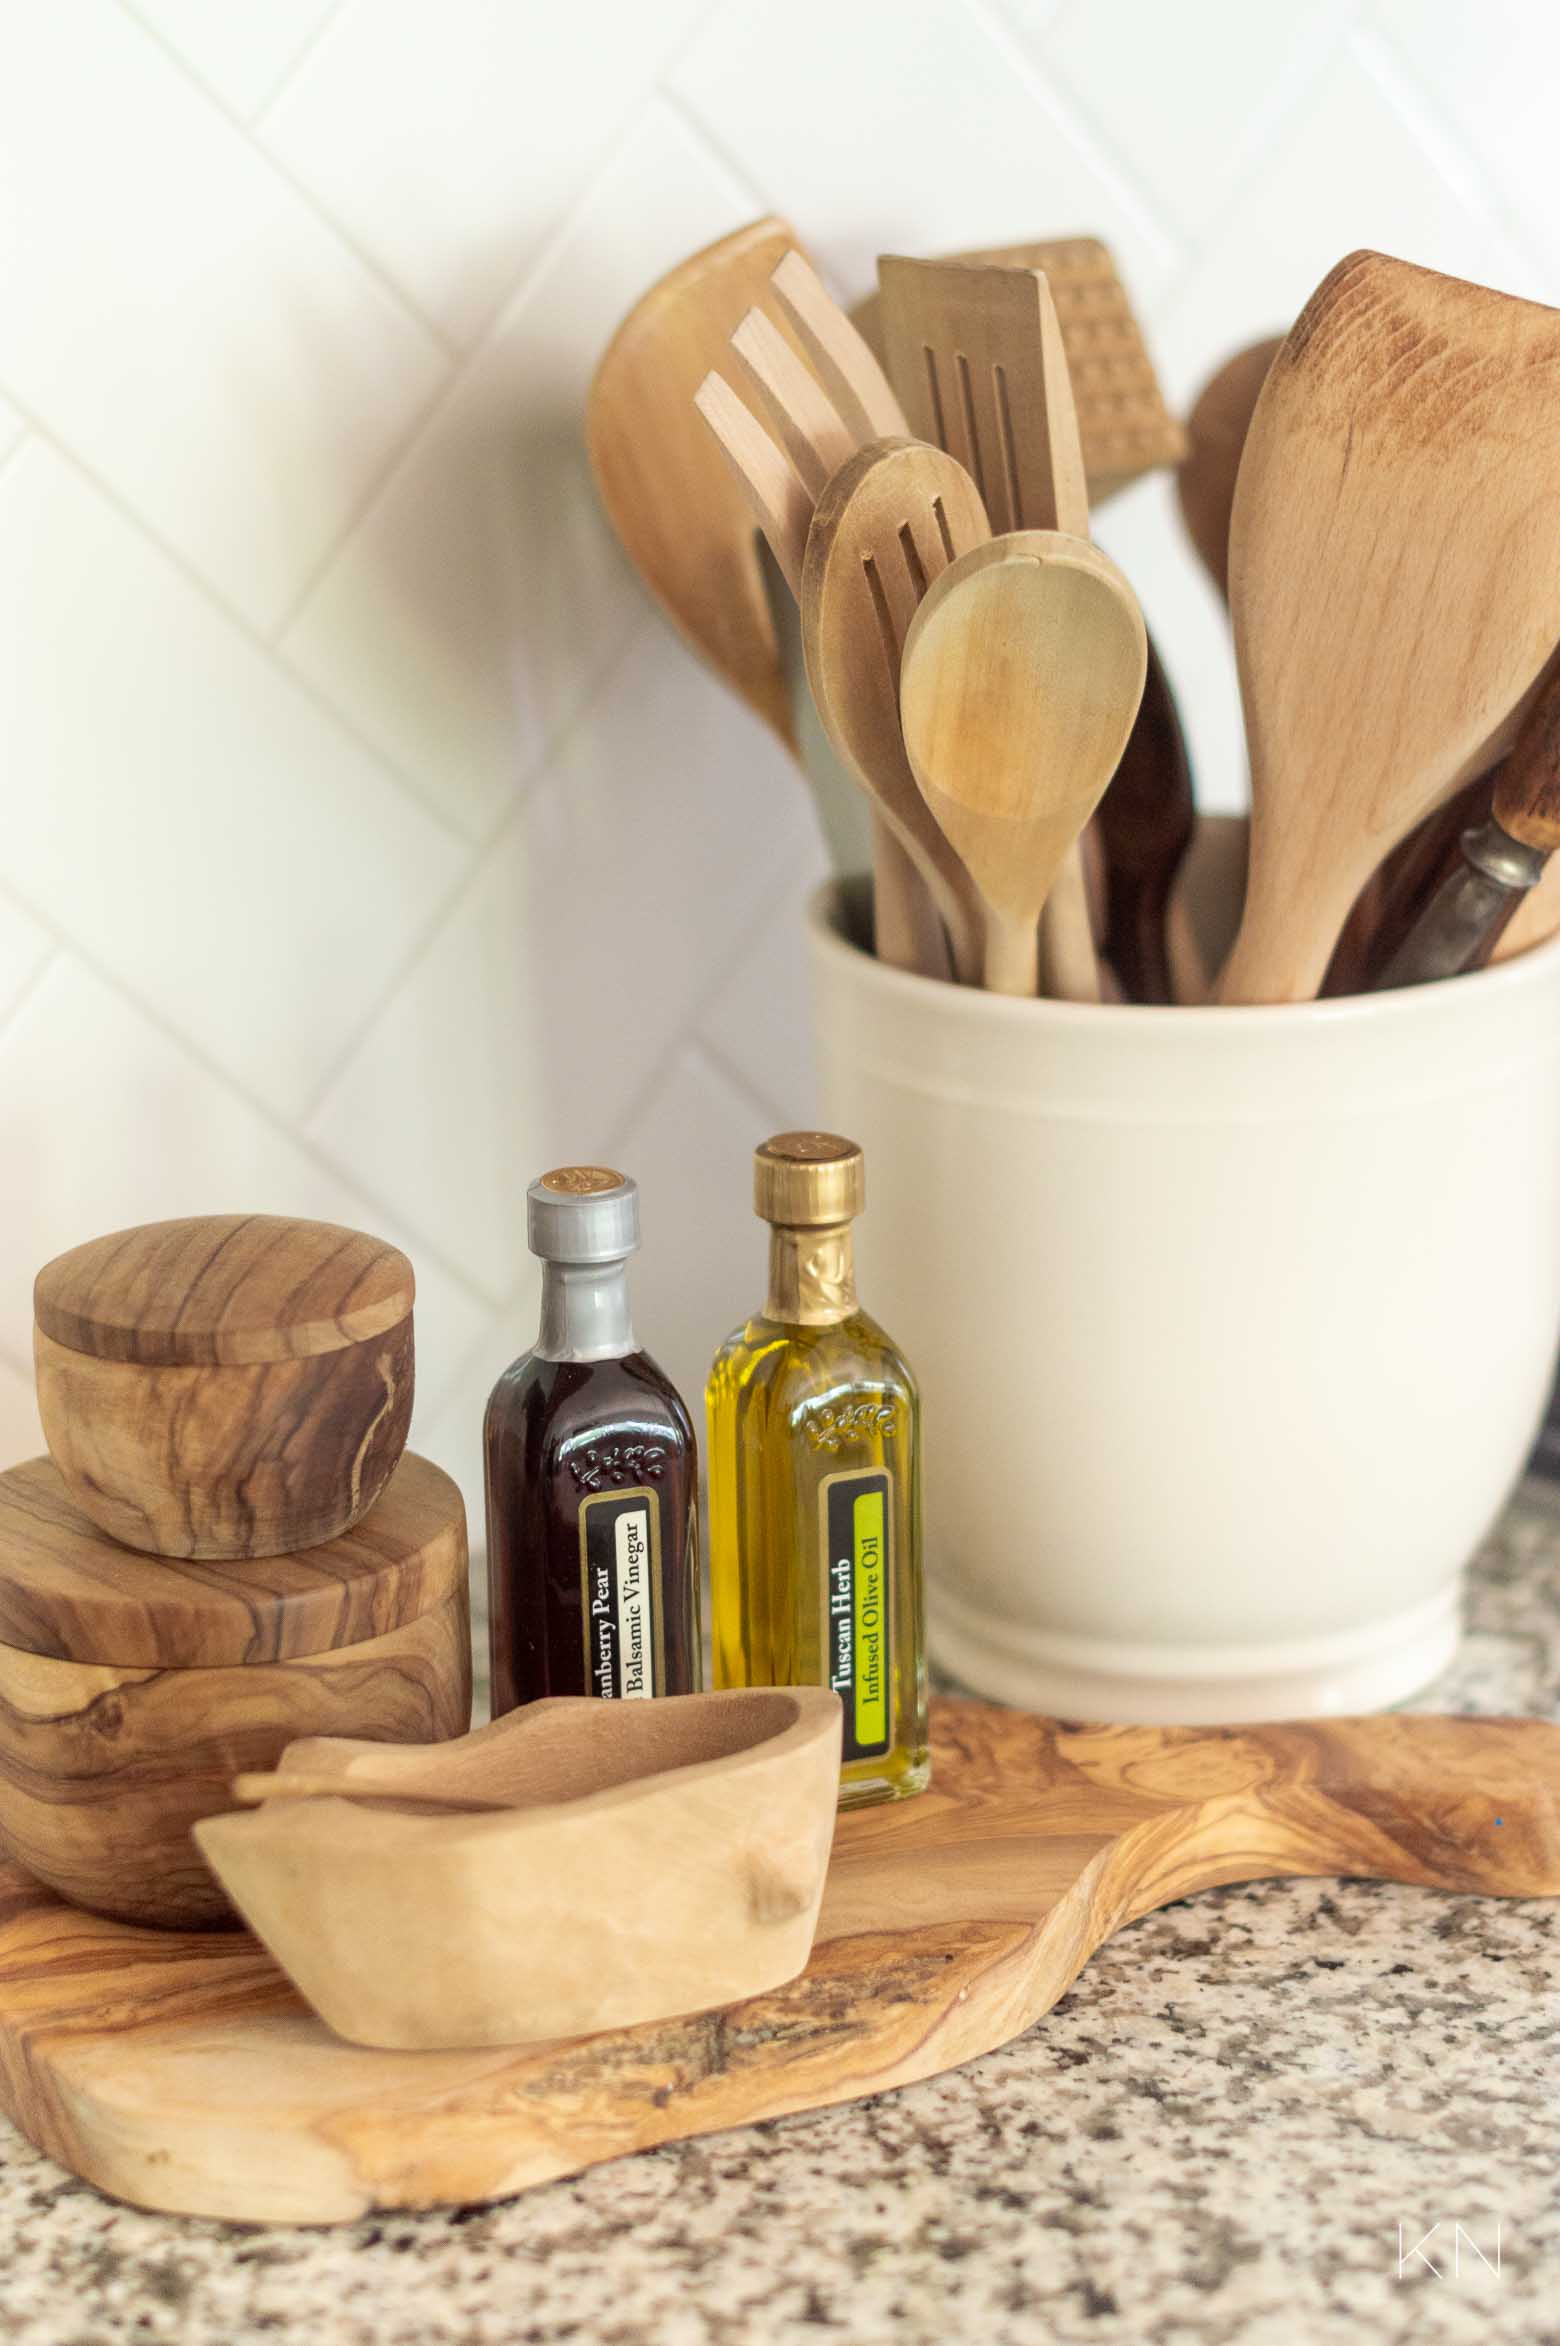
Sources: Olive Wood Cheese Board | Olive Wood Salt Keeper
Using functional kitchen accessories is the only decor the space needs.
I LOVE her counter height stools but again — those black spindles called for something else in the lighting other than more black bars. FYI- these stools are substantial and sturdy! They’re a classic style with just a slightly more current silhouette.
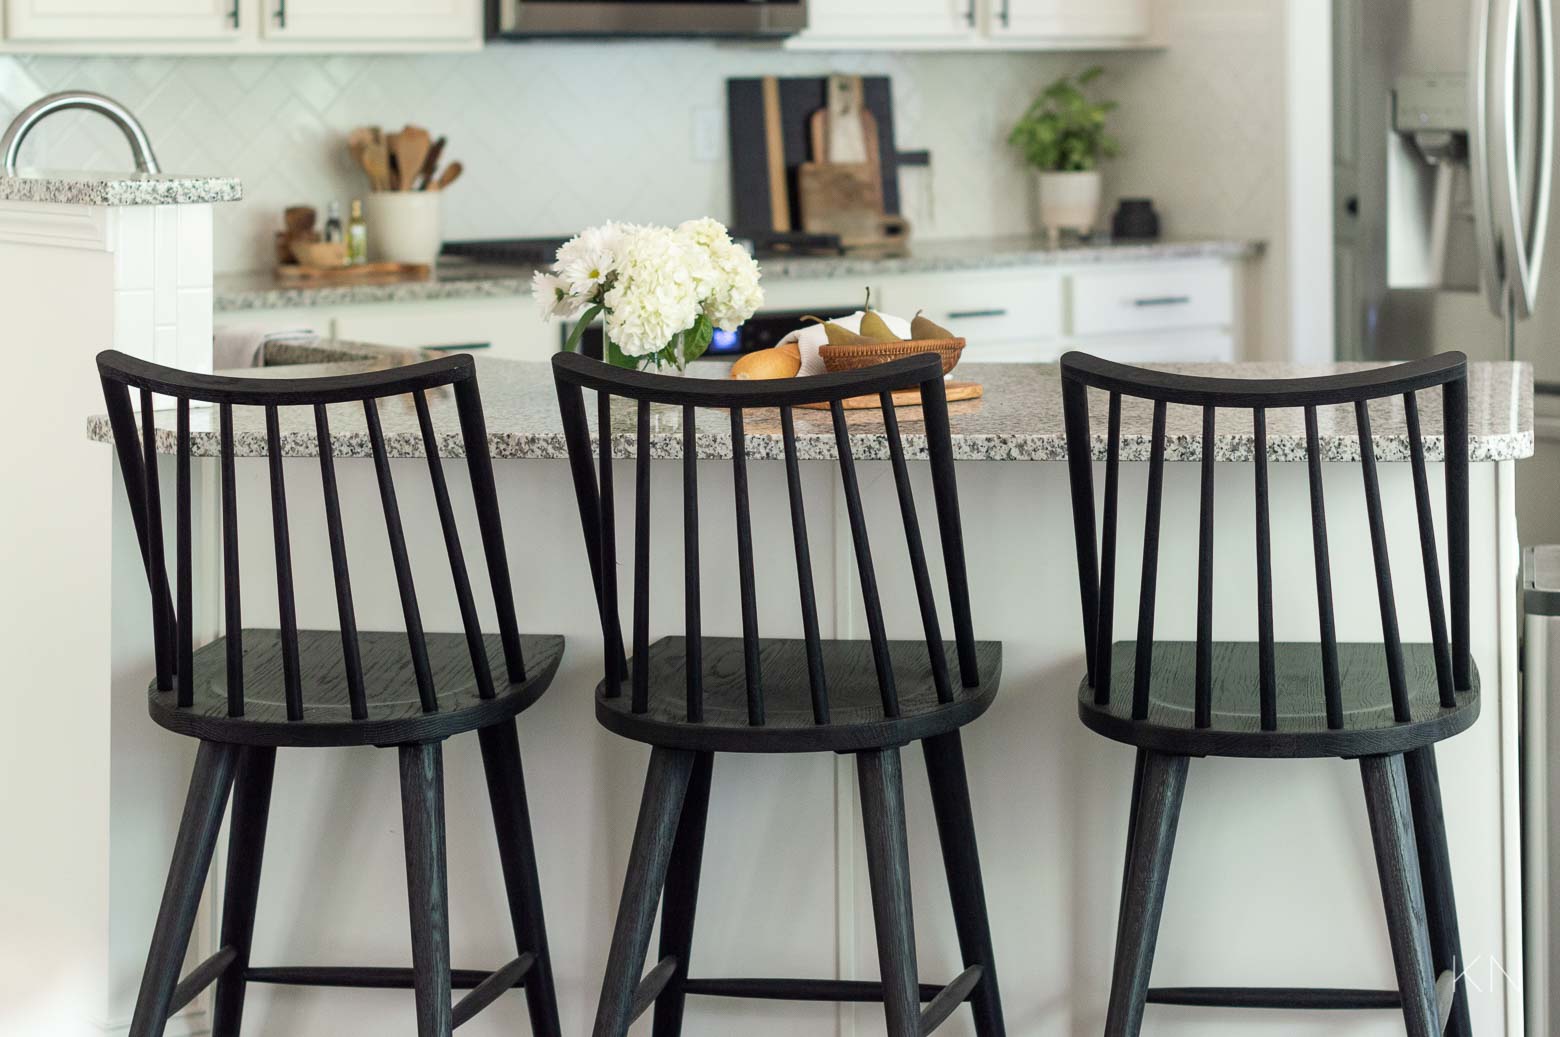
Sources: Counter Stools
Lighting, in general, is something to wait on and not worry about upgrading until you’re in your house. I made this mistake big time when we were building. Hopefully if any of you are in a building process, you don’t have to worry about omitting/changing lighting positions ;). And without having to worry about that, it makes switching a light fixture even easier!
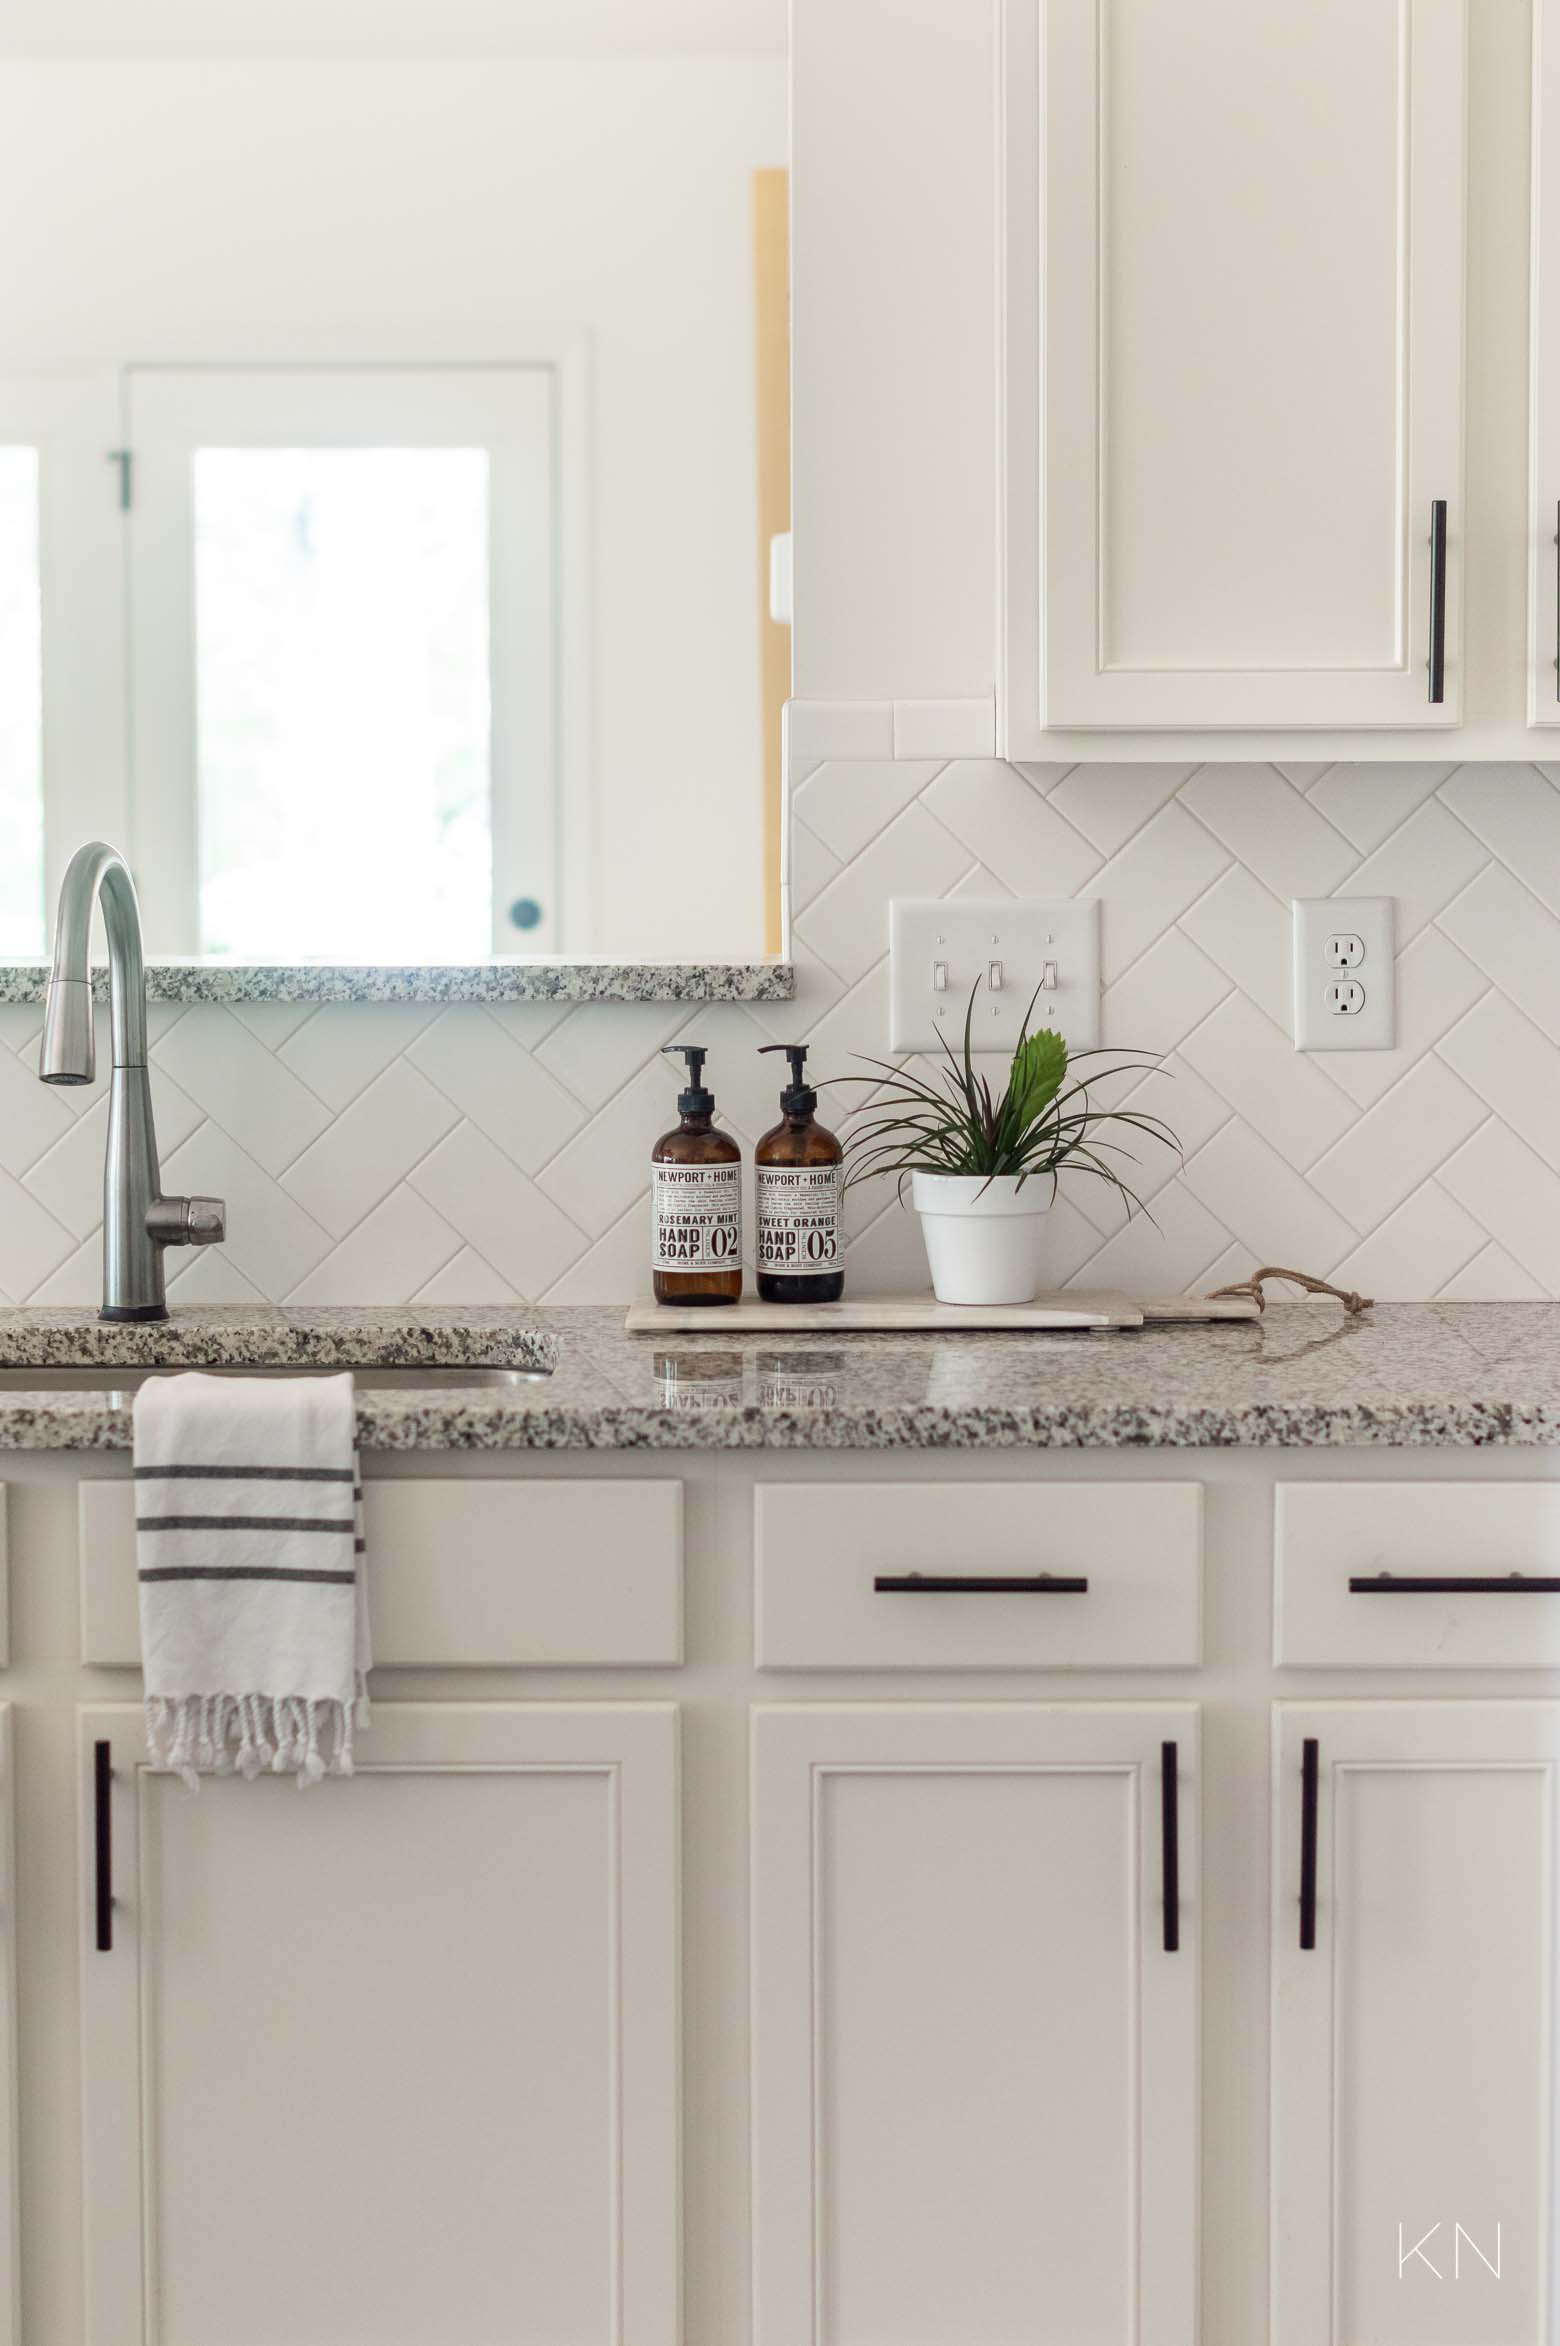
3. Personalize Your Cabinet Hardware
Ok, so we have 1. switching the kitchen faucet, and 2. switching the lighting, so what’s number 3? The easiest of all to customize — the cabinet and drawer hardware. But, it also comes with caveats — I’ll get to those in a second! The offering of cabinet hardware with my mom’s builder was non-existent. Literally — one or two pull options and one knob that (again) was automatically chosen based on the finish of the rest of the house fixtures. Let’s take a look at the before — with no hardware on the cabinets and drawers…
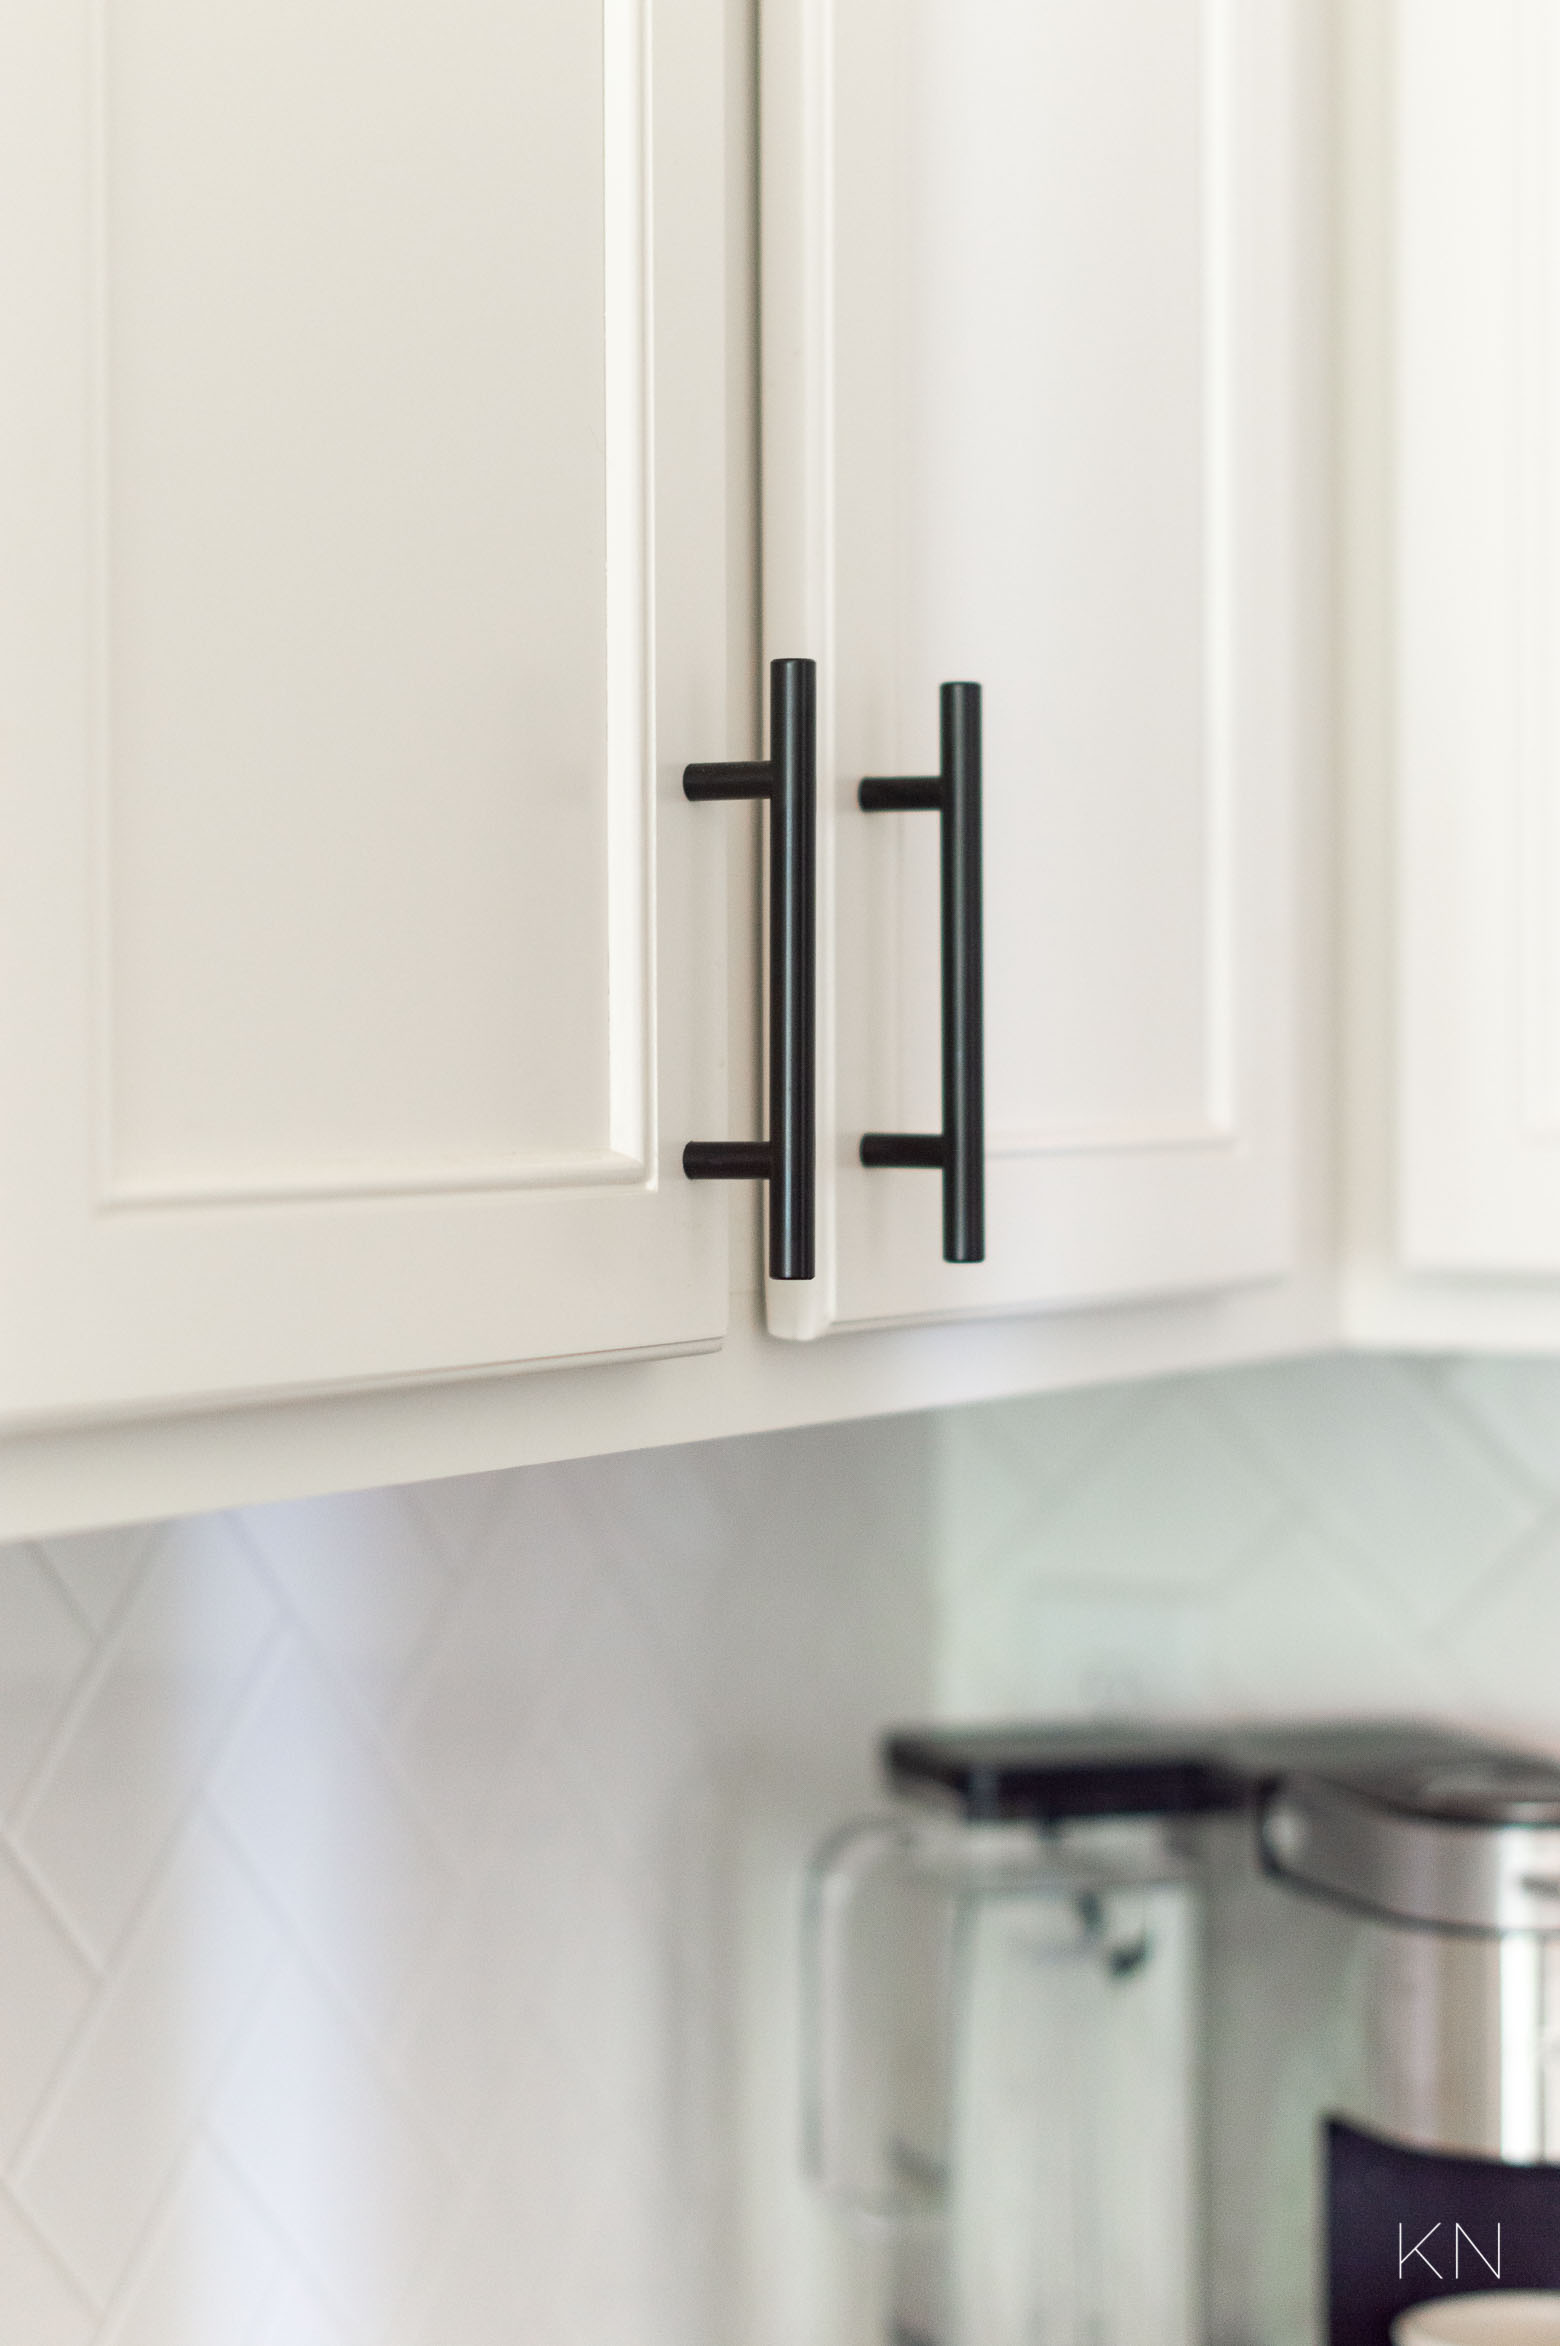
And here’s the “after” — with THESE uniform bar pulls (c/o Amerock) in a 3″ spread in a black bronze finish. They come in several sizes and finishes and they’re affordable with free shipping and returns on Amazon HERE.
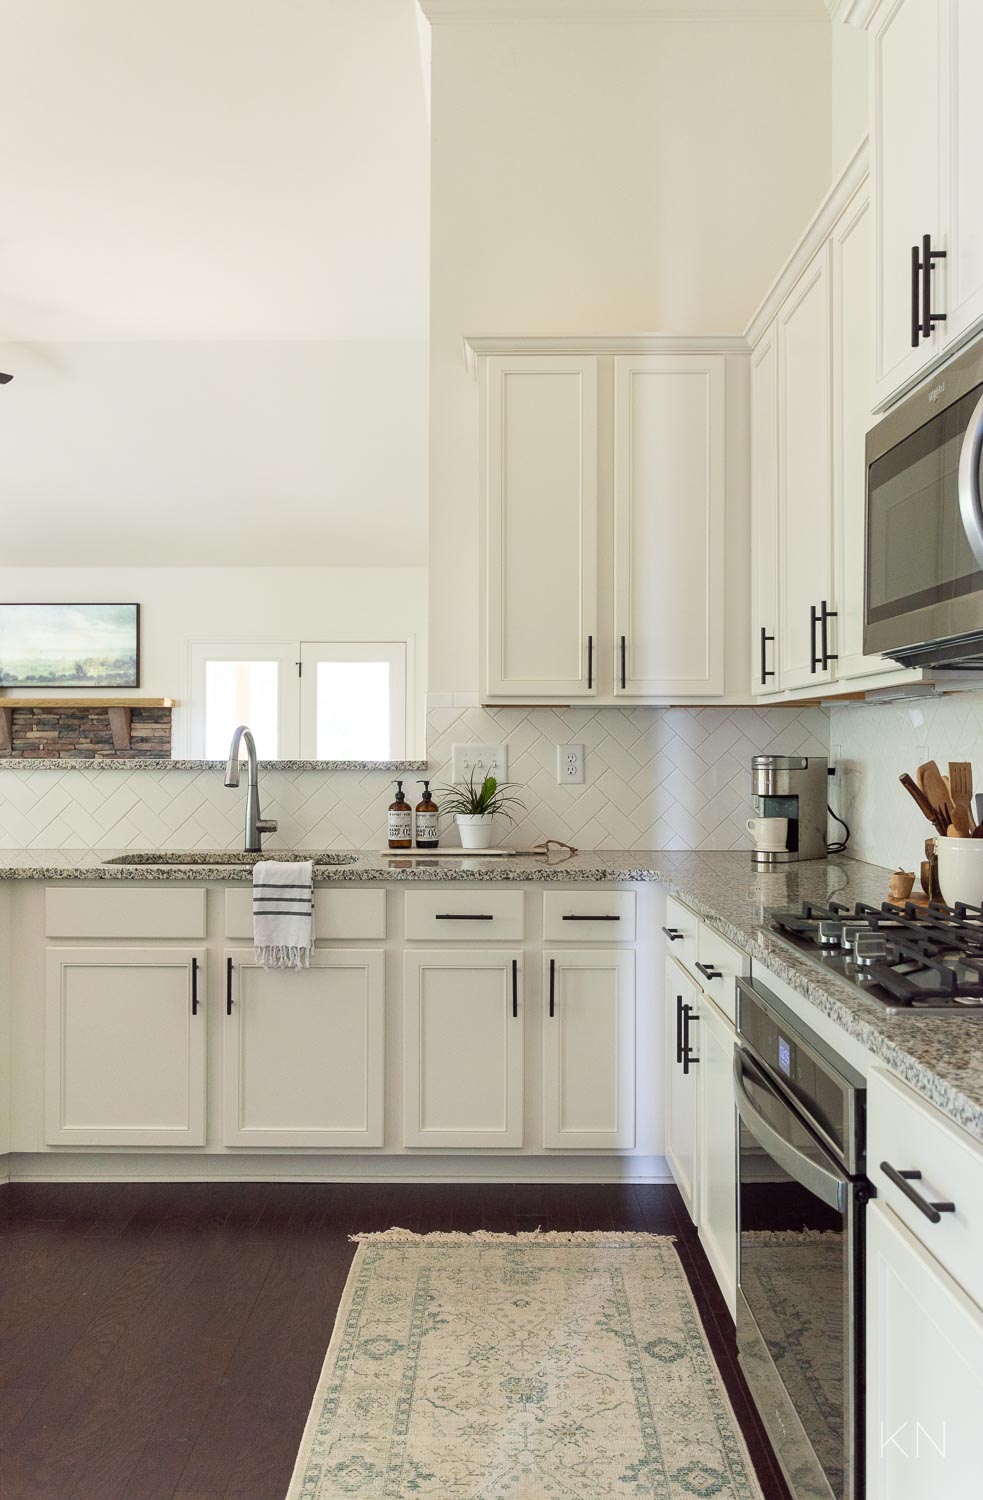
Sources: Runner | Olive Wood Cheese Board | Olive Wood Salt Keeper | Faucet | Turkish Hand Towel | Cabinet Pulls
So, what’s the caveat? Well, you can always change your existing knobs and pulls and it’s a really easy project. If you’re replacing pulls, just unscrew your existing pull and measure the distance between drill holes and that will determine the spread and size you can order for replacements (without patching, painting, and all that stuff you definitely don’t want to do 😉 ).
But, my mom actually opted for the builder to not install any. And here’s why. Once the holes are there, they’re there. Depending on what pulls/knobs she wanted to use, her choices would be limited because she would have had to have worked within the confines of the already existing holes. 2. We walked through other houses and noted that the placement of much of the cabinet and drawer hardware wasn’t level and was a bit sloppy. So, she had them leave the cabinet fronts blank so she could start from scratch. That said, by pure luck, we actually showed up one afternoon when someone was errantly drilling holes in the cabinets. Luckily, it was early on and few enough where the holes were able to serve as the placement for the bottom holes of the pulls.
Sources: Runner | Olive Wood Cheese Board | Olive Wood Salt Keeper | Faucet | Turkish Hand Towel | Cabinet Pulls
Instead of a knob/pull combo, she wanted uniform pulls all around. THESE simple pulls are really easy to incorporate into a variety of styles, regardless of what your kitchen vibe is. Also, while the spread is 3″, the actual pull extends beyond that and is over 5″ in length.
Sources; Cabinet Pulls
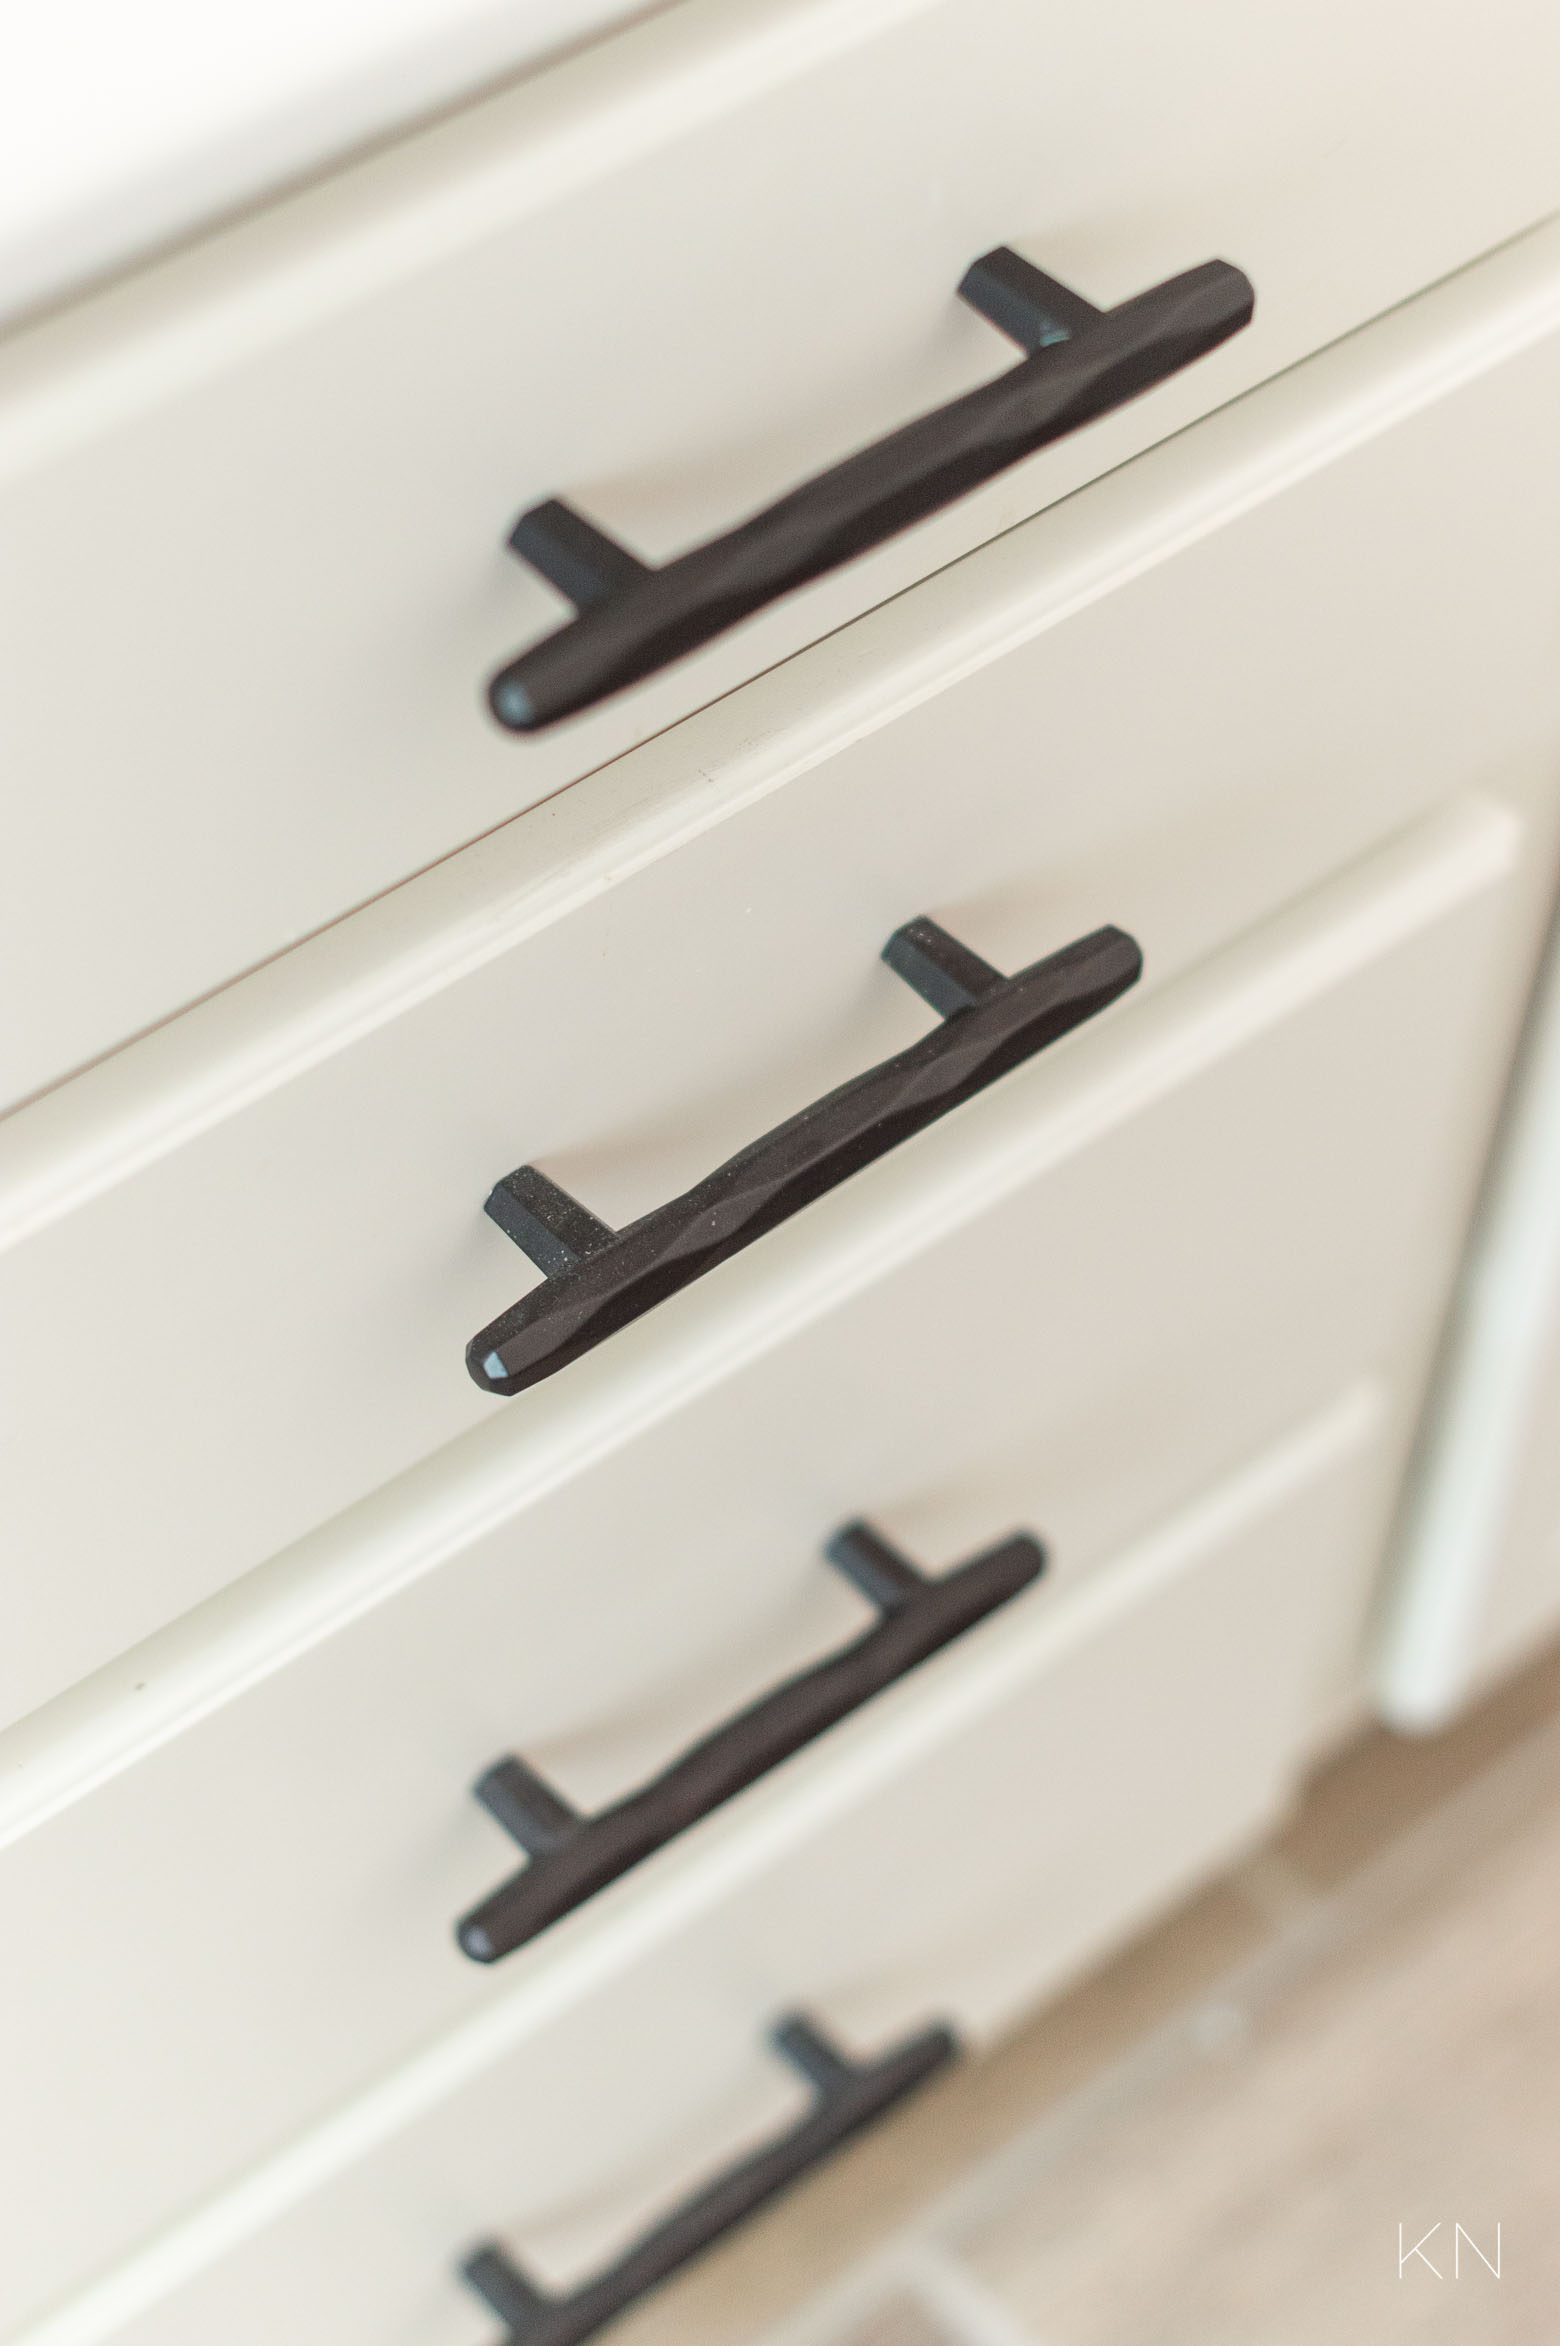
Another favorite pull she used in her house was THIS faceted pull (c/o Amerock) — again in Black Bronze in a 3-3/4 spread. She used it in her master bathroom against white cabinets-
Sources: Cabinet Pulls
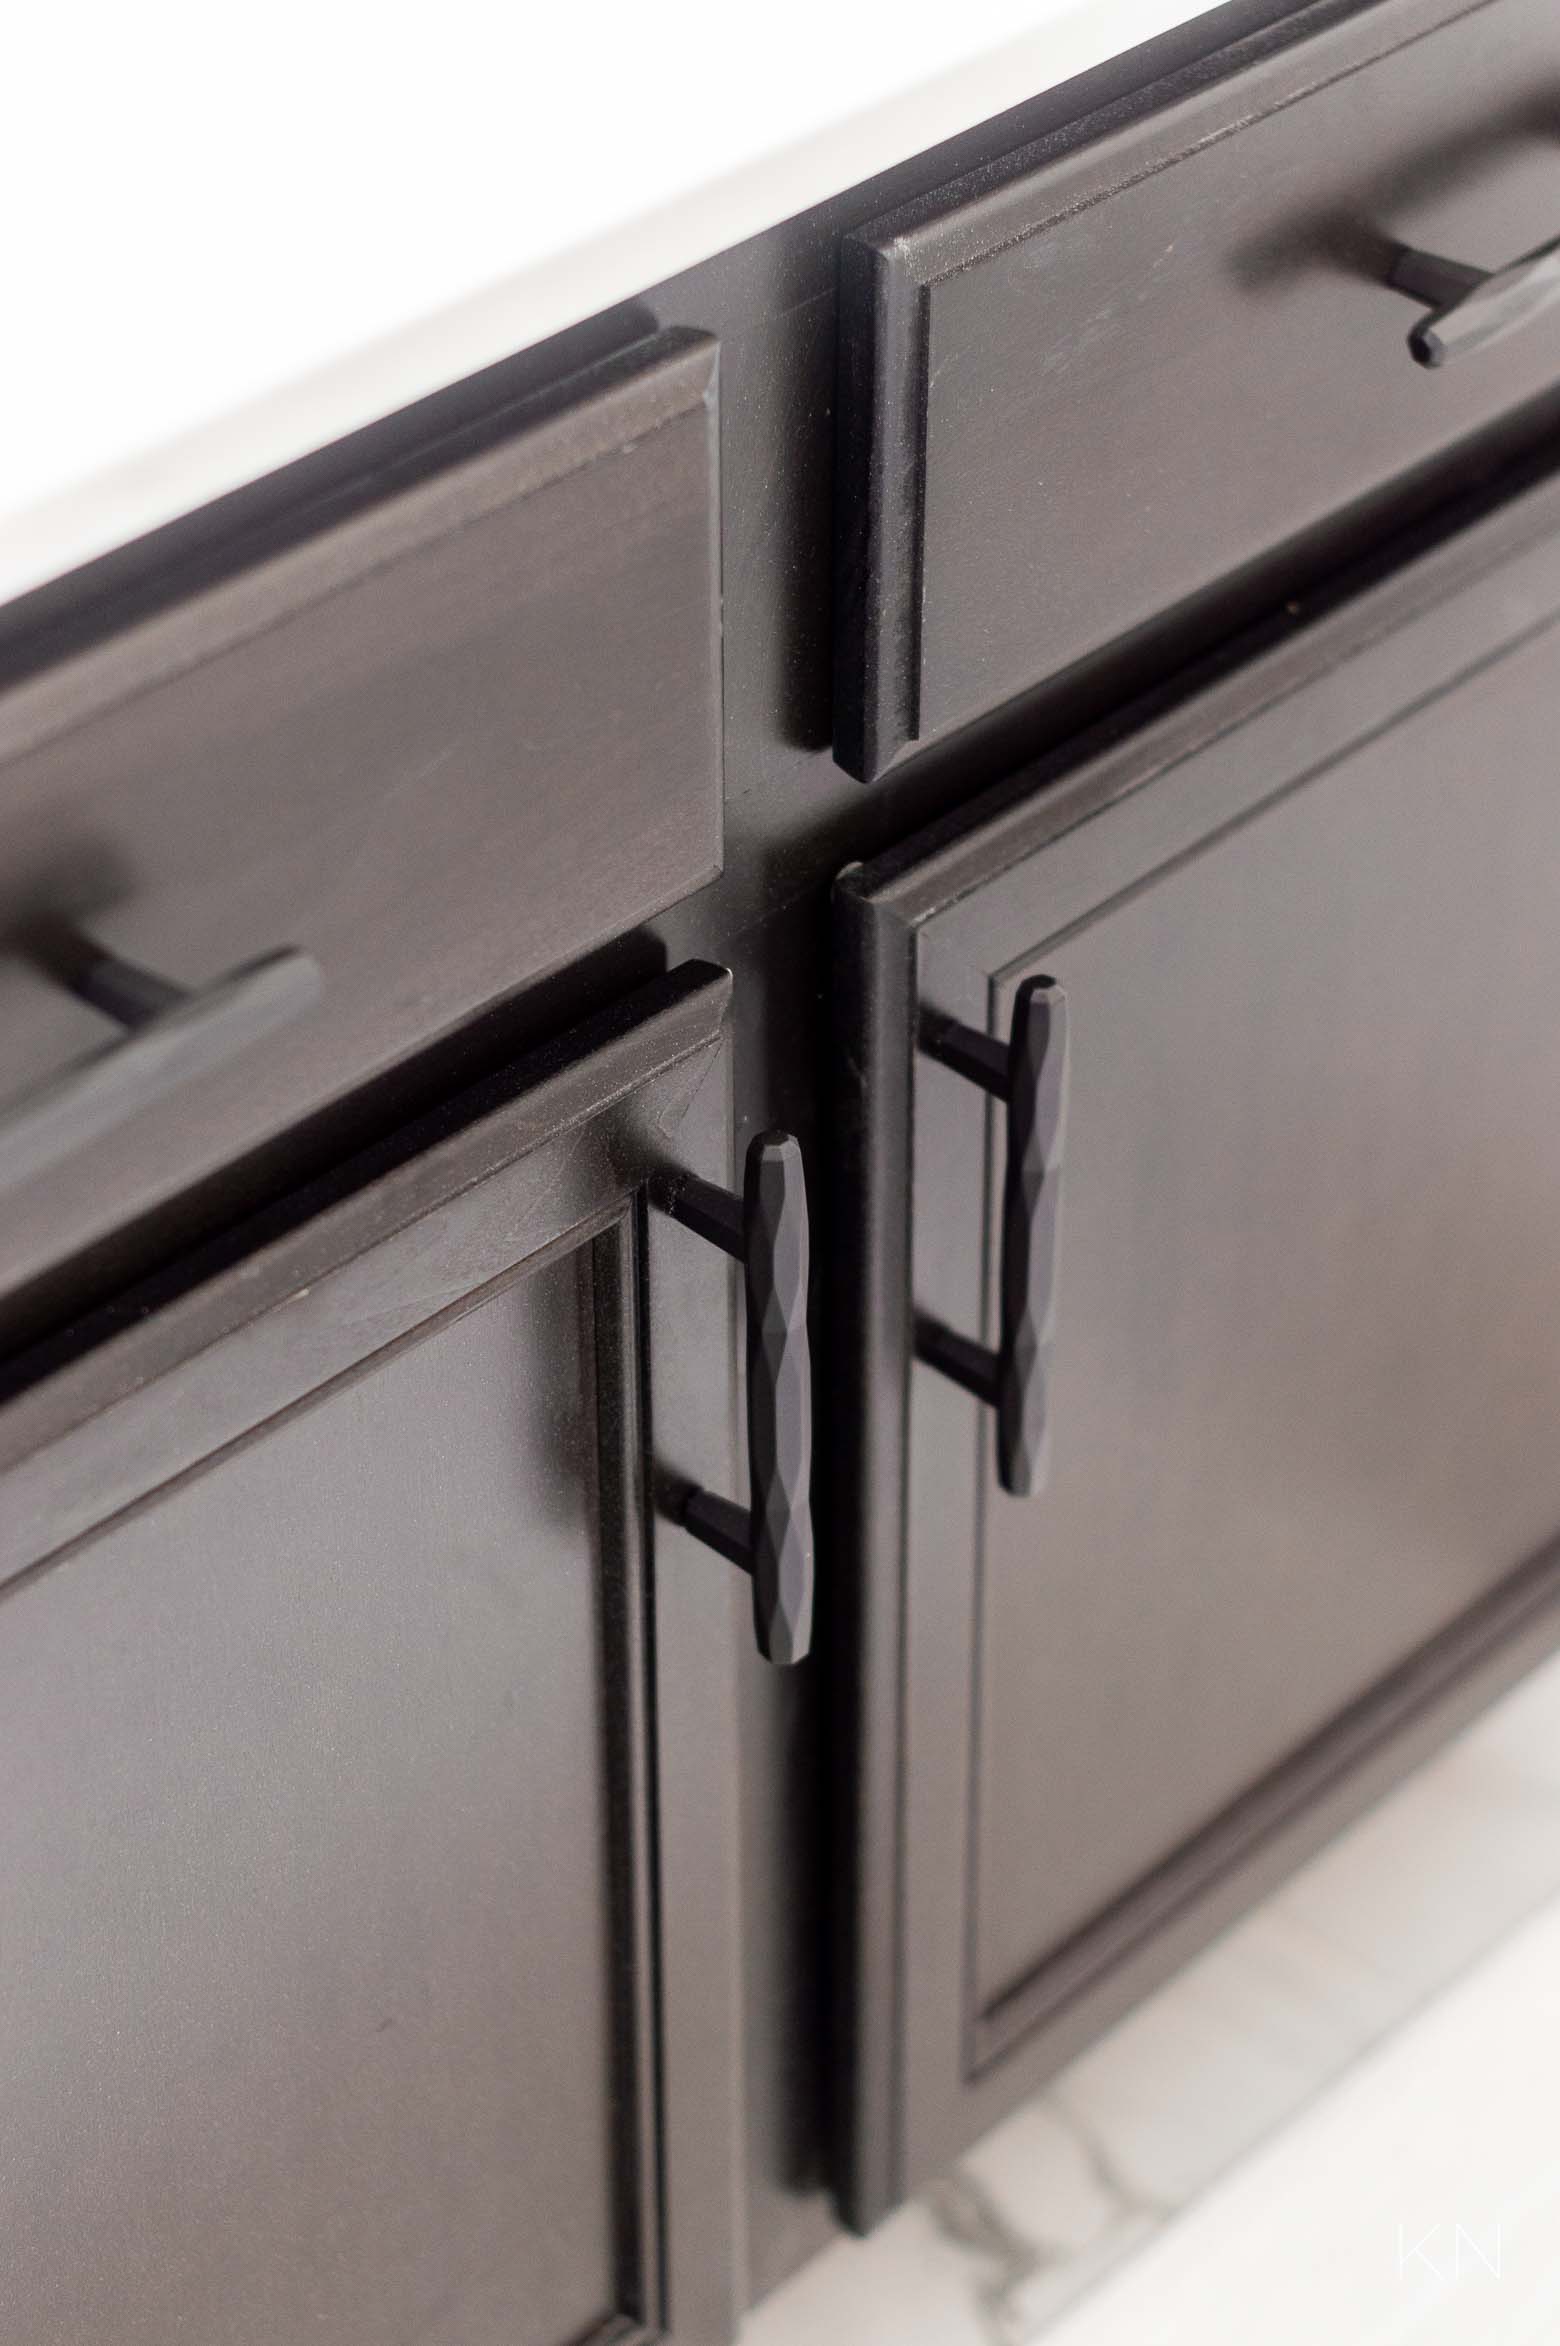
And again in the guest bathroom against a dark vanity. I LOVE the dark on dark look but these also come in several finishes, sizes, and also ship free (with free returns) on Amazon HERE.
Sources: Cabinet Pulls
Cabinet hardware can totally (and easily and affordably) transform a space. Here are 20 beautiful pulls — almost all come in different sizes and finish options. Links for each can be found below the graphic.
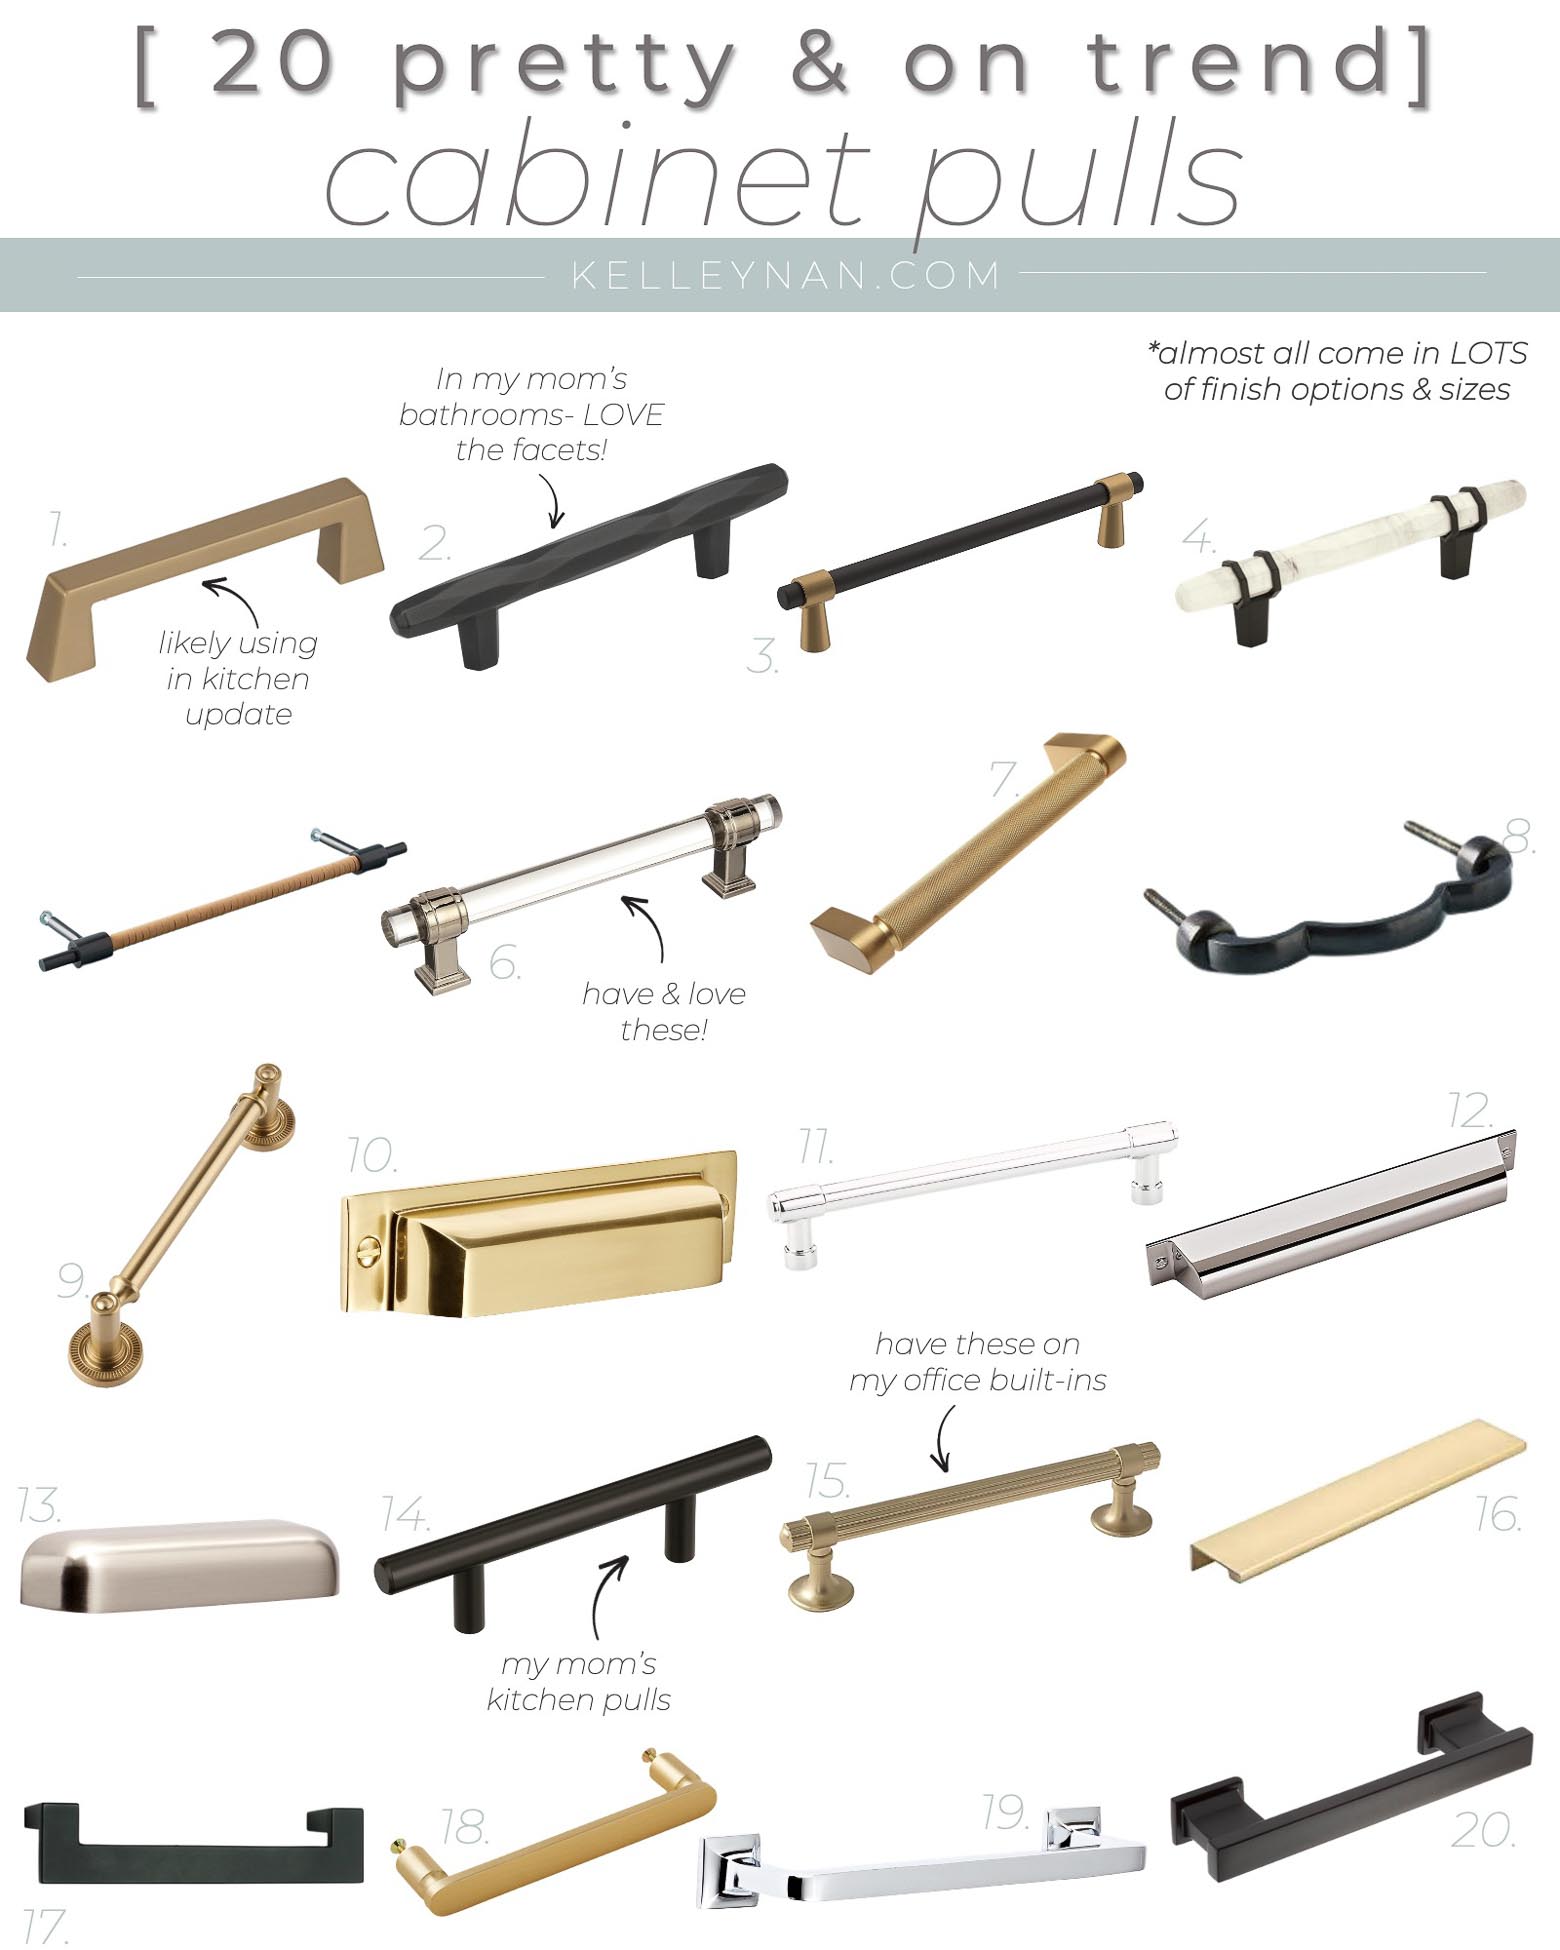
Sources: 1 | 2 | 3 | 4 | 5 | 6 | 7 | 8 | 9 | 10 | 11 | 12 | 13 | 14 | 15 | 16 | 17 | 18 | 19 | 20
I’m actually considering THESE in Golden Champagne for my kitchen update (if you’re confused and haven’t seen hints of this on Instagram, I’ll be sharing “why” and announcing more on that soon 😉 ).
And if you prefer knobs, to mix and match pulls with knobs, or even just have a small dresser to update, there are a lot of classic and unique knobs! I’m sharing 16 favorites below. All sources can be found linked below the graphic.
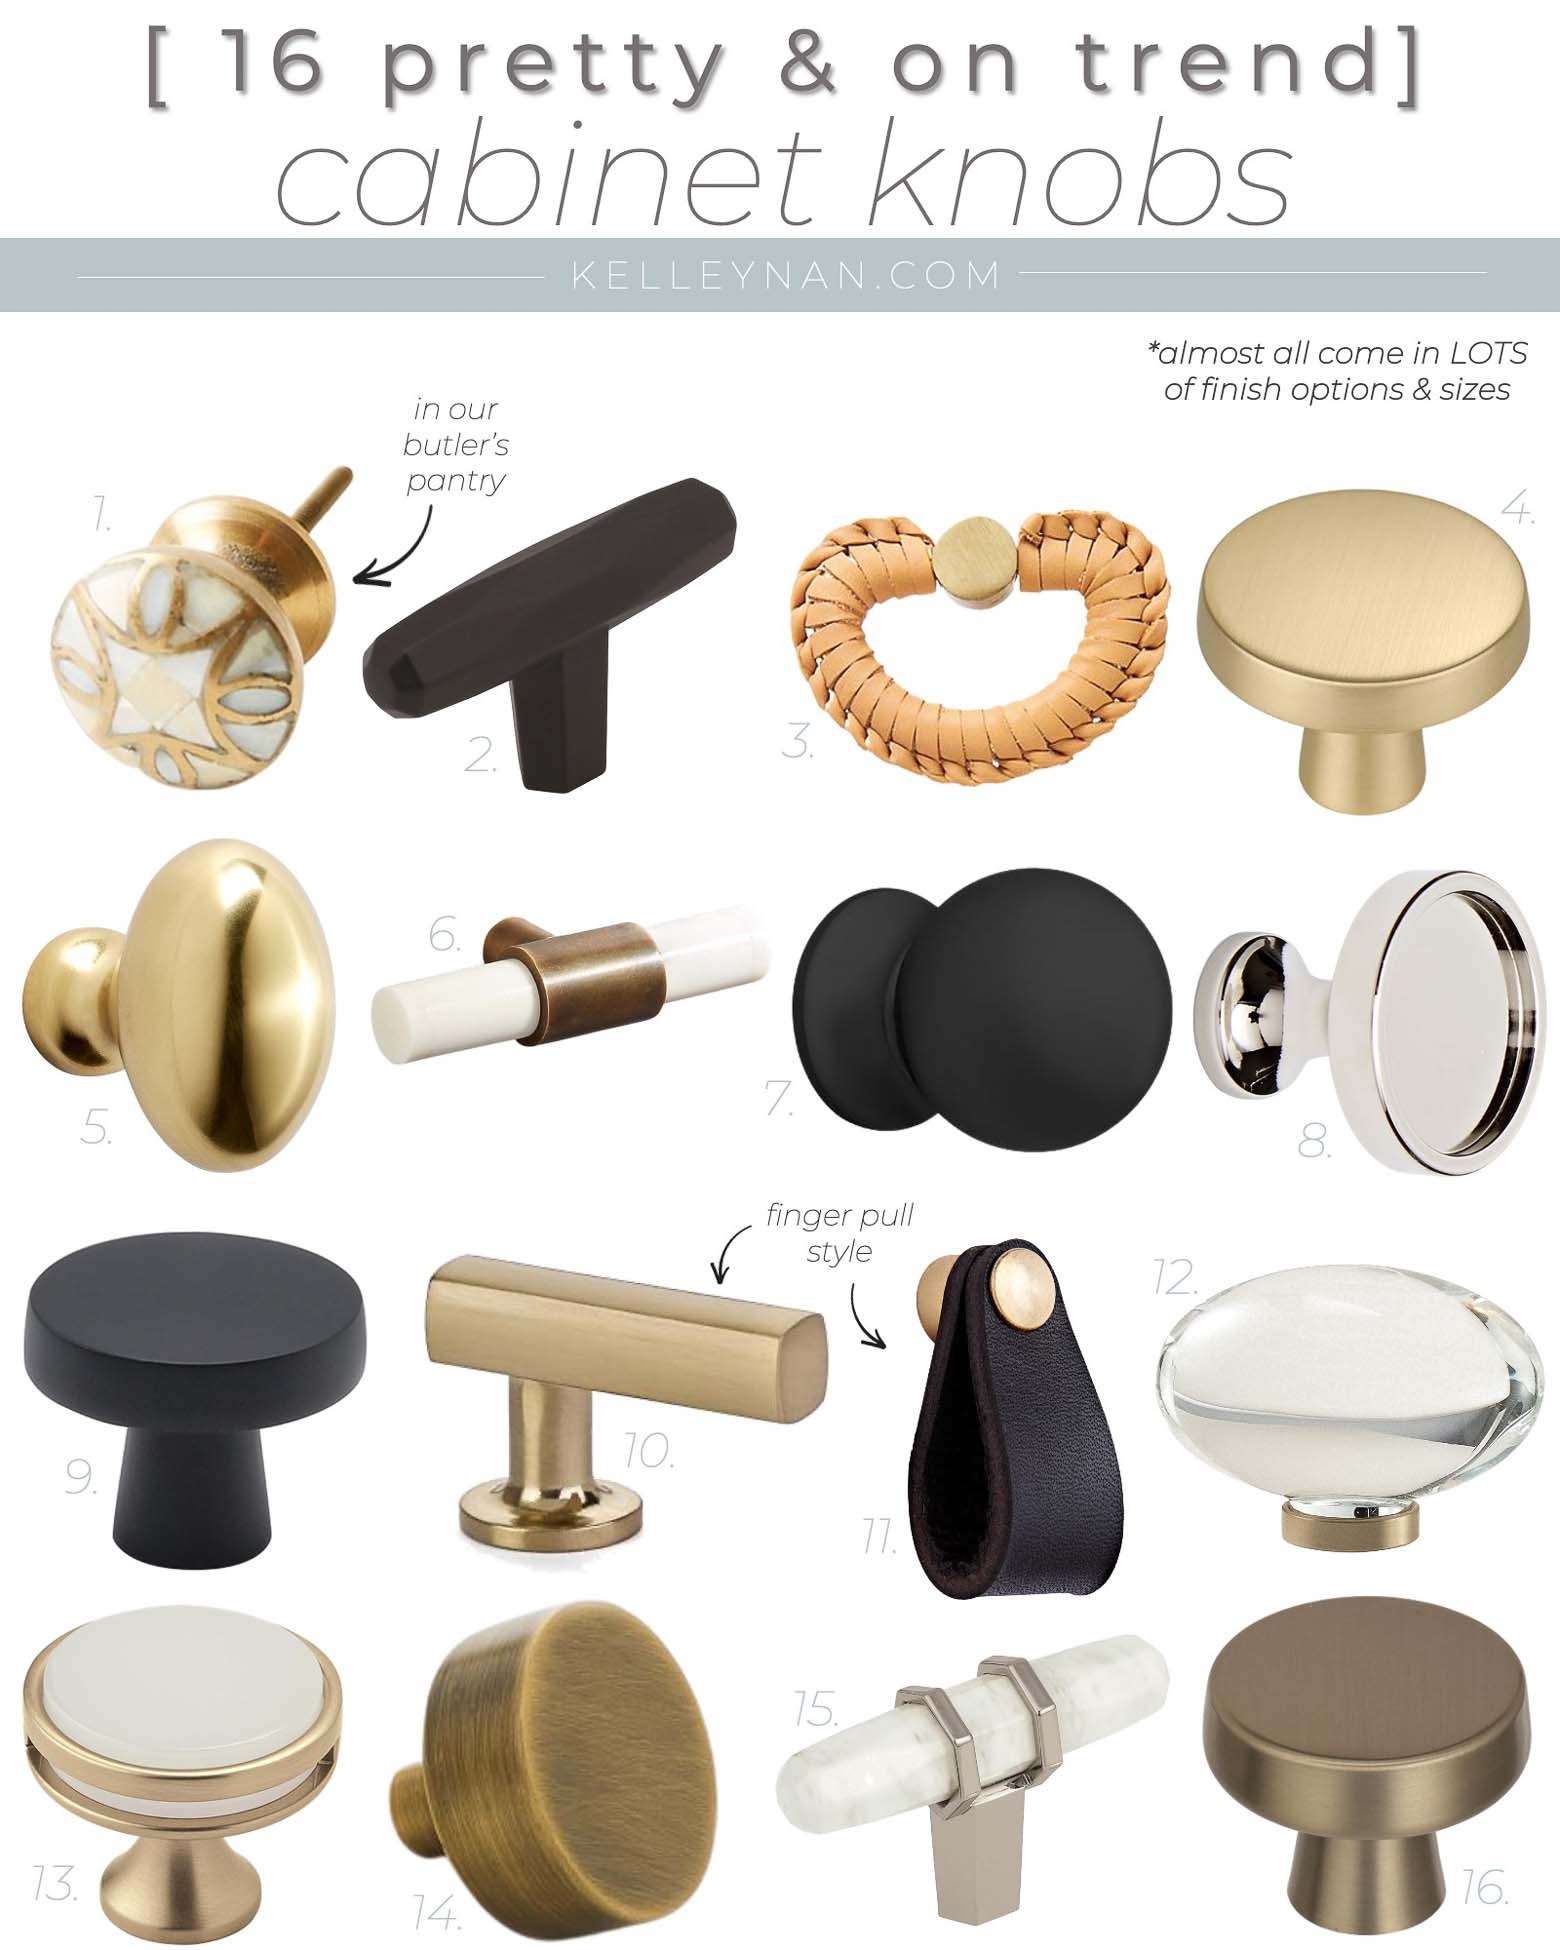
Sources: 1 | 2 | 3 | 4 | 5 | 6 | 7 | 8 | 9 | 10 | 11 | 12 | 13 | 14 | 15 | 16
Cosmetics aren’t permanent and while I know you want to move into a new home and have everything perfect, it can make a lot of sense to wait and let your home evolve. And save projects for later. And aside from saving money, it may be the only way you can even get your spaces looking exactly as you want them. Depending on your level of handiness, there are so many simple updates you can make and I’m never afraid to enlist the help of a plumber or electrician 😉 As a matter of fact, it may save you money to have an electrician/plumber to knock out several projects in one visit — especially if they charge by time.
If you have any easy upgrade projects you chose to take on (or wish you had saved to take on after moving in), share them in the comments below! They don’t have to be exclusive to the kitchen — I have so many all over our house I wish I’d waited on.
I’ll be sharing more of Gran Nan’s house soon — her office is probably my favorite spot in her home. And of course, I have new projects being announced and projects nearing completion. To catch all that and more, subscribe to emails at the bottom of the post!

We r also contemplating a move to Georgia.
Marietta. Wondering where your Mom is. And if she lives it.
Thx for any input
Hi Ellie, We are both in North Forsyth County, in a more rural area of the suburb. We love Georgia, its seasons and all of the rest! Good luck as you finalize your decision-making plans.
Hi Kelley! I enjoy your “obsession” with details sooo much! You’re just like me! There is no such thing as planning too much. I so agree that builder grade materials are better left out if they don’t meet your standards or aren’t your taste. Wait and do it yourself rather than undo ugly. I always love the detail you go into when describing your projects. You’ve got a great eye. Your conversation room is beautifully done….probably my favorite room.
Hi Lindsay, Thank you so much for taking the time to stop by! I truly appreciate your kind note and that we share our “obsession” with the details. My mom continues to make some changes and switch outs to her home, but she absolutely loves the floor plan and the locale!
Hi- another thing to consider with builder options, is that when you upgrade, it increases the amount of your mortgage, taxes and insurance. So you could potentially be paying off those ‘upgrades’ for the next 30 years, even if you have already replaced them for ‘real upgrades’.
When we built our house we went basic and did all the upgrades after the fact. I had better choices, got them cheaper and didnt have to finance them for 30 years! (I also sold our builders appliances and fixtures at a garage sale!)
Hi Lynn, Absolutely and love your thought process!
Hi KN,
Love this whole article. I appreciate you precise attention to detail especially because I don’t seem to notice much of it. I just know when the room feels right! Thanks for all your interesting posts!
Maureen, Thank you so much for your sweet support! I agree that “it’s all in the details” and you know when the room feels right. My mom viewed a variety of cabinet pull samples before she arrived at these and it did take some time to find the just right pendant lights. I am so glad she did not settle!
Great post! We just built our house a year ago, and one of my biggest regrets is choosing cabinet hardware through the builder. I was able to choose different styles/colors for each room, but when you are just picking cabinet colors and hardware styles, you don’t really see how it all looks/fits together. Now in some spaces I have really large pulls on small drawers, and wish I would have gone with knobs instead. Now the holes are there forever and I just have to kind of live with it. 🙁
Aime, Thank you for taking the time to visit and for your note. I am so sorry that you do not love your cabinet pull choices. If you are a DIY’er, there are methods you can do to fill the holes. You may also find some smaller pulls with the spread that matches yours. I hope you are enjoying your new home!
I hope you continue through the rest of her house with all of your tips and tricks. They are so very well thought out and look wonderful.
The idea of not putting any hardware so that you can choose exactly what you want is genius.
Kemia, Yes! We will definitely be showing more of Gran Nan’s new home. She has made some other easy cosmetic changes throughout. I agree that she was wise to have the builder add the cabinet hardware. And, we were very lucky that we arrived one day when the cabinet maker was doing just that!
Hello! Love your site! Hey, is your mother’s floor the same as your floor? It looks similar.
You are awesome!
Hi Michael, Thank you so much for taking the time to stop by! My mom’s floor is not the same as mine, even though they are both dark brown and made by Shaw. I’m not sure of the exact color of my mom’s floor, but mine is Nottaway Hickory Weathered Saddle.