It’s been a while since we’ve talked about the kitchen, so let’s get caught up first. What started as a quick backsplash change, ended up turning into a full- on mini kitchen makeover. And then, that mini kitchen makeover, ended up turning into a more than one year process. Full disclosure, the kitchen today is further along than what is shown in this post that was started about a month ago. So, I’m feeling pretty good about the progress that’s been most recently made. How did we get here? Well… I ended up loving my bathroom shower tile (see the bathroom reveal HERE) so much that I thought that the varying shades of neutral would go perfectly in the kitchen. White, beige, gray, and lots of creamy neutral tones. And, since I already had someone who was doing the tile in the bathroom, I thought that it would be of benefit not to have to pay extra for additional trip charges. But, once the backsplash was installed, as much as I loved the backsplash, it did not blend with my cabinets as I had hoped it would. At all. Instead, it made them look even more yellow which is what I’ve spent years trying to minimize in the appearance of my cream cabinets. It became apparent that day that the cabinet color was just not going to work. A kitchen project was officially on the books.
*Posts on KelleyNan.com may contain affiliate links. Click HERE for full disclosure.
Once I started speaking with a cabinet person, they indicated that the cost between installing new doors that are painted and just painting the cabinet boxes wouldn’t be that much of a difference in price than painting the full cabinets, as they were. Since some of the cabinet doors weren’t in the best shape, and the fact that they were a raised panel style, I opted to go for new cabinet doors. From that, other small projects in the kitchen were added to the list since we were already having the cabinets painted and work was already being done. If some of the smaller projects were ever going to happen, it made more sense to do them now rather than later in an effort to save a little money in the long term. Now that we’ve caught up, let’s talk about the specifics.
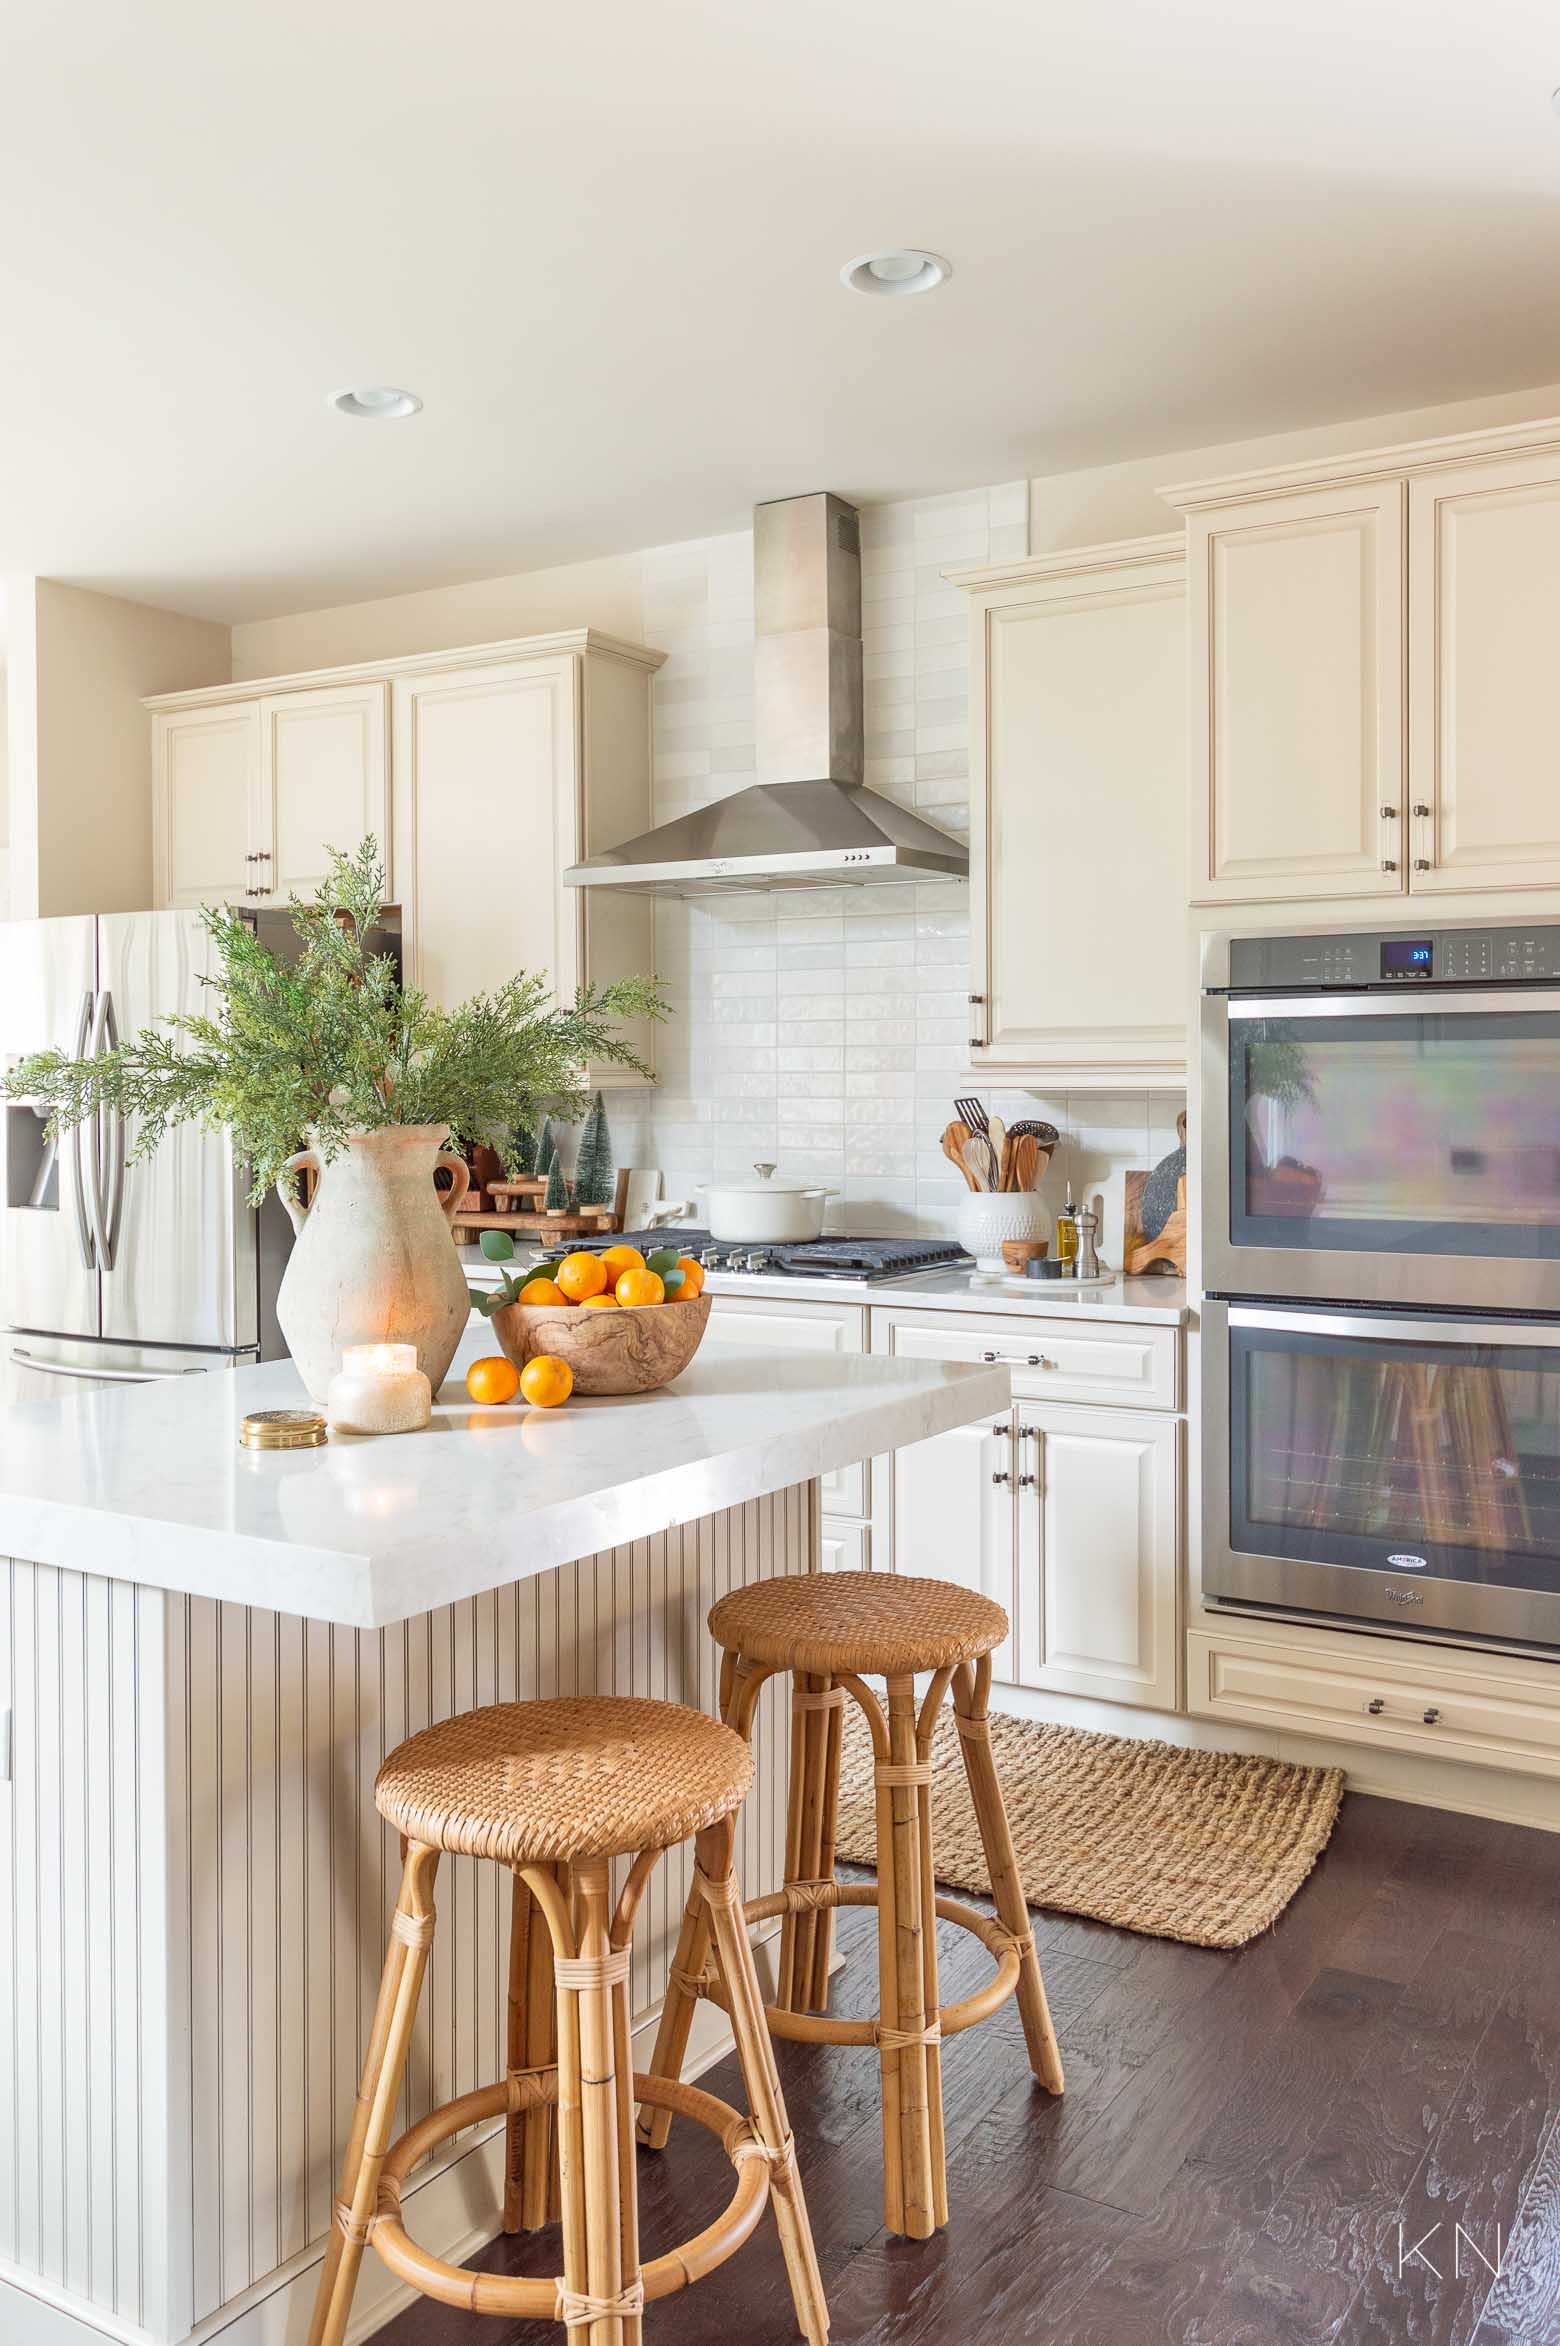
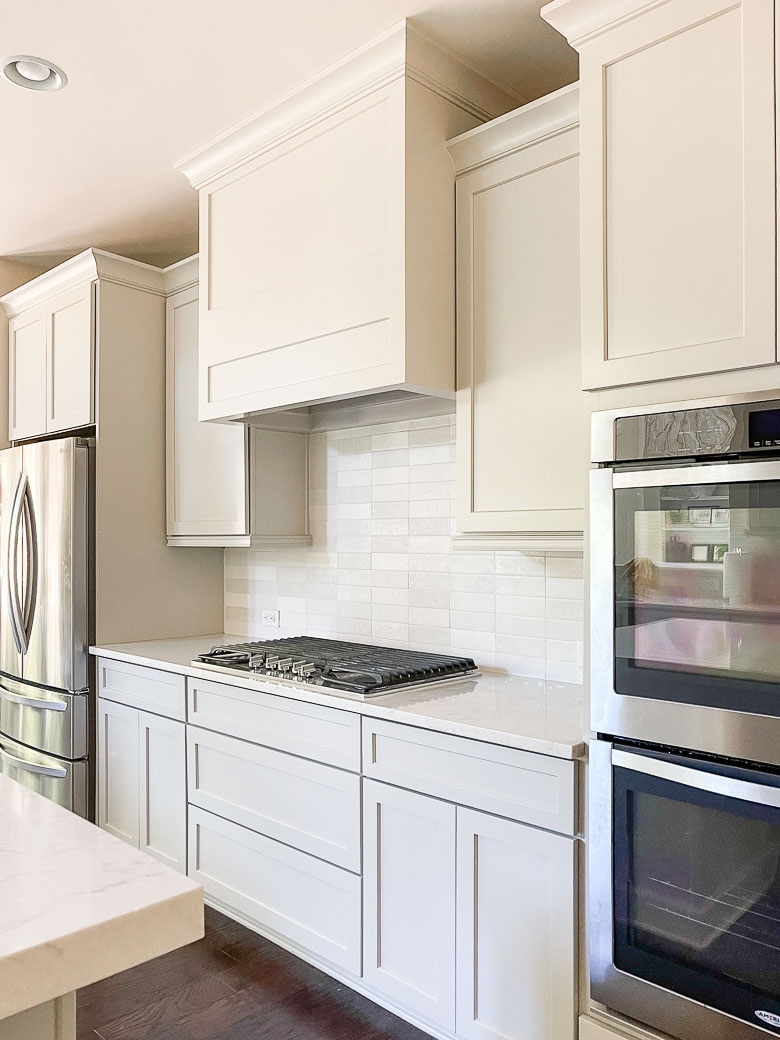
Here’s a reminder of what our kitchen looked like last Christmas — not awful and we’ve lived with it like this for the past year. But in person, and throughout the day, the cabinets have the tendency to look even more buttercream-like than this…
Sources: Woven Backless Counter Stools | Vase (similar) | Wooden Bowl (similar) | Jute Runner | Round Marble and Wood Cheeseboard | Rectangular Wooden Cheese Board | Olivewood Salt Keeper | Small Olivewood Cheeseboard | Olive Oil Dispenser | Cabinet Pulls | Backsplash Tile
By the time the cabinet company was able to fit me in to their schedule last year, it was already in the middle of the holiday season. So, I opted to wait until after the beginning of the year. Since then, it’s been a waiting game of when they could finally fit me in. I won’t go into the dramatics of everything in between, but… it hasn’t been the most fun.
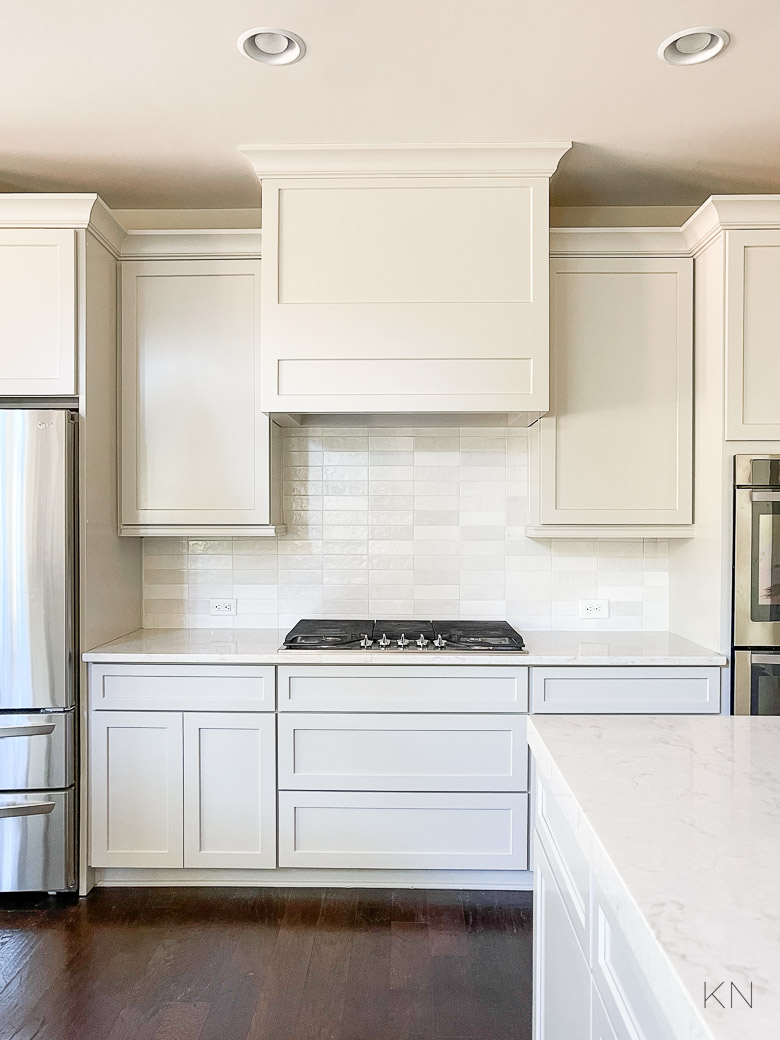
Fast forward to this past month. Great progress was made in a day, but as an in a project, there were some hiccups along the way. I had selected Agreeable Gray by Sherwin Williams for the paint early last year and was excited to see how the cabinet color goes SO beautifully with the backsplash and the countertops that I had installed a few years ago. So, I’m stoked about that.
Here are the projects that were taken on…
- remove cabinet doors to make way for new modified-style-fronted shaker doors
- remove molding at the top of the cabinets for a cleaner cove molding
- remove the bead board around the kitchen island to create a paneled look
- install pull out drawers within some cabinets to expand storage (and create easier access)
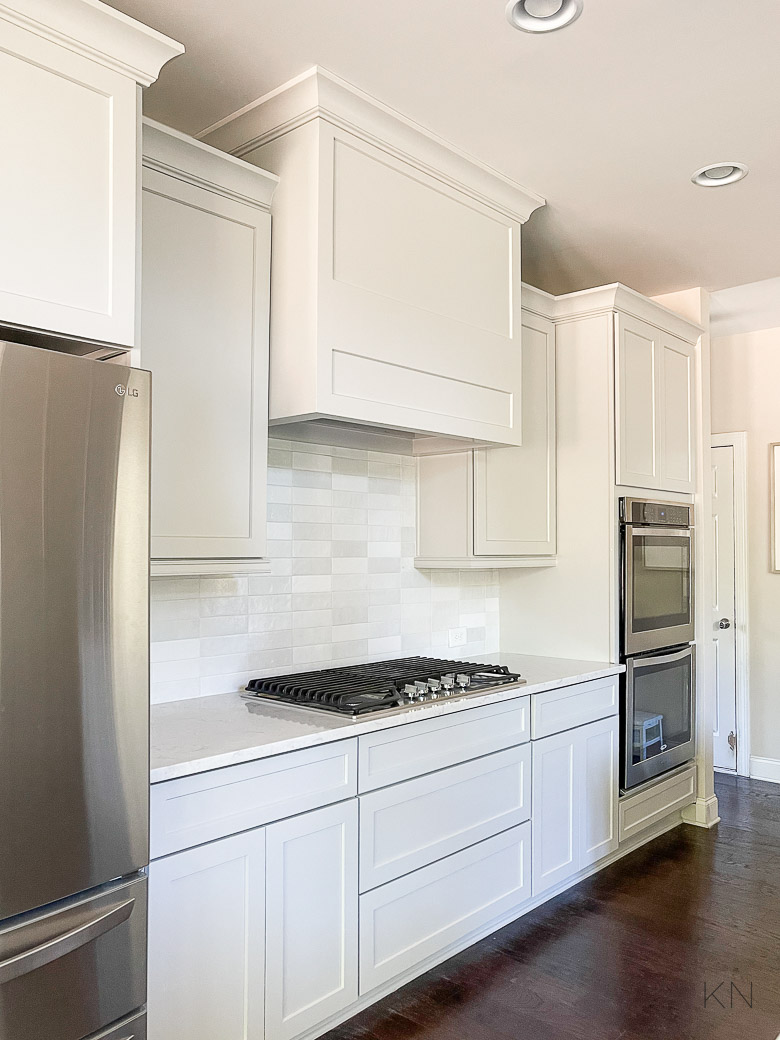
- modify the refrigerator opening to be built-in
- remove the stainless steel vent to install a custom hood to match the cabinetry
- install new hardware
Also, the Agreeable Gray cabinet paint is a soft, warm gray, verging on a mushroom tone (without a ton of brown). I knew we would also have to paint the walls and ceiling since our walls are a competing light greige — Edgecomb Gray. We are waiting on a new breakfast nook light delivery (the first one was damaged), and then an electrician will have to move the light to finally center it in the breakfast nook (the builder did not center it!), and then once all that’s done, we’ll have the painter scheduled to paint the walls, ceiling, and trim.
Here’s some of the day 1 progress…
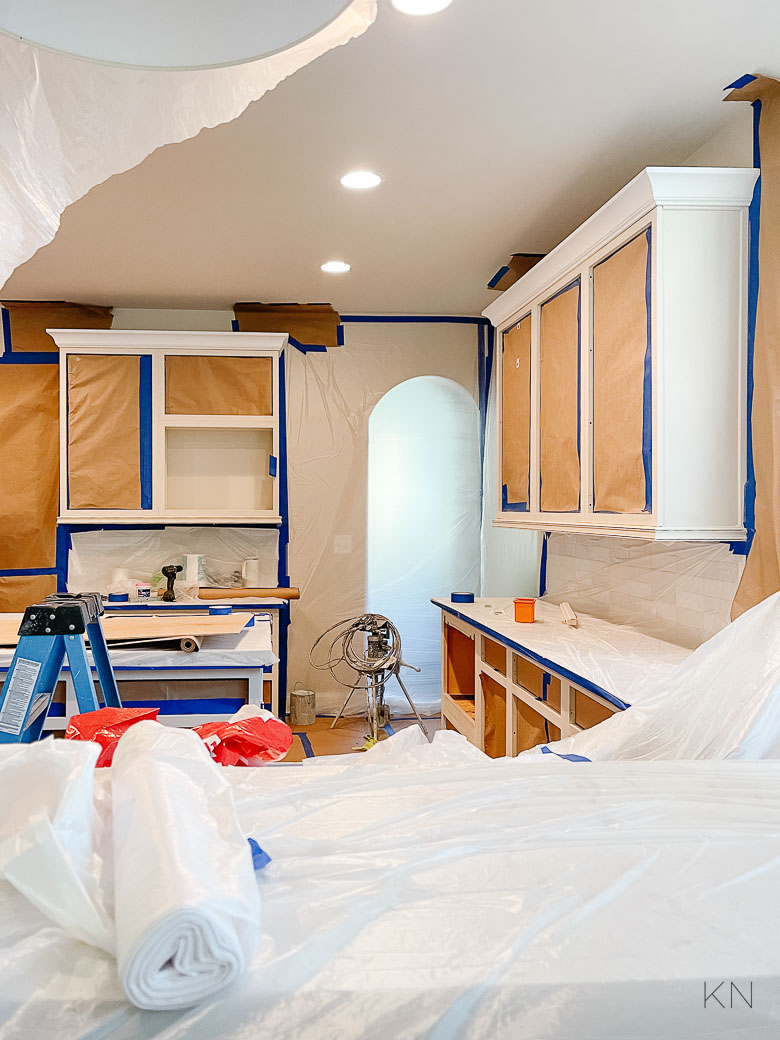
On the second day, painting of the boxes was completed (along with some carpentry). And on the third day, door installation began.
As to be expected with most projects, there were a couple issues with some of the doors, drawers needed to be adjusted, etc.
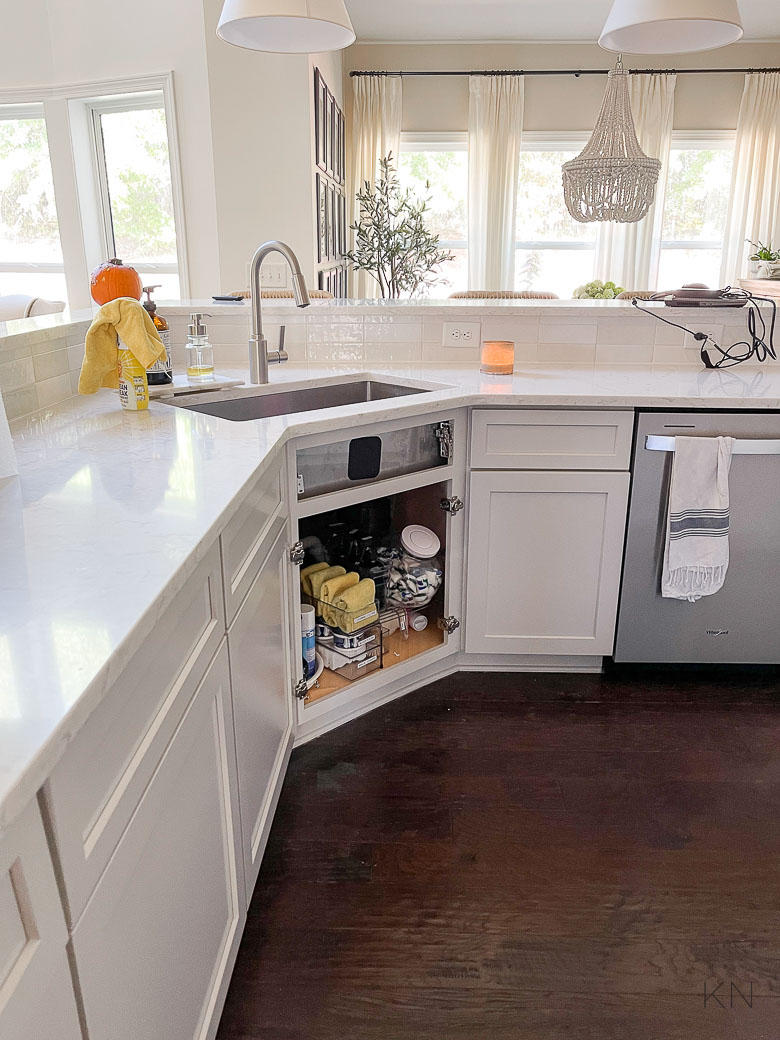
Sources: Backsplash Tile (2.5″ x 8″) | Faucet | 12″ Turntable | Chrome Risers (I used 2) | Clear Bins from Home Edit Cube | Clear Handled Bin w/Dividers | Narrow Bin w/Handle Cut Out | OXO Pop Canister | Amber Glass Spray Bottles (set of 2)
While the backsplash is a classic shape in a more modern, stacked configuration, and the cabinet fronts were designed to make the kitchen a little more sleek, I wanted to the cabinet hardware to be a perfect marriage of classic style with some tradition, with clean lines. I wasn’t sure if I wanted black hardware or something in the gold family, so I ordered samples of both. Once they were here, it was an easy decision for my kitchen and the look I was after.
I ultimately chose the Amerock Exceed pull (in the 5 1/16″ option) in Champagne Bronze for the drawers (the next size up for the pots and pans drawer), and the Amerock Blackrock knobs in Champagne Bronze for the cabinets. (c/o Amerock) In the past, I’ve used all pulls across both drawers and cabinets so I was looking forward to mixing it up a little. I have used Amerock hardware in just about all my projects and keep going back because the quality is unmatched. The cabinet folks were really impressed and pleasantly surprised by the heft. They’re beautiful in person.
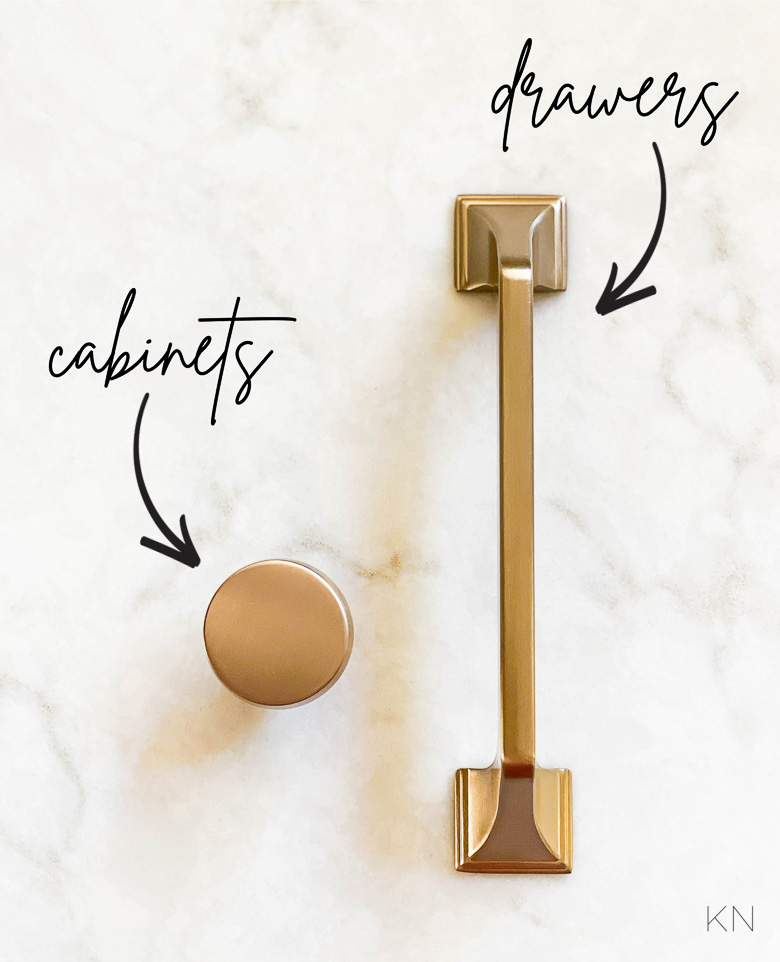
Sources: Cabinet Knob (5/16″ diameter, champagne bronze finish) | Drawer Pull ( 5 1/16″ center to center, champagne bronze finish)
They have lots of collections with several colors and sizes in each style. And, it 100% ok to mix styles that aren’t necessarily in the same collection.
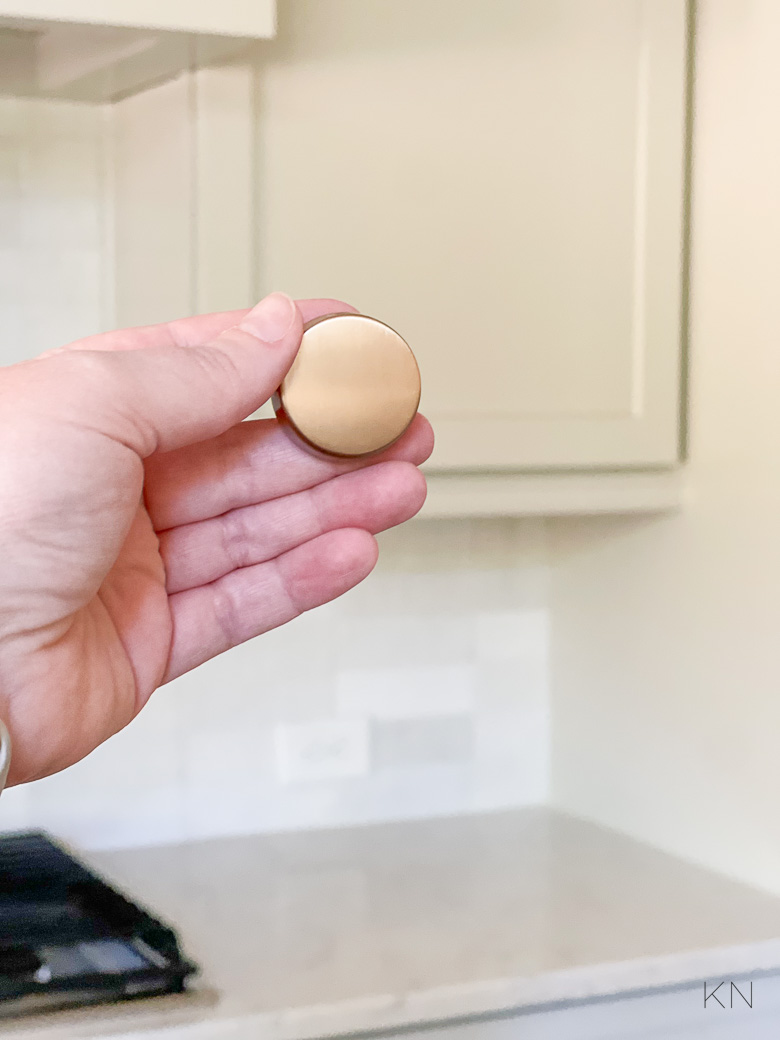
Sources: Cabinet Knob (5/16″ diameter, champagne bronze finish)
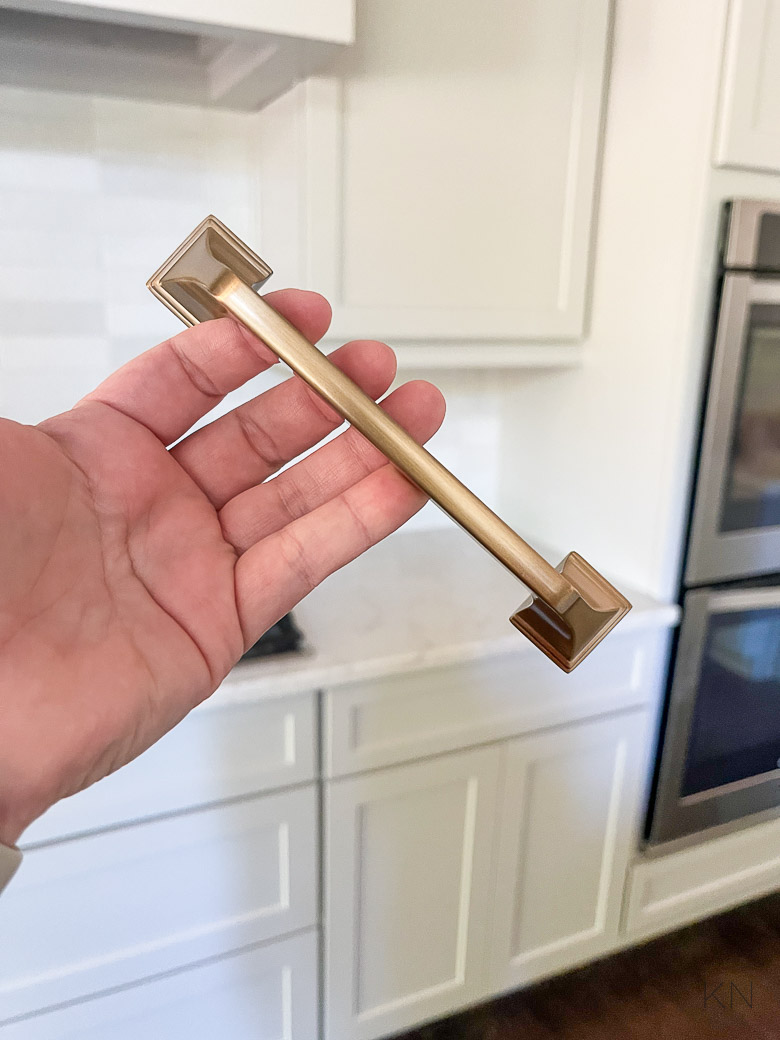
Sources: Drawer Pull ( 5 1/16″ center to center, champagne bronze finish)
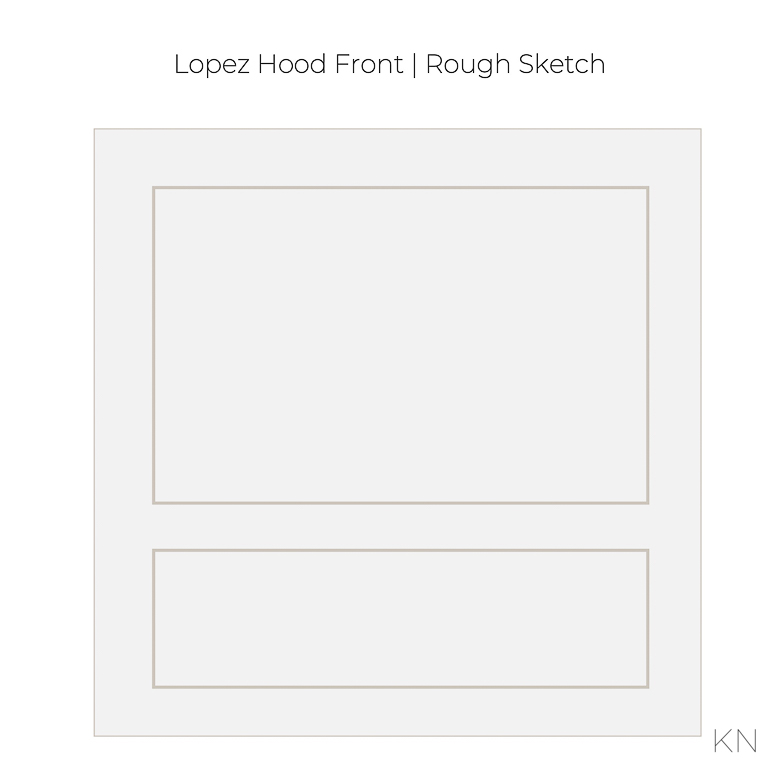
The hood was a… journey. I had been sending inspiration pics with different aspects I liked across several hoods over the past year. I never received a mock-up so I thought the box would be built on site, and I would be able to say (collaboratively), like this, or like that. Call it lack of communication, but when I came downstairs on day 2, the hood was hung. I was surprised to see that it looked like they had taken the last photo I had sent (out of many over the past year and just to point out a few aspects I liked), and they had re-created that entire hood, but since they couldn’t wrap the molding in an apron fashion around the bottom, they had used a chunkier piece and nailed it on the front as a shelf. I went back and forth about whether I should say something and ultimately decided that if it bothered me that much (I hated it), I had to. I asked if it was possible to see what it would look like without the (again, for lack of a better term) shelf on the front and they said they could easily remove it without consequence. Well, it broke coming off and then it left a full outline of where it had been. I could be ok with the larger-than-preferable spacing between the front’s top and bottom paneled boxes, but I wasn’t ok with gouged wood and an outline of the shelf. It was an area of contention but ultimately, they were able to easily remove the hood and hood molding and create a new front. Here’s what it looked like after the shelf was removed (not bad and had it not had a full shelf outline — which you can’t make out in this photo) I would have left it alone. There were other issues too — like it not being sized appropriately for the insert — that made the decision even more easy.
Sources: Backsplash Tile (2.5″ x 8″) | Refrigerator
And, for anyone who may ask (wink, wink), we have tall kitchen ceilings and since we were keeping our cabinets in place, taking them to the ceiling wasn’t a great option for us. The area between the cabinets is too short for upper cabinets (without them looking squatty, which I hate), and it was too tall to build up the space without it looking awkward. My solution was to take the hood to the ceiling and I love how it turned out. I went back and forth with this decision — attempt building them up and spending lots more money, only to potentially not like them vs. leave them as is and just add different molding. For us — especially with this not being a planned update, it was definitely the correct decision.
Sources: Backsplash Tile (2.5″ x 8″)
It makes me love our countertops we had installed a few years ago even more (Soprano by LG Viatera) and again, I can’t get over how well the cabinets, backsplash, and countertops compliment each other.
Sources: Backsplash Tile (2.5″ x 8″)
Today, the hardware’s been installed and we’re just waiting on paint and for the breakfast nook to come together. This kitchen makeover (part II) is nearly done and I am so happy we decided to proceed. After eight years with a bit of buyer’s remorse with some building decisions (and doing what we could over time to camouflage those decision), I am thrilled to fully embrace this space.
The full reveal will be coming early in the new year — to be alerted to the final kitchen, you can subscribe to emails at the bottom of the post!

The changes are stunning! Can’t wait to see the final reveal!❤️
Hi Sharon, Thank you so much for taking the time to visit and for your kind note. I am so happy that progress has been made and can’t wait to share the final result.
Looks fabulous. If I mention painting, my husband pitches a hissy fit. Yours is surely under-
Standing.
Dianne, Thank you for visiting and your note brought a smile to my face. Dave is so understanding and takes all of the changes in stride, thank goodness.
Love the colours! So much better than the buttercream tone. You must be loving it. Great choice to take the hood to the ceiling. Really looking forward to your Christmas tree post, can’t wait to see it!
Hi Heather, Thank you! I am so so happy with the changes that have been made thus far and especially love the hood. Please stay tuned as my Christmas tour will be published soon.
You are knocking out of the ballpark once again.. beautiful work in progress.
Trudy, Thank you for visiting and for your sweet note. I was so happy to report that progress has been made and hope to share the kitchen again soon after it is finished.
What an upgrade!! Absolutely love 🙂 The cleaner, whiter, brighter look is perfection. Would you care to sell your old cabinet pulls?
Hi Jennibell, Thank you for taking the time to visit and for your kind note! I have sent an email to you in regards to your inquiry.
For what I can see without the full reveal, your kitchen is insanely fabulous
You are so kind and I can’t wait to show the full reveal when the kitchen has been completed!