I’ll be sharing a post which includes priorities and projects I’ll be focused on and hoping to complete in 2024, but a lot of the projects on my list aren’t big projects. The majority of items on my list address small areas needing improvement within spaces. They’re primarily solution-based conquests, but I’m excited because many have been on that ever-growing list (we all have), and I’m excited to finally be marking them off. As a matter of fact, we are a start-taking-down-Christmas-decor-the-day-after-Christmas family, so while we were erasing the holidays from our house, I was also starting to tackle a few punch-list projects. Over the course of the post-Christmas, pre-New Year’s week, I was able to successfully tackle four projects and create solutions and improvements for ongoing annoyances that I’ve had for… well… a long time. I also included a few additional improvements at the end of the post I’ve made since January 1, but with motivation and a positive pace, we’re off to a good start for the year. Here’s what I tackled over Christmas break…
*Posts on KelleyNan.com may contain affiliate links. As an Amazon Associate I earn commissions from qualifying purchases. Click HERE for full disclosure.
By the way, several of these will get their own dedicated post soon, so I’ll be going light on details for the more involved projects. Stay tuned for more detailed explanations of several of these and you can sign up for email alerts HERE to be notified when they’re posted.
1. Organized Christmas Decor (Sorted, Purged, Developed System)
I have wanted to, planned to, talked about, stressed over, and procrastinated in tackling my Christmas decor for years. Doing what I do, I have amassed quite the collection over the years and even casually letting go of a few things here and there, the volume of holiday storage items was OOC. I’m happy to report, I finally wrangled it into a workable system that will work for us longterm. I culled, organized, and developed an entirely new system. New specific totes and racks are involved and while I’ll be sharing in more depth, labels and THESE QR labels are a key component. I’ll be sharing all the details, before, after, etc. in a full blog post soon!
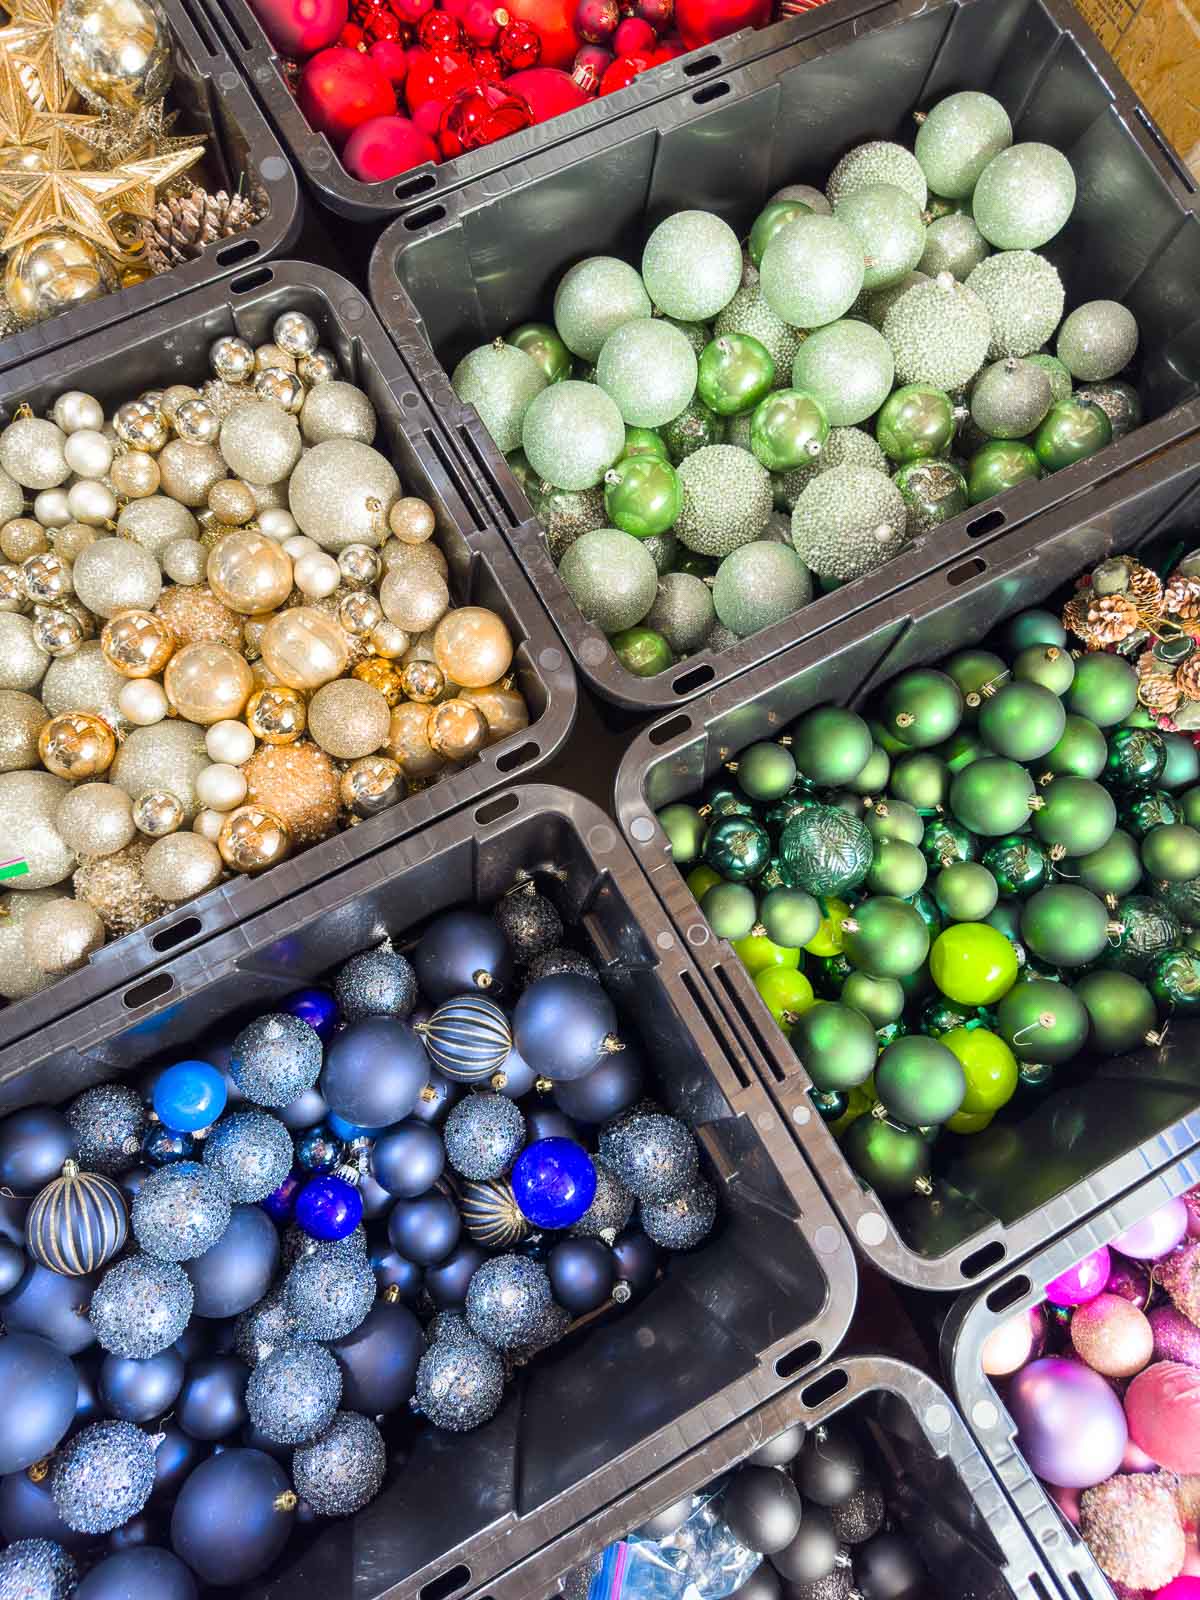
Sources: 27-Gallon Storage Bins
2. Corralled the Stuffed Animals
Eliza has an embarrassing number of stuffed animals — and I’m sure this is a common thing. I’ve always loved gifting her extra “special” Cuddle & Kind dolls, but we’ve always loved a casual soft Jellycat, too. And then there’s lots of random stuffies and souvenirs and gifts and… Basically, she had four big baskets, stuffed to the brim in her room. The funny thing about Eliza is — like she is with all her toys — she doesn’t have a favorite. She seriously is an equal opportunist and chooses different animals to play with and sleep with every night. And if anything… I mean anything goes missing, she’ll notice. One day, I decided to try to thin out at least a FEW of her animals and felt I could safely do so without her catching on. I guess it’s a good thing they were still in a bag in the basement because over the course of a week, she recalled and asked where each one had been. So… that didn’t work. But, I also didn’t want to leave them all in baskets, taking over her bedroom.
So, I was thrilled to try this back-of-the-door net solution. Y’all, I grew up with the hammock and this is way better. It comes with dowels to hold the organizer more flat against the door, and while mine (HERE) has four pockets, there’s a new version that’s a few dollars less and comes with five pockets (HERE) that I would prefer. You can also use the back-of-the-door stuffed animal organizer for other dolls, toys, blankets, barbies, etc.
I hung it over the back of her playroom door and put in all her “play” collection, while leaving her Cuddle and Kind dolls (and Jellycats) in her bedroom. This one simple change has been huge! We have entire empty baskets available in her room, now. And, I’m hoping that over time, by being able to see these on the back of the door, she will either 1. play with them because they’re visible, or it will become more evident which stuffies can be culled.
While I chose the back of the playroom door, you could also hang one behind a bedroom door, closet door, attached bathroom door, etc.

Sources: Over the Door Organizer for Stuffed Animals (New 5-Pocket Version) | Over the Door Hooks (4-pack)
FYI, I also upgraded the over the door hooks to THESE heavy duty hooks that are extra sturdy, have a non-scratch coating, and lay flat. I had to wedge them over the eyelets a little but it worked perfectly.
3. Reconfigured Eliza’s Closet to Accommodate Shoe Drawers
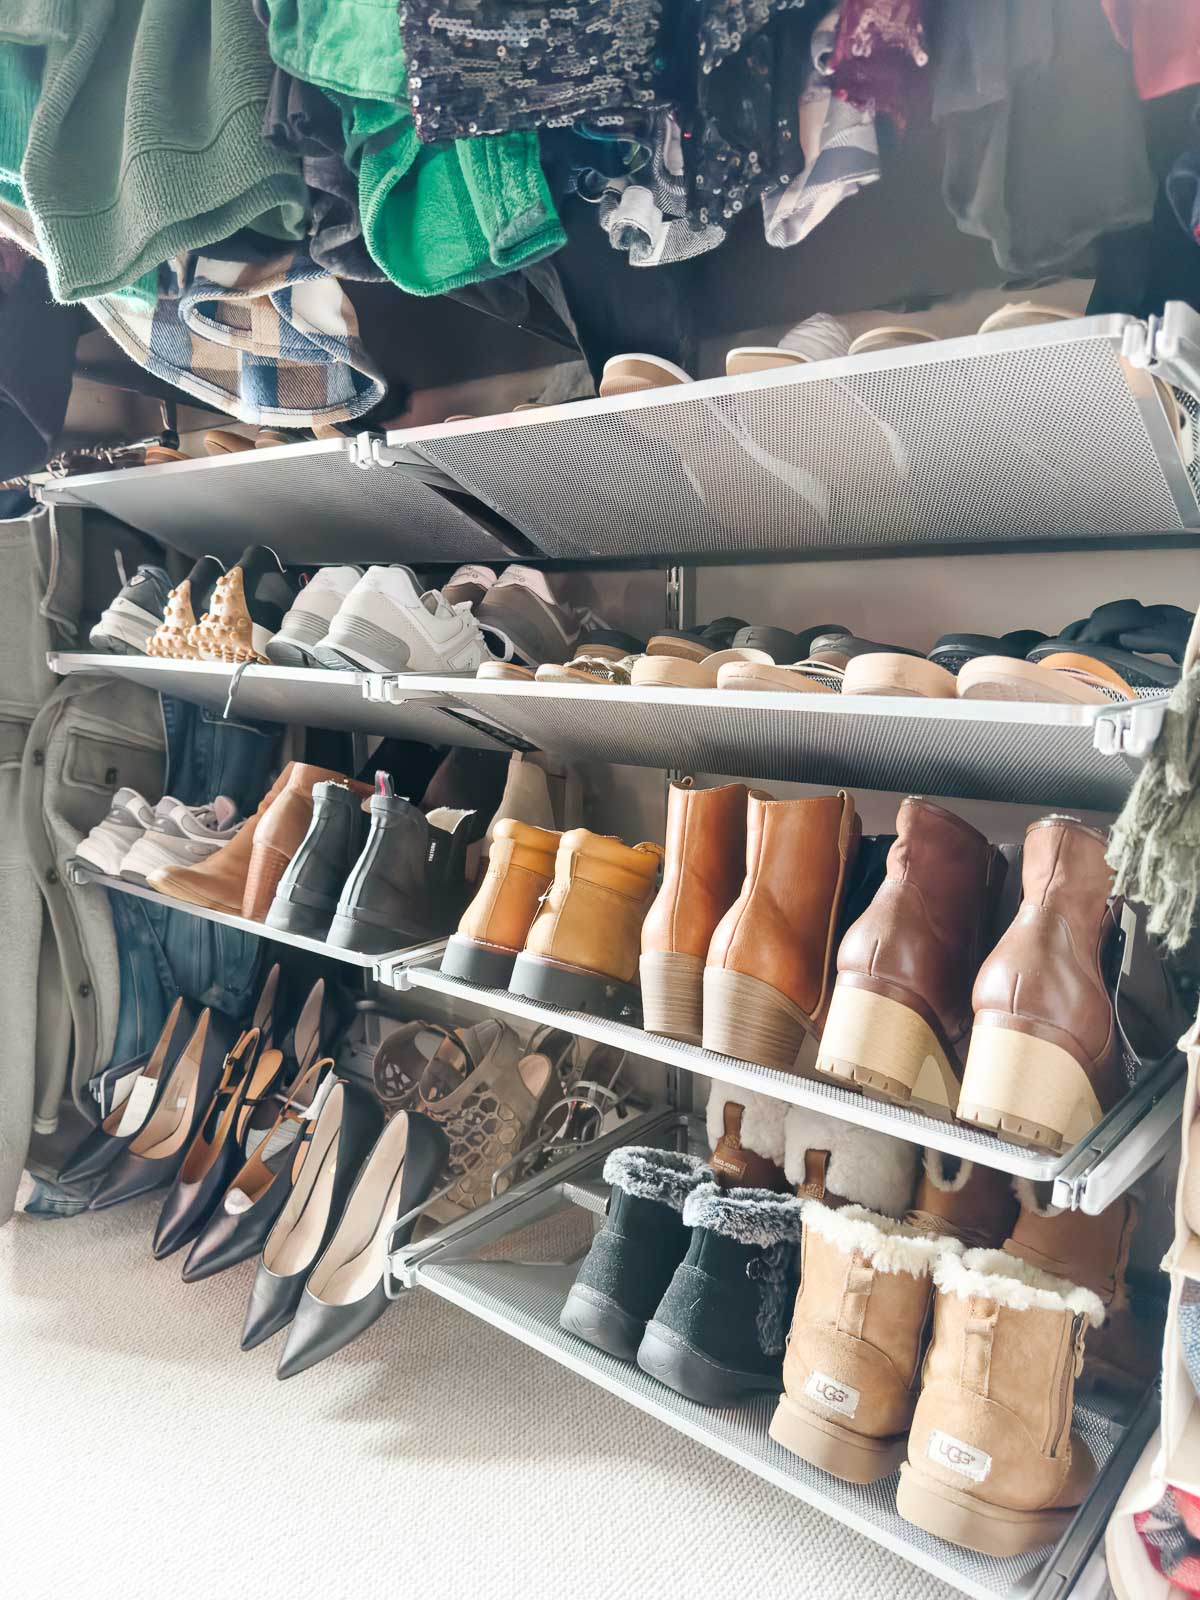
The Elfa system in Eliza’s closet has been amazing and a big reason I wanted to start with the Elfa was so that as she grew, we would be able to make adjustments to accompany her changing needs and sizes. For more than a year, I’ve been using her former drawers to come up with ways to store her shoes and as her feet have grown, storage has gotten more and more tricky. So, while the annual Elfa sale is happening (currently 30% off all components HERE!), I finally committed to switching her drawers to shoe drawer pull-outs. I don’t know why it took me so long. Not only is it more organized, but Eliza finally knows how to put her own shoes away (and looks forward to it!). Before, she nor Dave knew how I did it, so I was the only one putting her shoes away. Since I already have the closet system, this component change was so simple. I moved up the shelf a couple notches, added the shoe pull-outs (while keeping the spacing tight to maximize the number of drawers), and kept the deep drawer on the bottom for upsized rain boots she can’t wear just yet (I’ll likely add more upsized shoes to be stored in here.) Each shelf can hold eight pairs of shoes for her and we still have extra room for growth.


Sources: Easy Hang Standard | Gliding Mesh Shoe Shelf | Mesh Drawer
4. Added Elfa Door Organizer to Our Closet
I don’t know how or why we have a full Elfa system in our closet but we failed to have a simple Elfa door organizer in here.
My closet is begging for special attention this year but to get things moving along, I addressed a few of the major immediate issues… 1. I cleared out two huge contractor bags of donations, sitting in the middle of the floor, that we had pulled literally — 8 months ago? I mean, we need to pull donations again and we didn’t drop off what we pulled last spring until a couple weeks ago. Yikes. But, having those out of the closet created a LOT more room.
Another big pain point I needed to address was that with our vaulted ceiling that comes down low, our configuration is tricky and I only have so much room for shoe drawer pull-outs. And, my collection had exceeded the allotted space (even with purging several pairs). Casual pool slides, flip-flops, and slippers were taking up valuable real estate on my shoe racks and were overflowing to the floor and other shelves. So, I decided to dedicate an Elfa door organizer to those, specifically. Before, the back of the door only held Dave’s hats so it was easy to add a pegboard with hooks to the top, with large baskets dedicated to slippers and rubber sandals below.
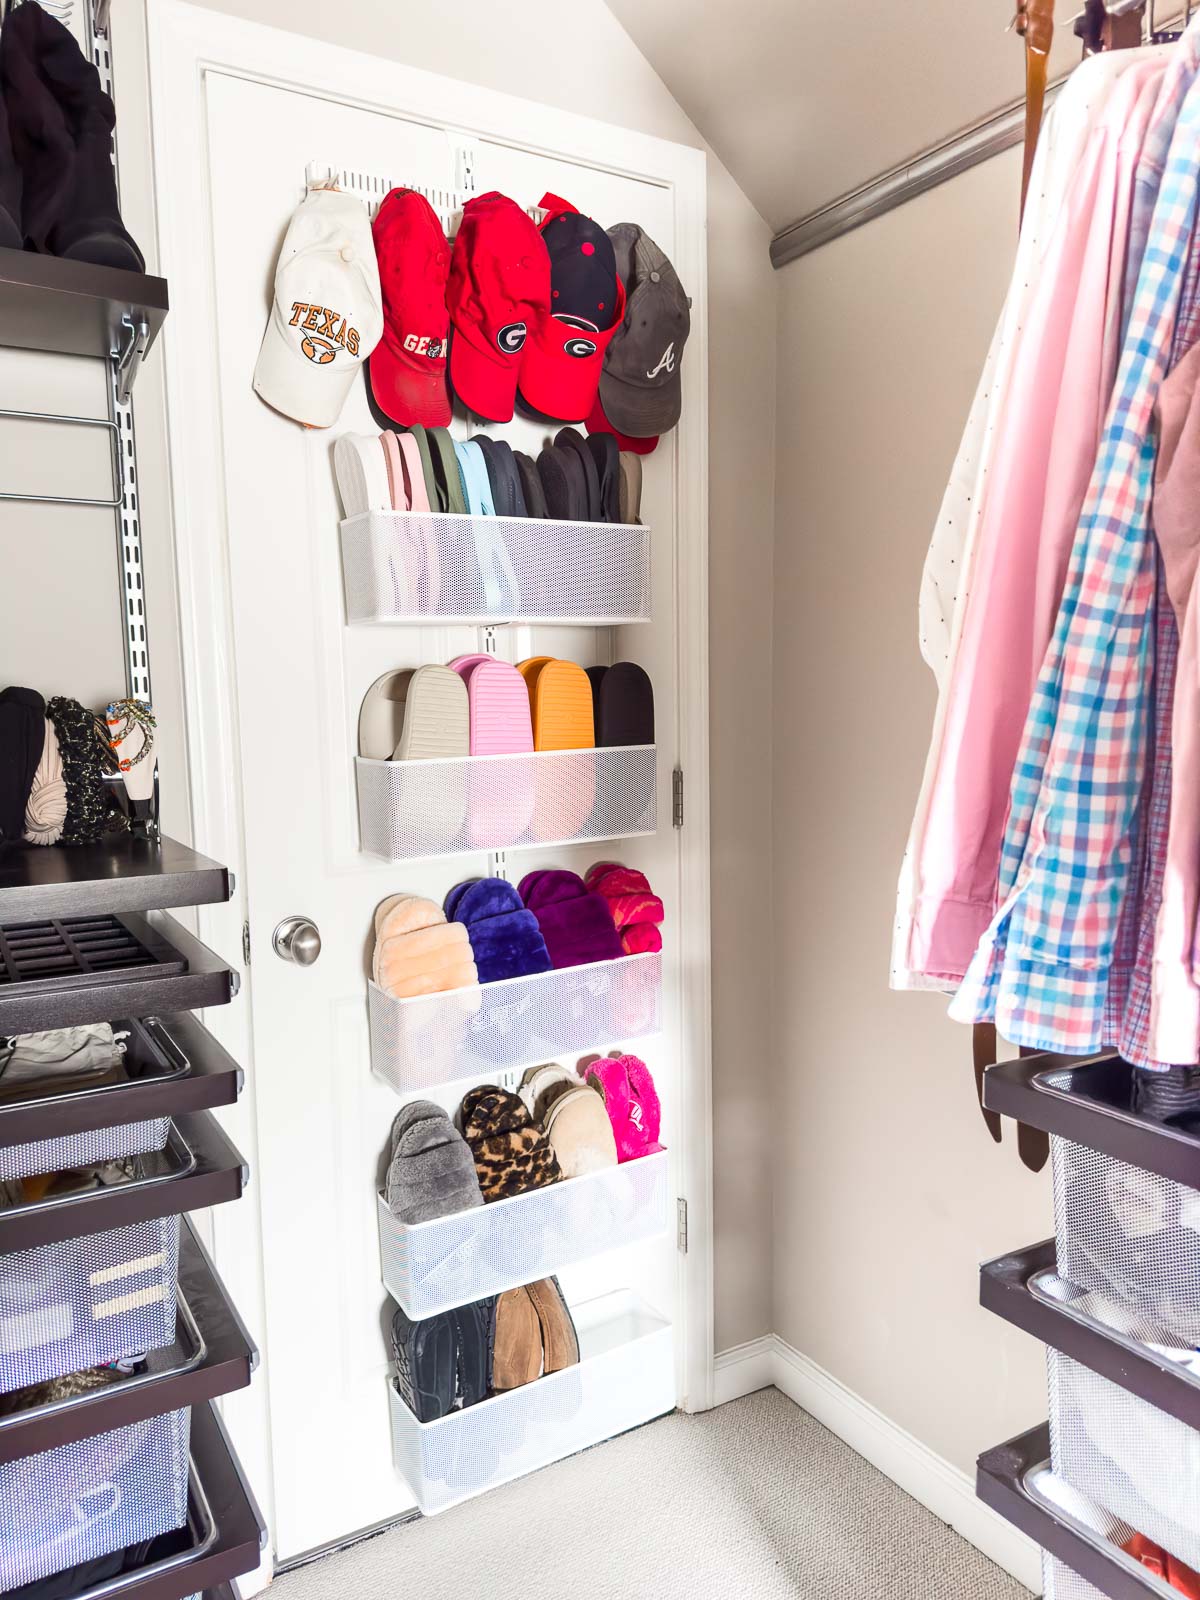
Sources: White Mesh Over the Door Storage Rack (pre-configured) | Peg Board | Peg Board Hooks
Speaking of casual slides, my favorite cushy pools slides from Target are back this year (HERE)! I love the support and that they’re all one piece and after I think I collected most colors, I got my mom addicted to them, too. I wore these almost daily last summer.
Sources: Gliding Mesh Shoe Rack
Additional Small Projects Completed Since January 1
Gran Nan gifted Eliza an original watercolor of Eliza’s favorite place — Rosemary Beach — last year for her birthday and I had a photo of Eliza on Rosemary Beach printed to accompany it six months ago. And then, they both sat on my office console ever since. I knew I wanted to trade in her little animal gallery (that’s been in place since before she was born) for a more age appropriate (and personal) beach gallery but I just never made the time. So, I finally jumped online to order a few photo possibilities (I order all my prints from Mpix, btw) and on the day they arrived, I chose my winner to round out the trio and re-hung the gallery. I’d love a sunset/sunrise with warm colors for the bottom photo, but that doesn’t exist (yet). So, I went with something we did have access to.
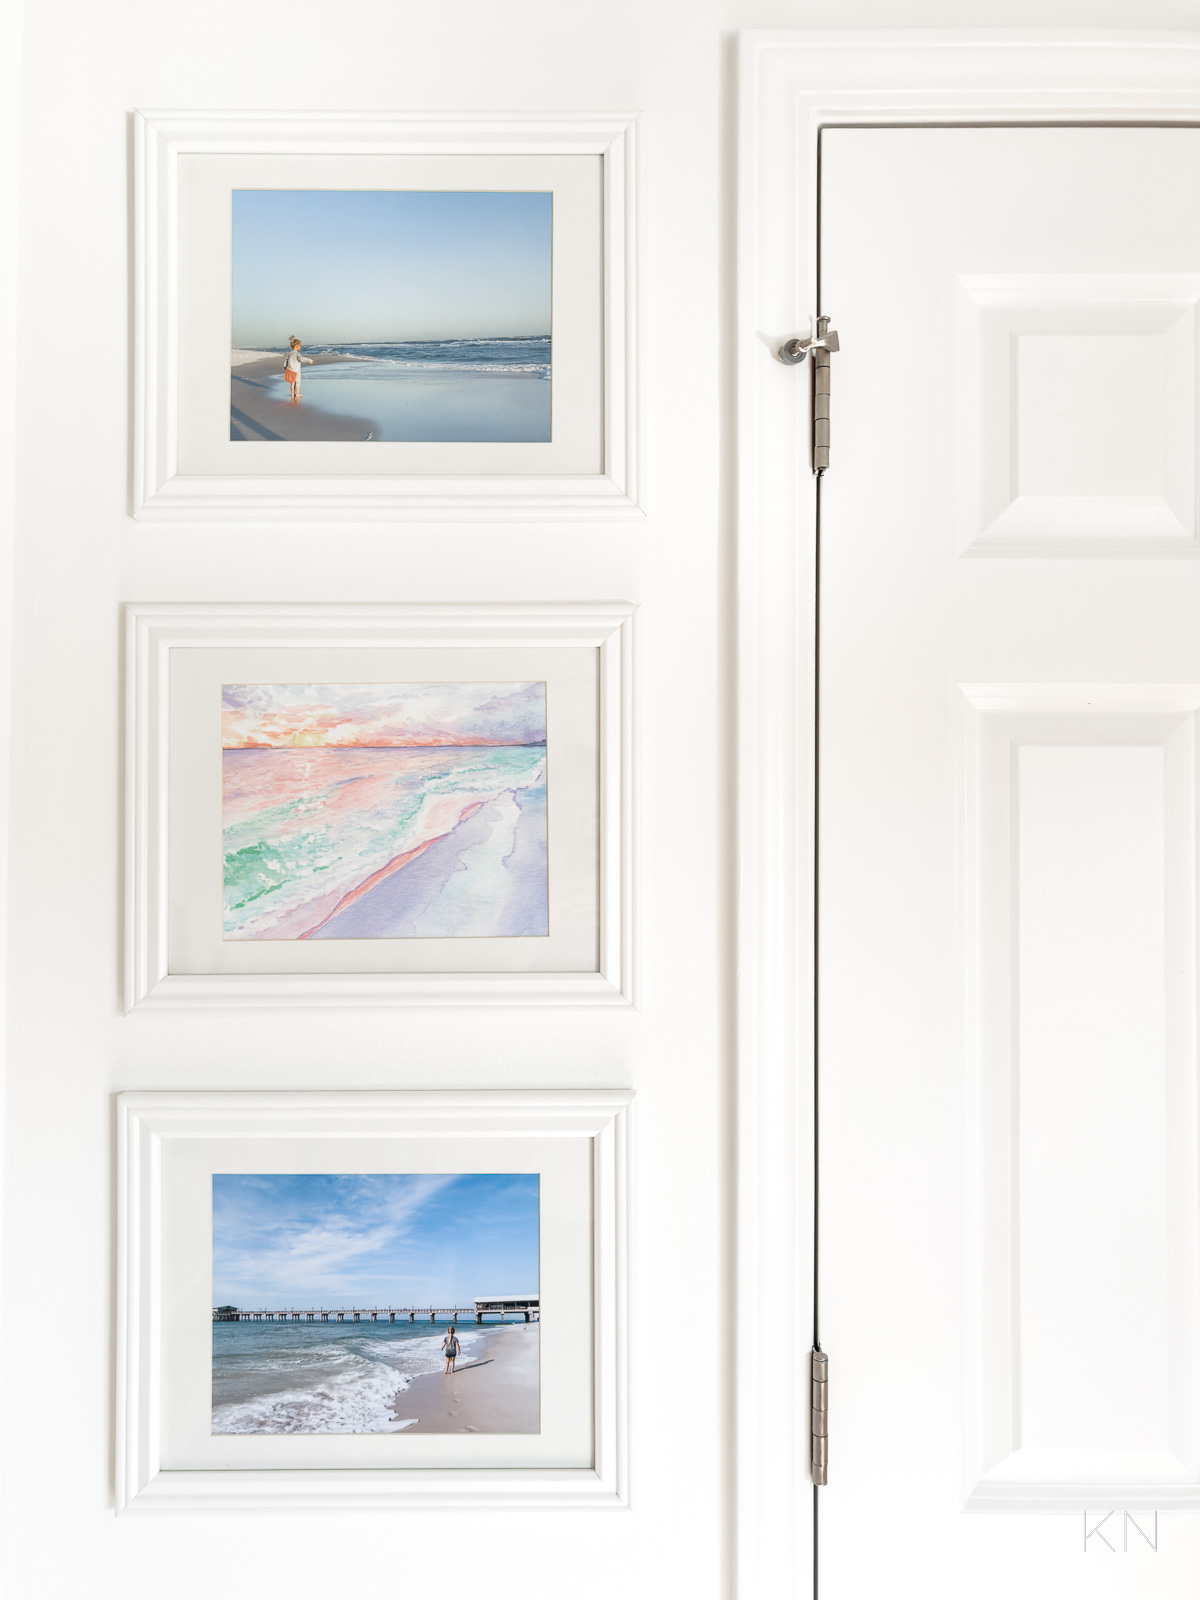
Frames (8×10 photo with mat; 11×14 without mat) (SIMILAR)
Another item that’s been on my list for a LONG time was to add a pinboard to my office — for a place to pin announcements and photos that make me happy, but primarily as a place to hang some of Eliza’s favorite art when she presents it to me, specifically. I never thought I’d have a pinboard again, but here we are. I had a growing pile on my desk and nowhere to put it. So, I did it. At the beginning of the year, I ordered THIS pinboard off Amazon (it comes in a bunch of sizes but I went with the 27″x43″ option) and hung it with THESE simple claw picture hangers as soon as it arrived. No tools necessary. You can’t see the frame finish as well in photos but it’s a soft white where you can still see some woodgrain — I love it. And, most importantly, Eliza loves it and I love that she can see how proud I am of her creations.
By the way, a bit more but THIS pinboard is so beautiful. They also have an identical one on PB Teen but the one on the PB Kids website is priced lower.
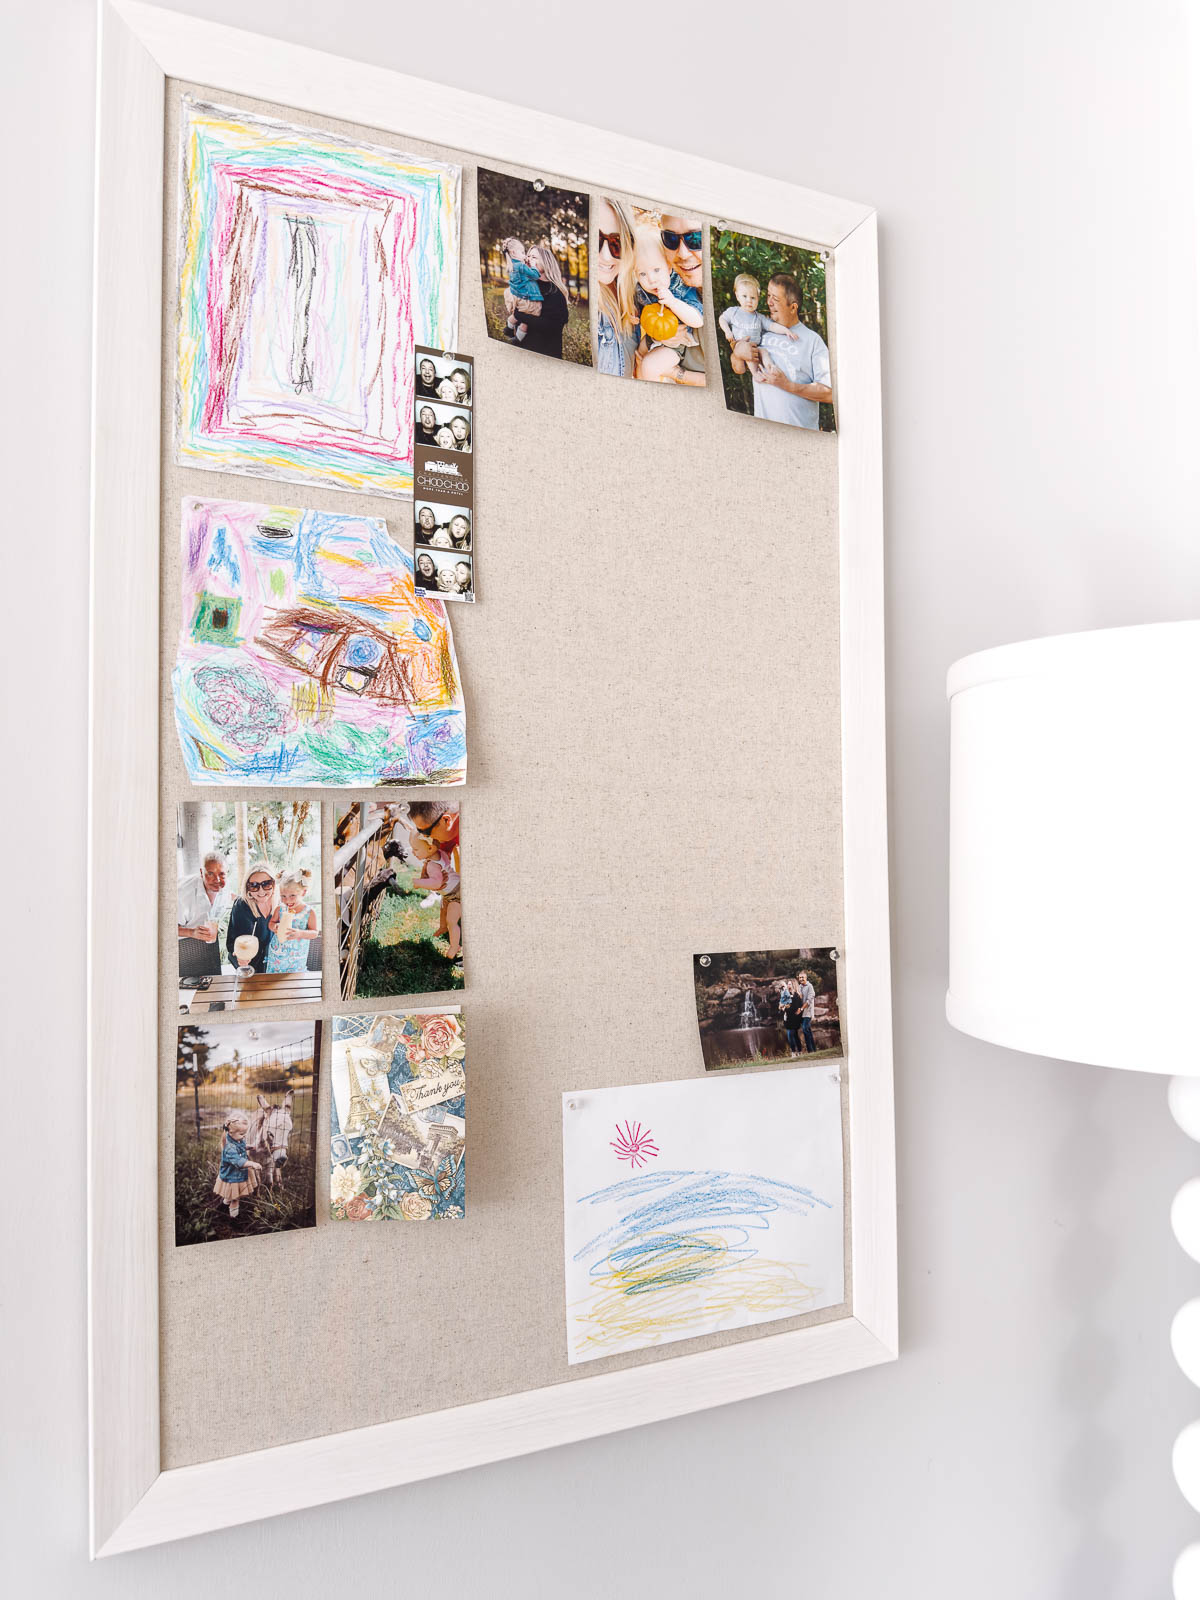
Sources: Pin Board (27″ x 43″)
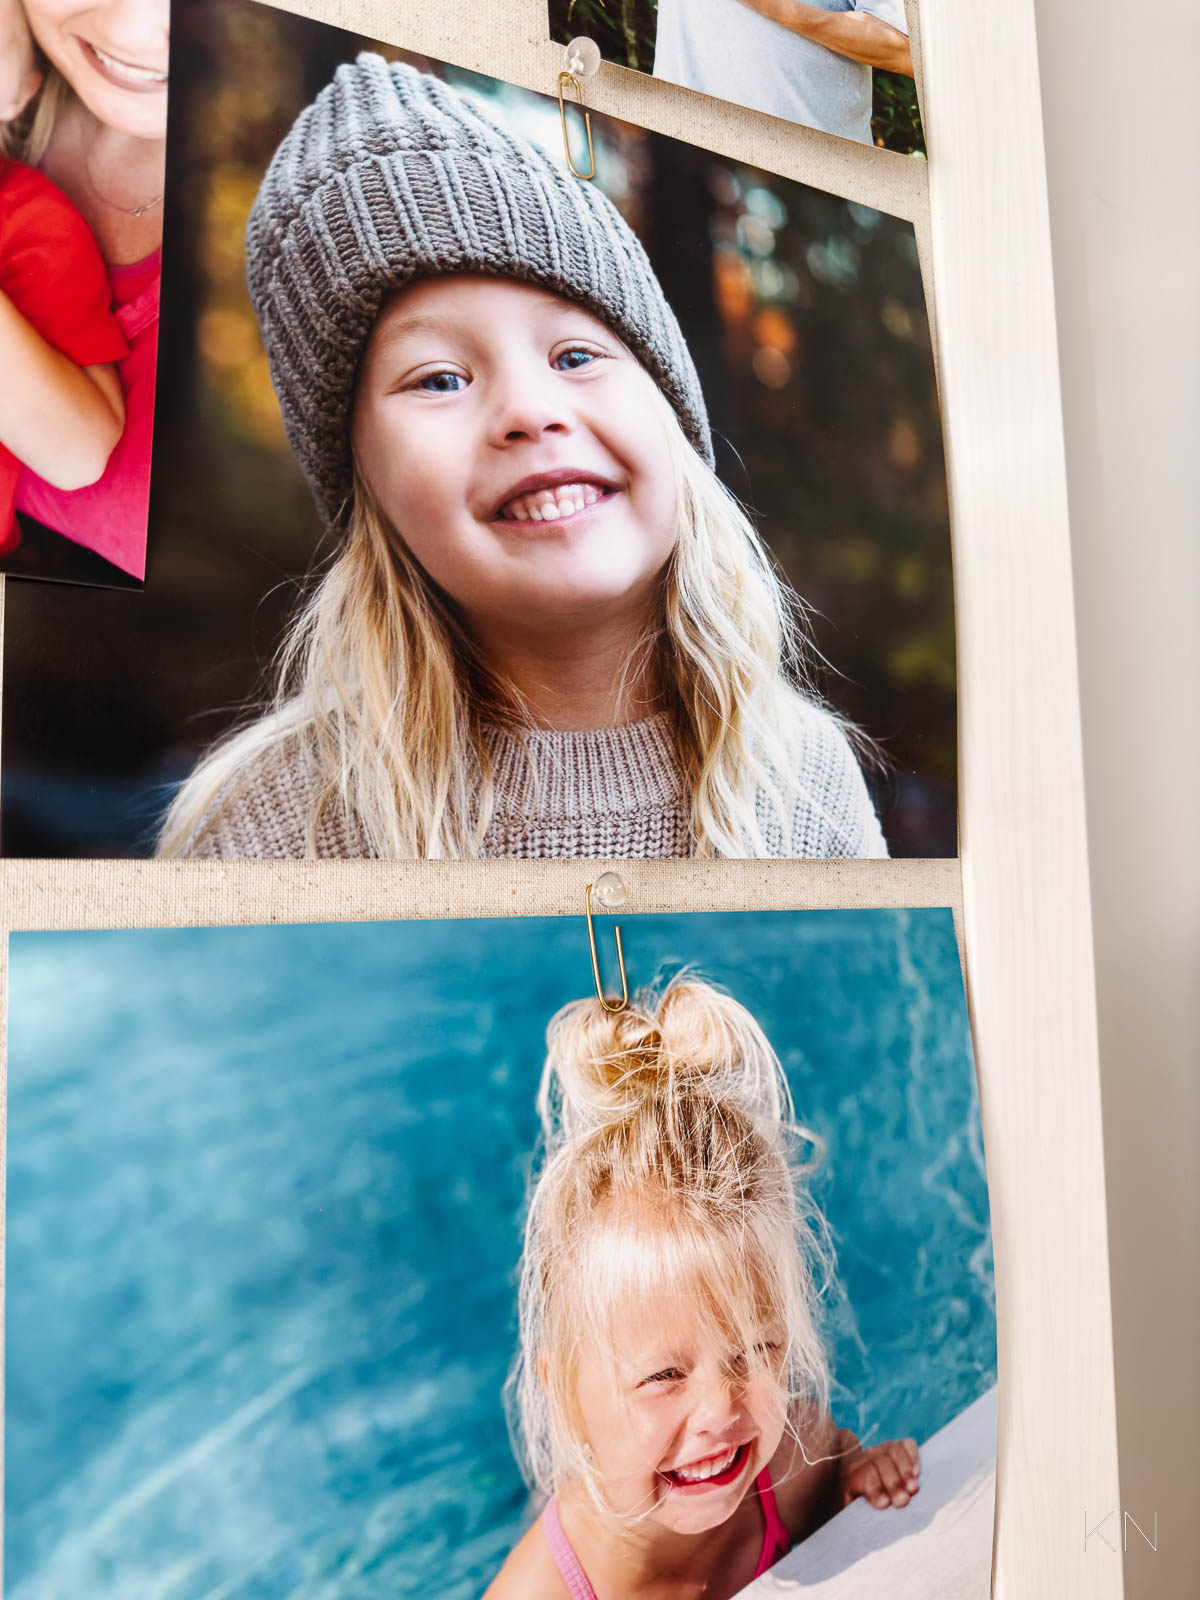
I don’t mind pinholes in my inexpensive printed prints but my mom can’t stand it. She found a quick solution if you prefer your photos/art to remain hole-free in THIS post from Girl in the Garage. Such a clever at-home alternative. I used her method for some of my larger 8×10 prints and would do it also for special art. I just added a paperclip to the top of the photo and then stuck a pushpin through the curve. THIS set of clear pushpins actually comes with pushpin clips.
I’ll be sharing a more exhaustive list of current priorities and projects I hope to tackle this year within the next week, but I’m feeling great about marking some things off that have been on my radar for a long time.

Inspiring results! I especially like the shoe shelves. Kelley, I always rely on your great gift basket ideas for the kiddos so I’m hoping you’re planning a Valentines post this week since I’ll be celebrating early with my grandkids 2 weeks from today.
Hi Debra, Thank you for taking the time to stop by and for your kind note. I’m working on a post now and hope to include Eliza’s Valentine’s basket. I also just purchased this darling throw for an early gift.
https://rstyle.me/+Z9wE4tX6HwSYr94crK9f1g
Awesome! Love all of it. Look forward to the blog on Christmas decor blog post. Eliza is so cute and getting so big!!
Thank you for your thoughtful note, Dina! I hope to share my Christmas storage post soon. I was determined to get things organized like they needed to be, once and for all, this year. Please stay tuned!