If you are as impatient as I am and prefer crafts that don’t require you to be “craft-y” per se, then this super simple DIY Valentine’s Day ribbon garland is the perfect little project. For smaller holidays, I don’t do much decorating, so easy, handmade creations are a good way to let your home celebrate without going over the top. I created my first ribbon garland this past 4th of July and it brought the perfect little hint of patriotic flare. Below, I will take you through a quick step-by-step of how to create your own ribbon garland.
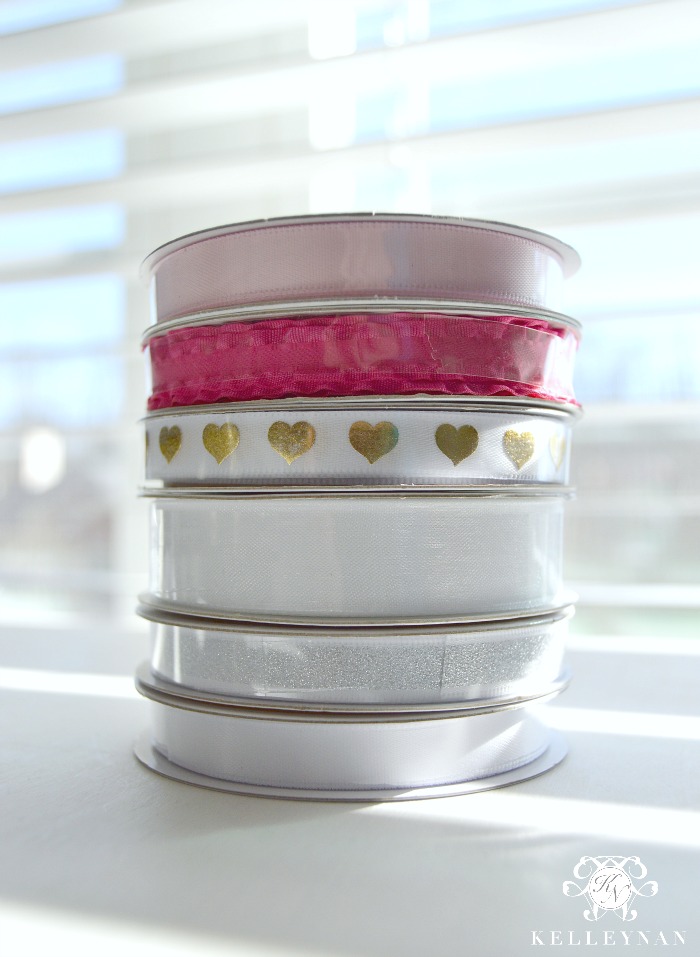
You can begin with as many rolls of ribbon as you like; I prefer non-wired, slender ribbon. I also like to use ribbon that has slightly different detail- some sheer, some slightly wider, some with print… there are so many options! While these were smaller rolls, I did end up using all of it for my garland, so make sure you purchase more than you initially think you need. Once you have your ribbon, we can get started!
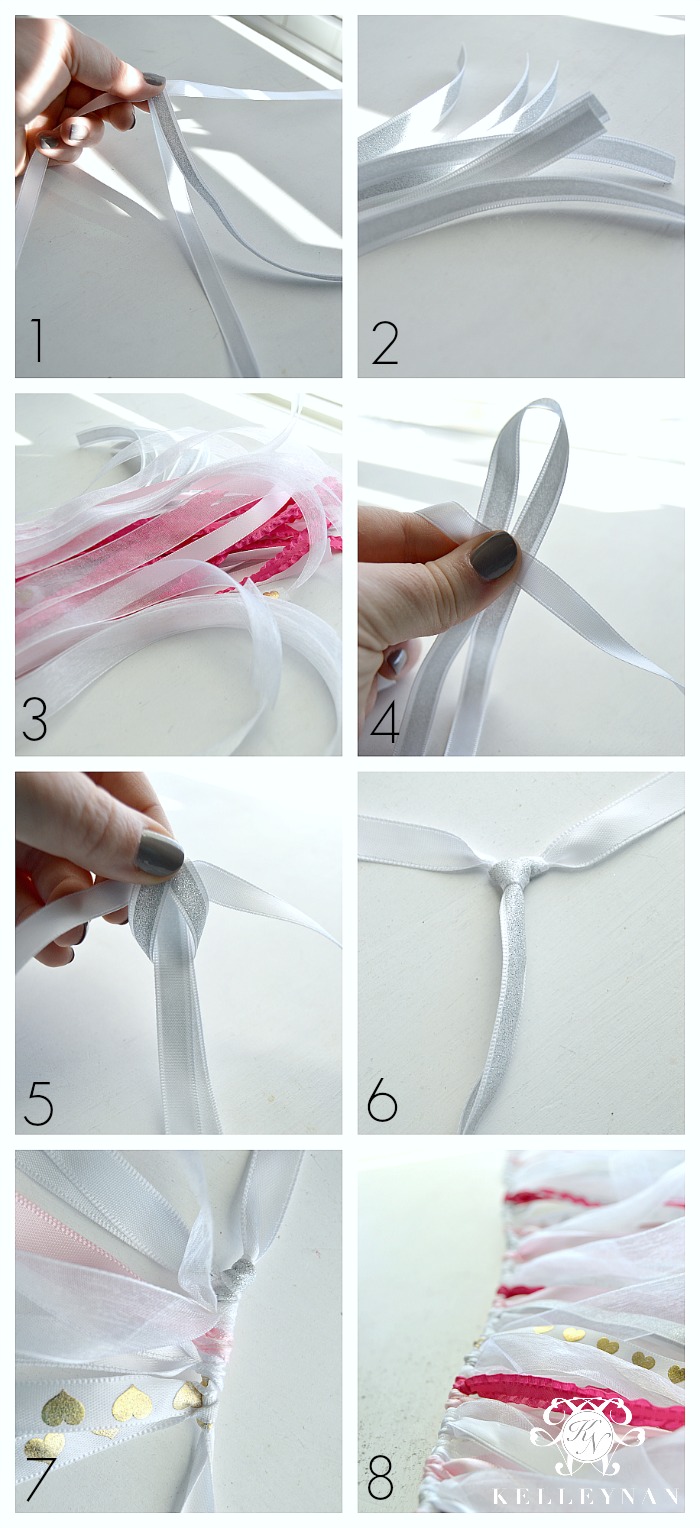
- Depending on where you want to hang your garland, cut a piece of ribbon or twine long enough to have a swag and two tails to secure the garland. This will be your base. Take a piece of ribbon and fold it over the “base” to determine how long you want your garland strands and cut the ribbon to your preferred length.
- Use the first strand of your garland as the template to cut your other strands. It doesn’t have to be perfect, just close.
- Continue cutting strips until you have a large pile.
- Now you are ready to start adding strips to the base to create your garland. Fold the strip in half evenly to form a loop. Place it behind the “base” and keep in mind- you want to start far enough down on the base to leave a little tail for securing the garland when you are ready to hang it. Note: you can tie/secure the tail of the base to make tying the strips easier, although this is not necessary.
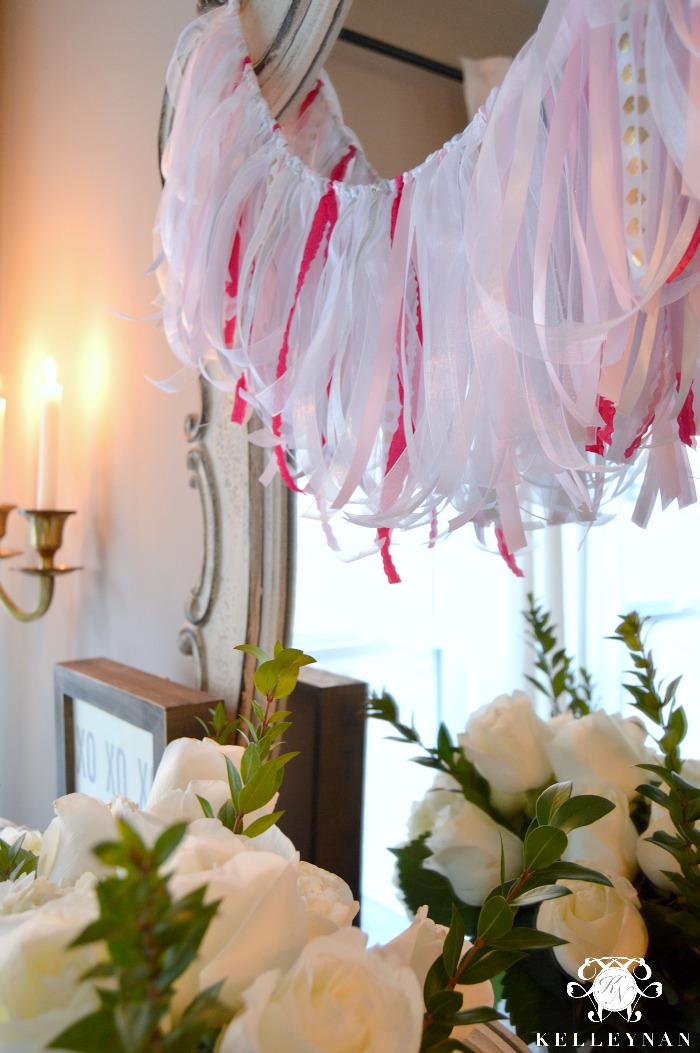
- Fold the loop down and pull the ends through. This technique is important to how the garland will ultimately turn out; you want all ends draped downward.
- Pull tightly so the knot is secure.
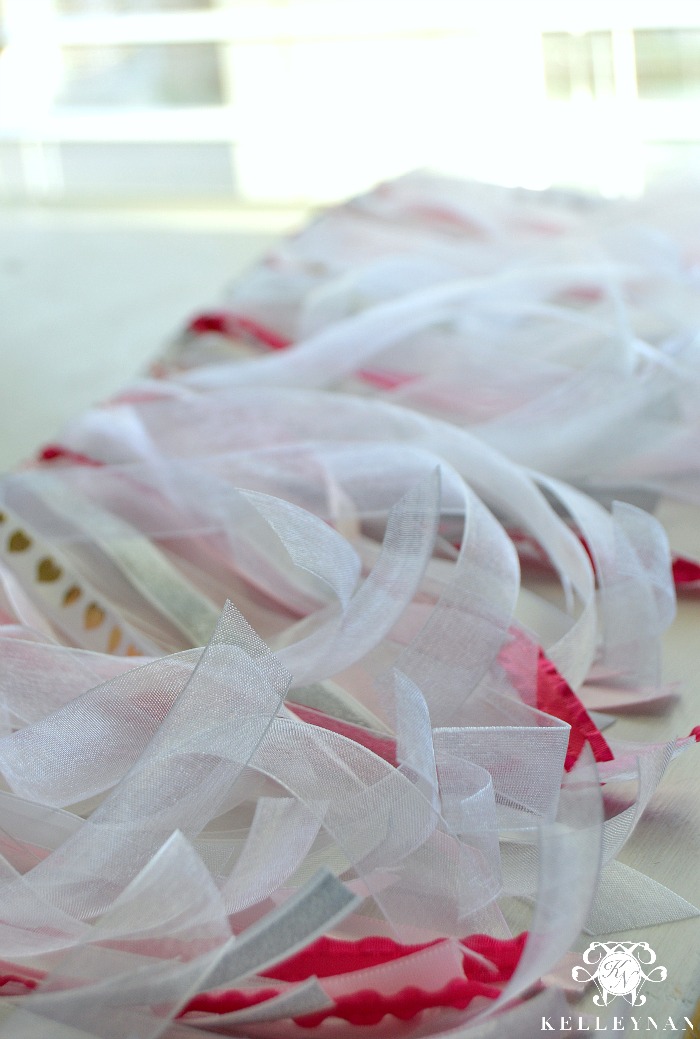
- Repeat Step 6 working your way down the base, sliding each knot close to the last. The closer you place the knots to each other, the more full your garland will be. The process is time consuming, but gets easier as you make progress down the base. I like to place my strips in no specific order, however, because I knew I wanted white to be dominant, I used less pink and only a couple of fuchsia strips and did space those evenly.
- Once you work your way down the base, make sure your knots are all pulled taut and that your ends are all pulled down in the same direction. That’s it!
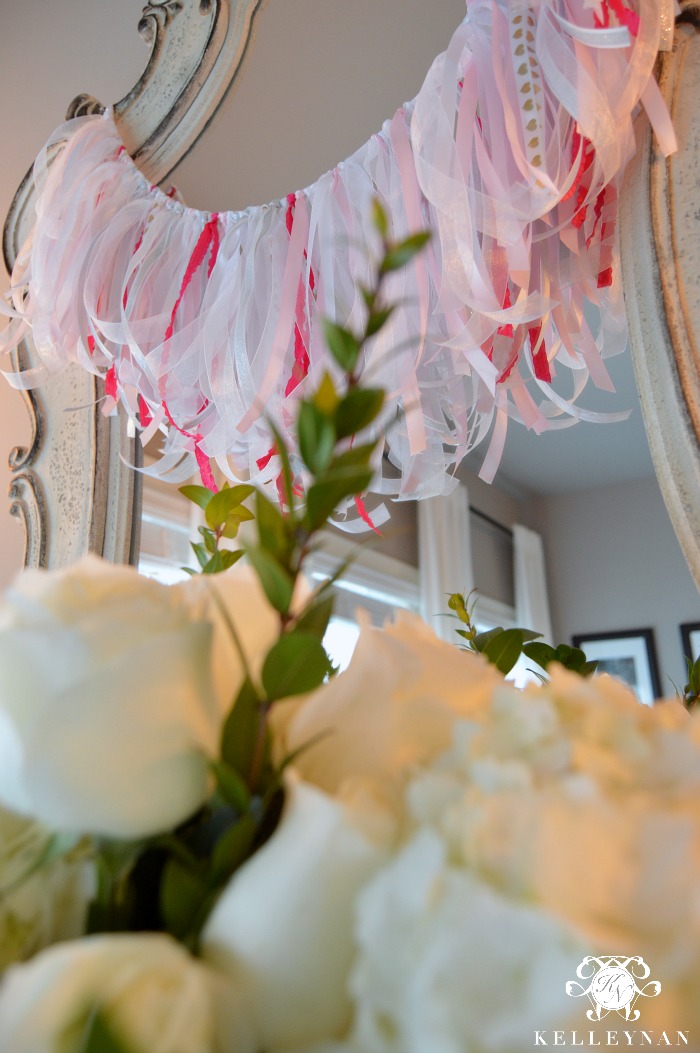
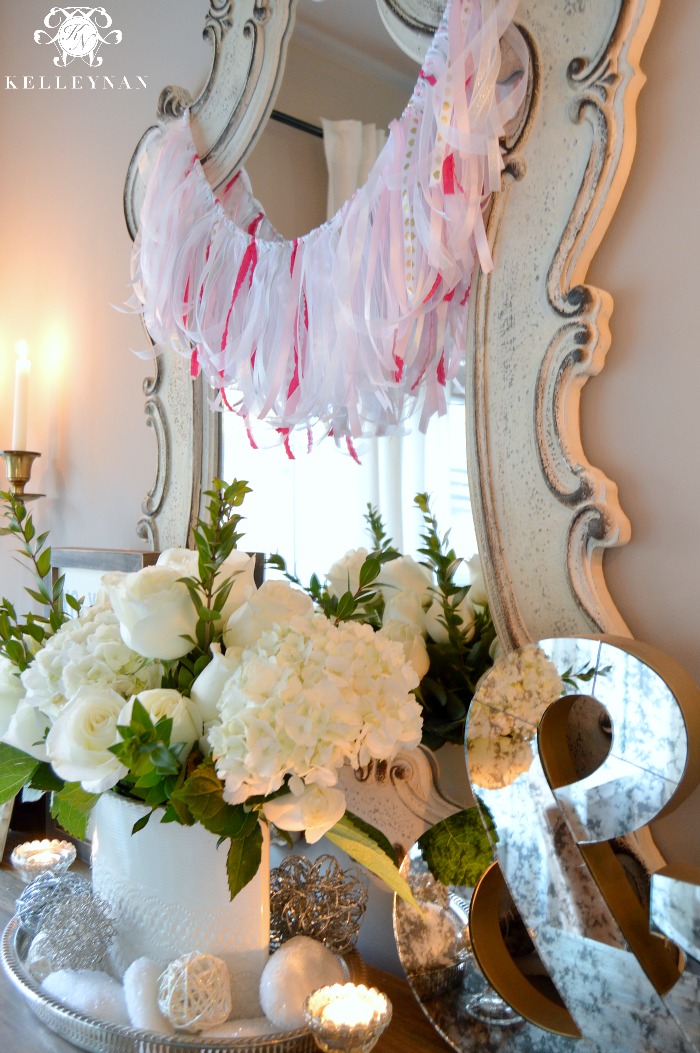
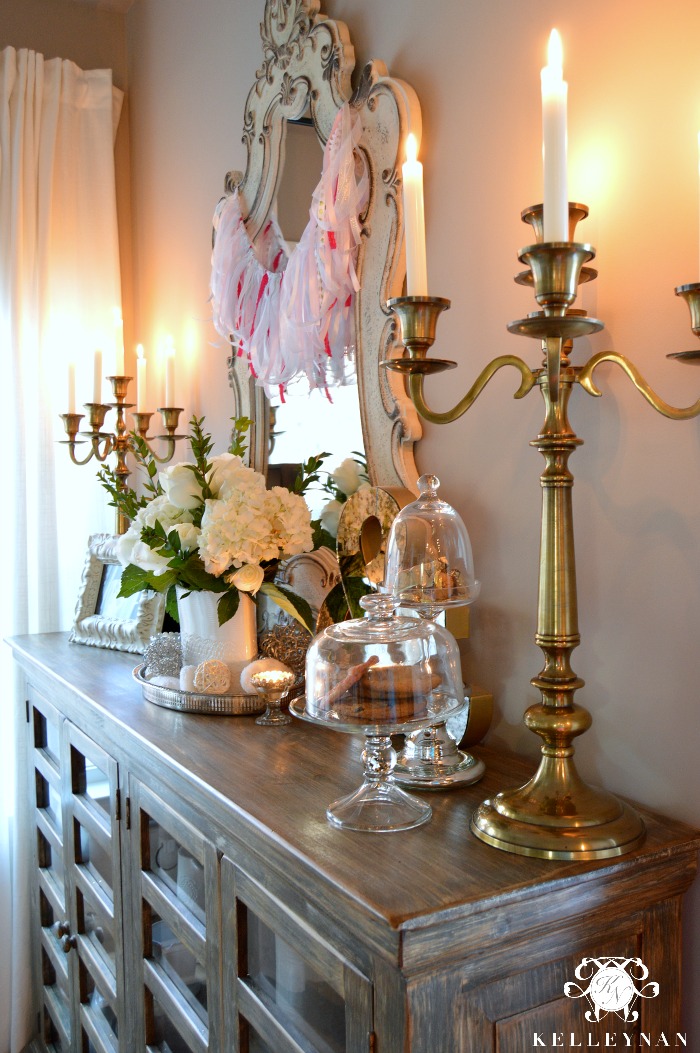
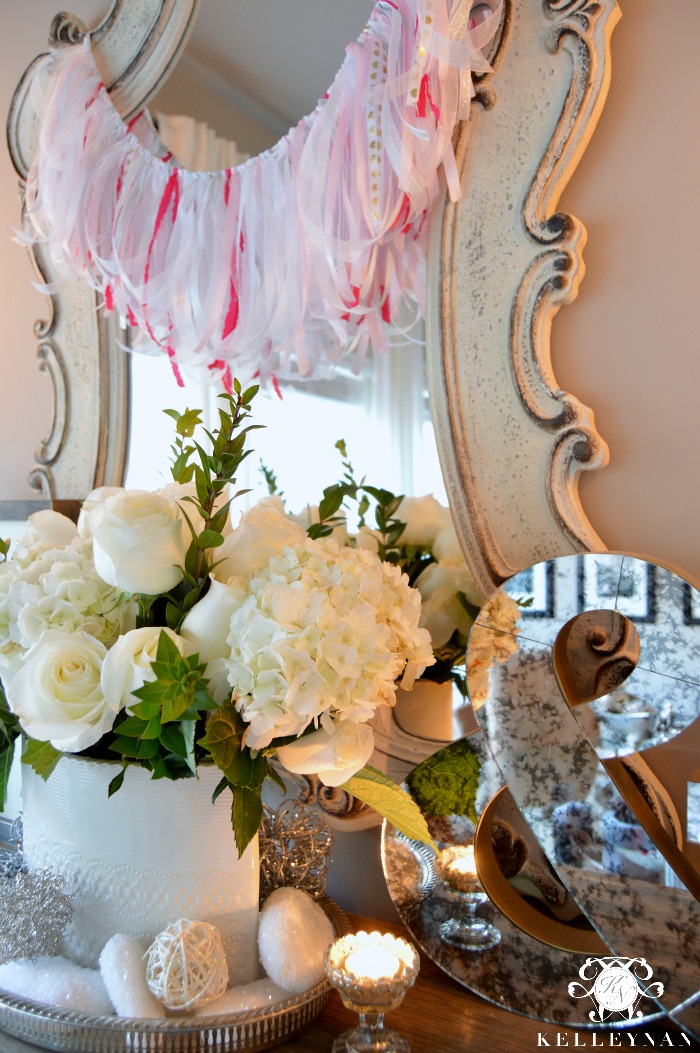
I have an interesting mirror in my breakfast room that I love to “dress up”; I knew it would be the perfect place for my finished ribbon garland. After I hung the garland, I quickly shopped my home for the finishing touches for the buffet.
One thing I love about creating little Valentine vignettes and “moments” is being able to bring out decor which I would typically deem as too “cute” for the main living spaces. For the next couple of weeks, it all works!

The elements I chose were easy and all relative to what comes to mind when you think of Valentine’s Day: candles, flowers, love, and sweets.
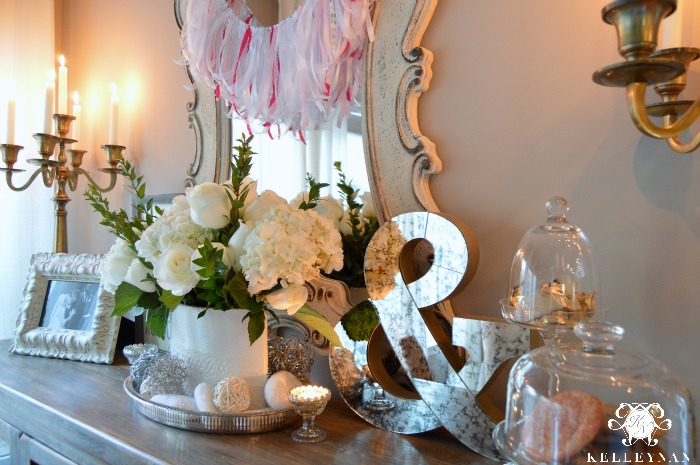
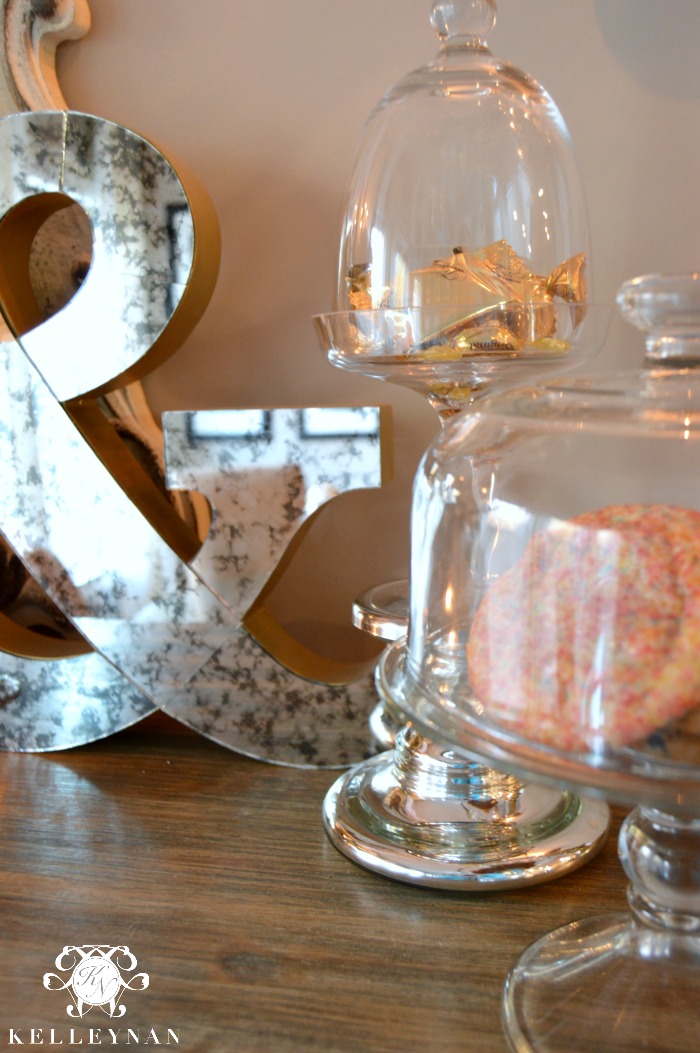
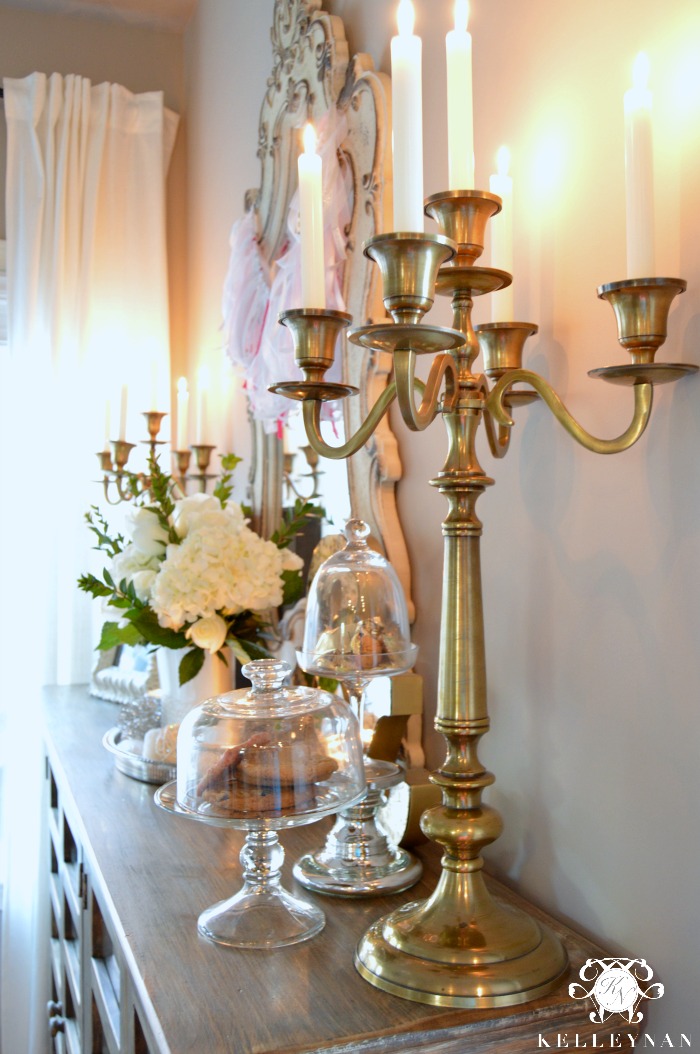
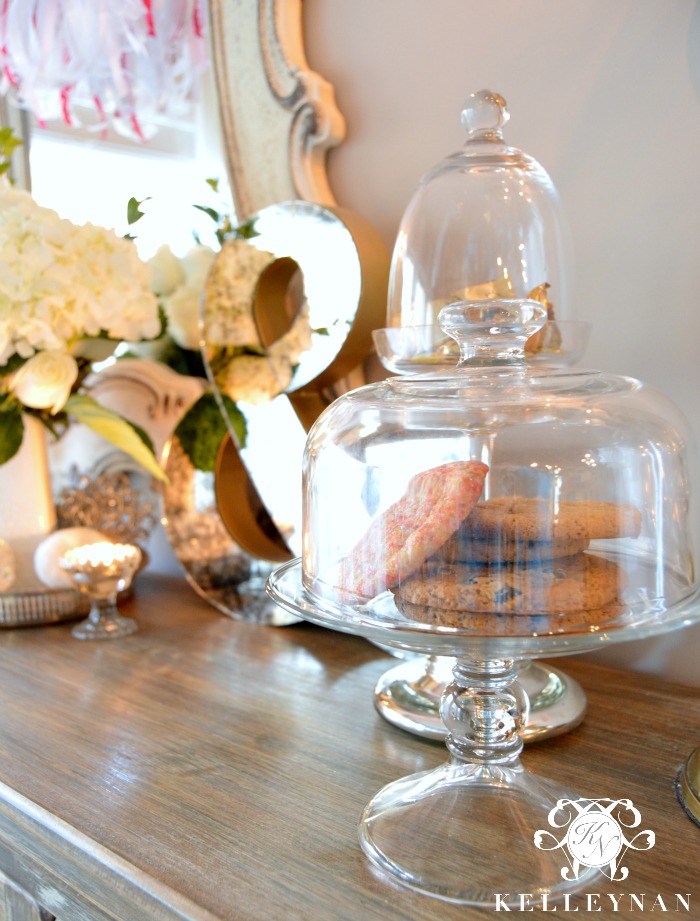
I brought this ampersand down from our bedroom and filled these cloches with truffles and cookies.
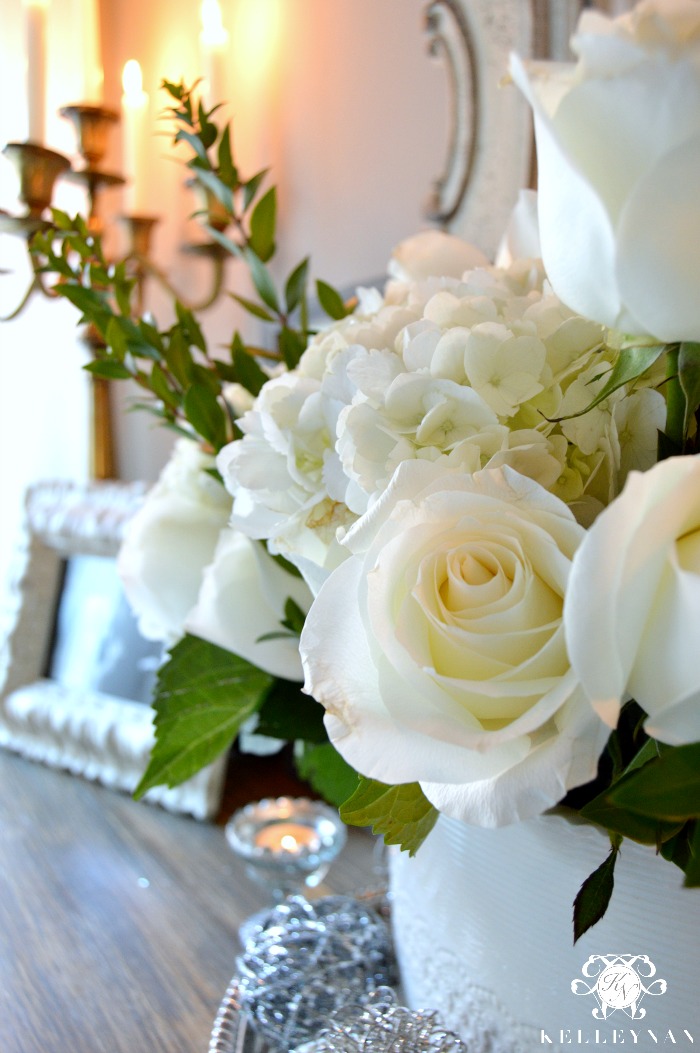
The flowers I had in the kitchen serve as the perfect centerpiece. As I often do, I placed the vase in a silver tray and piled some orbs and filler around the base.
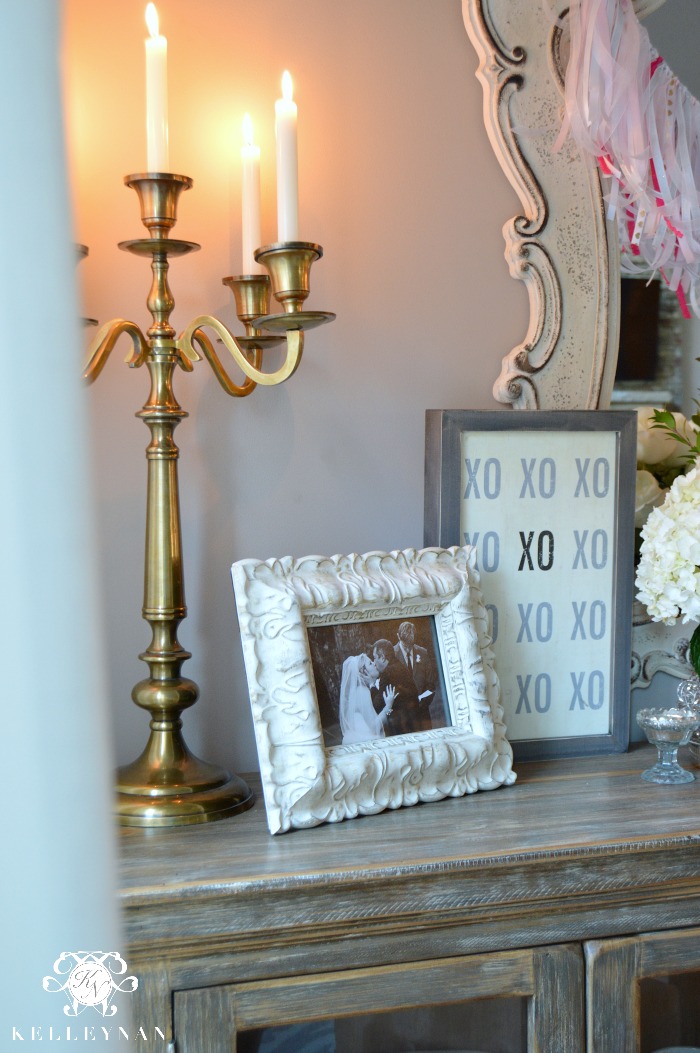
One of my favorite pieces to decorate with are my candelabras. They make such a statement and are perfect for any season/holiday.
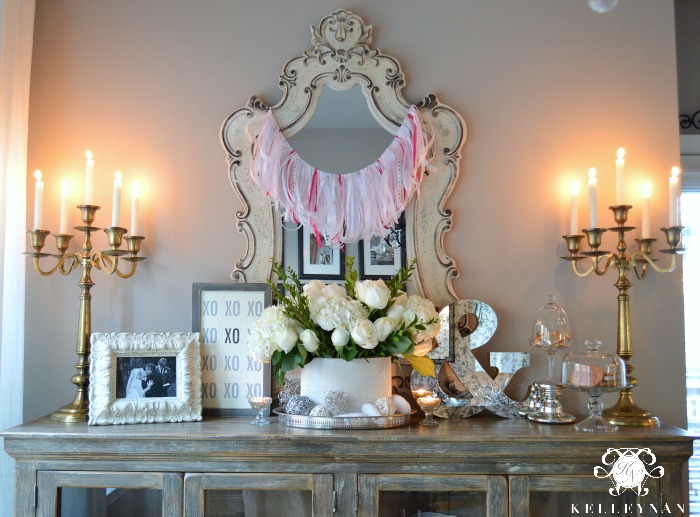
I thought this little XOXO sign was so cute when I purchased it. Unfortunately, it was one of those pieces that I came home with, couldn’t figure out where to put, and ultimately stuck it in a closet until “later”. I am so glad that “later” finally came!
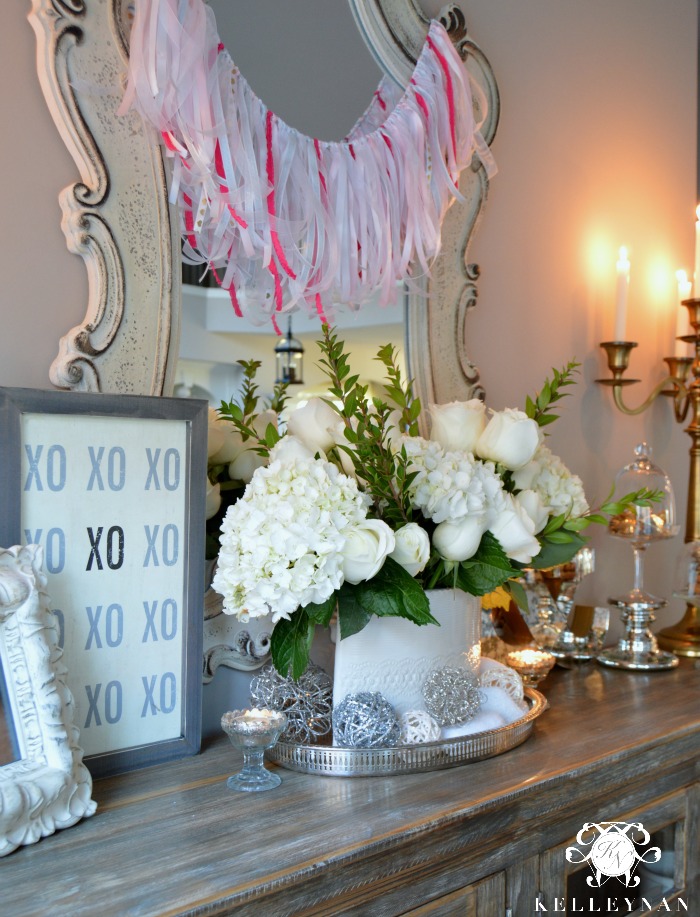
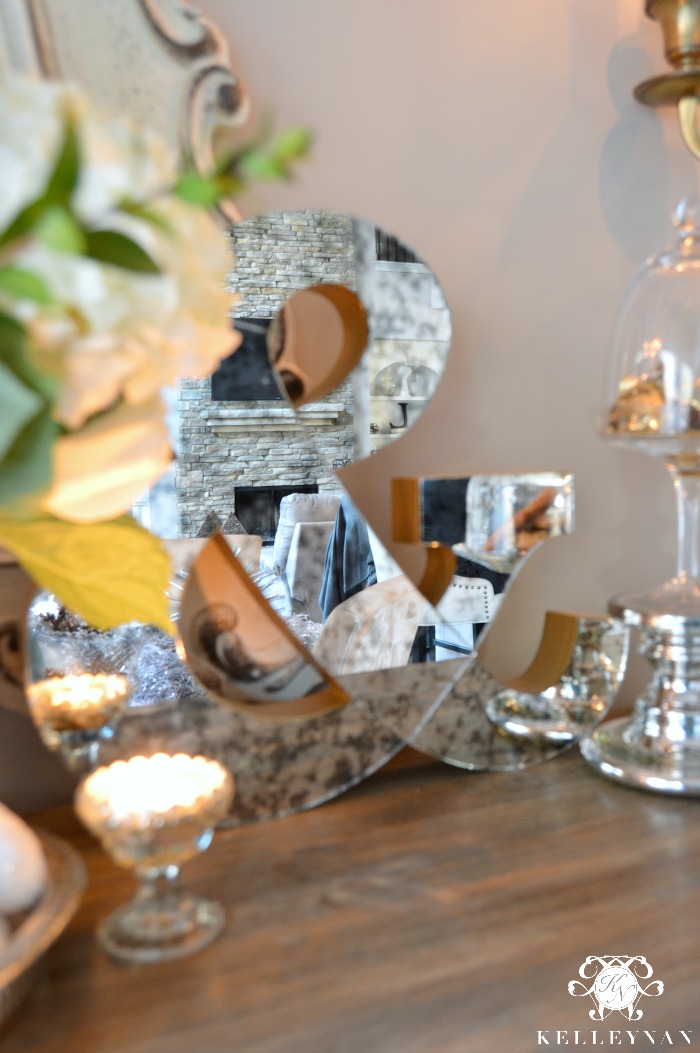
When I create vignettes, I try to layer and stagger items. Pedestals and trays are also great ways to add dimension.
I love how this sweet little garland turned out; watch out, St. Patrick’s Day! I may be coming for you next!
Sources:
- Ribbon: Michaels
- Buffet: HomeGoods
- Mirror (Similar)
- Curtains
- Candelabra (Similar)
- Glass Cloche
(Similar)
- Ampersand: Hobby Lobby
- XOXO Sign: Hobby Lobby
- Mercury Candle Holders
- Pottery: Custom
- Silver Tray: Heirloom
- White Frame: HomeGoods
- Votive
- Paint: Perfect Greige by Sherwin Williams
affiliate links used


Hi Kelley!
Great & easy DIY! It looks so wonderful displayed on your beautiful mirror. I recently started to follow you on IG & decided to check out your blog. I’m so glad that I did! Very lovely! Thanks for sharing.
Dana
Styled by Dana
Dana, thank you so much for following along with me and taking the time to stop by my blog! I am all about (and only about) super easy DIYs that can be created quickly and inexpensively!
Kelley this is soooo beautiful!!! Maybe I can make one for my headboard in the bedroom?! I need all the faux ‘crafty’ I can get! Haha! Loved it hon!
K, I can totally see one there! It will go perfectly with your Saturday relaxation vibes after your morning chores. AND, your new mug!
So cute, Kelley!! What a great idea:)
Aw, Bree, thank you! And thank you for stopping by!
So pretty! Everything looks so glamorous!
Thank you, Sue!
Kelley this is gorgeous! I am excited to make this garland. Thanks for the tips and sharing.
Cathi, thank you! Best of luck in your crafting!
Kelley Nan, you are so inspiring, I am going to Costco today to try to make a beautiful arrangement too, thanks for the tips.
Denise, thank you and how fun!! I’m heading there tomorrow!