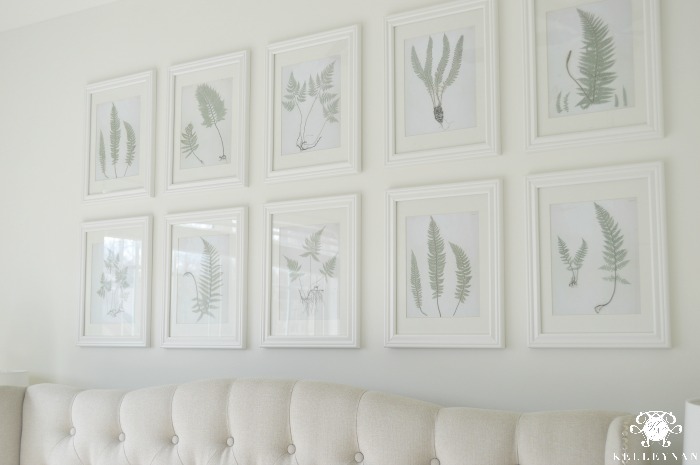
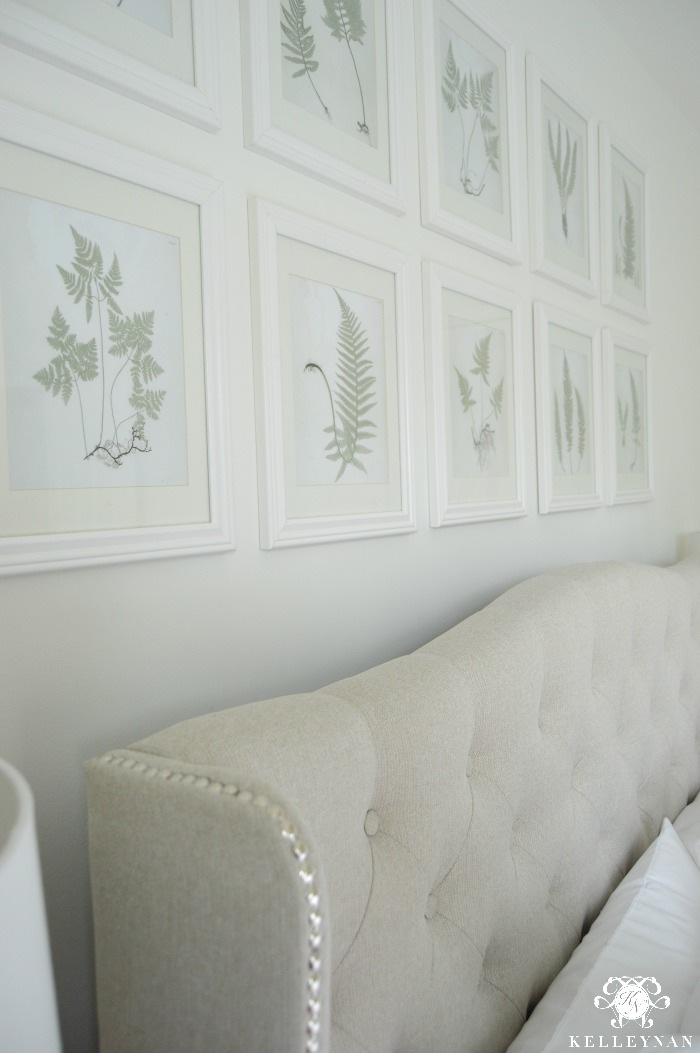
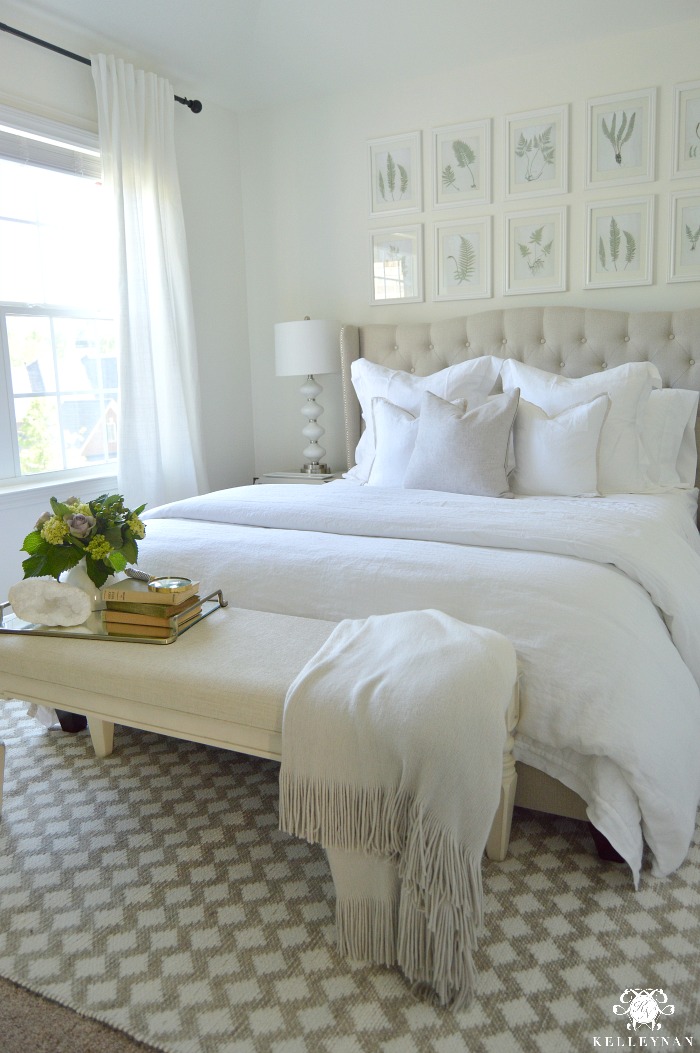
When I was planning our latest guest room transformation (you can see the full reveal HERE), I wanted the art above the bed to be simple, neutral, and budget friendly. I have also been considering where in my house I could hang a botanical gallery wall after falling in love with the dining room art in Alicia Florrick’s home in The Good Wife.
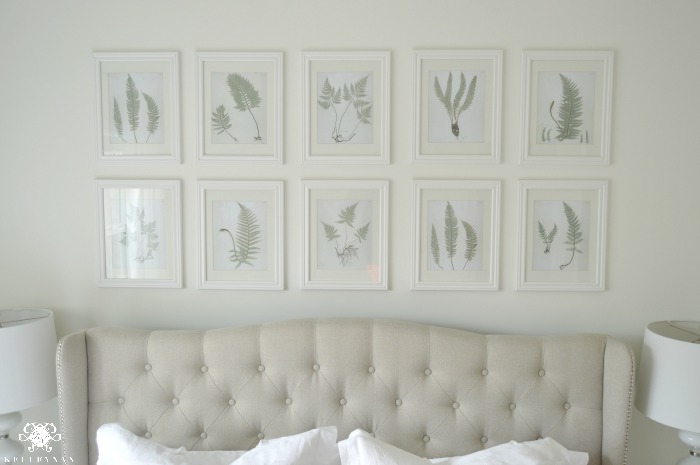
After searching online for free botanical images, I decided on the fern prints I found on The Painted Hive. Once I downloaded them, I toned down the green a bit. I love the vibrant color but thought it would be best in a muted tone for this bedroom. Printed on regular lightweight copy paper, I went to Michaels while they had frames on sale and scored 10 11×14 frames for just over $50. Now that is some affordable art I can get on board with when working on a budget! Although I found my frames locally, you can have some similar options delivered to you HERE.
So now you know the what, where, and why of my botanical gallery, we can move on to the how. I always look for the simplest way to get from Point A to Point B. I have said before I am a bit DIY lazy and if I can get away without measurements, levels, etc., I will. Because this gallery uses the same sized frames, it made the hanging and planning process even easier. Below, I will show you how I hung the entire gallery wall of 10 frames in about 20 minutes.

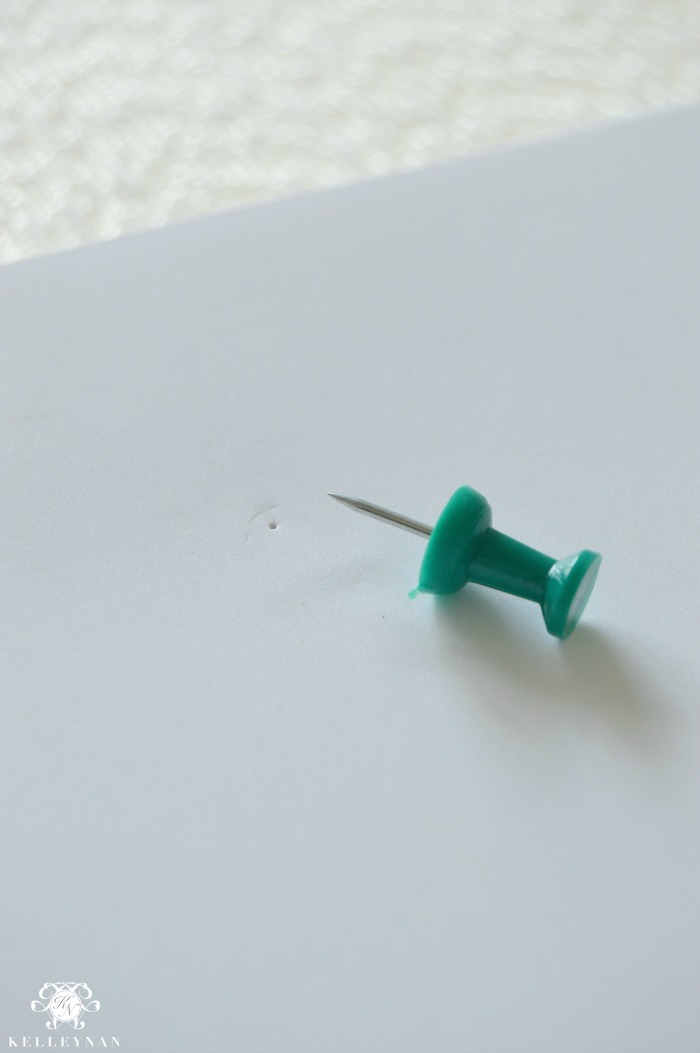
Since it is thin and already has 90 degree angles, I used copy paper to form my template for each frame. Using four pieces, I lined up each paper corner with the corner of the frame, overlapping each. Once the paper was straight and in the shape of the frame, I used a few pieces of tape to make it form one sheet that was the same size as my frame.


Because the paper is thin, I could faintly see where the top of the hook fell on my paper. With the template still directly on top of the frame back, I took a thumbtack and made a small hole where the frame would hang from a nail. I repeated this for each of the frames until I had 10 templates with small thumbtack holes.

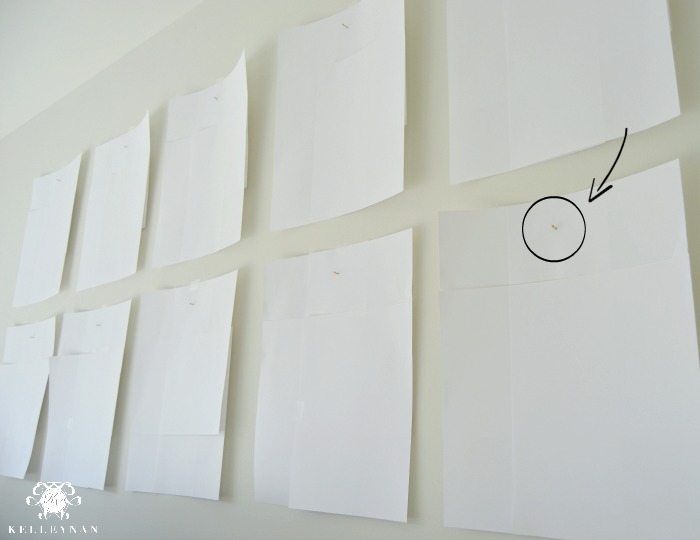
Starting in the center on the bottom row, I used a small piece of tape to secure your paper to the wall. The space between each is very easy to eye; while you can use a tape measure and level, I opted to take the easy way out and just eye it – it worked out great.
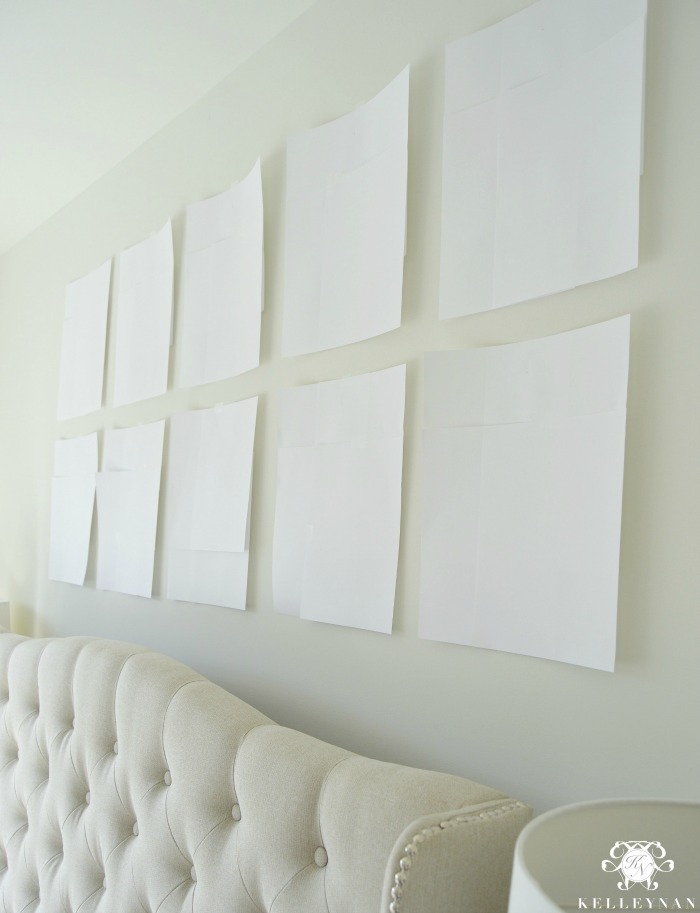

Once the rows were set and each template was spread apart evenly, I tapped my nail into the wall, through the paper, where your small thumbtack hole is. Once each of the nails was tapped into the drywall, I literally just pulled the paper down to rip it off.

Lastly, I hung each frame to complete the gallery wall. That’s it!
If I am hanging a large piece of art with multiple hooks, I am more likely to use formal measuring tools. But, for these 11×14 frames with one hook, the template method while eyeing the spacing works fabulously.
If you use this method on your own wall, check back in and let me know how it turns out!
GET THE LOOK

*post contains affiliate links*


What a great way to hang a gallery of pictures! You are awesome Kelley Nan, and so very helpful!
Love, love, love this room!
Hugs – Joni
Joni, thank you!! You are the best. Thank you for always checking in with me 😉
Great tips! I love seeing this room again! Definitely one of my favorites!
Enjoy your week!
Shelley
Shelley, thank you so much!! Have a wonderful week.
This is my favorite way to do this! But I never thought about taping paper together!! So easy…
It so is! Try it next time 😉
I love this method to hang frames so easy. Can you please do a post about rugs and what sizes do you recommend for each room?
Thank you! And I should totally do that! Thank you for the suggestion!
Kelley! This is brilliant!! Thanks for sharing, dear:)
Bree, thank you!! xo
Gosh…so many can learn from this! What a beautiful and “teaching” post!
Thank you! I am so glad it was helpful – it makes things so much easier!
Room is lovely! Love your style.
How were you able to change the color of the prints. I find the background too antiqued, but I only have the option of saving as a pdf file.
Thanks!
Angela, thank you! I modified them a little by saving them as the pdf, re-saving them as a jpeg from the pdf, and then editing the coloring a little in PicMonkey.
Thank you for your quick response! I really appreciate it!
have a great evening,
angela
I just used your method and it worked nicely!
This worked perfectly! I actually only made one paper template and worked off of that. I also used the width of my long level for spacing (2.25”) and that really helped things move quickly and minimized measuring even more. Thanks for the quick and easy tip, you saved my walls from a million holes!
Kristin, that’s awesome! Thank you for sharing!
Thanks for the idea! With the 11×14 frames I found it hard to tape all the pieces together. The frames I found had cardboard packaging, so I used the cardboard instead but utilized your method. It worked out perfectly!!
Thank you for the help and for the inspiration!
Hi Emme, Thank you for stopping by and for taking the time to leave a note. I am so glad you developed a method that worked for you!
Genius, thank you!
Hi Shawna, Thank you so much for your kind note. I am so happy to know this post was helpful to you!
The direction for hanging the gallery picture wall are excellent. Thank you.
Hi Judy, Thank you for taking the time to visit and for your note. I am so glad this post was helpful to you!
Thank you! This was so helpful!
Celeste, Thank you for taking the time to stop by! I appreciate your note and am happy to know this post was helpful to you,.